Part C: Amplification of folA using PCR
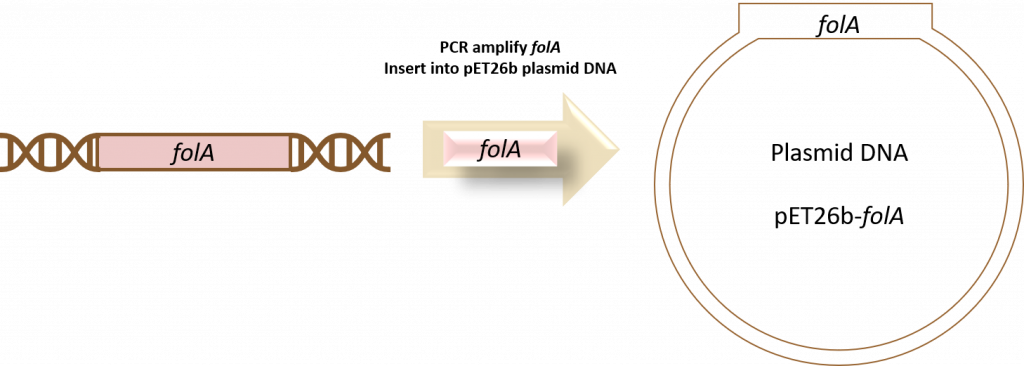
Before we begin amplifying our folA gene using Polymerase Chain Reaction (PCR), we first need to understand where this piece of our project fits in with the overall goal of molecular DNA cloning. So why does the first part of our research project begin with molecular DNA cloning? To incorporate the E. coli folA gene into a specific plasmid DNA! This plasmid DNA will allow us to express and purify our gene product: Dihydrofolate Reductase (DHFR) protein. This diagram depicts the overall workflow for chapters 1-5 of our course… but this is just an aerial view of this intricate process.
Now it is time to delve into the details of this workflow.
So what exactly is molecular DNA cloning? Well, let’s click on the following module to find out: Molecular cloning module
To recap, molecular DNA cloning refers to a set of techniques that allows us to manipulate DNA. For our course, the main goal is to clone the folA gene into a circular piece of DNA called a plasmid. This plasmid is unique because it allows us to introduce our gene of interest (aka. folA) into bacteria so we can then transcribe/translate the gene into its protein product: DHFR.
This workflow for manipulating DNA to yield pure protein can be applied to countless biochemistry research projects. And so, let’s look at our specific molecular cloning workflow:
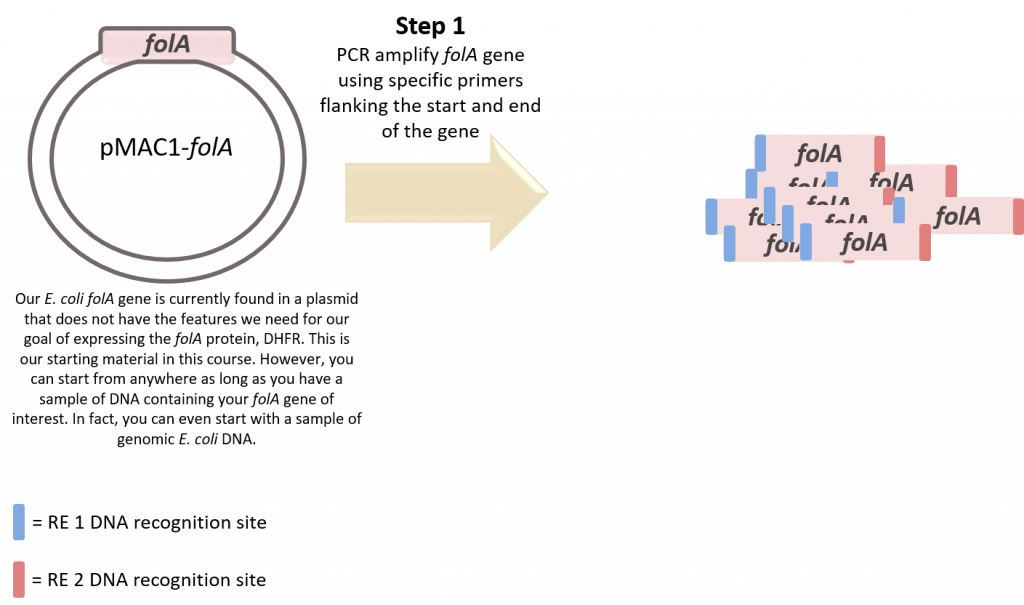
Step 1: PCR-amplify the folA gene. Actually, before we even begin step 1 we need to design our primers. Students can work individually or in small groups to design one set of primers. Instructors should also take care to design and optimize a second set of primers which will serve as a positive control. The primers should flank our folA gene … but wait, there’s more. For this next part we need to have a strong understanding of our main goal (expression of our protein of interest) and ensure that we incorporate any necessary elements needed for this goal when we manipulate the DNA. Also, please remember that the PCR primers are DNA primers and become incorporated into the newly synthesized DNA strand during PCR. Why is this so cool? Because we have the ability to introduce new DNA at either end of the gene. This is exactly what we are going to do. We are going to add Restriction Enzyme (RE) recognition sites for 2 unique REs at either end of the folA gene by incorporating these RE recognition sites at the 5′ ends of each primer. In this way we have designed primers to PCR amplify our folA gene and we can manipulate this amplicon later using restriction enzymes!
Step 2: Restriction Enzyme (RE) digestion of the folA amplicon and pET26b plasmid using two unique restriction enzymes (RE-1 and RE-2).
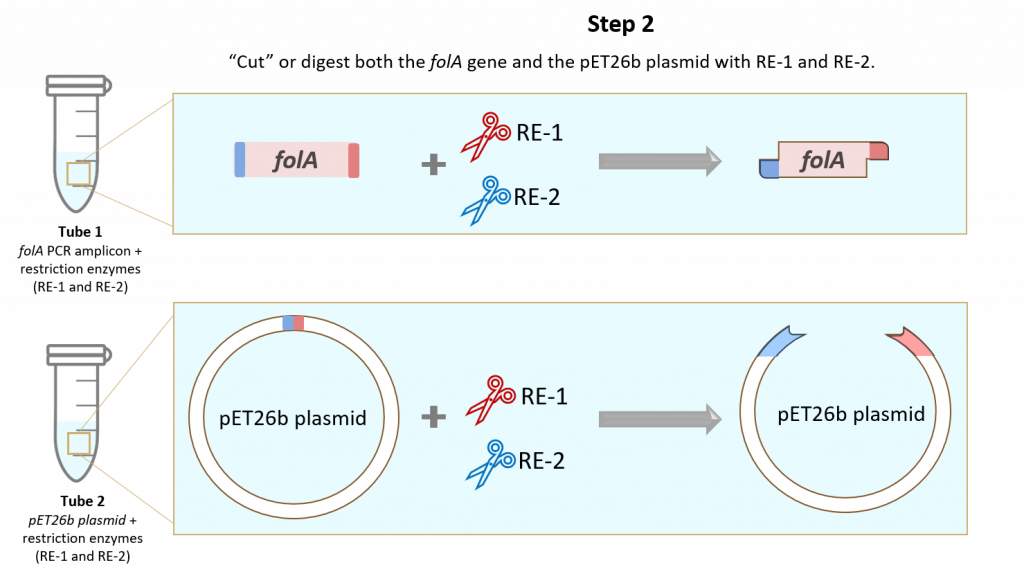
This step allows us to generate restriction-enzyme-specific “sticky ends” which direct the insertion of the folA gene into the pET26b plasmid. We will learn a lot about these sticky ends in chapter 2 of this course.
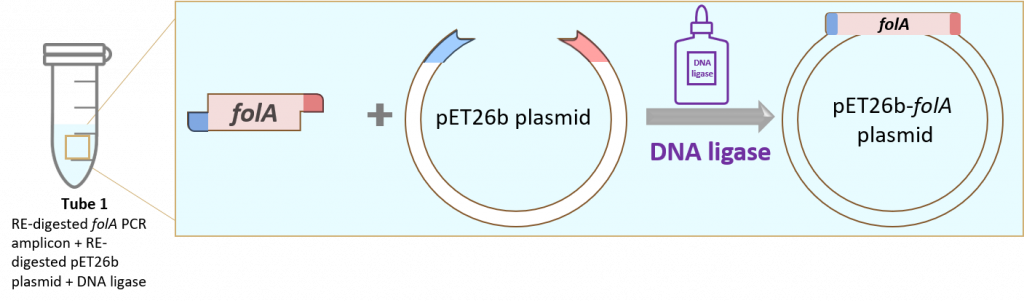
This leads us to step 3:
Step 3: Insert the RE-digested folA gene into the RE-digested pET26b plasmid using the molecular glue known as DNA ligase.
And job done! Of course, we do need to check that we successfully cloned our folA gene into the pET26b plasmid. How? Why using Restriction Enzyme mapping and Sanger sequencing techniques!
