Chapter 4 Lab Overview and Background Information
Learning Outcomes: Upon completion of this lab, students will gain practical experience in:
- Isolating plasmid DNA from bacteria
- Reading and understanding how to use the PureLink® Quick Plasmid Miniprep Kit
- Extracting pertinent information from a kit manual to fit specific lab work conditions
Required Readings
PureLink® Quick Plasmid Miniprep Kit manual found here
Scroll to the bottom of the page and go to: documents, manuals and protocols. Please note; this website also contains the (M)SDS information required for each buffer in the kit.
BiteSizeBio blog post – The Basics: How Alkaline Lysis Works
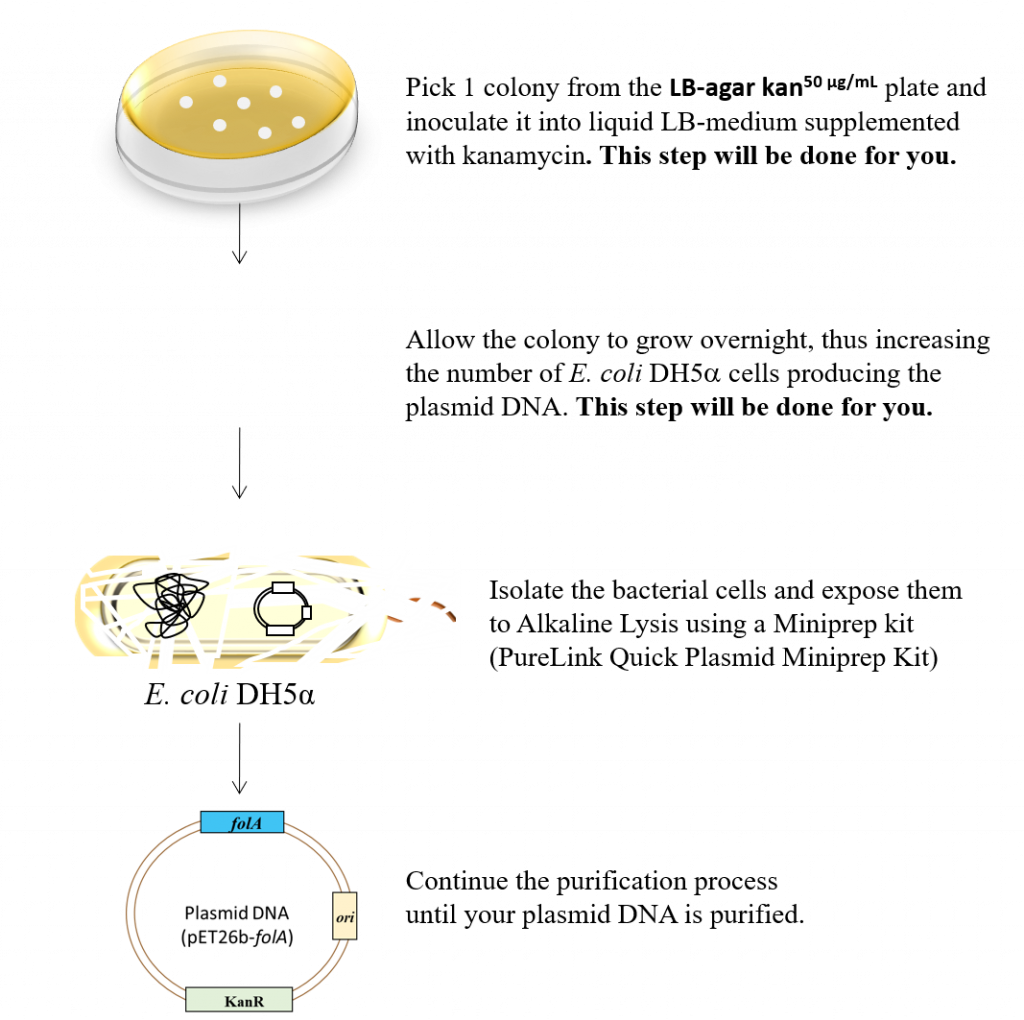
Following bacterial transformation (chapter 3) we should have bacterial colonies on the LB-Agar-Kan50 ug/mL plates. However, what’s in your colony? Remember that the main goal of this entire project thus far is to clone the folA gene in the pET26b plasmid. The colonies on the LB-agar plate hopefully contain said plasmid: pET26b-folA. Given our understanding of possible ligation reaction products we cannot tell for sure if we successfully cloned our folA gene: at least not by looking at the colonies. We need to isolate the plasmid DNA from each colony (remember that a colony is a clump of genetically identical cells). The other complication is that we need considerably more cells for our plasmid isolation technique than we currently have in a standard colony of cells. To address both points we need to physically pick each individual colony of cells and introduce it (aka. inoculate) into fresh, sterile LB media supplemented with kanamycin.
Following overnight incubation of the inoculated liquid LB media tubes, cells are isolated and lysed (aka. burst) and the plasmid DNA is isolated.
The task for this lab is highlighted in the following figure.
The main goal of this procedure is to isolate purified plasmid from individual bacterial colonies in order to:
- Test that the purified plasmid does indeed contain the folA gene. This will be tested in the next lab (chapter 5) using restriction enzyme mapping.
- Use the engineered pET26b – folA plasmid to transform another strain of E. coli designed to over-express the protein product (DHFR) encoded by folA (chapters 7-10).
Alkaline Lysis Miniprep Isolation of DNA from Bacteria
“Alkaline lysis, in combination with the detergent SDS (sodium dodecyl sulfate), has been used for more than 20 years to isolate plasmid DNA from E. coli. Exposure of bacterial suspensions to the strongly anionic detergent at high pH opens the cell wall, denatures chromosomal DNA and proteins, and releases plasmid DNA into the supernatant. Although the alkaline solution completely disrupts base pairing, the strands of closed circular DNA are unable to separate from each other because they are topologically intertwined. As long as the intensity and duration of exposure to OH- is not too great, the two strands of plasmid DNA fall once again into register when the pH is returned to neutral. During lysis, bacterial proteins, broken cell walls, and denatured chromosomal DNA become enmeshed in large complexes that are coated with dodecyl sulfate. These complexes are efficiently precipitated from solution when sodium ions are replaced by potassium ions. After the denatured material has been removed by centrifugation, native plasmid DNA can be recovered from the supernatant” (excerpt obtained directly from reference (1), “preparation of plasmid DNA by alkaline lysis with SDS” chapter, page 1.31).
In preparation for the miniprep procedure, cells are grown and harvested as described in the image below:
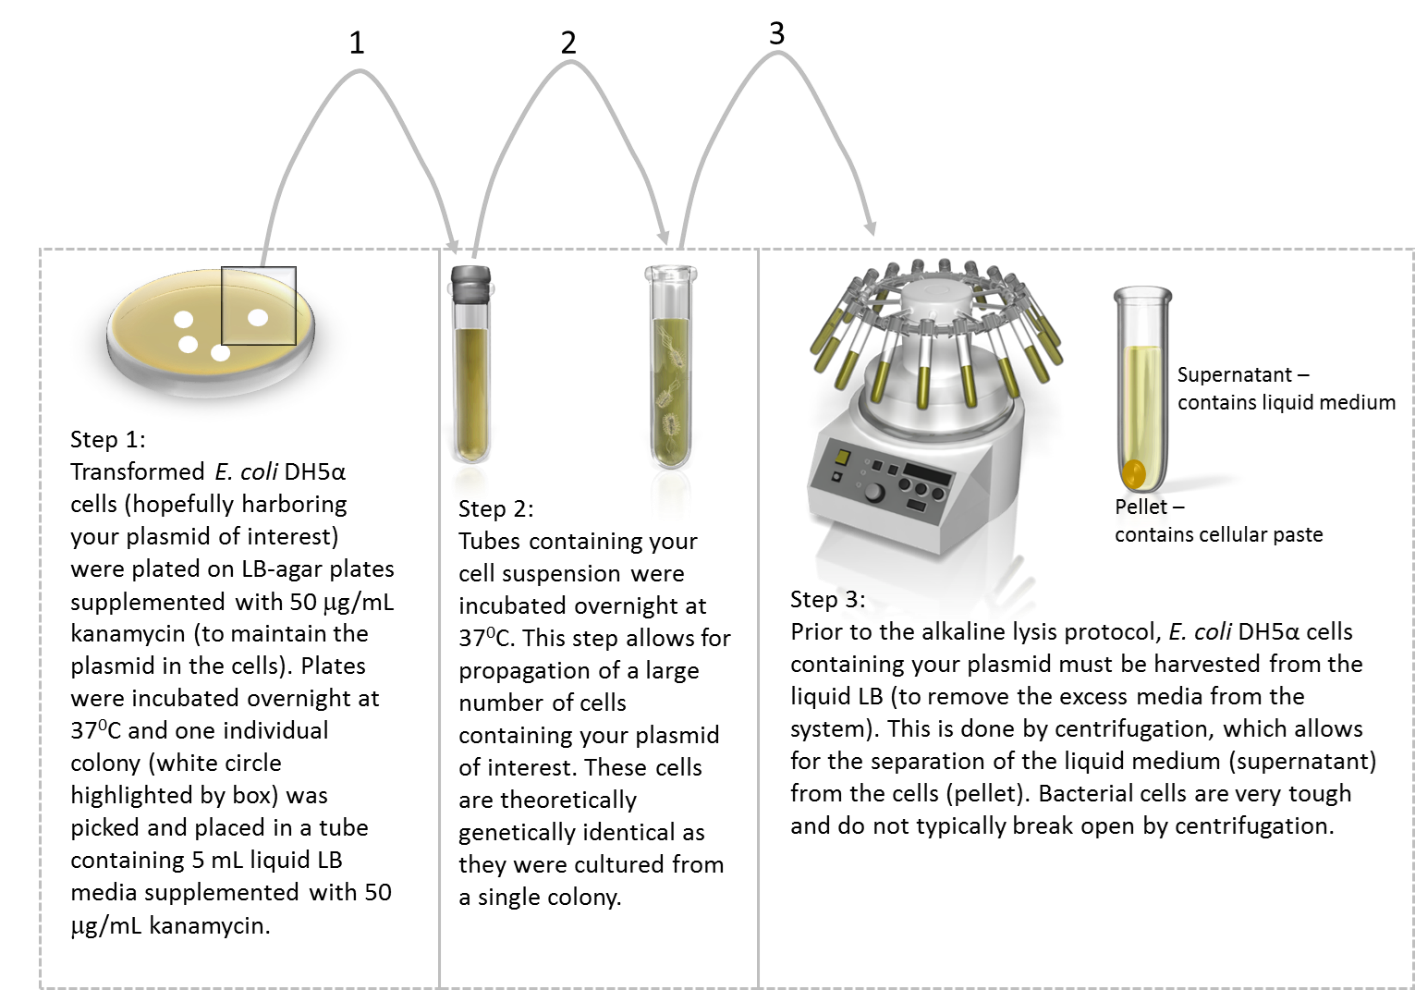 Image created by Felicia. Centrifuge and tube containing bacteria clipart obtained from Presenter Media © 2009-2021 Eclipse Digital Imaging, Inc.
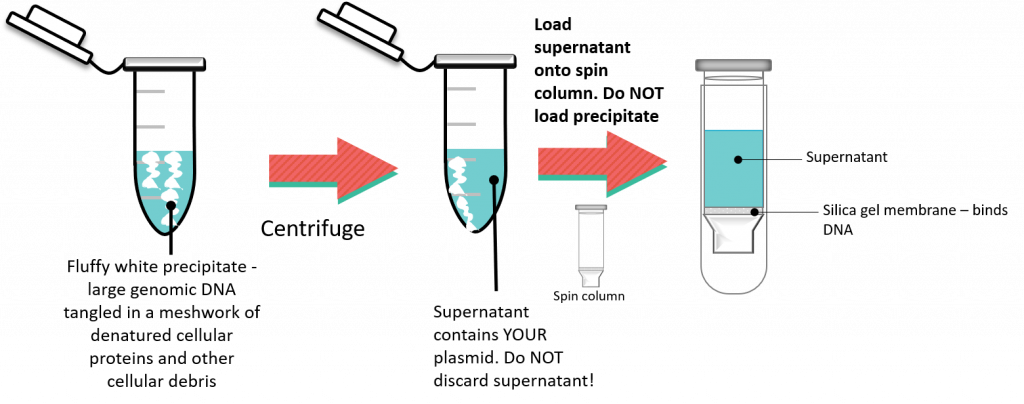
Once you obtain a cell pellet, the next 3 steps involve lysing the cells, denaturing the DNA and renaturing the plasmid DNA which will now be found in the supernatant. Descriptions are adapted from (1, 5).

Following cell lysis the supernatant containing plasmid DNA needs to be separated from the white, fluffy precipitate. This is accomplished by centrifuging the sample and keeping the supernatant.
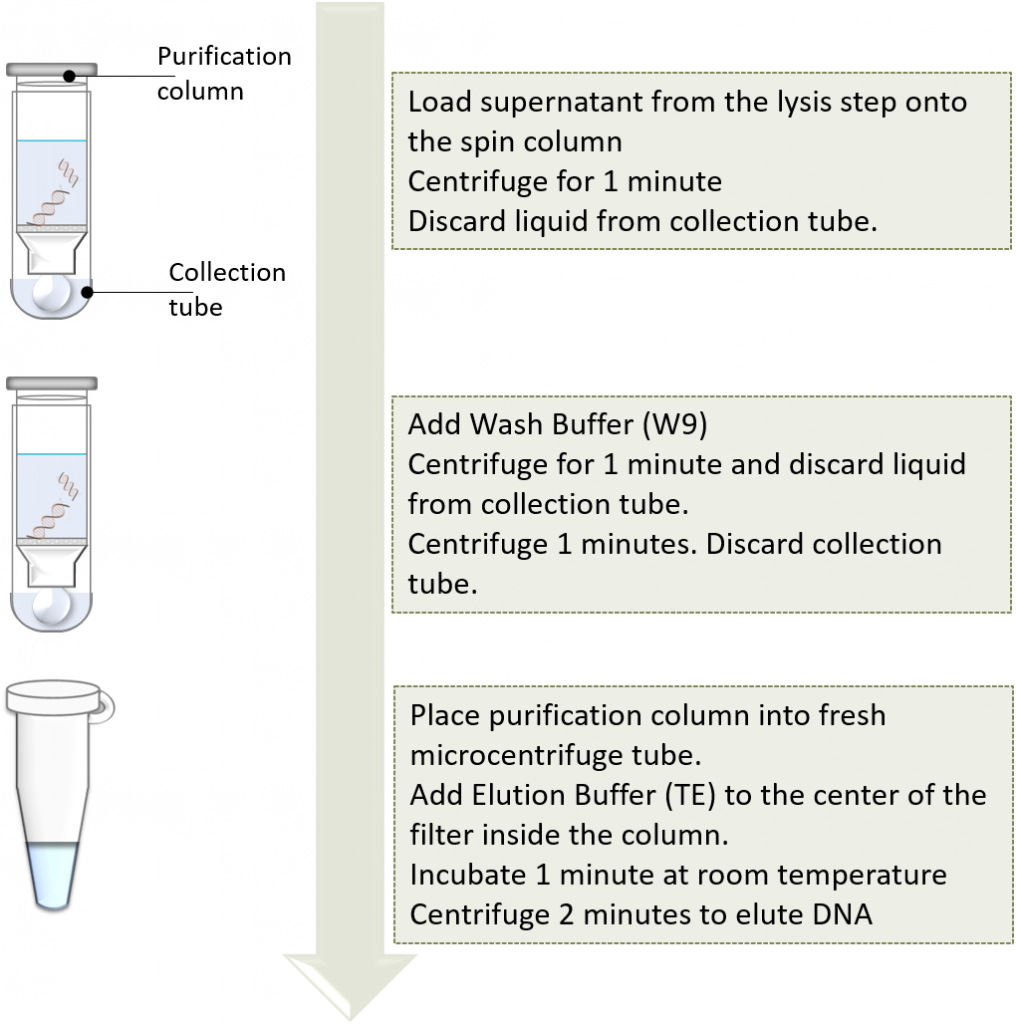
Now it’s time to purify and concentrate the plasmid DNA. This will be accomplished using a spin column. This involves a silica-based resin and the addition of the supernatant containing plasmid DNA, along with chaotropic salts. The resulting DNA will selectively bind to the silica resin, while all other impurities are washed away. The plasmid DNA is eluted form the silica resin with the addition of elution buffer. This is exactly the same concept as described in chapter 2, PCR purification kit.
You will be using the PureLink® Quick Plasmid Miniprep Kit to isolate your target plasmid from E. coli DH5α cells. The concept behind this kit is based on the original alkaline lysis method, (2). Please make sure that you go to the Thermo Fisher Scientific site and read the manual, SDS and other information to understand the use of this kit, safety considerations, possible troubleshooting considerations, protocol, etc.
