Part D: Protocol PCR
It is now time to PCR amplify the folA gene. Please review “Part B: amplification of folA using PCR” chapter prior to tackling this protocol.
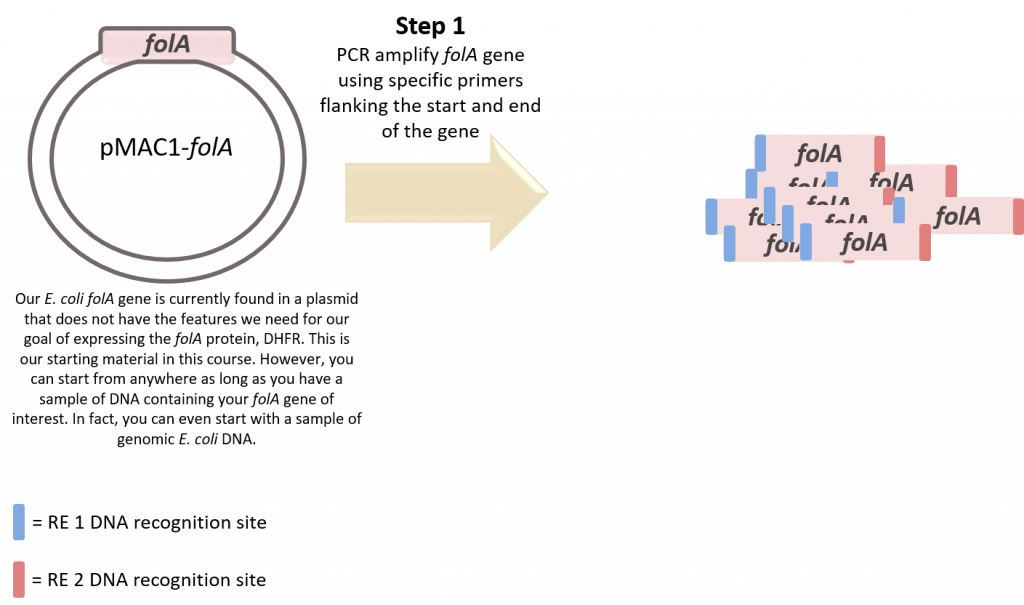
Prior to this lab, we introduce our students (working alone or in small groups) to primer design by asking our students to collaborate together in one of our Team Think Tanks (refer specifically to Team Think Tank 2: Primer Design). If you wish to learn more about our Team Think Tanks, click here.
Please note, Instructors should also design and optimize a second set of primers.
Before beginning this lab,
You will use the PCR primers you designed in one reaction, and the PCR primers designed by your instructor in the second reaction.
Please click this hyperlink to access the Chapter 1 virtual lab bench
Please click this hyperlink to see how we set up the thermocycler (aka. PCR Machine)

|
Materials and Reagents |
|
| Reagents: | Materials: |
|
|

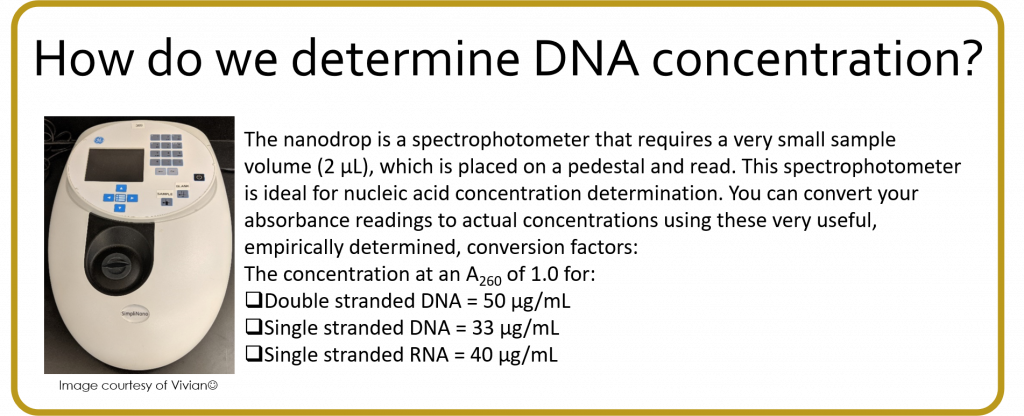
Please click this hyperlink to see how we use the microspectrophotometer (aka. Nanodrop)
DNA can be quantified by measuring the absorbance at 260 nm using a spectrophotometer. This is a happy consequence of the fact that purines and pyrimidines have a conjugated double-bond system that absorb light in the ultraviolet spectrum (260 nm). There is a simple conversion formula used by scientists in the lab, which states that on average, an absorbance reading of 1 (i.e. 1 A260) at 260 nm is ~ = to 50 µg/mL double-stranded DNA.
Given this conversion factor, please calculate your working concentrations for the sample of template DNA, knowing that the sample was measured at 260nm.
Reagents must be kept on ice. Prior to the start of your experiments acquire a bucket of ice. Discuss with your instructor how you will label your PCR tubes. Record your tube labels in your lab notebook. Please note, the PCR tube has a very small area for writing on the cap (do not write on the side of the tube as it will rub off when placed in the Thermocycler).
You will be given the primers that you have designed and manufactured by a scientific company, primers will be lyophilized (i.e. freeze-dried so they appear in crystalline form).
Please calculate the amount (µL) of nuclease-free water needed to re-suspend (i.e. dissolve the freeze-dried primer DNA into a solution) the lyophilized PCR primers to a final concentration of 100 µM each.
Record pertinent information and calculations in your lab notebook.
1. Add the calculated amount of nuclease-free water to each tube of lyophilized primers. Once added, vortex the tubes for 1-2 minutes (make sure you fasten the cap securely before you start to vortex your sample).
2. Prepare a 1/10 dilution of each stock primer by taking 2 fresh, microcentrifuge tubes and labeling them appropriately as forward and reverse primers.
For each primer, please dilute 1/10 from the stock primer tube into the fresh microcentrifuge; a total volume of 30 µL each.
In your lab notebook answer the 2 questions.
1. How many µL of stock primer do you need to add to each tube?
2. How many µL of water do you need to add to each tube (final volume = 30 uL)?
These 2 diluted primers will be used as your forward and reverse primers for one of your two reactions.
PCR components: 50 µL total volume
Copy the chart in your lab notebook and fill it in.
|
Place a checkmark beside each item added to each tube. Please add reagents in the same order presented in the table, starting with water. |
||
|
Reagents |
Added to PCR tube 1 (Instructor designed primers) |
Added to PCR tube 2 (Student-designed primers) |
|
36.5 µL nuclease-free water |
|
|
|
5 µL 10X PCR buffer stock (final working concentration = 1X) |
|
|
|
5 µL dNTP mixture |
|
|
|
1 µL forward primer (ensure you add the correct primer to the correct tube) |
|
|
|
1 µL reverse primer (ensure you add the correct primer to the correct tube) |
|
|
|
1 µL template DNA |
|
|
|
0.5 µL Taq DNA polymerase |
|
|
Practical lab considerations
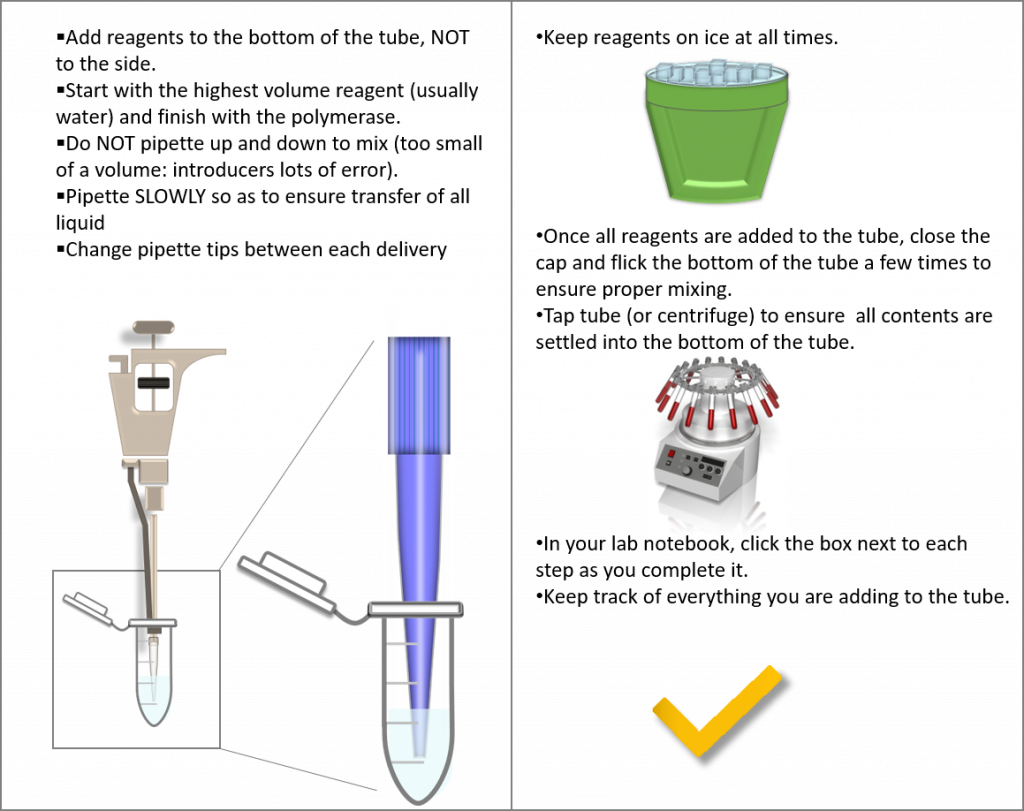
(Image created by Felicia, centrifuge obtained from Presenter Media © 2009-2021 Eclipse Digital Imaging, Inc.)
Once finished, please clean up your work area. Properly dispose of reagents properly and safely as specified by your lab mentor, and please wash your hands.
