Protocol for NdeI/XhoI RE digested folA amplicon purification
In this lab, you will purify the folA DNA from your 2 restriction enzyme digest reactions using the PureLink™ Quick Gel Extraction and PCR Purification Combo Kit. A sample of previously digested pET26b plasmid will be provided for you. You will then set up 2 ligation reactions of the folA gene and digested/purified pET26b. Please read the PureLink™ Quick Gel Extraction and PCR Purification Combo Kit manual found here. Scroll to the bottom of the page and go to documents, manuals, and protocols. Please note; this website also contains the (M)SDS information required for each buffer in the kit. The manual can also be downloaded from the company website. Please focus on the overall description of the system (note the disclaimer that this system is not designed to purify supercoiled plasmid DNA) and the components of the manual targeted specifically towards PCR purification.
System overview, PCR purification: “To purify DNA fragments from PCR reactions, or restriction digests using the PureLink® Quick Gel Extraction and PCR Purification Combo Kit, mix the PCR product with Binding Buffer to adjust conditions so that they are optimal for subsequent double-stranded (ds)DNA binding to the PureLink® Clean-up Spin Column. Purifying DNA is based on the selective binding of dsDNA to silica-based membrane in the presence of chaotropic salts. The dsDNA binds to the silica-based membrane in the column. Remove impurities by thoroughly washing the column with Wash Buffer. Elute the dsDNA in low salt Elution Buffer or water”. (3)
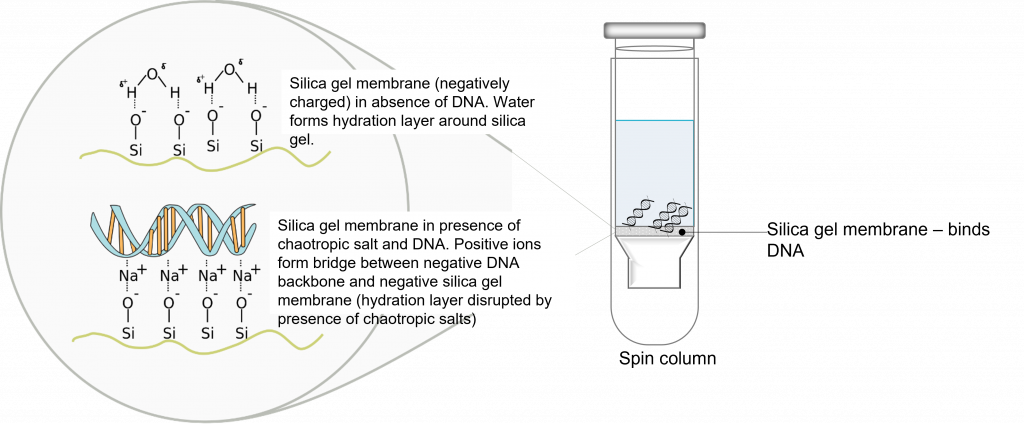
Please make sure you pay attention to page 3 of the manual (3), the kit specifications. Is your fragment size and reaction volume compatible with this system? Please reflect on this question and write your response in your lab notebook. Also, read through and take notes on the “method” section of the manual. Please note, buffers B2 and W1 already have isopropanol and ethanol added to them. Read through and write down the PCR purification protocol (you will be using a centrifuge) in your lab notebook prior to the lab time. Please make sure you understand the order of steps and why you are conducting them.
Following DNA purification, you will use spectrophotometry to determine the concentration of purified DNA.
Please click this hyperlink to access the virtual lab bench

|
Materials and Reagents
|
|
| Reagents: | Materials: |
|
|
Prior to coming to the lab – read the PureLink™ Quick Gel Extraction and PCR Purification Combo Kit manual found here:
Click on “documents”, scroll down to “manuals and protocols”, and download the “PureLink Quick Gel Extraction and PCR Purification Combo Kit” manual.
Prior to the lab time, please write out the PCR purification protocol in your lab notebook. Please include reagents/equipment, safety considerations, and the step-by-step protocol (you will be using a centrifuge).
The following workflow highlights the main protocol outlined in the manual:
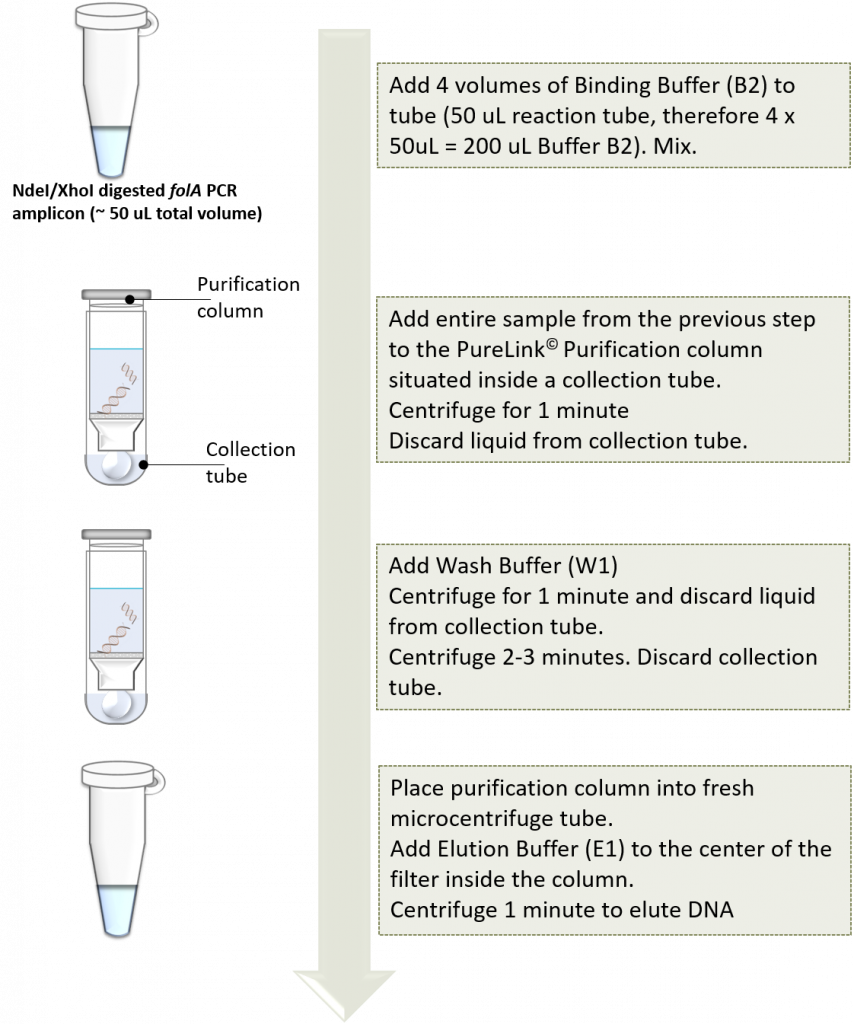
Following purification, please set aside 2 uL of purified DNA to determine the concentration using the Nanodrop. The protocol for the SimpliNano is as follows:
The SimpliNano is a UV/Visible instrument used to measure low volumes of macromolecules such as DNA, RNA, and proteins.
The following image was created by Felicia. The image depicts a photograph of the Simply-Nano spectrophotometer used in our teaching labs. Other spectrophotometer brands are available for purchase, but we are describing the protocol using this specific brand as it is the brand of instrument we use in our lab space. 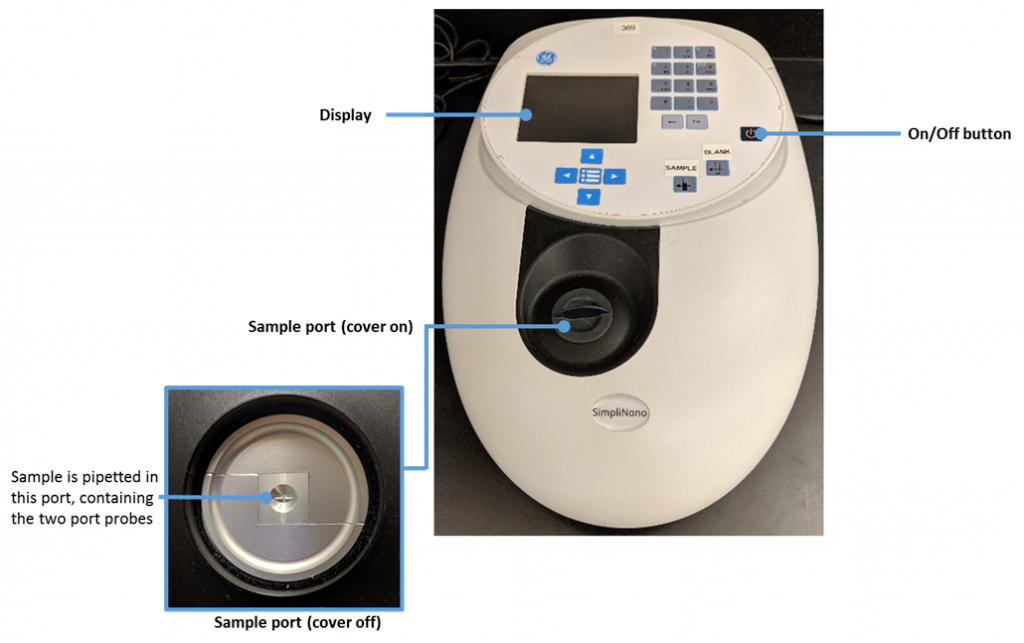
- Turn on the Nanodrop, and select desired program i.e. Select “1” for concentration and purity check for DNA samples.
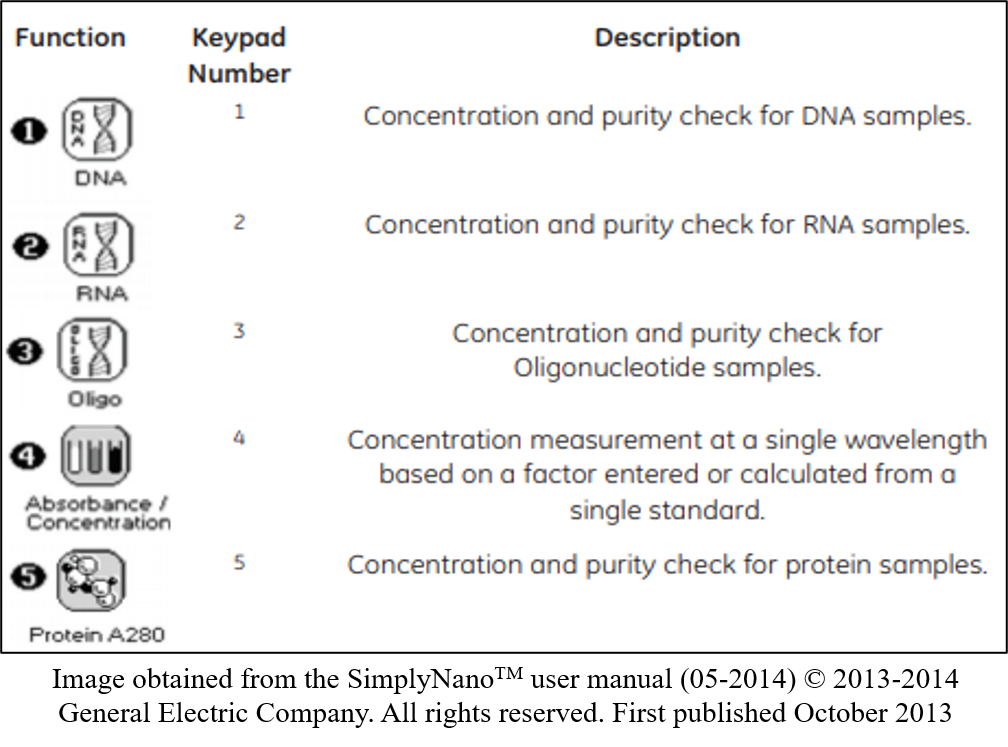
- Set the specifications required for your program, such as dilution factors and units. Press left or right to scroll through options on one setting or press down to scroll to the next setting.
- Before measurement, inspect the sample port for cleanliness. You may use a Kimwipe dampened with water to clean the sample port prior to sample loading.
- Pipette 2.0 µL of the reference solution (i.e. a blank, such as nuclease-free water) into the sample port. Ensure the reference solution is in the center of the port, and in contact with both port probes. Do not introduce bubbles into the sample. Gently place the black cover on the sample port.
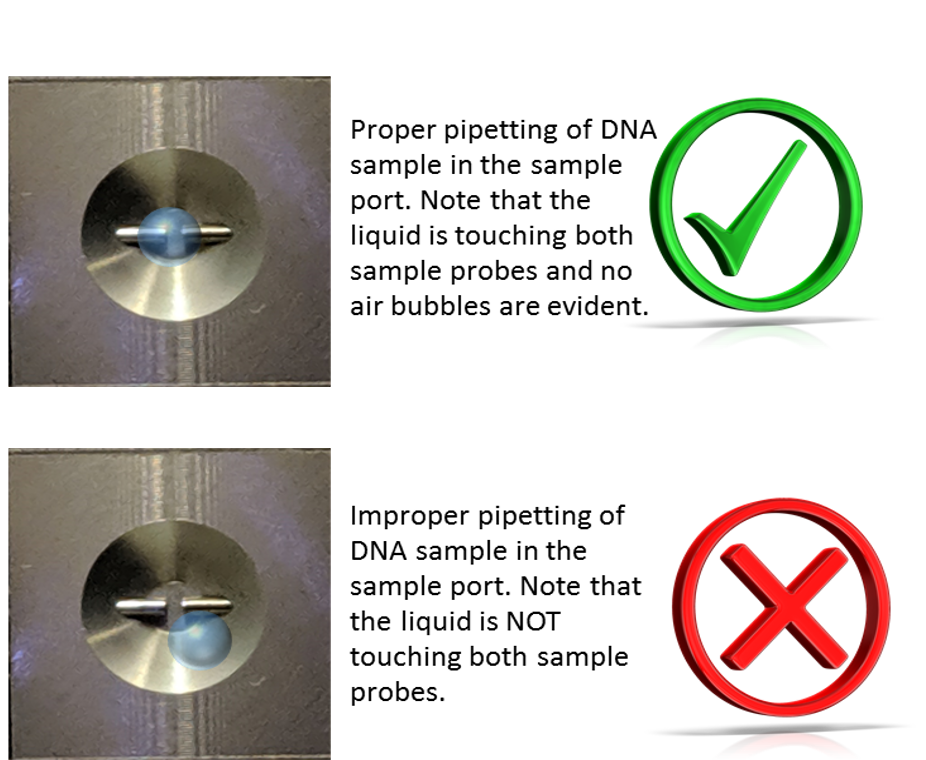
Please note in the above images that the sample (a blue liquid in this example) is gently pipetted into the center of the probe without touching the tip of the pipette to the actual probe (left image). Note that the liquid sample is in contact with both port probes and no air bubbles were introduced (right image).
5. Press the  key twice.
6. Gentle remove the sample or solution with a dry Kimwipe.
7. Load 2.0 µl of DNA sample.
8. Press the  key.
key.
9. Gently remove the sample or solution with a dry Kimwipe, or a dampened Kimwipe if required.
10. Repeat steps 8-10 for all samples while recording values.
The nano-spectrophotometer has a 0.5 mm path length.

