Part B: Protocol Pipetting Lab
Please click this hyperlink to access the Chapter 1 virtual lab bench
Please click this hyperlink to access the “Proper Handling of Pipette” video

|
Materials and Reagents
|
|
| Reagents: | Materials: |
|
|
Run through the “Using a micropipette” section outlined on how to use a micropipette. Make sure you are comfortable operating a pipette before continuing with the protocol.
Let’s recap our pipetting best practices by clicking in this video: Pipetting basics
Please click this hyperlink to access the Pipette “First Stop versus Second Stop” video
1. Practice delivering varying amounts of water using all the different micropipette sizes available at your lab station. Make sure the amount chosen is within the acceptable limits of the micropipette you are using. Please do NOT over-exceed the upper or lower limits of the pipette as it will damage the pipette.
2. To confirm that the correct amount of liquid was delivered dispense the water onto a weigh boat and weigh the water on a balance.
The density of water is 1 g/mL, therefore:
1 mL H2O = 1 g
Given the volume range of micropipettes, it would be best if we calculate the weight of 1 µL of water and work with this value.
1 µL H2O = 1×10⁻³ g = 1 mg
3. Demonstrate, using a scale, that you can accurately pipette one volume (e.g. 7.5 µL, 17 µL, 99 µL, and 551 µL). Choose one pipette, take the pipette to the weigh scale (along with a tip box). Choose one volume and measure out each volume 5 times. Record your measurements in the table provided and fill in the rest of the table in your notes. In the observations section discuss how accurate and precise your pipette is.
![]()
|
Number of times repeated |
Weight delivered (mg) |
Volume delivered (µL) |
|
1 |
|
|
|
2 |
|
|
|
3 |
|
|
|
4 |
|
|
|
5 |
|
|
|
Mean = _______ µL Percent Error = __________% Std.Dev. = ___________µL
|
||
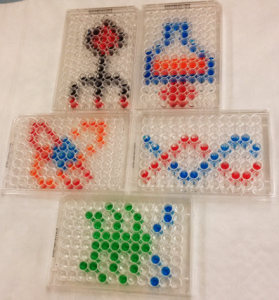
Following this pipetting protocol, we implement a SUPER FUN pipetting activity that we adapted from the “Pipetting by Design” lab (CPET University of Florida). The Word file containing the template designs can be found here (29).
The image below depicts a sample of our students’ pipetting results. This entire exercise requires micropipettes, food coloring, and 96-well plates, along with a design template (see Word file, above).


