41 Tables in Pressbooks
Although tables can be very helpful tools for presenting large quantities of data, they are often used in situations where it severely impacts the experience for users of assistive technology.
Best Practice for Using Tables in Pressbooks
- Tables should not be used to control the layout of a page.
- Tables should have a header row and/or header column.
- You can verify header cells have been assigned correctly in the text editor.
- Cells should not be merged as this can impact the reading order of the table.
- Complex tables should be split into simpler tables when possible, especially to avoid the use of merged cells.
- Empty cells should contain “No Data.”
- The Caption checkbox should be selected and a meaningful title should be included for the table.
- Header background colours can be changed by adding to the html code. Please see below for a step-by-step explanation.
Inserting Tables with the Visual Editor
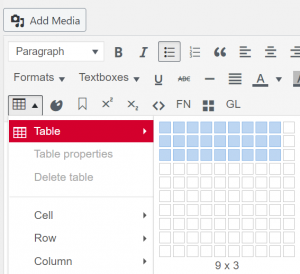
- Insert a Table by using the Table button in the Visual editor.
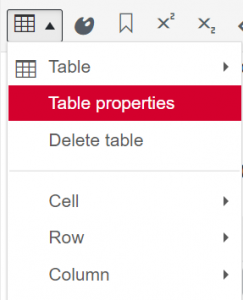
- Access the Table properties button in the Visual editor.
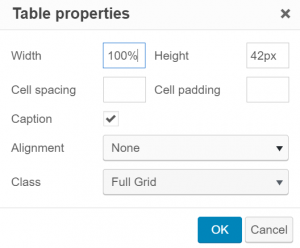
- Select the Caption checkbox and change the Class to Full Grid if you would like cell lines to be visible.
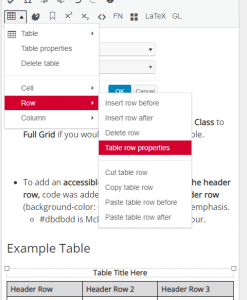
- To add a header row, open the Table row properties menu item in the visual editor while your cursor/selection is in the header row.
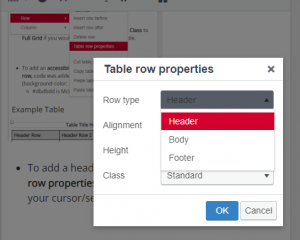
- From the Row type drop down, select Header.
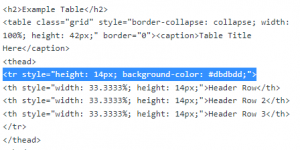
- To add an accessible background colour to the header row, the Table row class was changed to Shaded. Code can also be added to the style tag of header row (background-color: #dbdbdd;) to add visual emphasis.
- #dbdbdd is McMaster’s Neutral Tint colour.
Example Table
| Header Row | Header Row 2 | Header Row 3 |
|---|---|---|
| Data Cell 1 | Data Cell 2 | Data Cell 3 |
| Data Cell 4 | No Data | Data Cell 5 |
