3. CREATING FORMS
3.2.3: Adding a Calculated Field
A calculated field is one that involves a calculation using existing fields; for instance, to multiply a quantity and a unit price to get an extended price.
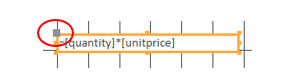
To add a control where a calculated value will be displayed you must click the Text Box control, then click (and drag for sizing) where you wish the control placed. You will see two controls placed in the form: a label and a text box. For the label one could enter Extended price, and in the text box you would enter a formula (e.g., for an extended price a formula would be: =[quantity]*[unitprice]).

Adjust the size and location of the controls as necessary. To do this can be a little tricky. To move a control, you must select the control, and then click (and drag) the large dot in the control’s upper left corner:
To resize a control you must position the mouse so you can see a resizing indicator, and then click (and drag) to get the size you need:

Exercises
1) Open the Orders database (see databases for these notes) and create a form for OrderDetails. You will be able to incorporate the calculated field discussed above. Open your form in Form View and view the data to verify your calculated field displays properly.
- Note that you can modify the properties of fields on a form. When you are in Design View for this form you can right-click a field and select properties – the first property on the Format tab is Format and, for this calculated field, you could choose Currency.
2) Open the Library database and create forms for each of Book, Loan and Member.
