16 The Final Steps: Post-production and delivering accessible content
Carlie Soares
In this chapter, you will learn:
- The post-production process: how to make simple edits go a long way
- Best practices for video editing, to save you time and enhance the quality.
- How to make your videos accessible with transcripts and closed captions.
Post Production
The editing stage is just as important as the preparation and recording stage. No video is ever ready if it doesn’t go through the editing process. In this section, we will go through multiple editing techniques, that are suited to everyone from beginner to advanced. This stage can be the most time-consuming, so make sure you have budgeted the time to spend in this stage.
Check out Ryerson University’s Video Editing Tips for Teaching [opens in new tab] for a detailed breakdown on basic video editing tips.
Editing tips
Here are a few quick tips that can help improve your videos and keep your students focused on your content:
Edit out the beginning/end of your recording. Reduce your video length and retain your viewers’ attention while also making your video presentation more professional.
Remove areas such as:
- The beginning of the recording, as you are preparing your computer workspace for your presentation
- Moments when you are realigning yourself, whether it be for the camera, or reviewing your notes.
- The end of the recording, when you reach out to click the stop button on your camera, or look away to press the stop button.
The video below demonstrates some simple edits you should apply to every video, even if you don’t make any mistakes!
Full video with transcript [opens in new tab]
Break up your video with different camera shots, or different content. Additional options:
- Start with a video of yourself, then switch to a slide deck and voiceover, then switch back as you introduce a new section or conclude your lecture.
- Break up sections with titles, or go back to the full video of yourself. Breaking up the video makes it easier for a student to review a particular section of a video.
- Bring in different visual elements. Keep yourself in the video frame, but bring in different visual elements that you are discussing.
Bring in different visual elements. Keep yourself in the video frame, but bring in different visual elements that you are discussing.
You can add things such as:
- Images, graphs, charts
- Text, animations, icons
- Music and sound effects
Tip: Make sure your music and sound effects are not affected by copyright. You can find a fantastic library of free sounds through the YouTube Studio [opens in new tab]
Don’t forget to edit your audio. Audio editing is just as important as video editing, as noises in the background can be as easily distracting to the viewer, especially if you are recording in an open area. Some things to remove, or “mute” include:
- Outdoor sounds: dogs barking, children playing, etc.
- Any background noises, including people walking, doors closing or people talking.
- Personal noises, such as clearing your throat, coughing or blowing your nose.
If possible, keep your videos short and sweet. If you recorded a long video, look for some points where you can separate your video into smaller chunks. Easy points to spot are when you are changing topics, or pausing while you review your notes. This step is much easier in the production stage, as you can plan your breaks or topics to be shorter, but don’t fret! Just make sure you keep your video engaging, by applying the steps above.
To learn more about different editing software, and their capabilities, visit the second chapter in this module, Creating Instructional Videos: Technology recommendations from low- to high- tech [opens in new tab]
Keep Accessibility in Mind
The material that makes up a video itself is critical to accessibility, and achieving accessible video content is much easier if the right steps and considerations are taken into account from the very beginning.
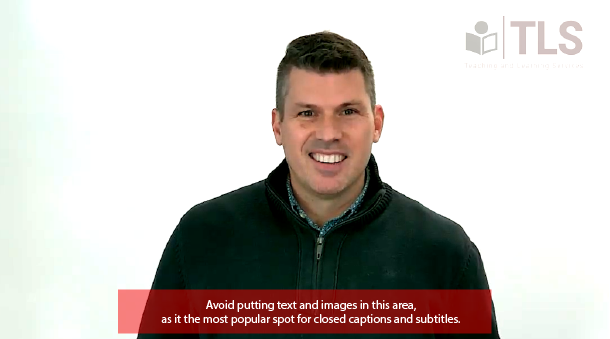
- Respect closed caption placement: Try not to place text or images at the bottom of your screen where captions will appear. The closed captions will block the text or image you are trying to show. Avoid placing text or images in the lower center of the screen.
- Use colours thoughtfully and with good contrast: Ensure information is not conveyed with colours alone and when colours are used they are sufficiently-distinguishable. Apply this principle to any content that conveys information, like text or charts. To learn more about colour contrast requirements read The Basics and Importance of Color Contrast for Web Accessibility [opens in new tab]
- Use text that is easy to read: When displaying text on screen, ensure the font size is large enough and text is on the screen for long enough to read.
- Avoid fast-flashing content: Flashing content in videos should be avoided or if included due diligence should be taken to ensure it meets the three-flashes-or-below threshold [opens in new tab]. Do not use videos that have more than three flashes within a period of 1 second, as this can provoke seizures in some users with seizure disorders.
Exporting and Uploading
Your video has gone through the editing stage and looks fantastic! Now what? Exporting, otherwise known as saving, is a crucial step in order to upload and share your video. While it sounds as easy as clicking “File-Save”, some essential steps often get missed. Here are some things to consider before you export your video:
Consider the format and size of your video
You want your students to be able to access your videos anytime and anywhere. Your videos should also be made available not just for computers but also for phones, tablets, or any other device your students use. Compress your video files and prepare lower quality versions. That way, you can still hand out your videos to students with a slow internet connection. It also allows them to watch your videos just as efficiently as others.
When exporting your video, you may come across a list of video formats, such as MOV, MP4, AVI, etc. It’s important to deliver the correct format for your intended audience. If you know where you are uploading the video to, check to see if they have any limitations on the file types. If they only allow MP4 files, then make sure you export it as an MP4. If you’re not sure where you will be uploading your video, check out this “Choosing the Right Video Format” [opens in new tab] resource for more information and where they can be uploaded.
Upload your video to an accessible video player
- Ensure the video player supports captions, transcripts, and audio descriptions.
- Ensure all controls, like volume, play, and pause, can be operated with a keyboard and have accessible labels for assistive technology such as screen readers.
- Ensure videos do not play automatically when the webpage loads. This can be confusing for many users, and the sound can interfere with assistive technology such as screen readers.
Add Closed Captions and Transcript
Add captions to your video
Captions are text alternatives of the audio content, synchronized with the video. Popular video hosting sites such as YouTube [opens in new tab] and Facebook [opens in new tab] have specific captioning options available. Some platforms will caption your videos automatically, but they won’t be 100% accurate. Make sure you pick a platform where you are able to edit the closed captions.
Captions should not be confused with subtitles — they are similar, yet distinct from each other. While subtitles are a straightforward translation of the video’s dialogue, often times in a different language, captions not only have a text description of the spoken word but also include description of the background music or sound so as to provide the same level of information as one would get from hearing the audio.
To meet web content accessibility standards, always include captions to prerecorded videos or provide real-time captions for live videos.
Captions should be:
- Synchronized – the text content should appear at approximately the same time that audio would be available
- Equivalent – content provided in captions should be equivalent to that of the spoken word
- Accessible – caption content should be readily accessible and available to those who need it
Options for captioning your videos:
- Campus captioning services
- If you are teaching at a University or College, the campus will most likely have a closed captioning service available. If you have a student with a registered captioning accommodation, you can request captioning from the campus captioning service, usually at no charge
- Zoom
- If you select the Record to the Cloud [opens in new tab] option, Zoom will generate an interactive transcript of your video using speech recognition technology
- YouTube
- YouTube generates automated captions for some uploaded videos that can be corrected within YouTube’s interface or using a desktop caption editor
Apart from the standard benefit most people think of — to make media accessible to people who are deaf or have hearing loss — captioning has additional benefits.
- Captions help you increase your viewer base. Multilingual captions are a great way to make your video accessible to all. It opens up the audience to people who speak a language different from the language the video is created in and allows your content to have the widest reach for your message.
- Captions help when watching videos in loud environments such as on the bus or places where you need to be quiet such as a library or work. It’s estimated that 85% of Facebook videos are watched without sound.
- Captions improve the search engine optimization (SEO) of your video as content in text form is better indexed by search engines.
- Captions can be closed or open. Closed captions can be turned on or off, whereas open captions are always visible. For the sake of viewers’ convenience, most websites provide closed captions for video content. To read and understand more about closed captions, read Internet Closed Captioning Requirements [opens in new tab]
Add a transcript to your video
Transcripts can be thought of as text versions of your video. A transcript should include not only what is spoken in the video, but also descriptions of actions or important information on-screen.
There are several options for creating a transcript:
- Format and reuse captions: If you have already created a caption file, the same can be edited or added to and used as a transcript.
- Use professional transcribing services: There are many services that transcribe audio and video files and provide the transcript in HTML format for a fee.
- Use a speech recognition software: Speech recognition software such as Dragon Naturally Speaking is one of the most popular software in the market. However, like any other voice assisted technology, this software needs “training” to understand the voice, accent, tone, etc. and has an initial learning curve.
- Manually type up the content: If you are creating videos occasionally, this is a good DIY option.
Including a transcript with your video has added benefits.
- A person who is blind, has other disabilities, or otherwise cannot or prefers not to watch the video will still be able to get all the information in text form.
- A person using assistive technology such as a screen reader to access a transcript may be able to get the same content in less time than listening to the actual audio content. This is because experienced screen reader users may increase their reading speed to a pace much faster than we speak.
- Including transcripts can be helpful to everyone at different times — for example, when people don’t want to spend the time to watch the video but will scan a transcript to get the information they want quickly.
- Including a transcript makes your video more searchable as content in text form is better indexed by search engines.
Include audio description if needed
In cases where important information or actions are happening on-screen but are not clearly described or apparent in the audio track, an audio description can help fill in the missing information for someone who can’t see what’s being displayed.
Audio description is defined as, “Narration added to the soundtrack to describe important visual details that cannot be understood from the main soundtrack alone”. Audio description is a means to inform individuals who are blind or who have low vision about visual content essential for comprehension. Audio description of video provides information about actions, characters, scene changes, on-screen text, and other visual content. Audio description supplements the regular audio track of a program. Audio description is usually added during existing pauses in dialogue. Audio description is also called “video description” and “descriptive narration”.
If videos are created with accessibility in mind, audio descriptions probably aren’t necessary, as long as important visual elements of the video are described in the audio track itself. Or, if for example the entire video is a man speaking at a podium (or some other relatively static presentation), audio descriptions would usually be considered unnecessary.
An accessible video usually includes captions; a transcript; and careful use of colour, text, and flashes or animation. A video should also be delivered in an accessible format with an accessible media player, and may include additional audio description when the default audio track isn’t sufficient.
The 3 Stage of Video Production Recap
You have reached the end of the video production phases, and we covered a lot of material. Everything from coming up with a concept, to script writing, to choosing the right kind of camera and adding text to your final video. Complete this exercise below to see how much you remember about the video production phases.
—Click in the TOP-RIGHT corner of the window above to view in fullscreen.
You are ready to make amazing videos!
Welcome to the end of Module 4. We have covered A LOT of different topics, and there is still more to discover!
Keep thinking about these topics as you are creating instructional videos and navigating through the 3 stages of video production. You now have the tools, tips, and techniques to explore and enhance your content creation, while managing your time and keeping accessibility in mind. Now go show the world what you can do!
—Click in the BOTTOM-RIGHT corner of the window above to view in fullscreen.
