Testing Resistance (Ohms) with a Digital Multimeter
This test, using a digital multimeter, determines whether:
- an electrical circuit is complete or broken
- the resistance of a component matches the manufacturer’s specification
Figure 4: Ohm Test of a Load
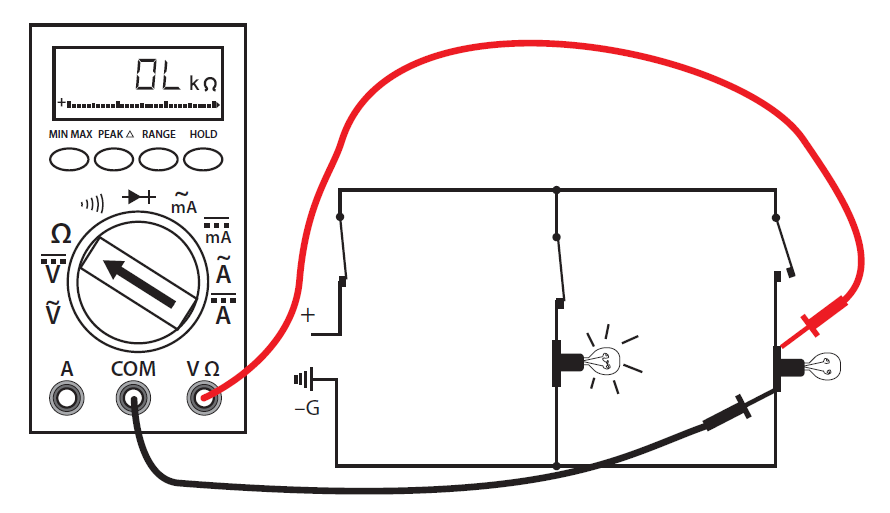
Follow these steps to complete the resistance test procedure:
- Make sure all power is off on the circuit you are testing.
- Make sure that the component that you are testing is isolated from the complete circuit. Either remove the component from the circuit or isolate it with an open switch.
- Set the selector dial to Ω.
- Connect the test lead and probes to the component terminals as shown (Figure 4).
- Observe the readout window to obtain the Ω reading.
- Compare the results to the manufacturer’s Ω specifications. If the readings match the component, then resistance is not a problem. If the component is a load, there should be resistance that matches the manufacturer’s specs.
- If the reading is infinite (I) or overloaded (OL), then the component is open.
- If the reading is zero, then the component is closed (if it is a load then this is an internal short).
- If this is the last test you are doing, turn the meter to “off” and store it in a safe place.
Video: Testing Resistance
There may be other circuits that are energized even though the circuit you are working on is not energized. DO NOT TOUCH THE METER PROBES TO ANY ENERGIZED COMPONENTS WHEN TESTING FOR CONTINUITY. YOU MAY DAMAGE THE METER.
