Microsoft Word
To run the accessibility checker in Word, try the following:
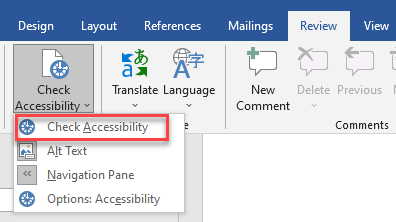
- On the ribbon, select the Review tab.
- Select Check Accessibility. A dropdown will appear – choose Check Accessibility again. This will run a test for accessibility and the results will pop up.
- Review your results. A list of errors, warnings, and tips with how-to-fix recommendations will be listed. See Rules for the Accessibility Checker for more information.

Microsoft PowerPoint
To run the accessibility checker in PowerPoint, try the following:
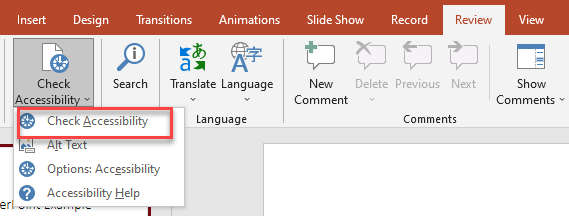
- On the ribbon, select the Review tab.
- Select Check Accessibility. A dropdown will appear – choose Check Accessibility again. This will run a test for accessibility and the results will pop up.
- Review your results. A list of errors, warnings, and tips with how-to-fix recommendations will be displayed. See Rules for the Accessibility Checker for more information.
Adobe PDF
Only some of the Adobe products have an accessibility checker. Adobe Acrobat Reader does not have an accessibility checker, but Adobe Acrobat Pro does. To run the accessibility checker in Acrobat Pro, try the following:
- Select Tools > Accessibility.
- The Accessibility toolset is displayed in the secondary toolbar.
- In the secondary toolbar, click Full Check/Accessibility Check.
- The Accessibility Checker Options dialog box is displayed.
- In the Report Options section, select options for how you want to view the results. You can save the results as an HTML file or attach the results file to the document.
- Select a page range if you prefer to check individual pages of a document.
Note: When you have a large document, you can either run a full check/accessibility check or check one page at a time, depending on your work style. - Select one or more of the Checking Options. These correspond to different accessibility features you want checked (page content, annotations, tab order).
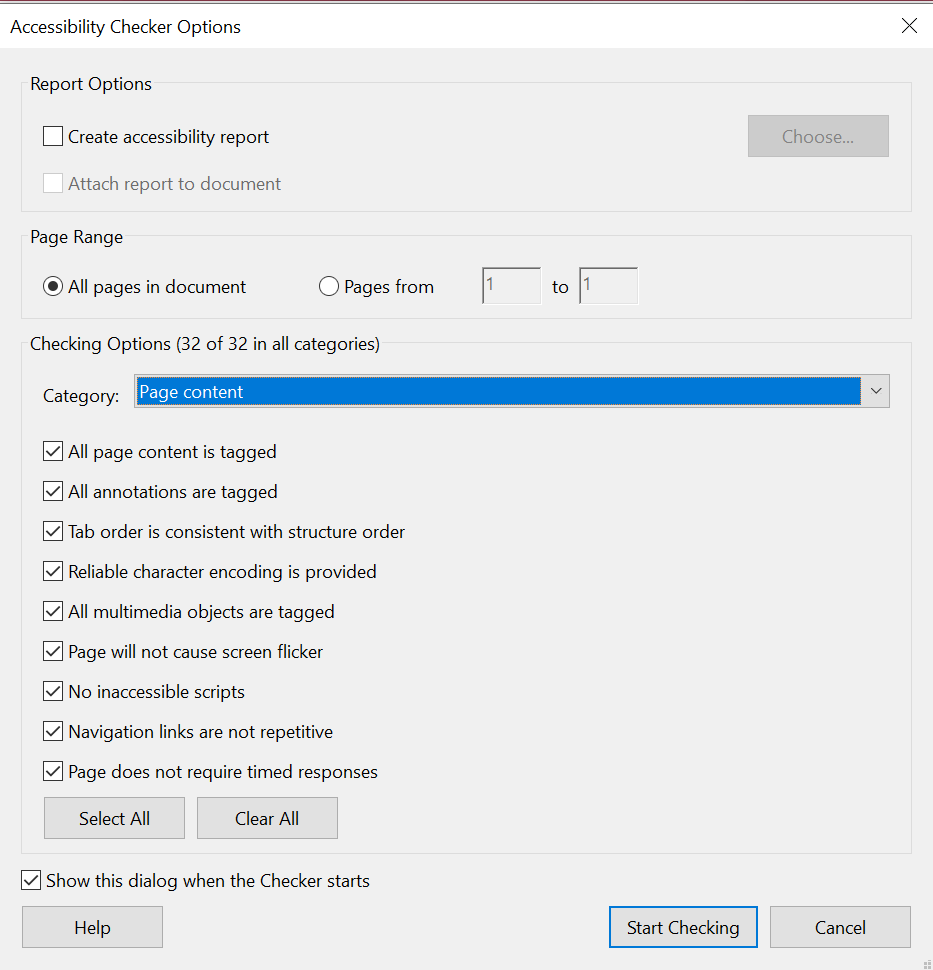
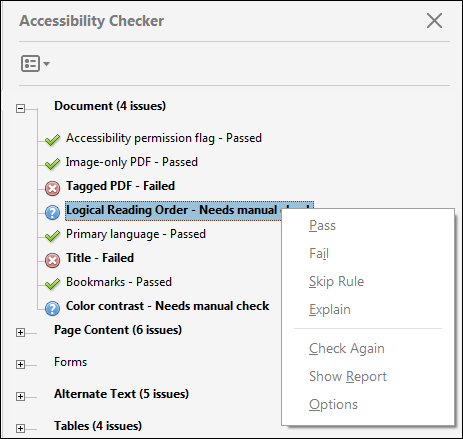
- Click Start Checking. The results are displayed in the Accessibility Checker panel on the left, which also has helpful links and hints for repairing issues. If you created a report in step 5, the results are available in the selected folder.
- Because the Full Check/Accessibility Check feature cannot distinguish between essential and nonessential content types (such as decorative borders), some reported issues don’t affect readability. It’s a good idea to review all issues to determine which ones require correction.
- The report displays one of the following statuses for each rule check:
- Passed: The item is accessible.
- Skipped By User: Rule was not checked because it wasn’t selected in the Accessibility Checker Options dialog box.
- Needs Manual Check: The Full Check/Accessibility Check feature couldn’t check the item automatically. Verify the item manually.
- Failed: The item didn’t pass the accessibility check.
Resources:
- Microsoft Word and PowerPoint:
- Adobe Acrobat Pro:
- Adobe Acrobat Reader:
