Installing Accessibility Insights
To download Accessibility Insights for Windows, go to the Accessibility Insights for Windows page and click the “Download for Windows” button. Follow the prompts to install the software.
Wildlife Manager (demo app)
Accessibility Insights includes a demo app: Wildlife Manager, with which you can learn to use Accessibility Insights. To get the demo app, go to the WildlifeManager page and download WildlifeManager.exe. You can open the .exe file right away (no install is needed).
Live Inspect
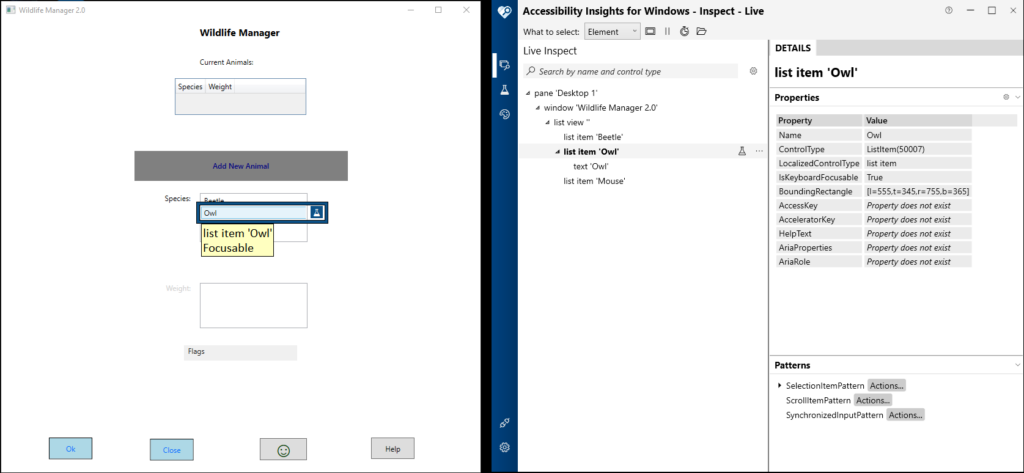
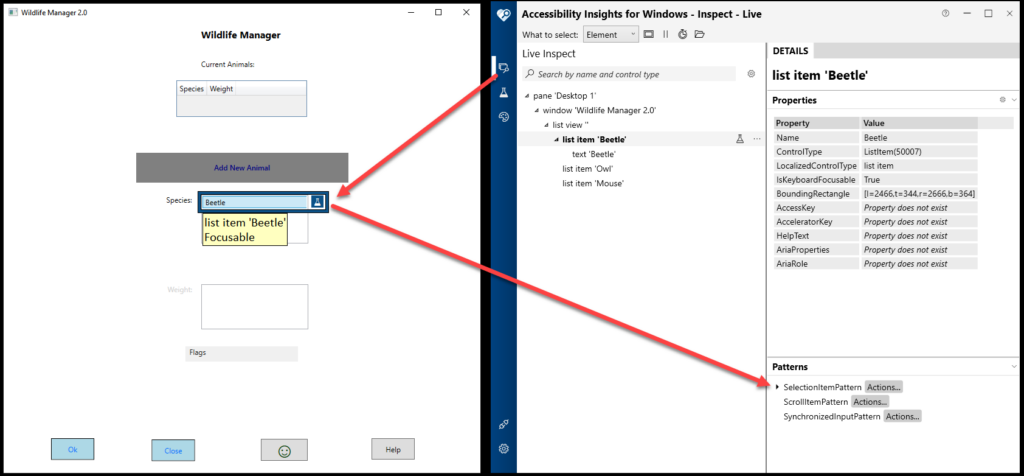
You can use the Live Inspect feature to inspect UI elements by placing your mouse over them.
To use it, open the demo app and Accessibility Insights side-by-side. Move your mouse pointer or tab to each UI element. Accessibility Insights will display the element’s name and properties.
You can customize the list of properties that are shown by clicking the “Properties Settings” button (which looks like a gear icon).
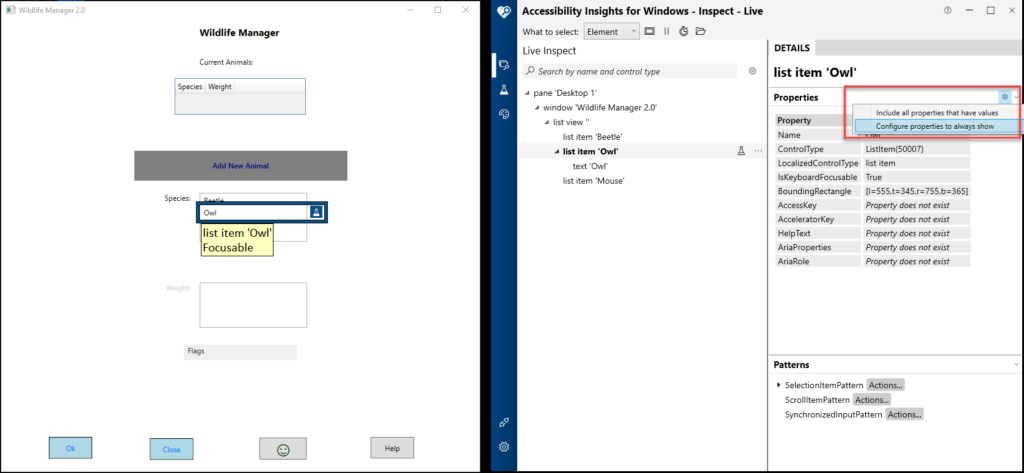
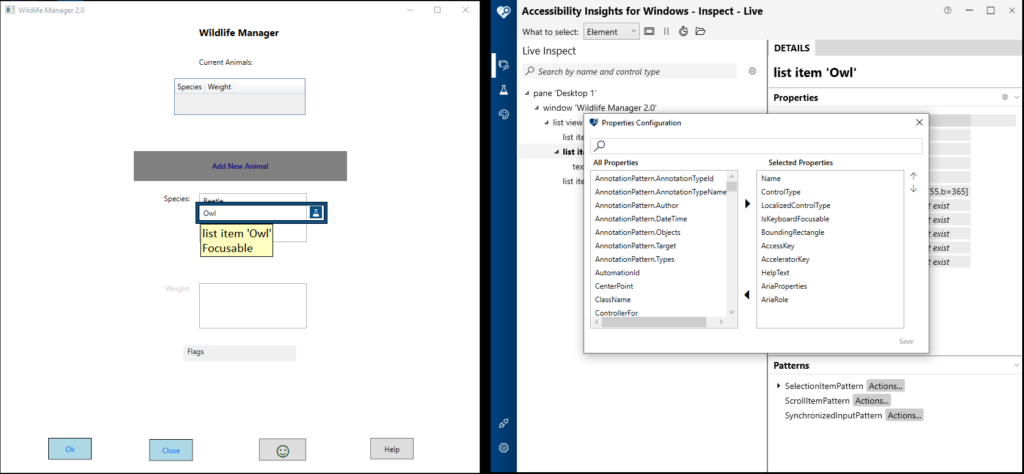
Then you can manage your list of Selected Properties.
FastPass
When developers are editing code, they can run a FastPass test before each code check-in to ensure no accessibility issues have occurred as a result of their changes. FastPass consists of two main features – Automated Checks and Tab Stops.
Automated Checks
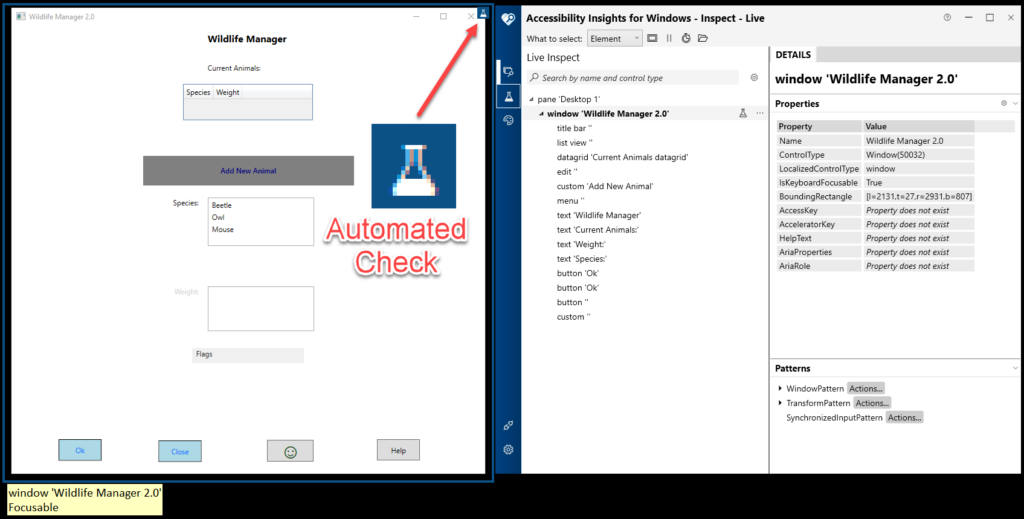
The Automated Checks feature checks an application’s elements for conformance with dozens of accessibility requirements.
To use this feature, position your mouse over the element(s) you’d like to test (a blue box will appear around them) and click the Test icon (which looks like a laboratory beaker).
Some elements will be flagged with issues. To select one, click on its failure icon (!).
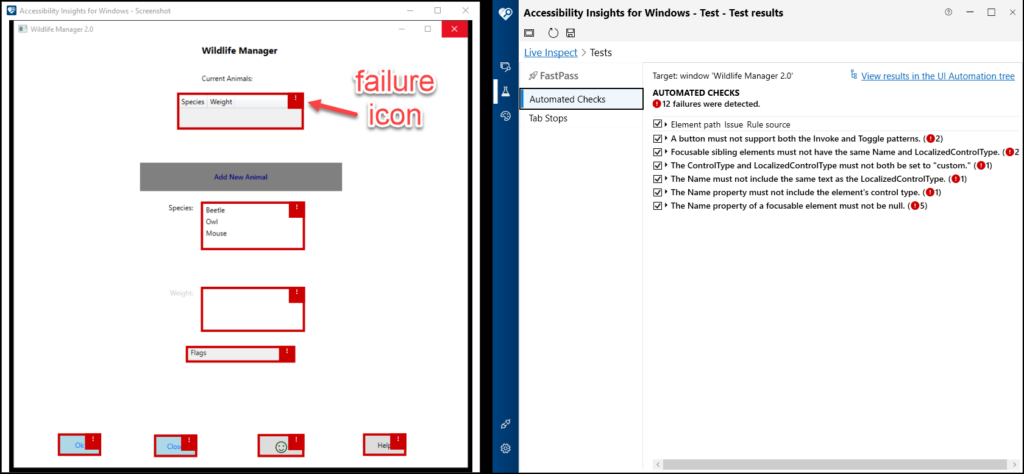
Details will be displayed about the highlighted issue along with tips on how to fix it.
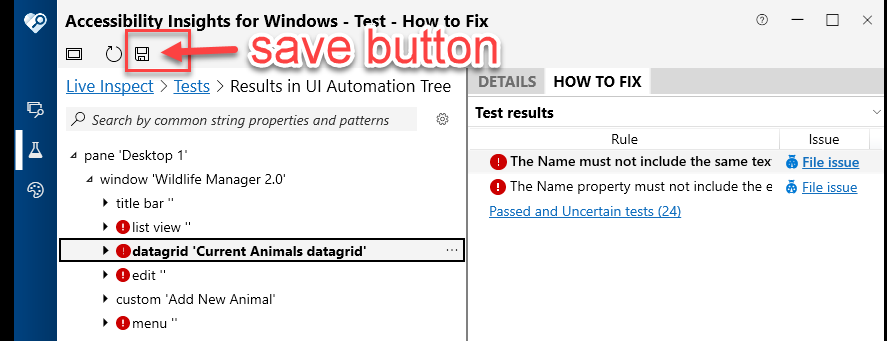
You can click the Save button (which looks like a diskette) to save a snapshot of the issue.
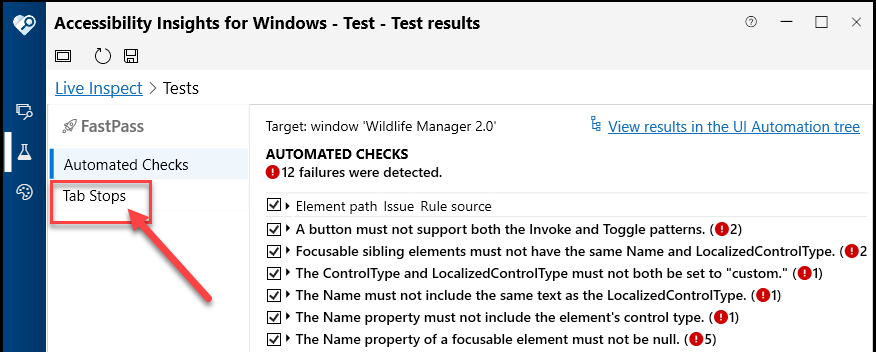
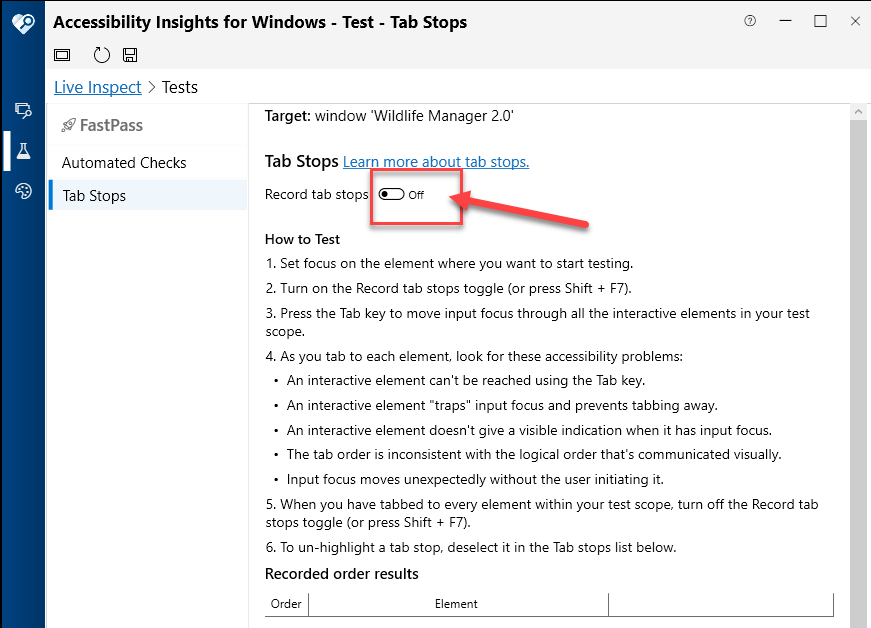
Tab Stops
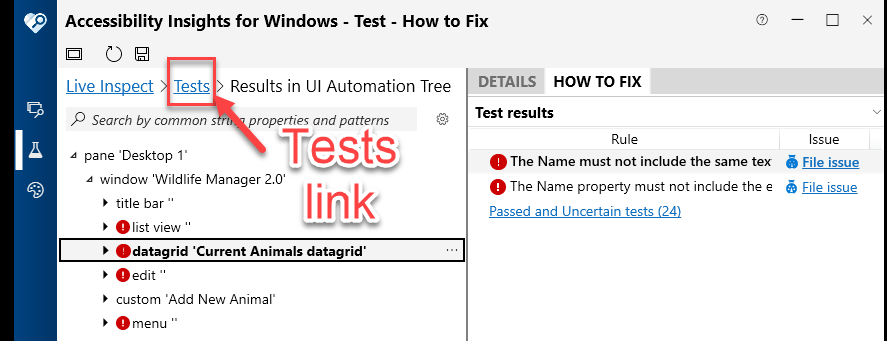
The Tab Stops feature of the FastPass tests supports you in testing whether the tab progression in the application is accessible. To test the Tab Stops, click the Tests link.
Then select Tab Stops.
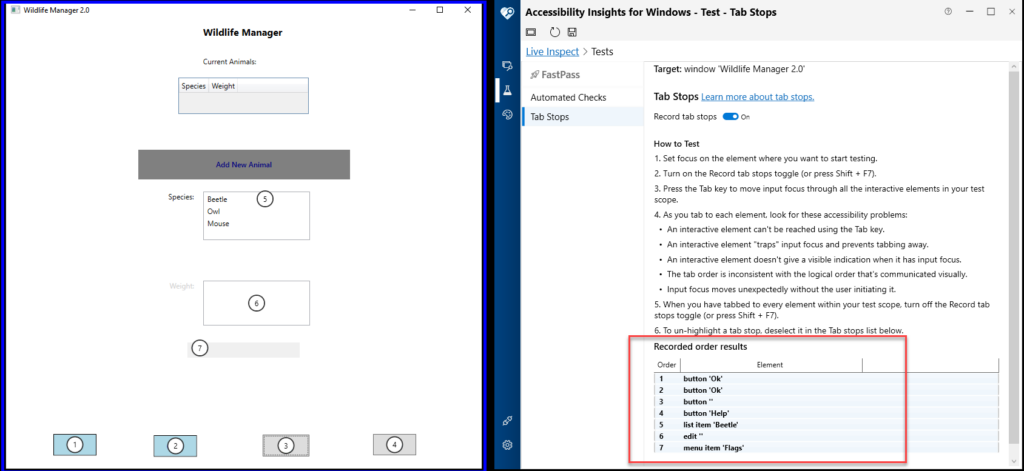
Switch the “Record tab stops” toggle to On.
Then press the Tab key several times, and each tab stop will be listed in the “Recorded order results” table. This will make it easy to identify missing tab stops or incorrect tab order.
Troubleshooting
There are two components of the Troubleshooting feature that are relatively important to keep in mind. The first allows you to see the patterns supported by a control and invoke their UIA methods to see whether it responds correctly to user input. The second records application events.
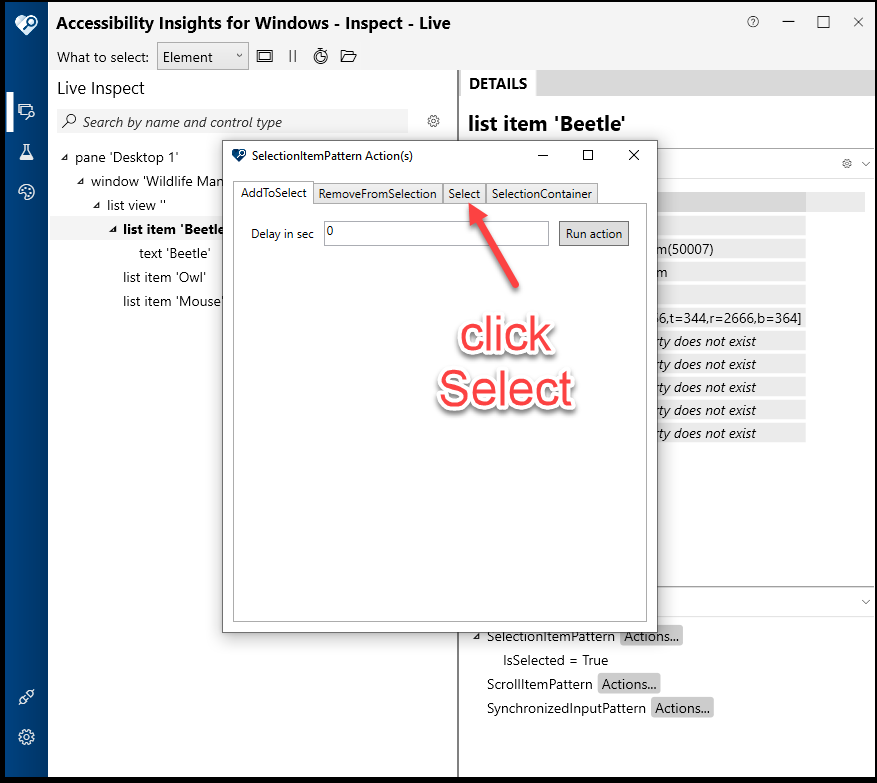
Patterns
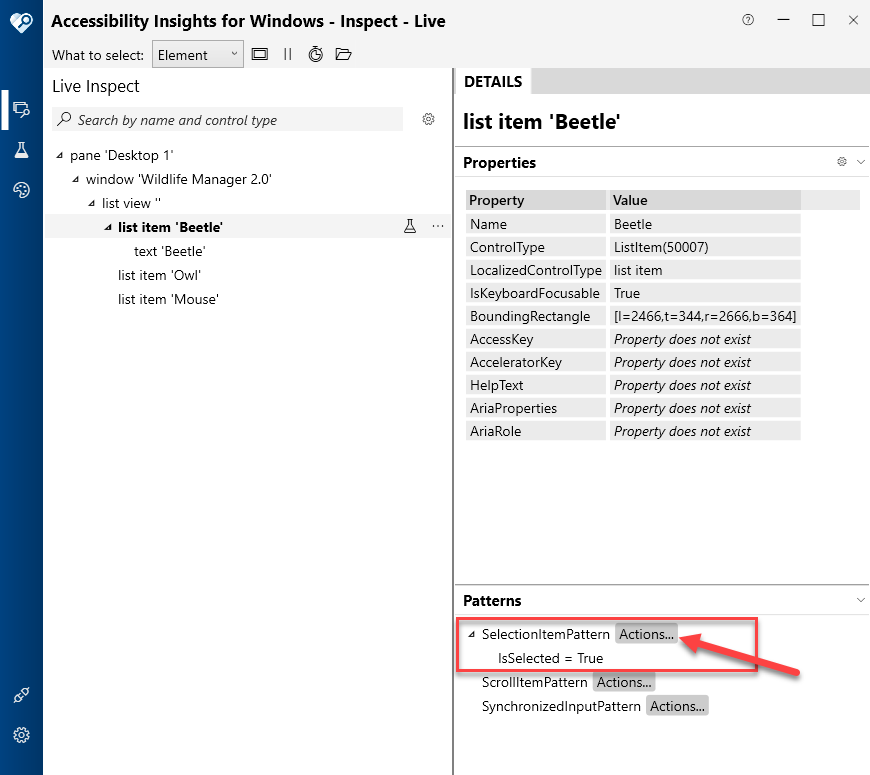
To use this feature, select the Inspect button in Accessibility Insights. Then select a UI element in the application. Then select a Pattern you’d like to inspect in Accessibility Insights.
Then click on the pattern’s “Actions…” button.
An Actions dialogue will open. Click the Select tab.
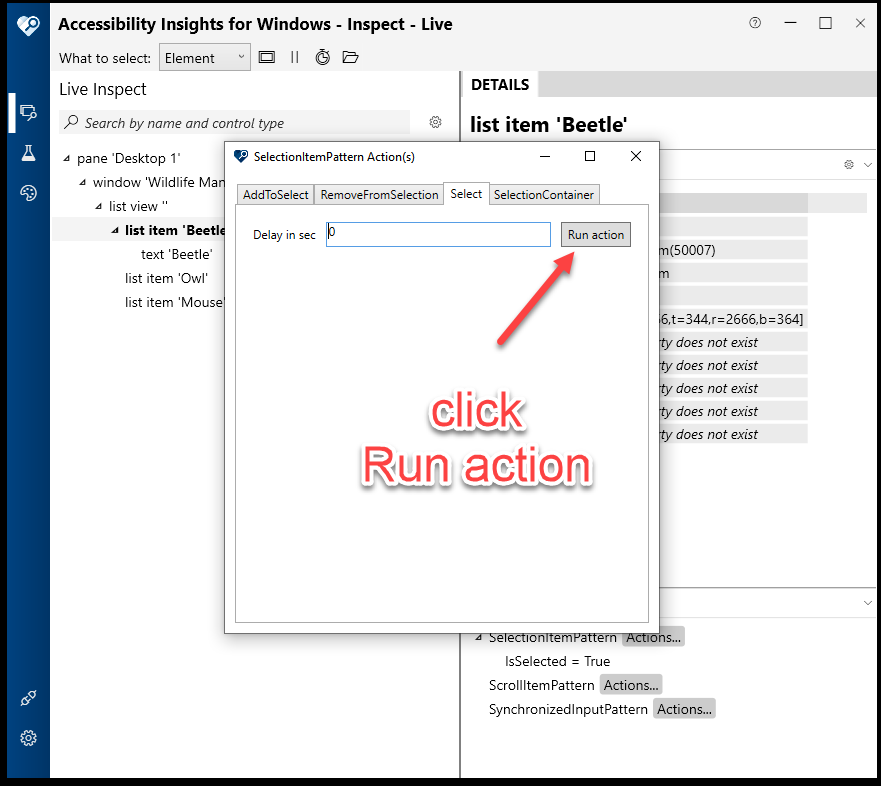
Then click the “Run action” button.
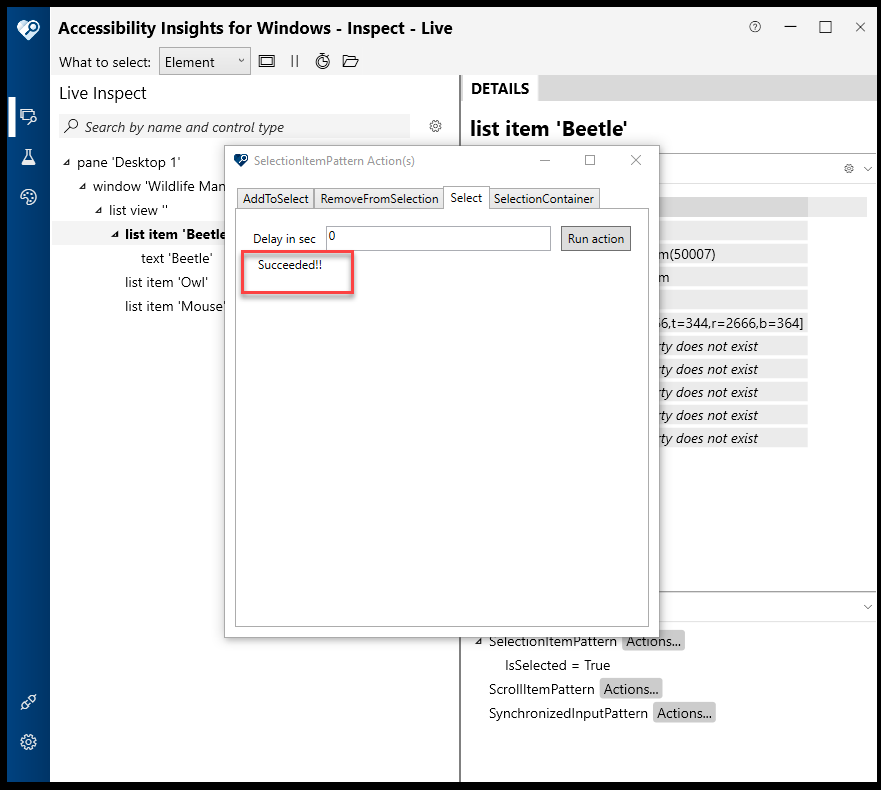
And the “Succeeded” message appears.
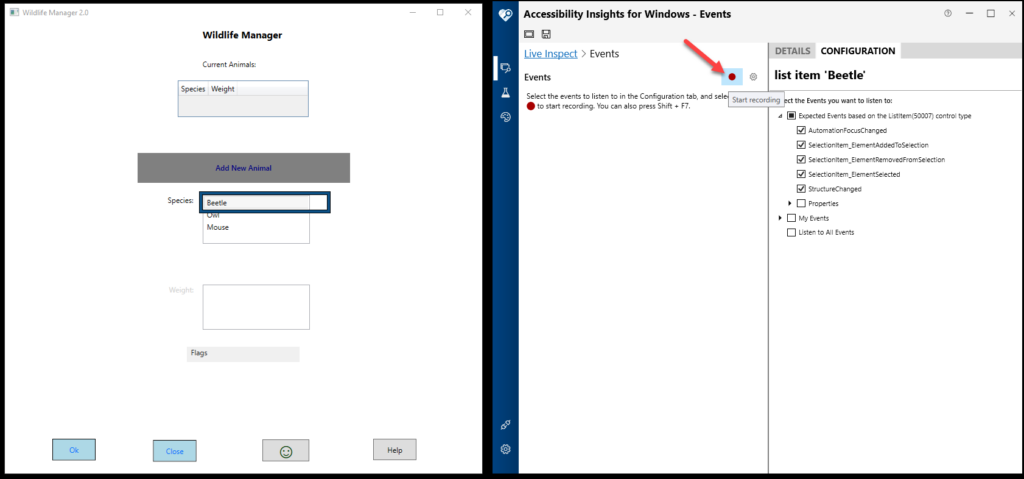
Record application events
Another part of troubleshooting is to record application events. To do this, select an element in the application. This element will become highlighted in Insights, click the “More options” (…) button, and select “Listen to Events”
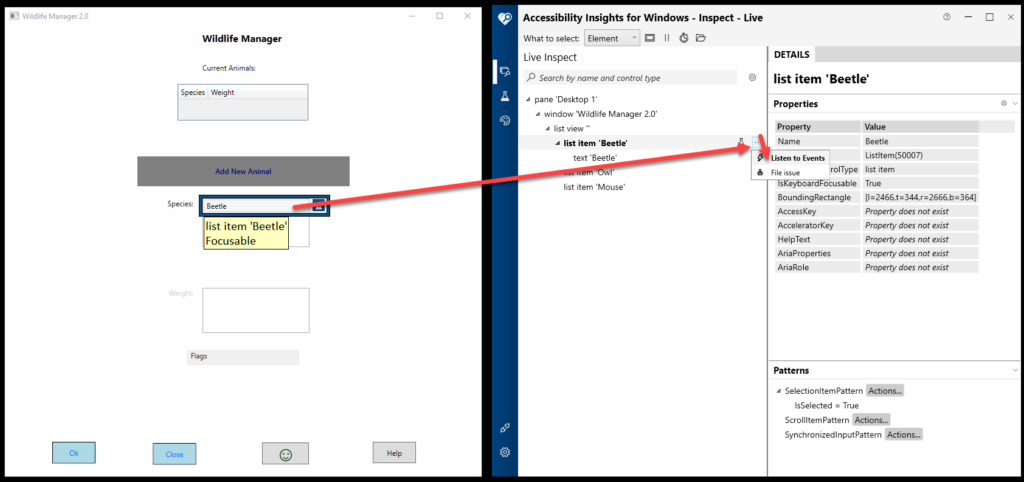
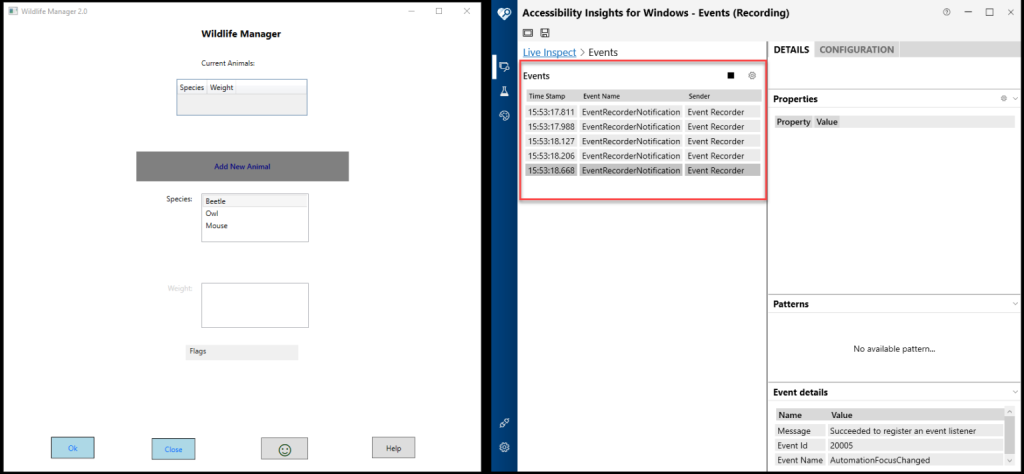
Then click the “Start recording” button.
The invoked events will be logged under the Events heading.
Resources:
