15.1: “How To” Instructions / Standard Operating Procedure
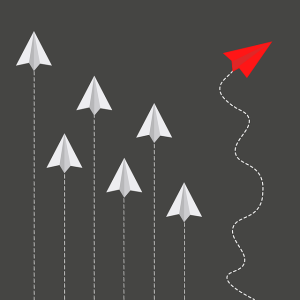 Have you ever made a paper airplane? Have you ever taught someone how to make a paper airplane? Which task would you say is easier?
Most people who would agree that the second task (giving instructions) is much more challenging than the first (simply doing it yourself). For this reason, the ability to communicate instructions or explain technical information is a highly valued skill in every industry. Some people even make an entire career out of it! Traditionally, these jobs can be found in technology or trades industries. These positions come with titles such as “technical writer” or “documentation specialist.” More recently, however, YouTubers, TikTokkers, and other content creators have turned the humble “how to” video into wildly popular entertainment. The most successful of these content creators have made millions by teaching viewers how to bake, how to apply make-up, or how to play video games.
You may not be interested in folding paper until it’s sky-worthy or posting “how-to” Reels for clout, but at some point, you must have taught someone how to do something. You may have explained how to make ramen to your roommate or coached someone in a sport. Whatever it was, if you’ve ever taught anyone how to do anything, you communicated a version of a Standard Operating Procedure.
A Standard Operating Procedure is an authoritative explanation of how to complete a task from start to finish. The measure of its quality is whether it enables the audience to actually “do the task” correctly, consistently, and safely. Other kinds of non-technical communication might strive for originality, beauty, or persuasive effect, but the style of a Standard Operating Procedure should be simple and informative. In fact, when a Standard Operating Procedure is communicated effectively, the audience won’t notice the quality of the language at all. They will, however, appreciate the ease with which they can complete the task.
The Standard Operating Procedure has a specialized style that requires writers to break some basic grammar rules that apply in academic writing or professional communication. This form of writing is characterized by: (a.) occasional sentence fragments; (b.) use of imperative / second person (“you”); and (c.) precise parallelism in subheadings and lists.
A basic Standard Operating Procedure typically has the following sections:
- A “How to” Title / Brief Introduction
- Before You Begin
- Required Resources
- Step-by-Step Instructions
- Finishing Up
9.1.1: A “How to” Title / Brief Introduction
The title of a Standard Operating Procedure should directly name the task that it explains. It often takes the form of “How to…” (ex. “How to Fold a Paper Airplane”). The audience wants to know how to do something, and the title should let them know that this document or video will help them do it. There should be no attempts at humour or efforts to provoke a philosophical reflection.
Directly under the title, there should be a brief introduction. It should describe the problem or the process being addressed. It should also identify the solution, outcome, or goal that will be achieved by the end. Finally, there should be mention of what is at stake. These three basic points help the audience create a mental model of what they are working towards and why these steps matter.
9.1.2: Before You Begin
This section should inform the audience of what they need to know before they jump into action. It begins by stating how long the task typically takes to complete. It should also offer any relevant safety precautions and advice on how to reduce or avoid risk. The point of this section is to help the audience set realistic expectations and and to prevent them from rushing into the process.
9.1.3: Required Resources
This section lists all of the tools, equipment, and materials that the audience will need to complete the task. Whether you need a particular piece of software or a specific screwdriver head, it is very frustrating to get halfway through a job before realizing you don’t have the right tool.
The previous section helps the audience prepare their minds. This section helps the audience prepare their practical resources so that they can realistically complete the task at hand.
9.1.4: Step-by-Step Instructions
This section is the longest and most detailed section of any Standard Operating Procedure.
In fact, the toughest challenge of writing a set of instructions is this: deciding what needs to be specified and what can be safely left out. Remember audience awareness! You will have to make decisions around message (what steps to include/exclude) and style (how formal/technical your language should be).
Imagine you were writing instructions for “How to Make a Peanut Butter Sandwich.” If you were communicating to an adult, you could simply say: “Open the jar and spread the peanut butter on the bread.” Try explaining the same task to a small child. If you don’t tell them to use a knife, you might catch them with their bare hands elbow-deep in the jar! When writing directions, you must always balance the steps themselves (message) with a heightened awareness of who is following those steps (audience).
The steps should always be numbered. Numbering the steps reminds your audience that things have to be done in a certain order. Anyone who has accidentally skipped a step while building with Lego blocks has learned that lesson the hard way. It also helps your audience keep track of where they are in the process and allows them to measure their progress.
If you write a long list of many steps, it can overwhelm your audience. To keep the task manageable, try organizing the steps into clusters. Use sub-headings to chunk out the information so that your audience does not become confused. Not only does this help the audience follow the instructions, clustering the steps will help you when you are writing the instructions. Some people prefer to start with “big picture” thinking by brainstorming the sub-headings first; other people prefer to jot down as many detailed steps as they can think of and then group them. Whatever works for you is fine.
9.1.5: Finishing Up
Begin this section with a simple phrase: “You know you’re done when…”. Provide the audience a clear, objective indicator that confirms for them that they have completed the task. It may seem obvious to you as the person writing the procedure, but, again, remember audience. There is almost no limit to the many ways that different people can misunderstand instructions!
If the outcome of the procedure requires ongoing maintenance or scheduled check-ups, be sure to let the audience know that in this section.
Also, be sure to caution the audience of any risks or safety hazards that could arise as a direct or indirect outcome of the process being completed.
Exemplar
How to Make a Paper Airplane
Making a paper airplane is a fun and easy way to relieve stress and defeat boredom. It is the perfect activity to take your mind off of the pressures of school. Once the airplane is finished, you can send your worries flying away.
Before You Begin
Time to complete: 3-5 minutes
Caution: Be careful not to get any paper cuts as you fold.
Caution: Be sure to only use scrap paper, not documents with important or sensitive information.
Required Resources
- a standard sheet of paper (8.5” x 11”)
- a clean, flat surface for folding
Step-by-Step Instructions
Create the Nose
1. Imagine a vertical line down the middle of the paper. Fold the paper along that line. Make sure that the 2 long edges line up edge-to-edge. Unfold the paper.
2. Take the top left corner and fold it inward so that the corner touches the centreline. Press down firmly so that it stays in place. Repeat with the top right corner. The top of the paper should now resemble a triangle.
3. On the left side of the paper, grasp the point where the straight edge meets the angled edge (the “base” of the “triangle”). Fold that point inward to the centreline. Press firmly. Repeat for the right edge.
Form the Body
4. Re-fold the paper along the crease the runs vertically down the middle.
5. Press along the fold firmly so that it stays folded.
Create the Wings
Finishing Up
You know you’re done when the paper has two symmetrical wings that are divided by a straight-edged base. Grip the base using your finger and thumb so that the plane is parallel to the floor. Using a flexible wrist, lightly throw the plane.
Caution: do not aim at anyone’s eye as the point of the plane could injure any unsuspecting bystanders.
