Module 03: Job Search
3.3 Networking
When an employer is looking to hire, often their first step is to consult their network. It feels safer to hire a candidate who has been referred by someone they trust rather than from screening a stack of resumes from unknown applicants. Therefore, the best way to increase your chances of getting a job is to get to know more people who work in your industry.
Who’s in your Network?
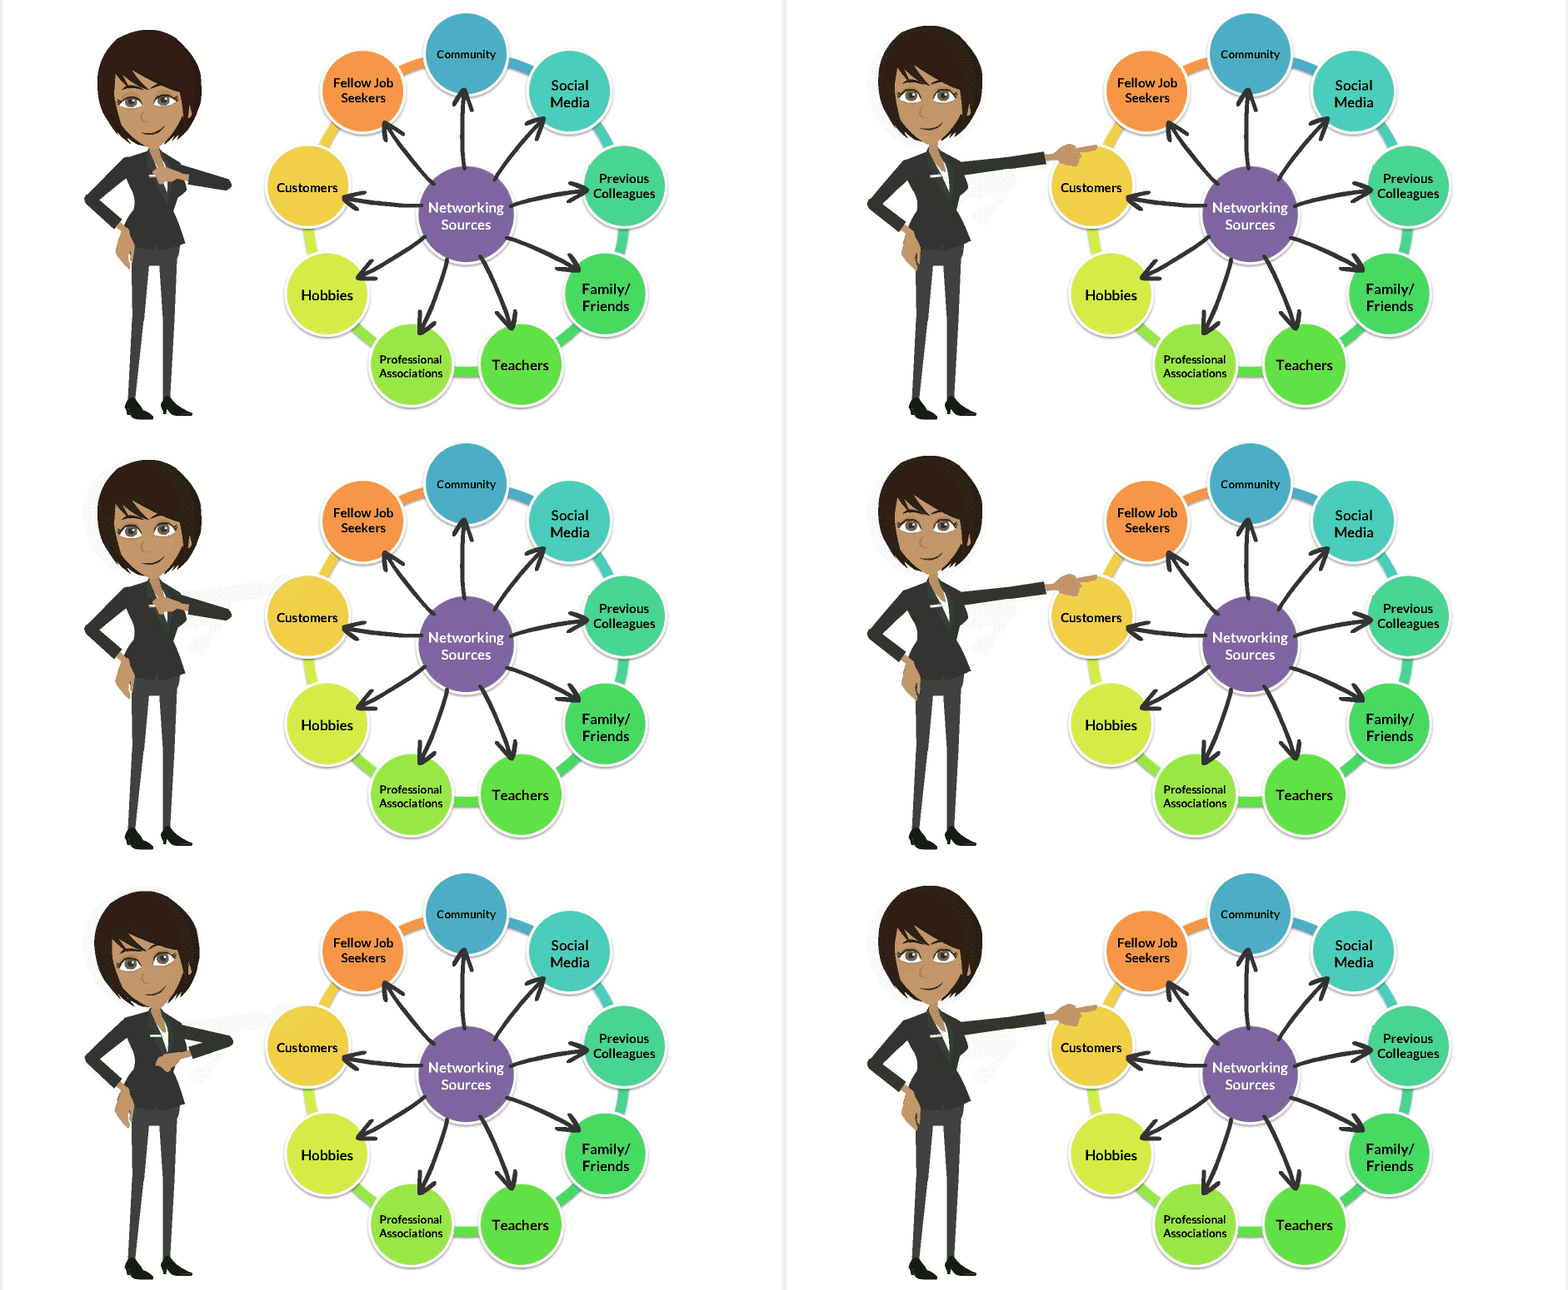
List people from all the various areas of your life who may be helpful in your job search. Refer to the diagram below (Figure 3.2) for ideas of where you might source these people from. While these connections may not have jobs to refer you to, they may have information or connections that can help guide you or introduce you to others, including professionals in your field.

Figure 3.2 Who is in your network?
Networking Do’s and Don’ts

- Do make sure that you are prepared for your job search. Have as clear an idea as possible of what you are looking for and have a resume on hand.
- Do let the people in your network know that you are looking for a job and provide as many details as you can of what you’re looking for. They can’t help you if you don’t communicate this to them.
- Do get out there and make new connections. The more people you have in your network, the more opportunities are available to you.
- Do regularly connect with your contacts to provide information, invite them to an event etc. You don’t want to be known as someone who only reaches out when you need something.
- Do create a networking business card to build a professional image. It will make it easier for you to exchange contact information with prospective employers or leads.
- Don’t forget that networking is a two-way street. Always look for opportunities to support your network.
- Don’t stop networking after you get a job. Remember, the best time to build your network is when you don’t need it, so that it’s there when you do need it!
Elevator Pitch
Since you never know when you might meet a potential employer, you need to be ready to introduce yourself and make a positive first impression. Your professional verbal introduction is often referred to as an elevator pitch – a reference to it needing to be concise enough to deliver while riding between floors on an elevator. An elevator pitch can be used during cold calling, networking and interviews.
Here are some tips to help you create an elevator pitch that you can use to impress an employer!
- Keep it concise (about 30 seconds)
- Customize your speech to your audience
- Practice your pitch out loud
- Get feedback from an Employment Advisor, professor or professional contact
- Convey confidence
- Be prepared with a plan to follow up
Using the tips above and the following structure as a guide, write your own elevator pitch!
Step 1: Provide a background of your experience, education and skills.
Jamila says, “Hi, my name is Jamila. I’m about to graduate from Centennial College with a Marketing diploma. I’ve spent the last two summers working in the Marketing department of ABC telecommunications company.“
Step 2: Tell the listener about what is it you have to offer and connect it to why it’s relevant to them.
Jamila says, “I’m looking for a full-time position where I can apply my experience and skills in marketing. I’ve spent the past 3 years working on brand development and I noticed that your company is currently re-evaluating your brand strategy.”
Step 3: Clearly state what you would like from the listener.
Jamila says, “I would love to meet with you to discuss your plans and perhaps offer you a fresh perspective.”
Networking Card

Once you have your elevator pitch nailed down (and remember, you will customize it for each prospective employer), you can easily create your networking card. Networking cards are essentially business cards for job seekers. They look like traditional business cards, but instead of including company information, they list your contact details and highlights of your skills and experience. You can hand them out to people you meet while networking. It is often awkward to hand someone your resume at a social event, so your networking card is a great alternative.
Here are some tips that will help you make the most of this tool:
- Keep your networking cards clean and crisp. Nothing says sloppy like a dirty business card.
- Always keep your networking cards with you. You never know where you might make a new contact for your network.
- List all of your contact information. Include your name, phone number and email address. If you have been building your online presence, you can also include your website, blog and social media handles. Consider using a QR code.
- Focus on your key skills. You don’t have much space so just list the skills and experience that strongly relate to your target position.
- Pay attention to the layout. Don’t let your card get too text-heavy. Sometimes less is more.
Your networking card alone isn’t going to get you a job, but if you use it effectively, it is one of the small details that will help you stand out from the crowd.
Figure 3.3 Sample Networking Card

Text Description of Image
Administrative Professional
Jane Career
Advanced certificate in MS Office
2+ years of administrative experience
careerservices@centennialcollege.ca
linkedin.com/in/janecareer
Resources for obtaining a networking card:
- Vistaprint – Source:© Vistaprint 2001 – 2020. All rights reserved.
- Staples – Source: Copyright 2020, Staples Canada Inc., All Rights Reserved


