Creating great video: Light
The amount of light, or absence of it, greatly impacts your video. Just like our eyes, the camera needs light to see, or record, the image. But the camera needs more light to create a quality image that replicates what our eyes can see. This section explains how to use light effectively to get great results when making video.
How light affects quality
Light is easily one of the most important factors for creating great video. While this could be a course unto itself, for our purpose we need to know that we need as much light as possible. There are a number of ways you can increase the light available for your camera – you can record outside and use daylight, position yourself near a window, or add an external light source – like a lamp or spotlight.
In this image, you see a comparison of how the computer camera and an external webcam interpret light. The images on the bottom have an external light source that greatly improve the quality of the image.
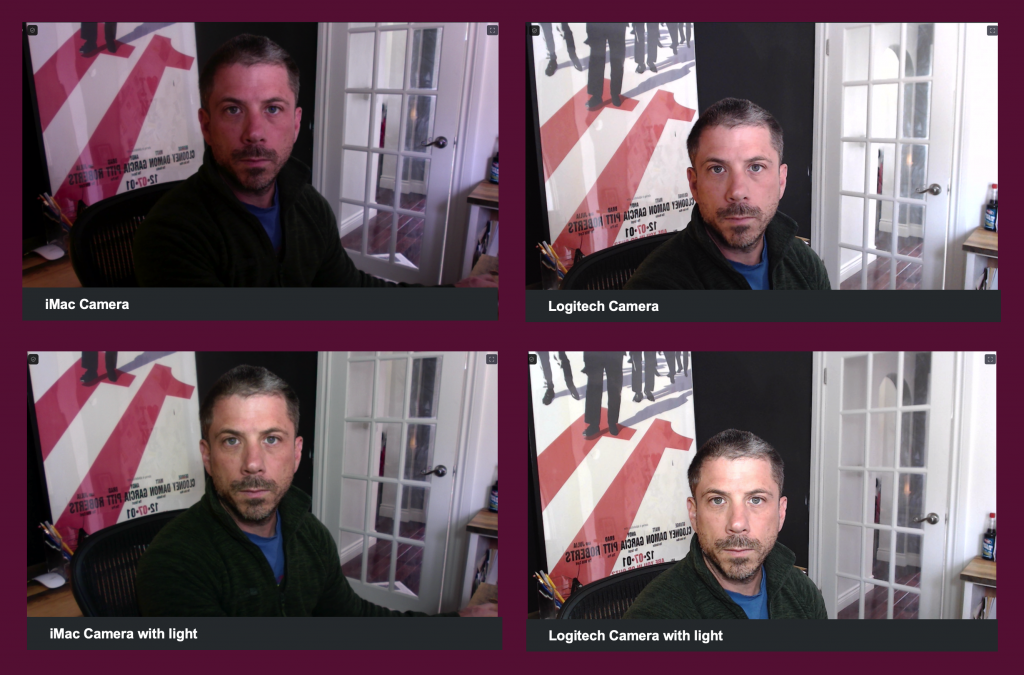
Take note of how the light hits the facial features and the resulting effect on clarity. You don’t want the light to be too harsh. You also want to avoid light on either side of the face. This creates shadows and an unflattering effects. Place the light directly in front of your face for best results. Or, face the window to take advantage of flattering, soft light.
Pro tip: While most built-in cameras are great, adding an external webcam or DSLR can greatly increase the quality of your videos. The camera used above is the Logitech 922 ProStream.
Exposure
Everyone has taken a picture that is too dark or bright – that is exposure – how much light is used by the camera to translate the image. Not enough light and the image/video is dark. Too much and it is too bright. You can control exposure in a few ways.
- Control the distance to the camera. Too bright? Move the camera away from the light source and vice versa.
- Add a Filter. You can filter the amount of light by putting something between the camera and the lights source. This can be as easy as a piece of paper over a light to help diffuse the amount of light.
- Use exposure lock. Most phones give you the ability to “lock” the exposure. This stops the camera from trying to measure the amount of light at a default setting that you choose. See the video below.
Light has colour
Adding funky filters for cool effects can be awesome on social media. But for professional purposes we want our videos to be high quality. And we want to look our best! Adding lots of light and making sure it is soft will get us most of the way there. But one other factor is that light has colour. As you can see in the image below, light ranges from warm yellow/orange to a cool blue.
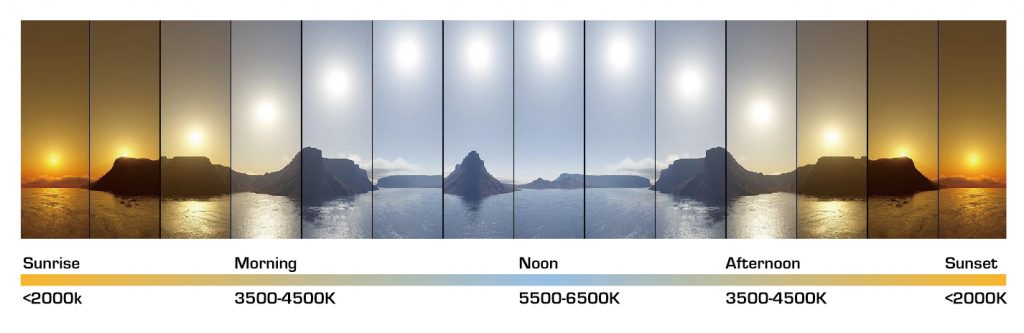
Typically, indoors we want to replicate the daylight spectrum for best effects and avoid our faces or room looking orange. You can accomplish this by using lightbulbs with a Kalvin rating of 4-5000K. This will give you great results. Avoid fluorescent bulbs if you can – they tend to flicker and the camera may pick this up and cause a distracting strobe effect.
Next Steps: We will begin to understand the components that effect video quality.
