1.7 Creating Cellphilms: A Nine-Step Guide
Objective
This guide was created to support students and instructors in making cellphillm videos (short videos made using mobile technology) about disability accommodation in academic placements.
This guide presents a nine-step mobile video-making process called the cellphilm method. It includes support for identifying a topic and figuring out how you want your cellphilm to look. The guide reviews filming techniques and visual ethics and presents some ideas of what you can do with your cellphilm once it is created.
You can adapt these steps to suit your needs:
- Think of a topic
- Brainstorm your topic
- Identify resources
- Video ethics
- Storyboard
- Film
- Edit (or not)
- Watch
- Mobilize
1) Think of a Topic
The topic of disability accommodation in placement is broad. Think about how you can narrow your cellphilm’s topic to something more specific. There are overarching and intersecting themes—for example, inclusion, stigma, identity, accessibility, learning, professional development, and systemic barriers—that may be relevant to your experiences and your ideas about what needs to change.
To help you narrow down your topic, consider the following prompts:
- What is your experience of disability accommodation in placement (from the perspective of the student/instructor being accommodated or the instructor supporting student accommodation)?
- Do you feel supported/excluded from academic placement settings?
- What are the barriers to and facilitators of communicating about accommodation in placement?
- What is the first step in addressing barriers to disabled students’ right to accommodation in placements?
These prompts are offered as inspiration; feel free to develop your own prompts, too. When you have decided on a topic for your cellphilm, you can move on to step two.
2) Brainstorm Your Topic
In this brainstorming activity, you will think more broadly about your cellphilm topic. You can write or draw your chosen topic in the centre of the blank page provided or use a system that works better for you. Around your topic, map out all the related perspectives, ideas, complexities, and nuances. You can draw lines connecting ideas and use colour to distinguish differences and common themes. Follow your train of thought and see where you end up. There are no wrong answers to this activity! If you are working in a group and people have opposing opinions, avoid arguing and include all ideas in the brainstorm. All contributions are welcome. This is a thought-generating activity; the point is to come up with as many ideas as possible.
Try these probes and prompts to support your brainstorming:
- Reflect on your positionality: What motivated you to choose this topic? How does your motivation impact your perspectives and ideas?
- Identify alternative perspectives: How might other stakeholders understand your topic? What alternative perspectives on this topic exist?
- Think micro and macro: What are the systemic and/or social factors that influence your video topic?
- Identify influencers: Who are the different institutions, stakeholder groups, or individuals that influence your topic? What do you want them to do after seeing your video?
- Identify your audience: Who should see your cellphilm and listen to your message?
Use the brainstorm activity to reflect on and expand your thinking—to see the unexpected and to think outside the box. This activity affords an opportunity to push your cellphilm topic critically and bring it to the next level. Once you have exhausted your brainstorm and can think of nothing more to add, move on to the next step of refining your cellphilm topic.
You can use this space to brainstorm your topic:
3) Identify Possible Resources
Different audiences are persuaded by different types of arguments. For example, a group of peers may be moved to action when they watch a cellphilm that shares a common, personal experience they can relate to. Other audiences, like government or policy- and decision-makers, may be persuaded by statistics and evidence. A group of community members may be influenced by a portrayal of the realities and lived experience of a particularly marginalized group or area that they have previously overlooked. Think about the intended audience(s) for your cellphilm and the types of story/evidence/perspectives that might influence them the most. Take some time now to collect any resources (e.g., statistics, quotations, images, soundtrack, soundscape) that you think will make your cellphilm more persuasive to a specific audience group.
The following three figures are examples of infographics on accommodation, students with disabilities, and placements in higher education. You may want to use some of this information in your cellphilm. Or, maybe it will make you think of other data that you want to find. Try doing an image search on your browser to provide some quick background information on your specific topic. You can always create your own infographics, images, music, or other media to help communicate your message. Whatever you use, do not forget to reference the original source!


4) Visual Ethics
Take a few minutes to think about the risks and benefits of sharing your cellphilm with different audiences. Be mindful; once something has been shared online it is very difficult to take it back and know for sure that it has been deleted. People can rip, record, and otherwise copy online content without permission. But sharing your cellphilm can also be a highly rewarding experience! You set the terms of sharing. You can share your cellphilm privately with friends and family. You can store your cellphilm online, unlisted, and share the link only with specific audiences (be aware that they could then share the link with others, so this is not 100% secure). Or, you can post your cellphilm publicly for the world to potentially see.
Before you start filming, consider your safety. You may want to avoid filming personal information or identifying characteristics (e.g., home address, telephone number, faces). Here are some strategies that you can use to make a cellphilm that maintains your anonymity while also presenting your ideas and experiences in a thought-provoking manner.
Only you can decide if you want to identify yourself in your cellphilm.
How comfortable are you with being identified in your cellphilm?
- What good things might happen if your cellphilm identifies you and is screened to your intended audience?
- What bad things might happen if you are identifiable in your cellphilm and your intended audience watches it?
- What bad/good things might happen if someone you are not expecting sees your cellphilm?
- Based on your reflections above, to what degree are you comfortable identifying yourself in your cellphilm?
People may be able to identify you in your video if
- you include your name, email or other contact information;
- you show your face;
- you show other identifying characteristics (e.g., tattoos, jewelry, clothing);
- you include a recording of your voice; or
- your cellphilm portrays a real experience and includes details such as who was involved or where and when it happened. If someone watching the video is aware of the situation, they may be able to tell it is you who made the video.
The following strategies may help you to make a cellphilm that keeps your identity private:
- Avoid filming your face or other identifiable characteristics.
- Avoid using a voice-over.
- Use drawings, text, screenshots, and public-access footage to avoid filming any identifying characteristics at all.
- Avoid filming locations that people associate you with (e.g., your home, your favourite hangout).
- Avoid using your name. Choose a pseudonym or pen name.
The following examples of cellphone videos use different anonymizing strategies. They are each 60-90 seconds.
Third Party Consent
Everyone has the right to decide if they want to be in a video. It is not appropriate to film someone without their informed consent. In order for someone else (a 3rd party) to provide their informed consent to be in your cellphilm, they will first need to know
- what the cellphilm is about;
- what is expected of them (what they are being asked to do);
- how the cellphilm will be used;
- where the cellphilm and related files will be stored;
- who has access to the cellphilm and other video files; and
- that they have the right to consent or not consent to be recorded.
Make sure you let people ask questions about what they are consenting, and do your best to answer their questions honestly and in a timely fashion prior to filming.
The SmART Toolbox provides an easy-to-use quiz to help determine if you require a media release when making a cellphone video. You do not have to include other people in your video, but if you do make sure to obtain informed consent.
5) Storyboard
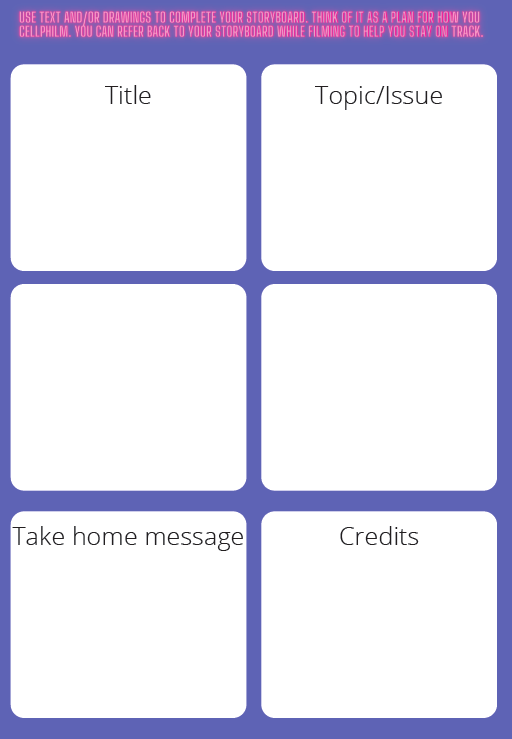
The storyboard is a visual plan for your cellphilm. On the template on the next page, imagine one box = one scene in your cellphilm. Start by planning your cellphilm in six scenes. The first scene includes the title of your cellphilm. The second scene presents the issue/topic under investigation. Two additional scenes in the middle of your cellphilm can provide further insight, perspective, or ideas about the topic. The penultimate (second-to-last) scene emphasizes the message you want audiences to take home from your video. The final scene lists the credits (using real or fake names) and any acknowledgements that you feel are necessary. The title and credit scenes are helpful beginning and end points to your video. Feel free to adapt this storyboard to meet your needs. You do not have to use every box, but using a title and credits is strongly encouraged because it helps signal the beginning and end of your cellphilm to your audience.
Try to keep your cellphilm under 2 minutes long. The longer your cellphilm is, the more likely people will become distracted or lose interest. Staying within the six-box storyboard (or less) structure will help to keep your cellphilm precise and impactful.
When completing the storyboard step for the first time, some people do not know where to start, while others feel the step is unnecessary or elementary. Experience has shown that storyboarding helps in planning the filming process and makes for a more cohesive and understandable final product.
A storyboard template is available below. Use text and/or drawings to complete your storyboard. You can refer back to it while filming to help you stay on track.
Storyboard Template
ACTon Storyboard Template (PDF)
6) Filming
Aim to film a first draft of your cellphilm all at once. If something needs to be changed, you can go back and fix it later. You never have to share a cellphilm that you feel is incomplete. The one-shot-shoot and no-editing-required strategies are two ways to film your first draft efficiently. You may be surprised; experience has shown that the first draft can be closer to the finished product than you first think!
One-Shot-Shoot
The one-shot-shoot technique is a quick and easy way to film a cellphilm and requires no editing. With a good storyboard in place, you can press record and film your video from start to finish in one go. If something unexpected happens, or if you mess up or are unhappy with the result, don’t worry. The cellphilm is only 1 or 2 minutes long. It’s quick to go back to the beginning and film it all again.
No-Editing-Required
The no-editing-required (NER) approach requires that you use a cellphone video app with a “pause” function. All Android phones have this function in their video app. iPhone users can download a free video app with a pause function here: https://apps.apple.com/us/app/pausecam-video-recorder-camera/id923045172
To use the NER approach, it is best to have your cellphilm planned on your storyboard from start to finish. You will film each scene in order. Start with your title scene. Film it in one shot; then press pause (do not press stop!) and set up your second scene. When you are ready to film your second scene, press pause again to continue filming. Continue pressing pause between each scene until you complete filming your final scene/credits. When you have finished filming your credits, you can press stop. When you go back to view your cellphilm, it will look like a series of scenes stitched together but no editing is required. Keep in mind, if you make a mistake in one of your scenes, you will have to start filming again at the first scene. Luckily, your cellphilm is only 1 or 2 minutes in length, so it’s not such a big deal!
Filming Tips
Sound
Mics on cellphones are generally terrible! Pay attention and avoid background noise (e.g., wind, traffic, people speaking in the background or next door). Locate the mic on your cellphone (usually on the bottom centre) and make sure you are not covering it with your finger. Alternatively, you can use your headphones like a mic or source a lapel mic.
If you want to record a voice-over, make sure the person talking stands as close to the phone as possible. A great way to record voice-over and film at the same time is to stand behind the camera and narrate while you film.
Lighting
Find a well-lit area to film. Avoid back light, unless you are planning to create a silhouette.
Close ups
Avoid using the zoom button, as it may pixelate your image (unless this is the effect you are going for). If you want a closer look, physically move your phone closer to what you are filming.
Holding the Cellphone
Generally, it is best to hold your cellphone in landscape mode (horizontally) while cellphilming. It is important that you do not switch the orientation of your phone in the middle of filming. This will turn your recording sideways and additional time will be required to edit the orientation after filming.
Safety
Keep yourself and others safe while filming. Don’t put yourself in harm’s way to get the perfect shot. People’s safety is the first priority.
7) Watching
Don’t miss this step! Review and celebrate what you have created! Making a first draft of a cellphilm is an accomplishment!
Think about what you have learnt through this process and how your thinking on the topic of disabled students’ access to accommodations in placement has changed, advanced, or shifted since you started this project.
Here are a few more reflective prompts to consider:
- How does it feel to watch what you produced?
- What surprises you most about the cellphilm process?
- What part of your cellphilm are you most proud of?
- Does the cellphilm feel ready to share?
- If revisions are required, what is a realistic timeline for finishing these revisions?
8) Editing
Not all cellphilms need editing. Editing can add to the professional look of your cellphilm, but it can also take a lot of time. If you want to edit your cellphillm, focus on a few key changes or additions and try and avoid getting bogged down in endless changes to insignificant details. You may want to cut some lines or add text, subtitles, or other accessibility features. You may have access to video-editing software on your phone or computer. If not, the editing apps listed below are relatively easy to use. (Be aware that free video apps often add watermarks, have limited features, or collect personal information and/or claim ownership of your media.)
- WeVideo
- iMovie
- Viva Cut
9) Screening
Congratulations you have made a cellphilm! Now is the time to consider next steps. The process of cellphilm making can, in its own right, be personally meaningful. You may feel that you have achieved your goal and want to stop here. However, you may also see your cellphilm as a resource that can be used to make change. Throughout this guide, you have been prompted to consider audiences for your cellphilm. Now is the time to develop a plan to ensure that your video is seen by the right people.
Consider the following questions to help you plan your screening:
- Who would be the ideal audience(s) for your cellphilm?
- What do you want people to do after watching your cellphilm? What is the intended change that you want your cellphilm to precipitate?
- How will you get your cellphilm to your intended audience (e.g., post online, email a link, organize a meeting, host a screening)?
- What materials (e.g., introductory remarks, handouts, interactive activities) could you organize to promote audience engagement with and discussion about your cellphilm?
The time to act is now! Get the word out, connect, and start the conversation.
This Concludes the Student PowerHour.
If you have not done so already, please take a moment to respond to an anonymous survey to tell us about your experience with the Student PowerHour (and other ACTon resources you may have looked at). The survey will take approximately 15 to 20 minutes to complete.
Interested in organizing a workshop and using the ACTon resources? Check out the ACTon Facilitation Guide!
The Cellphilm Guide was prepared by Kate MacEntee for the ACTon Project.
Cellphilm Guide by Katie MacEntee is licensed under a Creative Commons Attribution-NonCommercial-ShareAlike 4.0 International License.
