Creating and Using Accessible OER
As many open educational resources are created or hosted on websites, the requirements and practices already presented for the Web apply to OER in general.
A core principle of open education is widening participation through easily accessible learning materials. Ensuring an OER is accessible taps into this by opening up usability for learners with diverse needs. We want to remove as many barriers as possible to participating in use of OER and ensuring your OER is readable and understood by more users is critical.
The previous section provides specifics and the recommendation to explore this reference guide by WebAIM, which provides quick tips that are helpful when creating resources. As Pressbooks is a leading platform for creating and adapting OER in the Ontario postsecondary sector, we will focus on that platform in this section.
Accessibility in Pressbooks
According to assessments completed in February 2023, Pressbooks’ author and reader interfaces meet the requirements of WCAG 2.0 and 2.1, level AA. Of course, it is also up to authors to follow best practices for accessibility when adding content to Pressbooks to ensure that their resource is truly accessible. In general, we recommend using features already available in Pressbooks to ensure accessibility rather than editing the CSS (Cascading Style Sheets) if you wish to customize the look of your resource.
Structure
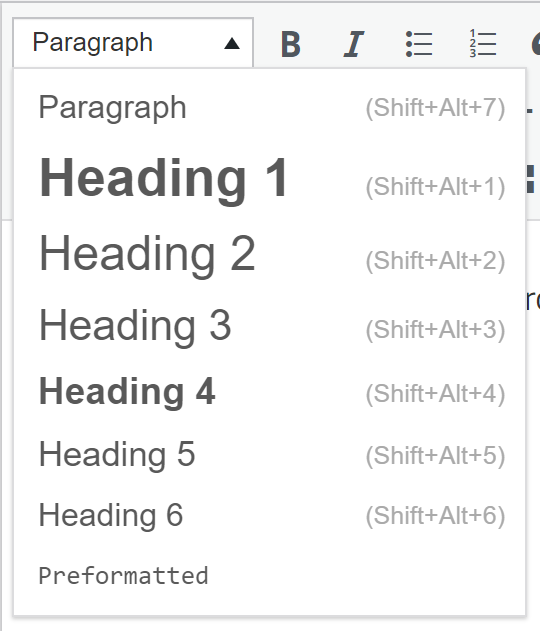
For content organization, use the Visual Editor styles menu to assign “Heading 1” to sections, “Heading 2” to sub-sections and so on. Headings should not use all caps.
Lists
For lists, use the Bulleted List or Numbered List option in the Visual Editor to structure your list in an accessible manner.
Font Styles
A good step when authoring an accessible OER in Pressbooks is to ensure you are using an accessible Book Theme. For example, the default theme for the eCampusOntario Pressbooks instance is Malala, which includes a sans serif 12 pt font.
Hyperlinks
To create an accessible hyperlink, copy the link, highlight the text and in the Visual editor, choose insert/edit link and paste the URL. Not that you can also use the shortcut Ctrl/Cmd +K and paste.
Tables
Tables created in Pressbooks need to have a defined structure to be accessible. You need to ensure your table has a legend or title, that there are row and column headers to define the table sections and avoid splitting or merging cells.
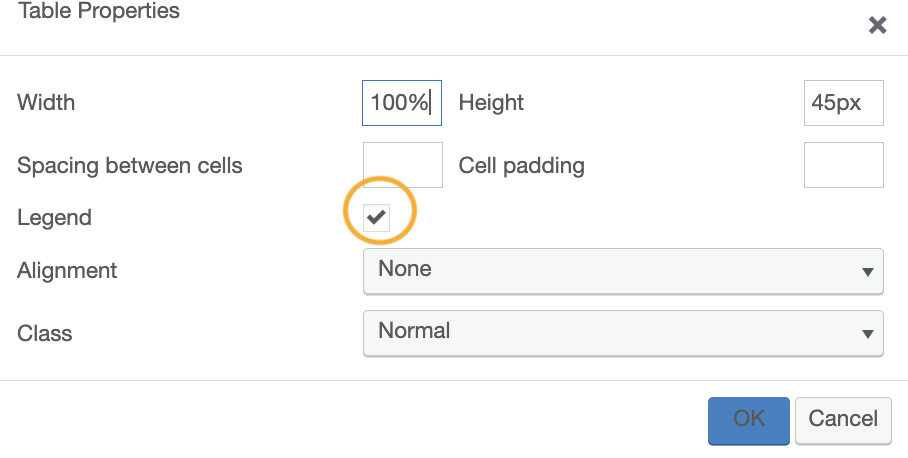
To create a legend or title for your table, select the Table icon, then Table Properties and then Legend. Choose the space that now appears above the centre of your table and type a title.
To add row and column headers after you have created your table, you need to adjust their cells’ properties. For example, to add a column header, select all of the cells that in the first column. Then select the Table Icon, then Cell, then Table cell properties and change the “Cell Type to “header cell” and the “Scope” to “Column.” Follow the same process to add a row header.
There are many accessibility items to consider with creating tables in Pressbooks. We recommend you review the guidelines on digital content accessibility and Pressbooks by McMaster University.
Alternative Text
For images, add an alt text when adding them to the Media Library.
Colour Contrast
Make sure you check the colour contrast when using two adjacent colours whether they be with your text, background, images, or figures. If you know the hex colour codes you can check via the Color Review contrast checker, or you can paste the URL of your webbook into WAVE Web AIM Accessibility checker and adjust as needed.
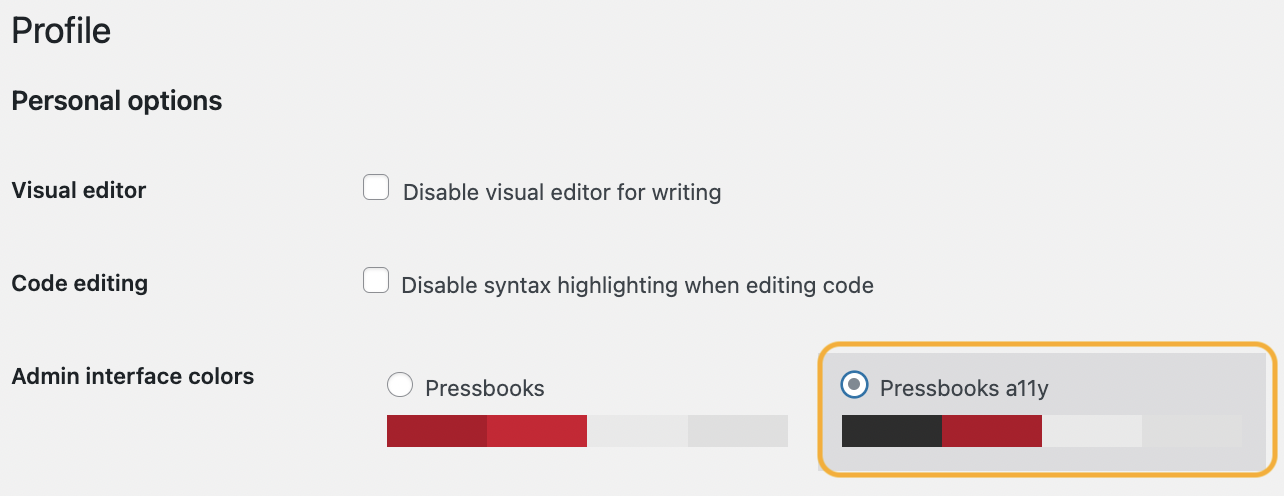
Note that if you are an administrator of a Pressbook and require a higher colour contrast to assist with authoring a resource you can change the default admin interface to the Pressbooks a11y selection under “Accounts” and then “Profile”. This only changes your interface not that of your readers.
Captions and Transcripts
Because of size limits, we do not recommend uploading and storing media such as audio and video recordings in Pressbooks. Instead, you should upload them to an online repository or hosting platform and use the caption and transcriptions options available within them. For example, uploading your videos to YouTube will give you the opportunity to add and edit captions and transcripts and easily embed them into Pressbooks.
You can also include the transcript for the video and audio recording in the text immediately following the media such as in this example from the Pressbook Essentials of Linguistics which includes the Video Script underneath the video.
Multiple Formats
Finally, it is best to make your webbook available in a variety of formats that allow readers to download your resource for use without an Internet connection (e.g. PDF or EPUB).
Accessibility in H5P Activities
Accessibility in H5P activities is covered in greater detail in the H5P module.
 Activity: Checklist for Accessibility
Review a resource you have already created in the context of your work using the Checklist for Accessibility [Word document] OR review a resource created by someone else using the Checklist for Accessibility [Word document] . Which features of this resource can you improve upon to make it accessible? How will you proceed? Share your thoughts in a Padlet.


