Optimize PDFs for Posting & Generate PDFs by Chapter
Why should we optimize PDFs and generate chapter files?
- Allows users to pick & choose what book sections to download/print
- Allow us to optimize the PDFs and improve their accessibility and file size for improved user experience
- Saves students money if they don’t need to print the entire text
- Full OER texts can be quite long – file sizes difficult to work with for digital notetaking etc
- Offers more choice for the end user
Before exporting:
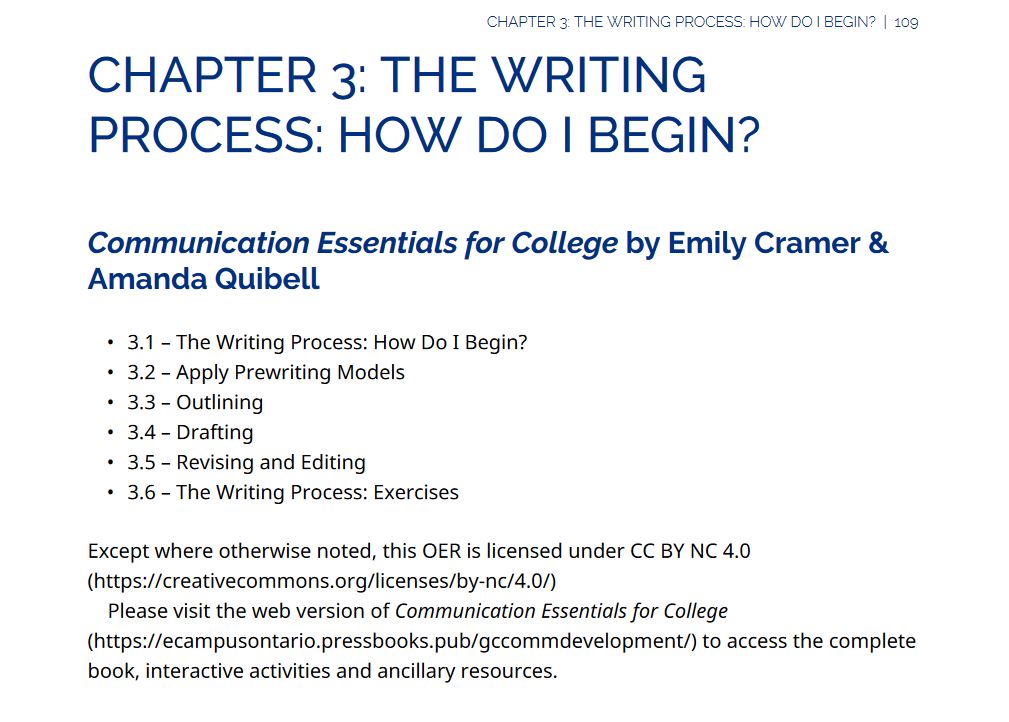
Each Pressbooks “part” needs to be marked with
- OER title
- authors
- CC license statement
- note to visit webbook for clickable links & ancillary resources
These items can be hidden in the webbook if desired (see CSS Modifications/Use), as they become a bit redundant when it’s clearly stated at top/bottom of webbook. However, if we are generating PDF by chapter, we need to ensure that all the metadata is displayed in each file, and this is the easiest way to ensure consistency.
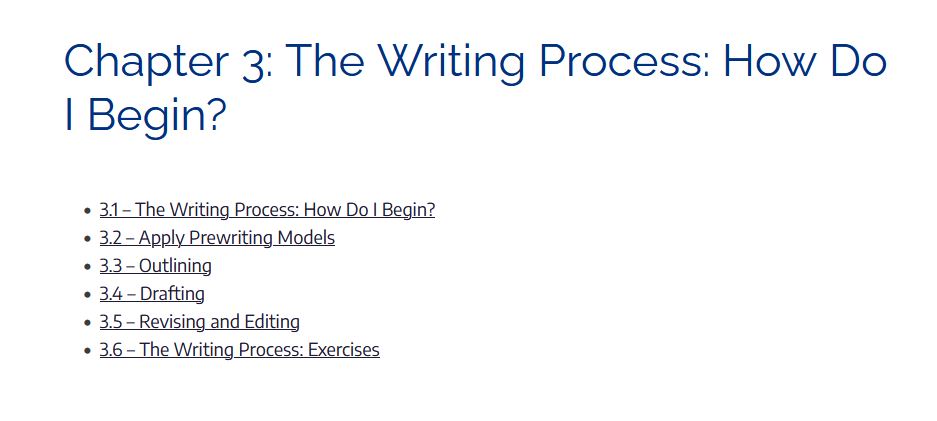
View web example of Pressbooks part – Chapter 3
View PDF example of Pressbooks part – Chapter 3
CSS Modifications / Use
On relevant parts
- Add the content needed to the part page in Pressbooks editor
- In the HTML/text editor, wrap the content to display only in the PDF with:
- <div class=”onlyprint”>Title, authors, license, view the web version notice</div>
- You can add the onlyprint tagging to multiple spots on the page
Note: while the content for the PDF part will display in the editor when you add it, it may disappear once the part is saved and you navigate away from it. It is still visible in the HTML/text view, but it doesn’t display in the editor later because Pressbooks is showing the web-view of the book. Do not add the onlyprint tagging until you’re ready to finalize the book, or you run the risk of breaking the tagging/mass confusion trying to figure out where everything goes.
In the CSS File
- Add the “onlyprint” CSS Customization to the *web* version of Custom styles, not the PDF custom style.
After Exporting – First optimize the file, save as whole book, and then generate by chapter or section
After exporting, generate the PDFs by chapter/section with the following process:
- Save a copy of the full PDF after exporting
- Use a Adobe Acrobat Professional to open the file
- Optimize the PDF of the whole book:
- File > Compress PDF – you will see a significant reduction in the file size as Acrobat cleans up layers.
- File > Properties – name of book should be filled out. Add in authors names, and click “Additional metadata”. Add in the copyright information. There’s no option for CC license, so apply “Copryight” and then add in the statement “Except where otherwise noted, this book is licensed under…”. Add the link to the CC license and save.
- Accessibility checker > Autotag document (run here, and then you shouldn’t have to for each individual chapter PDF)
- Complete for both PDF Print and PDF electronic. Uploaded to the add media area of the book, remove the “Share recent exports” option and link to these streamlined PDFs on Accessing this book page. Add to the main page via Book info.
- Ensure you see the pages of the PDF on left hand side of software
- Use CTRL+F (find) to locate Chapter 1 title page
- Select the page BEFORE Chapter 1, hold CTRL key, and scroll up to the first page of the document.
- Right click and select Extract pages, with delete after extracting*
- Save the new file as “OERName-FrontMatter”, and close the new PDF.
- Repeat steps a-e substituting the next chapter name (eg: search for Chapter 2 and work backwards to create the Chapter 1 PDF). At end of book, save the appendices and glossary (if applicable) as separate PDF files
*Using this process, you will work with an increasingly smaller original PDF file, the last file will be empty. If you don’t delete after extracting, the process is significantly more tedious.
Media Attributions
- Webbook Part Display © Emily Cramer & Amanda Quibell is licensed under a CC BY-NC (Attribution NonCommercial) license
- PDF Part format © Emily Cramer & Amanda Quibell is licensed under a CC BY-NC (Attribution NonCommercial) license
