Reviewing Proctored Sessions
A student’s exam session data is passed to the Proctortrack dashboard within 48 hours from when the student finishes their exam. As students take your exam and submit the data from their proctoring session, you will be able to use the Instructor Dashboard to track how many students have been proctored, how many sessions are processing, how many are available for preview, and how many require your attention.
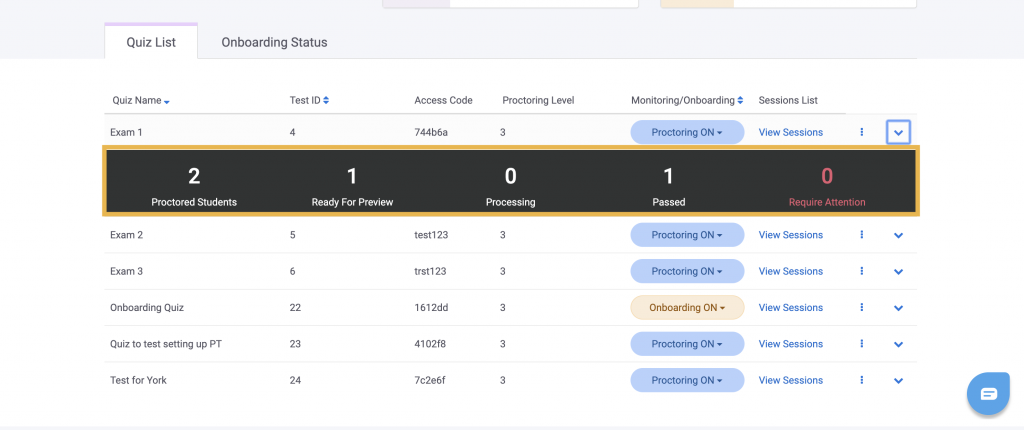
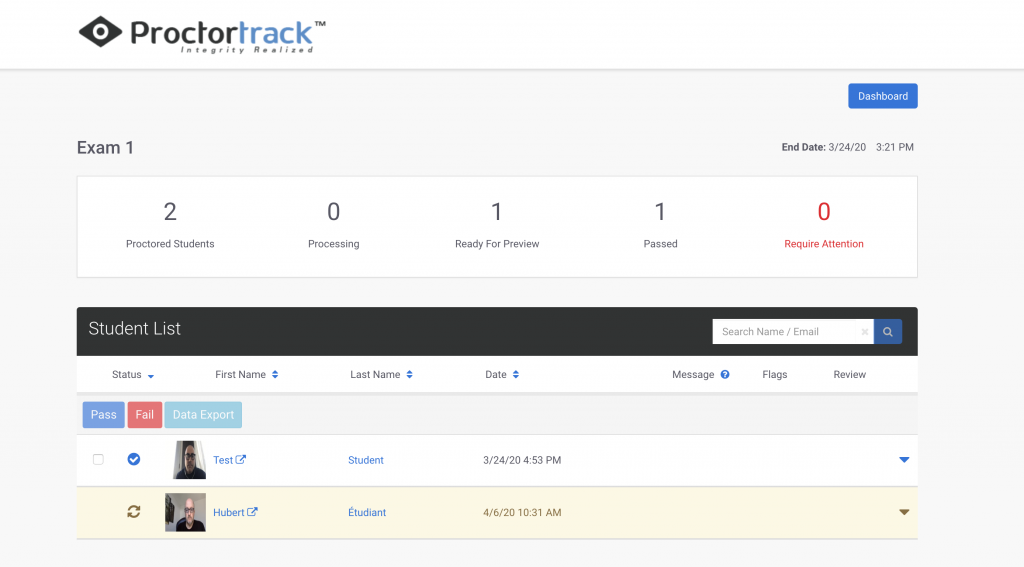
To access and review the data from a proctoring session, select the “View Sessions” tab for your exam. You will be presented with a list of the students who have uploaded their exam sessions.
Note the following in the above image:
- Proctored Students: Number of students who have been proctored for the exam so far.
- Processing: Number of proctoring session reports that are still processing (ie. not yet visible for the instructor).
- Ready for Preview: Number of proctoring session reports in preview mode. Reports may not yet be entirely accurate. They can be viewed by the instructor, but the instructor will not be able to take any action on the report.
- Passed: Number of students whose proctoring session reports has been reviewed by Proctortrack and deemed to be of no concern.
- Require Attention: Proctoring session reports that have been flagged by Proctortrack due to items in the report that misalign with the conditions and configurations set by an instructor for the exam. Students whose proctoring data is deemed to “require attention” will be highlighted with red text in the Student List.

You may prioritize time by first reviewing those proctoring session reports deemed to be requiring attention, but may also wish to review and comment on reports that the system has passed.
To review a student’s proctoring session report, click on the student’s first name. From there, you will be able to review and comment on video monitoring data, desktop screenshots, and student verification scans.
Video Monitoring
The video monitoring tab shows a video recording of the entire proctoring session, with time-stamped, coloured markings indicating points in the exam where the system has flagged activity that is contrary to the settings configured for the exam. For example, the image below shows several flags for background audio and multiple people in the frame.
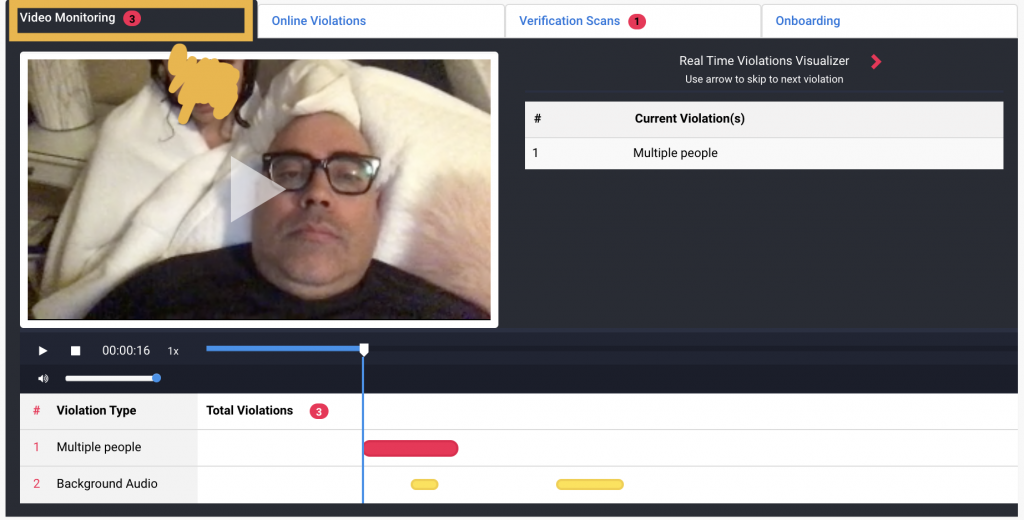
Clicking on the time-stamped, coloured markings (like the red and yellow ones in the image above) allows you to skip to the parts of the recording that have been flagged, and review those sections by playing the recording.
Desktop Screenshots
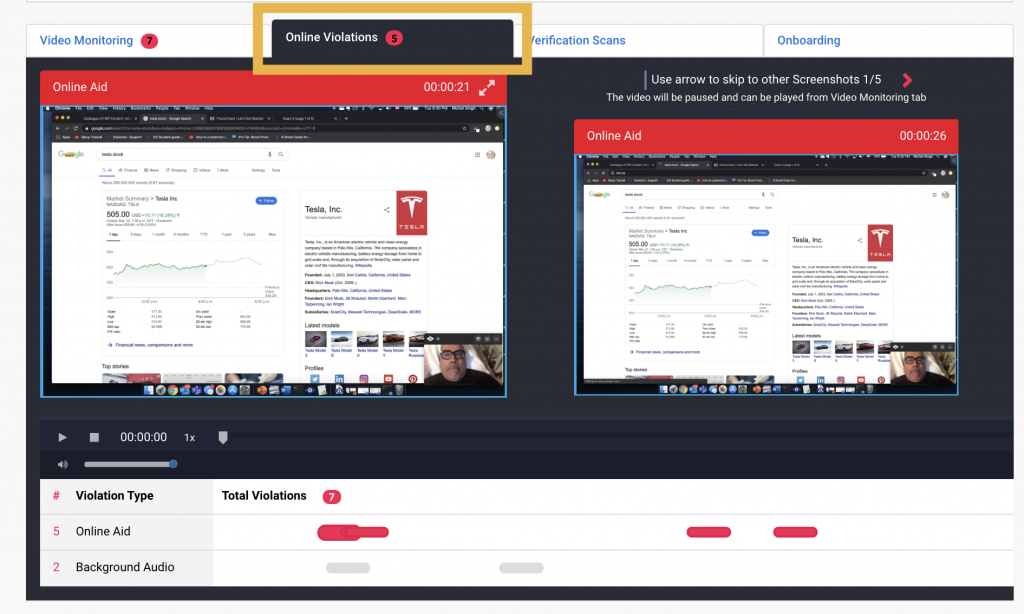
Desktop screenshots are found under the “Online Violations” tab. The page first presents screenshots of the desktop that have been flagged for showing potential access to websites or applications that were not deemed permissible in the exam configurations.
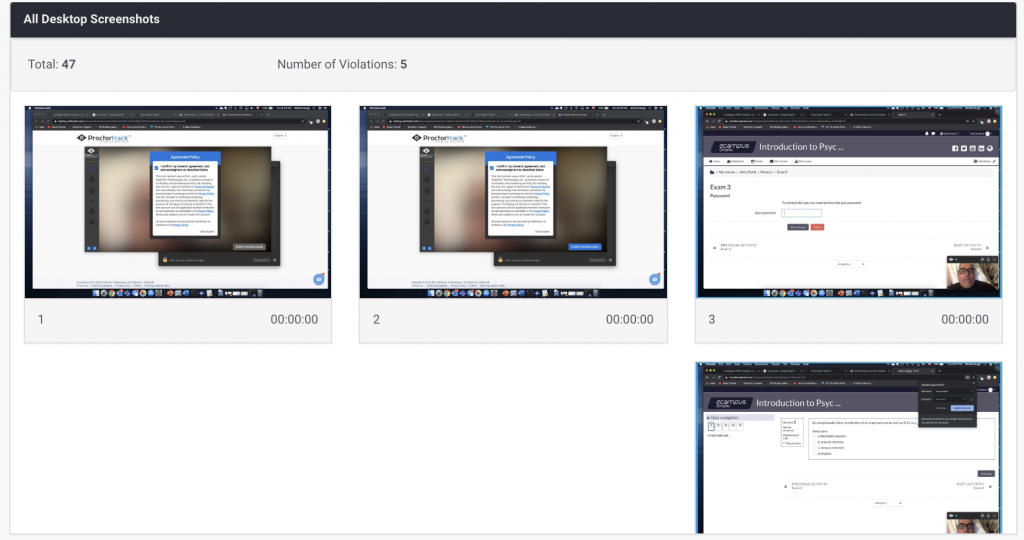
Scrolling further on the same page shows all of the screenshots taken of a student’s monitor throughout the proctoring session.
Verification Scans
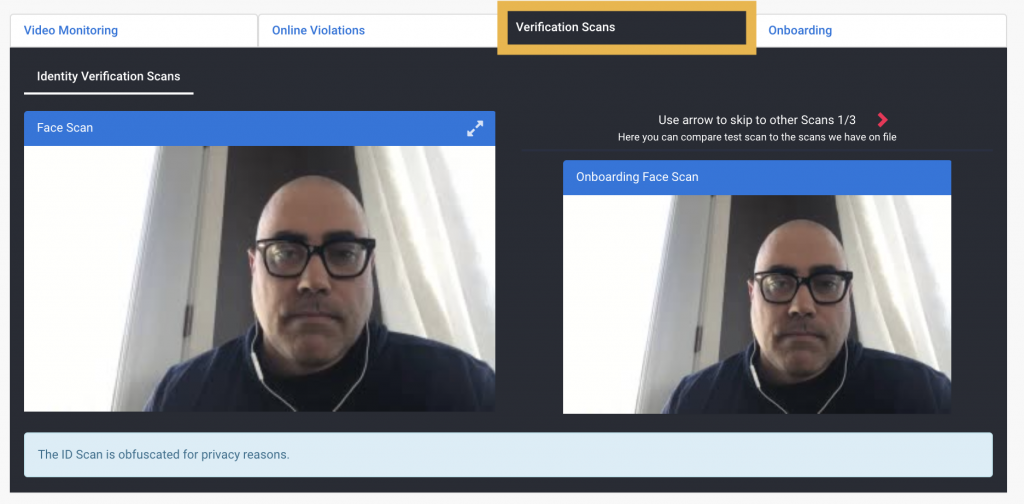
The Verification Scans tab allows you to view face scans, ID scans, and/or knuckle scans taken at the beginning of a student’s exam session.
By viewing the onboarding tab (shown in the top right corner of the above image), you can compare the verification scans from the exam setting to those that were taken during the onboarding test.
Instructor Notes
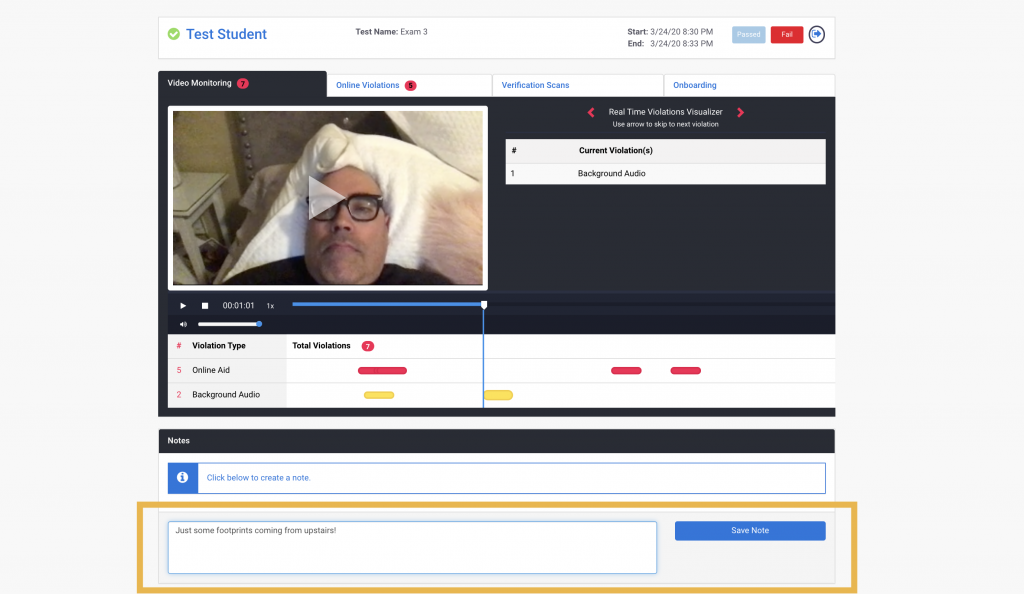
At any point while reviewing the video recordings, desktop screenshots, and identity verification scans, you can record notes in the “Notes” section at the bottom of the frame. For example, you may note that the audio flagged by the system was just loud footprints from a student’s upstairs neighbour, or that the extra person in the frame was just a student’s daughter asking about dinner.
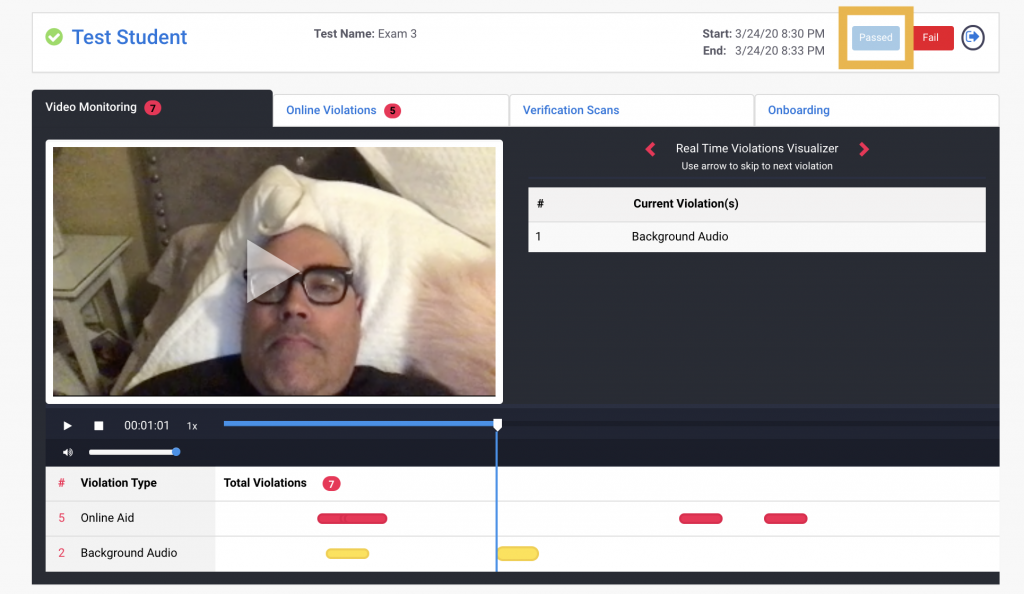
Should you deem that many of the alerts flagged by the system are of no concern to the exam’s integrity, you can override the systems decision to “Fail” a student’s proctoring session by selecting “Passed” at the top of the page.
After you have reviewed all proctoring data that you wish to view, you can comfortably release exam grades to students through your LMS.

