Experiment 2: Cycles of Copper
Table of Contents
Introduction
| Table of Contents | next section >> |
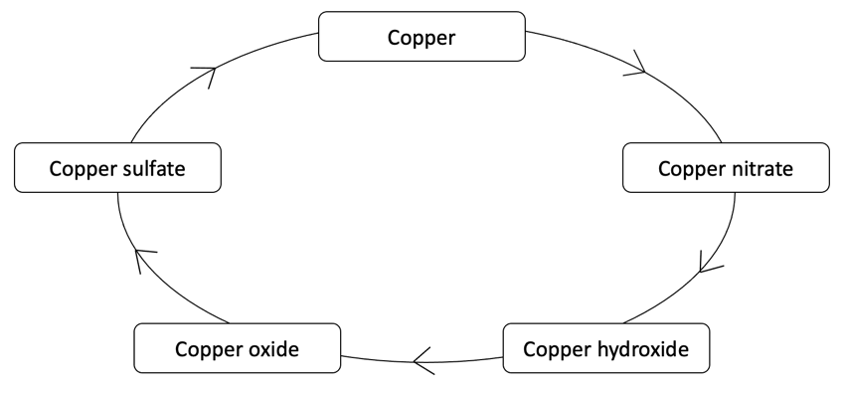
Very often, chemists produce new compounds, which later are used for many different purposes. In today’s experiment you will start with elemental copper, you will synthesize several copper compounds and finally re-cover the original copper. Comparison of the final weight of copper obtained with the starting weight of copper gives a percent recovery yield. This experiment will introduce you to performing some simple chemical reactions. You will also learn basic laboratory skills and how to write observations. The experiment is quite long, so please use your time wisely and plan things out in advance.
Figure 1 – Cycles of Copper
Materials
| Table of Contents | << previous section | next section >> |
| Reagent | Hazard Statements | |
| Hydrochloric Acid (conc) | 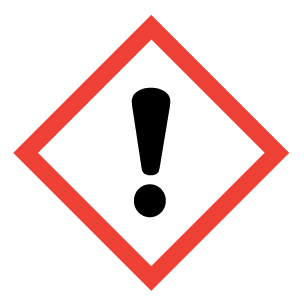 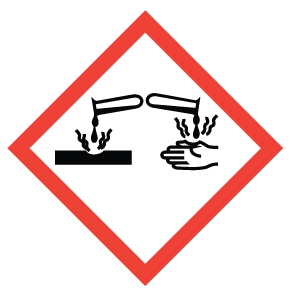 |
Corrosive, causes severe burns and eye damage, may cause respiratory irritation |
| Sodium Hydroxide (3.0 M) |  |
Corrosive to metals and skin, may cause serious eye damage |
| Sulfuric acid (6.0 M) |   |
Corrosive, causes severe burns and eye damage, may cause respiratory irritation |
| Nitric Acid | 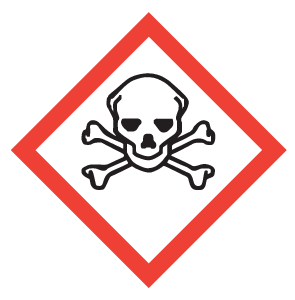 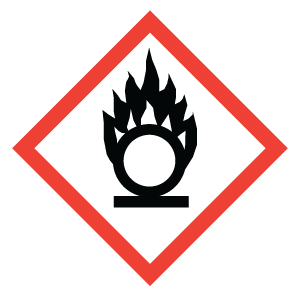  |
Corrosive, causes severe burns and eye damage, toxic if inhaled |
| Methanol |  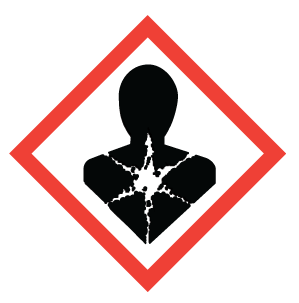 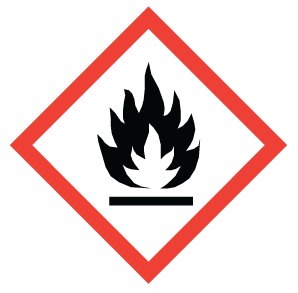 |
Highly flammable liquid and vapor Causes damage to organs
Causes damage to organs through prolonged or repeated exposure Toxic if swallowed, in contact with skin or if inhaled |
| Glassware | Quantity |
| Beaker, 250 mL | 2 |
| Beaker, 400 mL | 1 |
| Graduated cylinder, 10 mL | 1 |
| Graduated cylinder, 50 mL | 1 |
| Watch glass | 1 |
| Stir rod | 1 |
Pre-Lab Work
| Table of Contents | << previous section | next section >> |
A minimum of 24 hours before the start of your lab period:
- Watch the pre-lab video
- Complete and submit the pre-lab quiz for Experiment 2 on Avenue (under Assessments > Quizzes).
- Prepare a flowchart (see here) of the experimental steps in your laboratory notebook. Take photos of these pages and upload them to the Exp 2 Pre-Lab Assignment folder (Assessments > Assessments)
- Prepare any data tables that you think will help to keep your results organized. You do not need to submit these to Avenue as part of your re-lab assignment, but they do help you to get the lab completed on time and with higher marks overall.
Procedure
| Table of Contents | << previous section | next section >> |
- Half-fill a 250 mL beaker with distilled water and place it on a hot plate. Use a watch glass as a lid for the beaker and bring the water to a boil.
- Using the analytical balance, mass the supplied copper (approximately 0.25 g) on the weighing dish. To know the exact weight mass of the wire copper, first put the empty weighing dish on the pan, push T (tare), and when you see “0” on display, place the copper on the dish. and reweigh. Write the mass in your notebook. Include all the decimal places shown on the balance.
- Transfer the copper to a clean and dry 250 mL beaker. Wear gloves.
- Working in a fume hood, add 3 mL concentrated nitric acid with the plastic pipette attached to the bottle. Do not remove the beaker from the fume hood. Observe the reaction that takes place. All the copper should dissolve in 8–10 minutes. It is very important to wait until all the copper has reacted.
- After the reaction is complete, add 100–150 mL of the hot, distilled water that was boiled previously. Use the beaker tongs or a j-cloth to manipulate the beaker. Do not attempt to use a graduated cylinder; use the approximate volume markers on the beaker.
- Using a graduated cylinder, measure 20 mL of 3.0 M NaOH and add it to the beaker containing the copper solution. You should see the two reactions occurring in sequence. First copper hydroxide is formed (a blue precipitate), then, when the solution is hot enough, copper hydroxide decomposes into copper oxide (black precipitate).
- If your solution has not turned black, heat the beaker on the hot plate for 3–5 minutes while continuously stirring. You must stir to ensure the reaction does not bump and splash all over the fume hood.
- Remove the beaker from the hot plate and allow the CuO to settle. It usually takes ~5 minutes. While waiting, heat ~ 200 mL distilled water in a 400 mL beaker to almost-boiling (use your watch glass as a lid for the beaker to speed up this step).
- Decant the supernatant liquid (technique on page ix). Remember to decant to a clean 250 mL beaker (why?). Add about 100 mL hot water and let the precipitate settle before decanting once more. If you lose a small amount of CuO during decanting then be sure to record it in your observations.
- Add 10 mL of 6.0 M H2SO4 to the beaker containing your solid (the dispenser is calibrated to release 10.0 mL).
- Using a top-loading technical balance (not an analytical balance) measure out 2 g of Zn metal
- Working in the fume hood, add the Zn to your reaction beaker. Stir until the supernatant liquid is colourless. If the solution is still blue after 5 minutes, add more Zn (but not more than 0.2 gram).
- Decant the liquid.
- To remove excess Zn, add 5 mL of distilled water and then 10 mL of concentrated hydrochloric acid to the reaction beaker.
- When the evolution of gas becomes slow, warm up the solution without boiling.
- After copper settles to the bottom of the beaker, decant the solution away from the metal. Remember to decant into a clean beaker.
- Rinse the copper twice with a small amount (about 10 mL) of distilled water.
- To get rid of any remaining water, add about 10 mL of methanol (the dispenser is calibrated to release 10 mL), allow it to stand for a few minutes, and then decant the liquid. Waste methanol goes into the organic waste.
- Finally, wash with about 5 mL of acetone, allow the copper to settle, and decant the liquid. Waste acetone goes into the organic waste.
- Dry the product by placing the beaker containing the copper in a larger beaker containing hot water and let the beakers stand on a hot plate for about 3–5 minutes.
- Remove the beaker from the water bath, dry the outside, wait a few minutes for it to cool, and then transfer the copper to a previously weighed weighing boat. Use a spatula.
- Weigh the recovered copper. In this experiment you will be using the analytical balance twice for massing the copper at the beginning and at the end of the reaction cycle. Remember to use the same balance.
- Show your recovered copper to your TA.
- Dispose of the copper in the Solid Waste container; do not throw the copper into the sink.
- Dispose of all other chemical waste into the appropriate waste container (see here). Rinse glassware with distilled water and return it to your drawer.
- Wipe down your lab bench with paper towels or a j-cloth.
- Have your TA sign and date every page of your data for this experiment.
Report
| Table of Contents | << previous section |
- Show detailed chemical reactions for each step of the reaction.
- Summarize your detailed observations of each step in the procedure
- Calculate the % recovery of copper (% yield).
- Summarize the key findings and discuss possible sources of error
- See here for more information on how to prepare your report.
Have your TA sign and date every page of your data for this experiment. Within 1 hour of the end of your lab period, upload a single pdf of the images of your data pages and report to the appropriate Avenue Assignment folder (Assessments > Assignments > Experiment 2 Report). We recommend using the Microsoft Lens app for quick preparation of the final pdf

