Experiment 10: Organic Chemistry Part II
Table of Contents
Introduction
| Table of Contents | next section >> |
| For students who did not attend Experiment 9: Organic Chemistry I, please speak to your TA at the start of the lab. They will provide you with a sample for Organic Part II. |
In this experiment, tests will be done to explore the chemistry of your recrystallized product from Organic Chemistry Part I and to identify various other functional groups. Functional groups are the parts of molecules that give organic compounds their characteristic chemical properties. Species with the same functional groups usually undergo similar reactions, and therefore substances are usually categorized according to their functional group. Chapter 26 of the Petrucci textbook details some of the common classes of organic compounds that you will investigate.
Materials
| Table of Contents | << previous section | next section >> |
| Reagent | Hazard Statements | |
| Acetylsalicylic Acid | 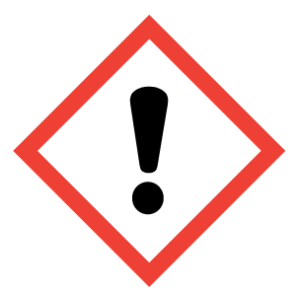 |
Irritant |
| Salicylic Acid | 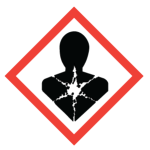 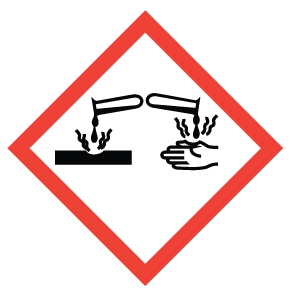  |
Harmful if swallowed.
Causes serious eye damage. Suspected of damaging fertility or the unborn child. |
| Ethanol | 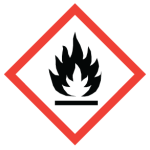  |
Highly flammable liquid and vapour.
Causes serious eye irritation. |
| Acetone |   |
Highly flammable liquid and vapour.
Causes serious eye irritation. |
| Sulfuric Acid |   |
Corrosive
Causes severe burns and eye damage May cause respiratory irritation |
| Hexane | 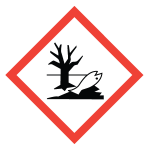    |
Environmentally damaging
Flammable Health hazard Irritant |
| Methanol |  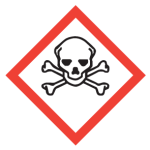  |
Flammable
Toxic Health hazard |
| Ethyl Acetate |   |
Highly flammable liquid and vapour
Causes serious eye irritation May cause drowsiness or dizziness |
| Glassware | Quantity |
| Beaker, 50 mL | 1 |
| Tube, culture 16 x 150 | 6 |
| Watch glass, 5 cm | 1 |
Pre-Lab Work
| Table of Contents | << previous section | next section >> |
A minimum of 24 hours before the start of your lab period:
- Watch the pre-lab video
- Complete and submit the pre-lab quiz for Experiment 1 on Avenue (under Assessments > Quizzes)
- Prepare a flowchart (see here) of the experimental steps in your laboratory notebook. Take photos of these pages and upload them to the Exp 1 Pre-Lab Assignment folder (Assessments > Assignments)
Procedure
| Table of Contents | << previous section | next section >> |
| General comment on cleaning organic chemicals. No waste is to be put down the drain. All glassware must be rinsed with a small amount of acetone into the organic waste before washing in the sink. (Water will not remove any residual organic compounds from dirty glassware, in most cases, once rinsed with acetone, glassware is considered clean and does not need further washing in the sink). |
- Record the mass of your product from Organic Chemistry I and calculate the percentage yield. If you did not obtain any product from part 1, your teaching assistant will provide you with a sample and information about mass of starting material and product so that you may calculate your yield. If your yield was not 100%, provide an explanation.
- Using the melting point apparatus, obtain a melting point of your product (see here for further discussion on melting points). Compare it to the actual melting point of Aspirin and salicylic acid. Discuss any discrepancies.
- Thin layer chromatography (TLC) – TA demonstration
- Procedure: On three separate watch glasses, using methanol, dissolve a small amount of your product, salicylic acid, and Aspirin. Using a separate capillary for each, spot each sample on the TLC plate ~ 1 cm from the bottom of the plate (drawing a line across the plate in pencil is a good method to line up samples) (see page xxviii for an example). Place the TLC plate in a jar (secure the cap) containing the solvent mixture (8:1:1; hexane, methanol, ethyl acetate). Make sure the solvent level is below the samples on the TLC plate before beginning. Once the solvent has risen to within a few cm’s of the top of the plate, the TLC plate can be removed. Mark the solvent front with a pencil. Allow the plate to dry for 2-3 minutes. Once the plate is dry, observe the contents of the plate under a UV light. With a pencil, mark the top edge of any TLC spots you observe.
- Record observations from the TLC plate and explain what information is provided about your product from this procedure.
- Reactions of Aspirin
- Place two small portions (pea sized) of your product into a 100 mL beaker and add 10 mL of DI water followed by 10 drops of concentrated H2SO4. Heat the sample on a hot plate. When the sample is almost ready to boil, remove the beaker and allow the reaction to settle for a moment. Gently waft (example on page xxiv) the air being expelled from the beaker. What do you smell? What reaction has taken place?
- Into 3 test tubes, add a small amount of your product, salicylic acid and aspirin. Dissolve each in water or the solvent provided. Add a small amount of ferric chloride. What does this conclude?
- Dispose of chemical waste in the appropriate waste containers (see here).
- Rinse glassware with acetone (into a waste container) and/or distilled water and return it to your drawer.
- Wipe down your lab bench with paper towels or a j-cloth.
Report
| Table of Contents | << previous section |
The report is done individually and prepared directly in your laboratory notebook. Be sure to include all results and observations including balanced chemical equations from both Organic Chemistry Part I and part II, where appropriate. If your yield is not 100%, explain why. Using the reactions, melting point and TLC results (if applicable), do you suspect you have aspirin and is it 100% pure? Explain.
Consult the report-writing guidelines for additional details and requirements.
Have your TA sign and date every page of your data for this experiment. Within 1 hour of the end of your lab period, upload a single pdf of the images of your data pages and report from both Exp 9 and 10 to the appropriate Avenue Assignment folder (Assessments > Assignments > Experiment 10 Report). We recommend using the Microsoft Lens app for quick preparation of the final pdf.
