19 How to Import Content from Microsoft Word
Pressbooks includes a feature that allows authors to import content from MS Word into Pressbooks, however it is not a precise import and chances are there will have to be work done in Pressbooks to fix formatting issues, especially if the Word document was heavily formatted.
If an author edits a book in MS Word, she or he may want to copy and paste the final text into Pressbooks but doing so won’t bring in images. Plus, each chapter/part must be created before it is copied/pasted which is time consuming. Therefore, we recommend using the import feature ahead of the cut and paste method.
The author can import the whole book or a ‘chapter’ (content between h1 headings). This is ideal when only certain portions of a book are revised/adapted.
To use the MS Word importer
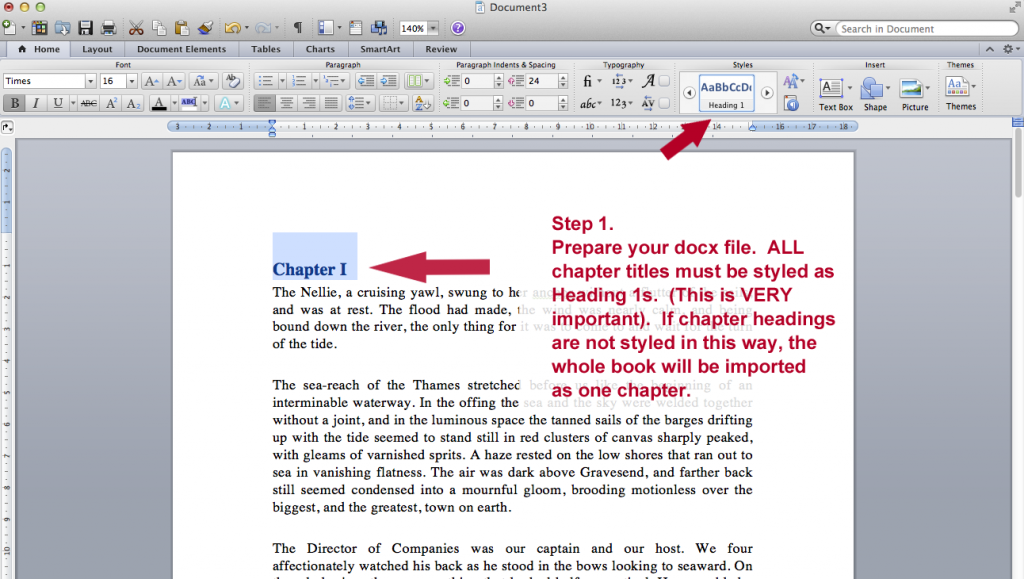
- Prepare your .docx file: Chapter headings in your docx **MUST** be tagged as **Heading1** (otherwise chapters won’t get recognized)
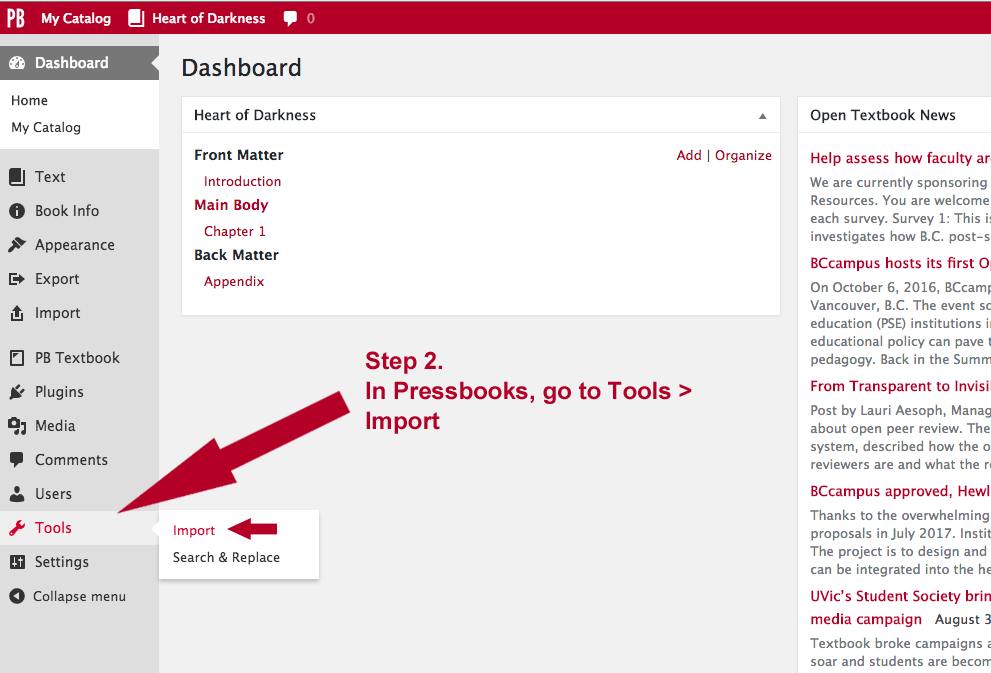
- In Pressbooks, go to: Left Menu/Utilities —> Import.
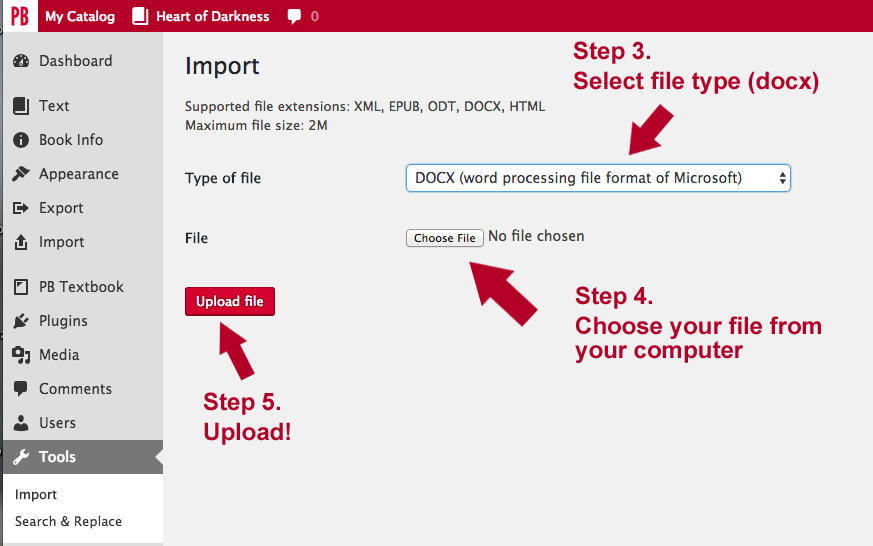
- Select: File Type: .docx
- Choose your file from your computer
- Upload
- Select which content/sections you want to import
- Decide whether the content/sections are: front-matter, chapters, or back-matter
- Import
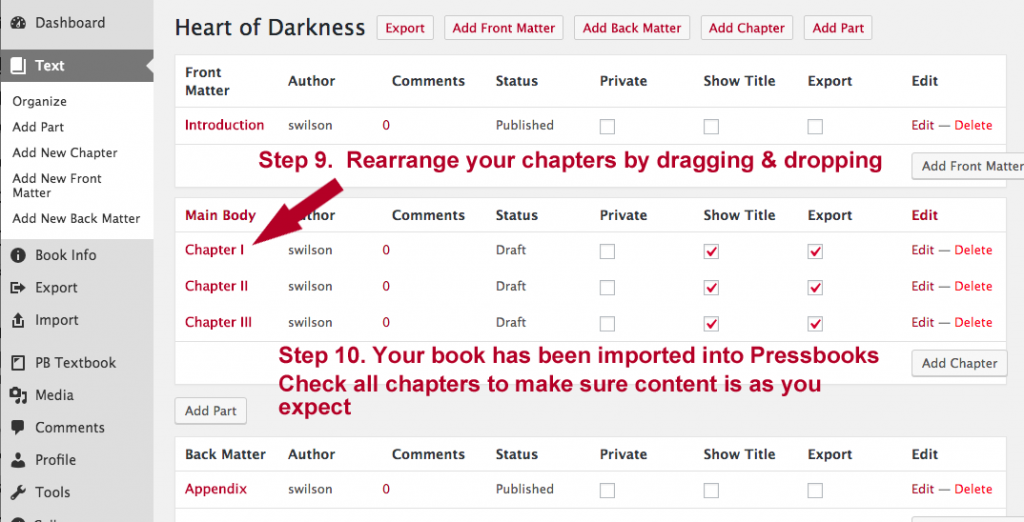
- Arrange your chapters in the right order
- Test some exports, clean up markup, and off you go!
Notes:
- Everything other than basic styling is stripped out by design… so fancy fonts and such won’t get imported. Italics, bold, etc should.
- All chapters are imported as DRAFTs. A quick way to get this listed as published is: mark all the chapters Private, then revert to Public. This will make them “published”.
- All chapters assign a Chapter Author by default (usually, your username). You’ll have to edit each chapter and delete the Chapter Author in the Chapter Metadata section.
Step 1. Prepare your .docx file
Note: Chapter headings in your docx **MUST** be tagged as **Heading1** (otherwise chapters won’t get recognized)
Step 2. In Pressbooks, go to: Left Menu/Utilities —> Import
Steps 3, 4 & 5: Select your file type, choose file and upload
Steps 6, 7, 8: Select your content, decide what it is, and import
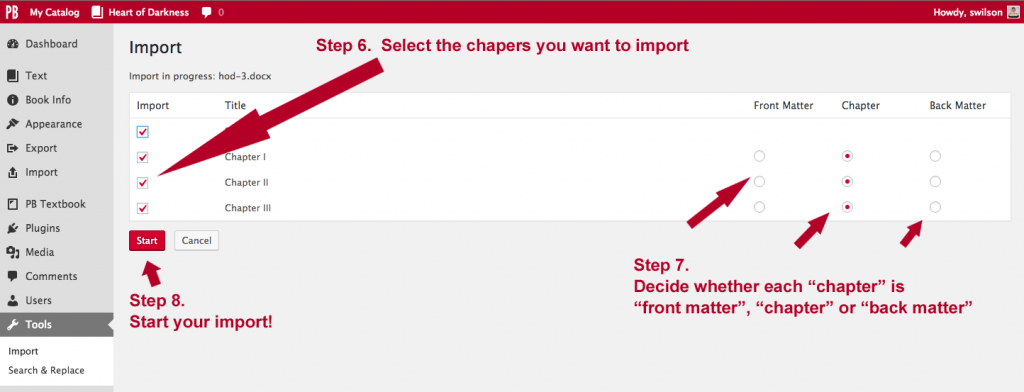 Steps 6, 7, 8: Select which chapters to import, what kind of content they are, and then click the Start button!
Steps 9 & 10: Rearrange your chapters (if necessary) and check them
