17 Adding and Editing Images
How to Add an Image
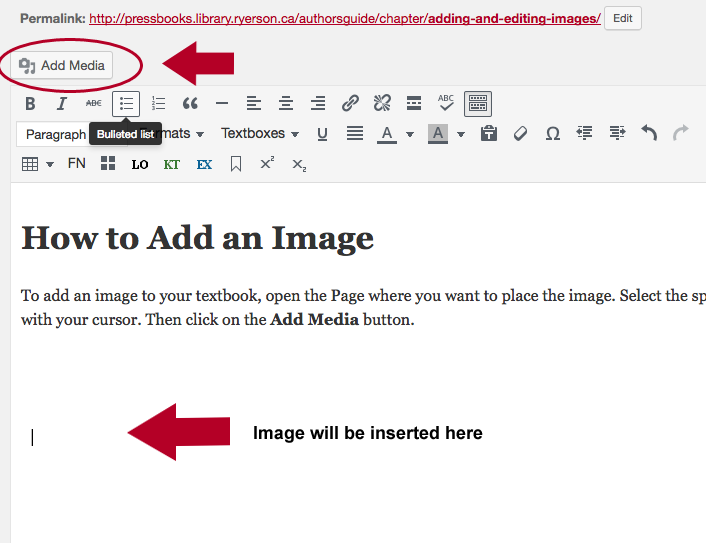
To add an image to your textbook, open the Page where you want to place the image. Select the spot where the image will go with your cursor. Then click the Add Media button.
You will be taken to an Insert Media screen where you can choose a previously uploaded image or you can upload a new image. To upload a new image, click on the Upload Files tab in the upper left corner and then on Select Files in the middle of that page. This will allow you to search for image files to add from your computer (Figure 2).
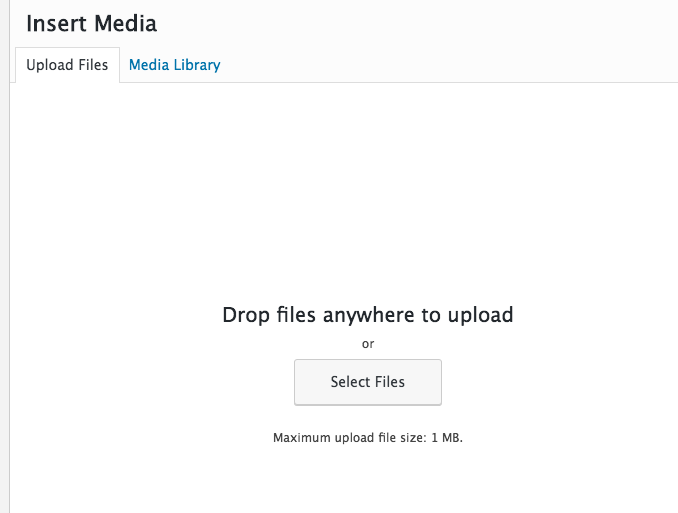
If you already have image files in your Media Library, simply select that tab and the image you want to add or insert. The selected item will be encircled by a blue border and have a blue/white check mark in the top right corner.

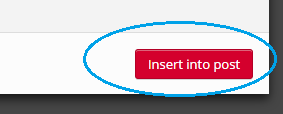
Complete this task by clicking on the Insert into post button in the bottom right corner.
Finally, make sure that your image is centred correctly and the right size. For the Queen’s University Library Open Textbooks, we strongly recommend that:
- All images are centred
- The width does not exceed 500 pixels
- The length does not exceed 500 pixels
See “Editing an Image” below for details on how to adjust an image.
Images that do not follow the above guidelines often produce PDFs that are less readable. A PDF file is one of the many formats offered for most textbooks in our collection. It is also used to create print-on-demand copies.
How to Edit an Image
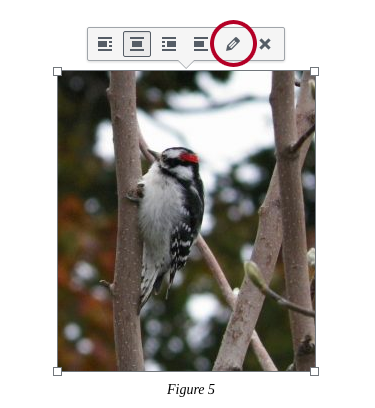
To change the placement or size of an image that has already been added to a page, simply click anywhere on the image. You will see a menu of options appear above the image. Use the pencil to edit the image and the X to delete the image.
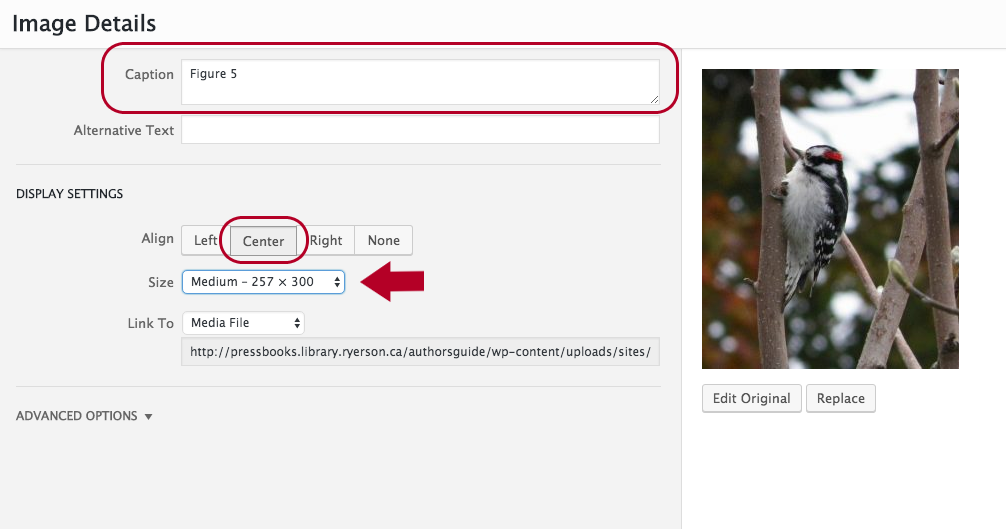
After you click on the pencil icon, the Image Details box will appear. Here you can:
- Add text for the image’s caption. (See Captions and Image Attributions for details.)
- Under DISPLAY SETTINGS, select “Center”. We recommend that you centre images.
- Using the “Size” dropdown list, determine if any of the sizes are the correct size for your image. If not, then select “Custom Size”…

3. Using the Width OR Height boxes, enter the correct number of pixels. Note that changing one of these parameters, e.g. Width, will automatically adjust the other, e.g. Height.
4. Ensure that “Media File” is selected by the “Link To” dropdown list.
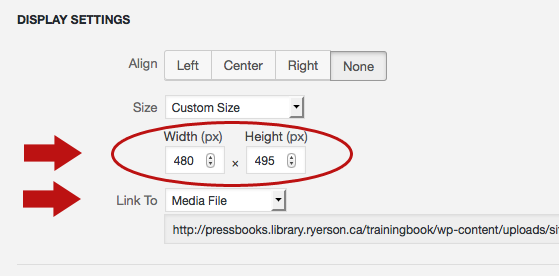
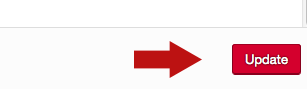
5. Save changes by clicking the “Update” button in the lower right corner of the page.
