Programming on the Client Side
23 The Canvas Element
 Learning Outcomes
When you have completed this chapter, you will be able to:
- Use JavaScript code to draw shapes, text, and images on an HTML canvas element.
- Write JavaScript programs that respond to keyboard and mouse events to control and configure canvas graphics (e.g., a simple drawing app).
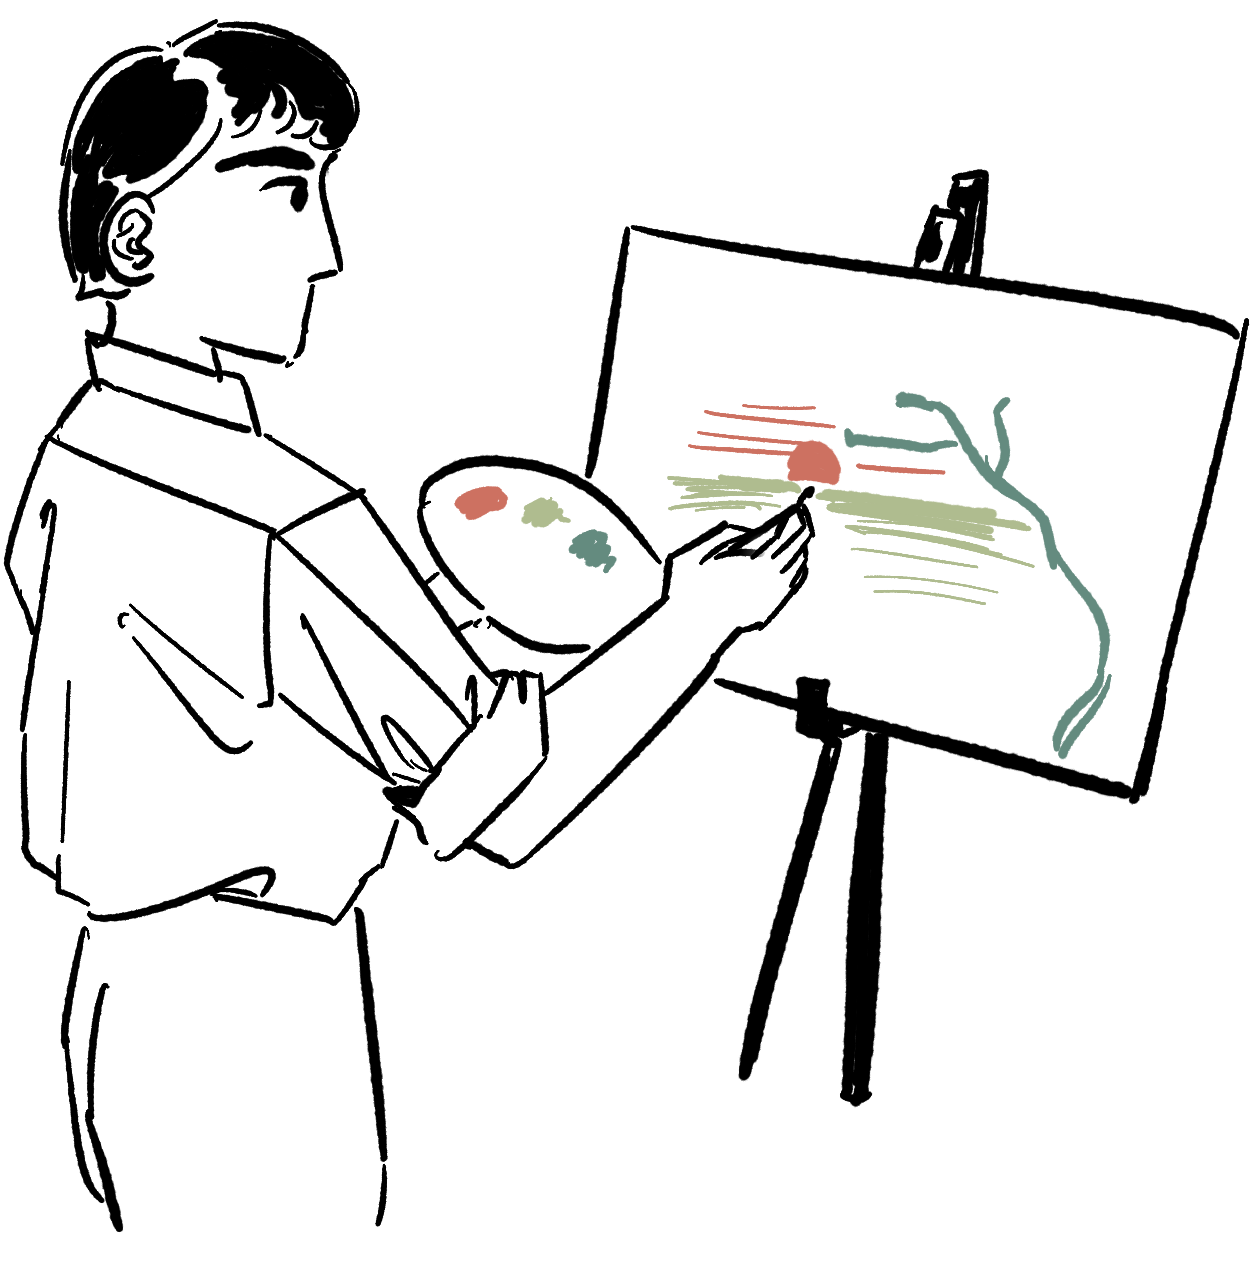 Until the advent of HTML5, developers who wanted to create interactive graphics and games directly on a web page had to use a plugin like Flash. But HTML5 introduced the canvas element for graphics. The goal of this chapter and the next is to give you all the raw materials you would need to implement simple interactive animations and 2D games on the canvas.
Canvas Basics
To access the 2D drawing API, you need a canvas element somewhere on your HTML page. This element should have an id attribute as well as height and width attributes to specify its size in pixels, like this:
<canvas id='testCanvas' height='500' width='250'></canvas>
The canvas is not an empty element. You do need a closing tag, though there is no need to include any content between the tags. By default a canvas just appears as a blank space on your page. But if you style it with CSS to give it a border and background color, you will be able to see it.
There are two steps to drawing on a canvas element. First you have to retrieve the element from the DOM:
const c = document.getElementById("testCanvas");
Once you have the canvas object, you can change its style and attributes like any other element. But if you want to draw on it, you need to retrieve a drawing context object that contains a drawing API. The simplest context available is the “2d” context:
const ctx = c.getContext("2d");
The ctx object represents a two dimensional space in which the top left corner has an (x, y) value of (0, 0). It’s a bit like a Cartesian plane, but with one important difference – the y values increase from top to bottom rather than decreasing. This is typical with drawing systems in many programming languages. It comes from thinking of pixel locations as rows and columns rather than like a mathematical coordinate system.
 Do It Yourself
Get the canvasTestBed.html file from the Full Stack Example Pack and open it in a browser. This page contains a canvas, with a height and width of 400 pixels. It also has a background color specified in CSS so that you can see it, and it has an id of “testCanvas” so you can easily retrieve it from a JavaScript program.
<canvas width="400" height="400" id="testCanvas"></canvas>
In the JavaScript console of your browser, try the following commands:
const c = document.getElementById("testCanvas");
const ctx = c.getContext("2d");
ctx.fillStyle = "red";
ctx.fillRect(125,25,150,50);
The third line in the code above sets a drawing color. Colors can be specified using any CSS color value. The fourth line places a red rectangle in the middle of the canvas. The top left corner is at an (x, y) position of (125, 25), the width is 150 pixels and the height is 50 pixels.
Here are some things to try, following the example of the lines above:
- Draw a black rectangle that fills the entire canvas.
- Draw the red rectangle again, but use (-40, -40) as its location. Can you explain the result?
- Draw two overlapping rectangles in different colors.
Tip: If you use the CSS rgba syntax for your colors, you can set an alpha (transparency) value (range 0.0 to 1.0) so that you can see the first rectangle through the second. Try rgba(255, 0, 0, 0.5) and rgba(0, 255, 0, 0.5) as the colors. (See W3Schools’ RGB Colors for more information.)
Rectangles and Text
There are two basic kinds of drawing supported on the 2D drawing context: stroke draws outlines and fill fills them in.
You saw the fillRect method already, but there is also a strokeRect method that uses the same parameters to draw the outline of a rectangle instead of filling it in. And there is a clearRect method that clears a rectangle to the current background color.
When you do fill drawing, the canvas uses the current contents of the context’s fillStyle field to decide how to fill in the shape. The fillStyle field can hold a CSS color string or a special object representing a gradient or a pattern (for more information on gradients and patterns see the w3Schools Canvas Reference).
When you do stroke drawing, the canvas uses the current contents of the context’s strokeStyle field, which can take the same values as fillStyle. Another relevant field for stroke drawing is lineWidth, which holds a number representing the pixel width of the line.
To draw text, there are fillText and strokeText methods. You can set the font by assigning a string representing the desired CSS font style, size, weight, variant and/or family to the context’s font field (you’re essentially setting the CSS font property).
 Do It Yourself
Get the canvasTestBed.html file from the Full Stack Example Pack and open it in a browser. In the JavaScript console, try the following:
const c = document.getElementById("testCanvas");
const ctx = c.getContext("2d");

ctx.strokeStyle = "#000066";
ctx.lineWidth = 10;
ctx.strokeRect(125,25,150,50);
Now add some text to the canvas:
ctx.fillStyle = "#006600";
ctx.font = "22px Arial";
ctx.fillText("Hello, world!",135,55);
Now try the following to clear part of the drawing:
ctx.clearRect(0,0,200,50);
Polygons
To draw a polygon other than a rectangle, first trace a path on the canvas and then use either the fill or stroke method to draw it.
Drawing a polygon has five steps:
- Begin the path with the beginPath method
- Move to the starting position with the moveTo method
- Trace out the path with the lineTo method
- (Optionally) close the path with the closePath method (this adds a line that goes back to your starting position)
- Set the drawing style with fillStyle or strokeStyle
- Draw the shape with either the fill or stroke method
 Do It Yourself
Get the canvasTestBed.html file from the Full Stack Example Pack and open it in a browser. In the JavaScript console, try the following commands to draw an orange triangle:
const c = document.getElementById("testCanvas");
const ctx = c.getContext("2d");

ctx.fillStyle = "rgb(255,128,0)";
ctx.beginPath();
ctx.moveTo(200,20);
ctx.lineTo(260,80);
ctx.lineTo(140,80);
ctx.closePath();
ctx.fill();
The ctx object remembers the path even after you have used it. So if you want to put an outline around your triangle you can do so without retracing the path:
ctx.strokeStyle = "rgba(0,128,255,0.5)";
ctx.lineWidth = 10;
ctx.stroke();
To draw a new shape, just begin a new path:
ctx.beginPath();
ctx.moveTo(140,20);
ctx.lineTo(260,20);
ctx.lineTo(200,80);
ctx.closePath();
ctx.fillStyle="rgba(0,0,0,0.5)";
ctx.fill();
Then add the outline again:
ctx.strokeStyle = "rgba(0,128,255,0.5)";
ctx.lineWidth = 10;
ctx.stroke();
Arcs and Circles
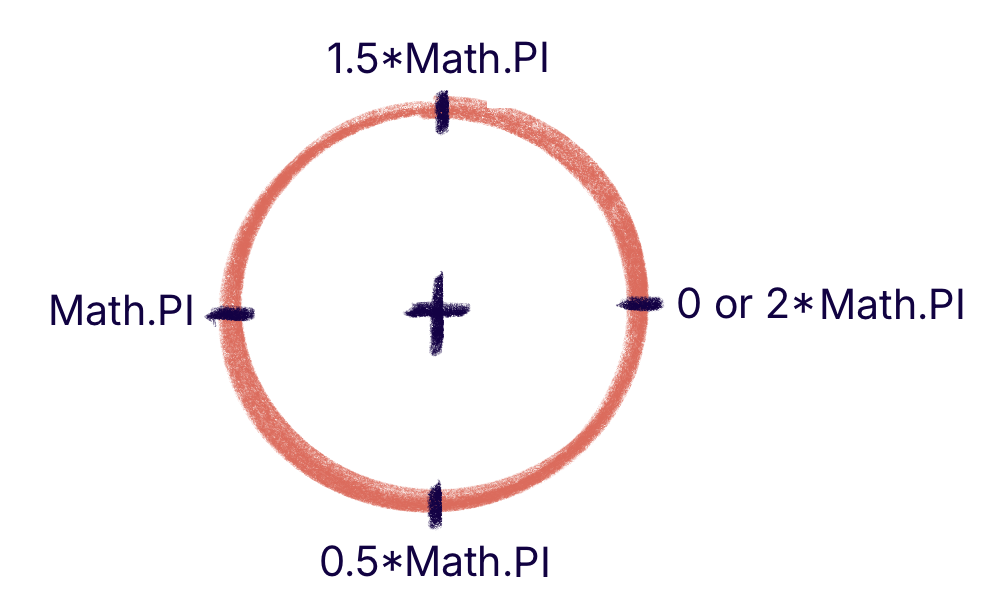
You can use the arc method to trace a path for a circle or part of a circle. You specify the center of the circle, its radius and then the starting and ending angle for your curve. These angles are specified in radians (Where π = 180 degrees). At right is a quick reference for common radian values to use in arc drawing, using JavaScript’s Math.PI constant.
 Do It Yourself
Get the canvasTestBed.html file from the Full Stack Example Pack and open it in a browser. In the JavaScript console of your browser, try the following to draw a circle:
const c = document.getElementById("testCanvas");
const ctx = c.getContext("2d");

ctx.fillStyle = "pink";
ctx.beginPath();
ctx.arc(200,50,45,0,Math.PI*2);
ctx.closePath();
ctx.fill();
If you want half a circle, you could draw from π/2 to 3π/2.
ctx.strokeStyle = "black";
ctx.beginPath();
ctx.arc(200,50,45,Math.PI/2,3*Math.PI/2);
ctx.closePath();
ctx.stroke();
Arcs are always drawn clockwise by default. What would you need to change in the above commands to draw the other half of the circle?
Can you clear the canvas and use the arc method to draw Pac-Man? (Hint: You may have to draw more than one arc.)
There are also methods available to integrate curves as part of a path, continuing from wherever your path left off. They are arcTo, quadraticCurveTo, and bezierCurveTo. There are also other advanced drawing commands which are all discussed in full in the w3schools Canvas Reference.
Canvas Mouse Input
If your goal is to create a game or some kind of interactive display, you need to be able to react to user input on the canvas from a keyboard or a mouse.
You were introduced to all the relevant mouse events in the Events chapter. As a reminder, they are click, dblclick, mousedown, mouseup, mouseover, mouseout, and mousemove. To take full advantage of these events for a canvas, you will often need to know where the mouse was when the event happened. This information is contained in the event object that is passed to the event listener.
Finding out where on the canvas the mouse event happened takes a little bit of math.:
c.addEventListener("click", function(event) {
    let x = event.pageX - this.offsetLeft;
    let y = event.pageY - this.offsetTop;
    console.log(x+","+y);
}
The pageX and pageY properties get you the x and y location of the exact pixel on the web page where the click happened, with (0, 0) being the top left corner of the page. But you want to know where on the canvas the click happened, you have to subtract the offsetLeft and offsetTop properties of the canvas, which tell you the location on the page of the top left corner of the canvas.
 Do It Yourself
Open canvasTestBed2.html from the Full Stack Example Pack in a browser and click on each canvas. Each canvas calls a function when clicked that reports the location of the click using the equation above. The location is reported to the canvas and also in the console.
But the second canvas locations are all off by 30 pixels. This is because this canvas has a 30 pixel border that counts as part of the clickable area of the element. So to get the x and y calculation right for this canvas, the size of the border has to be subtracted.
Fix the code so that it uses this calculation for the second canvas (but not the first):
let x = event.pageX - c.offsetLeft - 30;
let y = event.pageX - c.offsetLeft - 30;
Now change click to mousemove for one of the canvases. This could be the beginning of a painting app…
There are a few other event fields that might also be useful for mouse input: event.ctrlKey, event.altKey, and event.shiftKey will be true if the ctrl, alt, or shift keys (respectively) were held down when the mouse event happened. Otherwise they will be false.
Canvas Keyboard Input
If you’re making a game, you might want the user to be able to control it with the keyboard. The keydown event will fire when a key is pressed down, and the keyup event will fire when a key is lifted. In theory these event attributes can be placed on most HTML elements, but keyboard events will only ever be triggered on elements that have focus.
To give the canvas element focus, you can give it a tabindex=1 attribute in HTML, and then call the canvas object’s focus method. But if there are other focusable elements on the page, they could steal focus away later. So you will have to make sure you keep calling the focus method whenever you need to get it back.
Another solution that might work for many apps is to put the keydown and keyup events on the window object. The window always has focus.
When a keyup or keydown event happens, you can get the numeric ASCII or Unicode value of the key using event.keyCode. You can also get a string representation of the key using event.key. Just like with mouse events you can also use event.ctrlKey, event.altKey, and event.shiftKey to find out if any of those keys were held down when the event happened.
 Do It Yourself
Open canvasTestBed3.html from the Full Stack Example Pack in a browser and slowly press and release a key to see the keyboard events in action. These events are added to the window object. You can use this little test app to figure out key codes to respond to.
Can you use the instructions above to give the canvas element focus and then put the key listeners on the canvas instead of the window? Once you’ve got this working, click one of the buttons on the page. What happens? When would it be a good idea to add the key listeners to the window? When would it be better to add them to the canvas?
 Check Your Understanding
 Coding Practice
- Set up an HTML page for a pong game. Include a canvas with a black background, a heading and some instructions. Use the drawing commands to draw the player’s paddles, a net, a ball, and a score at the top of the screen. Put the drawing commands inside the window load event so the screen draws when you load the page.
- Get the canvasTestBed4.html file from the Full Stack Example Pack. Write a function that creates an 8×8 checker board pattern in the canvas when the button 1 is clicked. Use a nested loop.
- Get the canvasTestBed4.html file from the Full Stack Example Pack. Use the buttons to let the user draw a street view on a starry night:
- Write a function that draws a simple line drawing of a house on the screen when button 2 is clicked. Extend the code so that each time button 2 is clicked, a new house appears to the right of the last one drawn. (Hint: use a global variable to keep track of the starting x-coordinate of the next house.)
- Write a function that draws a simple line drawing of a car on the screen when button 3 is clicked. Have the car appear under the last house drawn in the previous exercise.
- Write a function to draw a star in the top left corner of the canvas when button 4 is clicked. Extend the code so that when button 4 is clicked, a star is drawn at a random position in a random color in the “sky” above the houses and cars.
- Continue exercise 1 by getting one of the Pong paddles moving under mouse control. You can do this by keeping the paddle’s x location fixed but making its y location match the y coordinate of the mouse every time there is a mousemove event.
- Get the canvasTestBed4.html file from the Full Stack Example Pack. Have a square or circle in the middle of the canvas respond to the arrow keys by moving and redrawing the circle 10 pixels up, down, left, or right.
- Project: A Paint App
- Create a new app with a large canvas. Write code so that a 5-pixel radius circle is drawn on the canvas as the mouse moves over it, like a simple drawing app.
- Now add a variable to indicate whether the paintbrush is a large circle, small circle, large square, or small square. Create four buttons to switch between brushes. Make sure the square brushes are drawn centered around the x and y coordinates of the mouse.
- Add an HTML input element of
type="color"to allow the user to choose the drawing color. Use a global variable to keep track of the color in response to input element events. Then, in the drawing function, set the fillStyle using the value of this variable. - Now change the app so that drawing only happens if the mouse moves while a button is pressed down. This is a little trickier than it sounds to get working exactly right. It will require the use of another global variable and a number of different events.
- Make it so that if the user is holding down the ctrl key, dragging the mouse will erase a square area (with clearRect).
- Now make it so that if the user is holding down the alt key, the size of the brush they are currently using doubles as long as they hold down the key.
- Make the backspace and delete buttons clear the screen. (It might be nice to pop up a confirmation dialog before you do that.)
- What else can you add to flesh out this paint app?
- Image Magnifier Project. This project uses mouse events but does not involve a canvas. Use the mouse events to implement an image magnifier like this one. An image magnifier uses a large and small version of an image and displays the small version by default. Then when the user mouses over the image, it reveals a previously hidden element containing the large version of the image, but showing only the part of it that is centered around the current mouse location. There are a number of ways to accomplish this, but one way is to use a div element for the magnified image and set its
background-imageCSS property to display the large version of the image. Then adjust thebackground-position-xandbackground-position-yproperties in response to mouse movements over the target image so that the correct portion of the image is shown.


Feedback/Errata