Programming on the Server Side
36 PHP Data Objects (PDO)
 Learning Outcomes
When you have completed this chapter, you will be able to:
- Use best practices to send SQL queries from a PHP program incorporating HTTP request parameters.
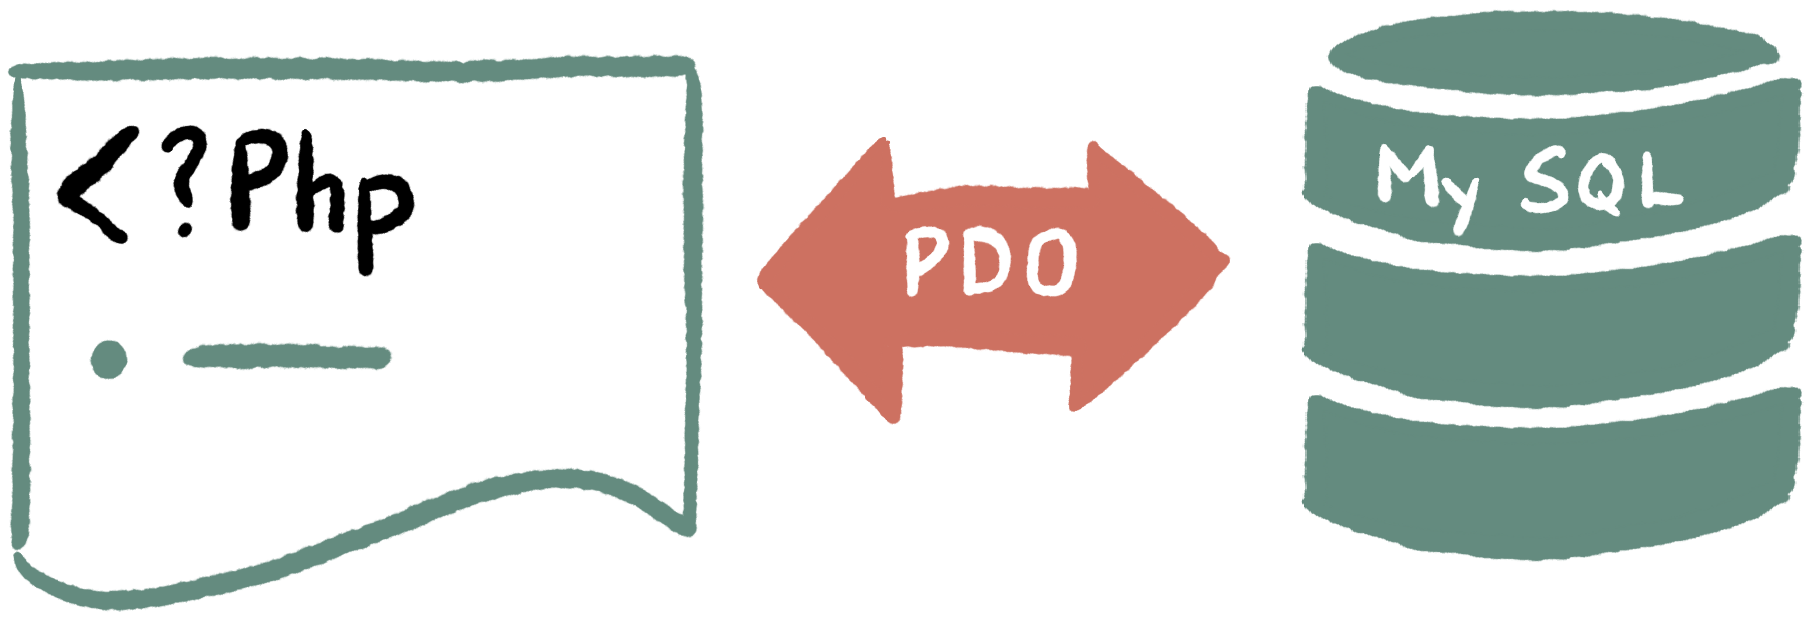
When a web app logs a user in, displays their achievements, helps them schedule an appointment, or offers a list of products and allows them to build a shopping cart, it is usually a result of server-side scripts on the Logic Tier interacting with a Database Management System on the Data Tier. A server-side program communicates with the database by sending SQL commands, then writes the results into the web page to send back to the Presentation Tier. In PHP, the latest and greatest way of accomplishing this is to use PHP Data Objects (PDO).
In the sections below, you’ll see how to connect to the database from a PHP program, and how to issue UPDATE, DELETE, and INSERT queries. SELECT queries are a little bit more complicated, so we’ll leave them until the next chapter.
How to Send SQL Queries from PHP
To send UPDATE, DELETE or INSERT commands from a PHP script, you need to go through four steps:
- Connect to the Database
- Prepare the SQL query
- Execute the SQL query
- Check to make sure it worked
Here are the details…
1. Connect to the Database
 Connections
The term Tier in Three-tier Architecture refers to a software component running on its own separate piece of hardware. In most live web apps, the web server running PHP is on one machine and the database is on a different machine with a different IP address.
Technically, if the database is on the same machine as the web server, this means you do not have a true Three-tier Architecture. You still have three layers of software, but they are not technically Tiers. But for our purposes, the distinction between layers and tiers does not matter all that much.
The code below will create a Database Handler object that represents a connection to a database on localhost. You should fill in the name of your database along with your personal database id and password where indicated:
try {
    $dbh = new PDO("mysql:host=localhost;dbname=MYDB", "MYID", "MYPASSWORD");
} catch (Exception $e) {
    die("ERROR: Couldn't connect. {$e->getMessage()}");
}
The “new PDO…” command in the above code establishes the connection and creates the database handler object. It’s creating a new PDO object, passing a database connection string, userid, and password as arguments to the PDO constructor. If you are using XAMPP on your own machine or running the database on a small server, the database will probably be on the same machine as the PHP interpreter, and localhost is an alias (an alternative name) for the current machine. In a larger scale hosting environment, the database is likely to be on a separate machine, in which case you would use that machine’s IP address and port number instead of localhost.
The rest of the code is concerned with exception handling. If something goes wrong with the connection, the PDO constructor will raise an exception, which will be caught and handled by the catch code block. The catch block executes the PHP die function to immediately terminate the script with an error message written into the HTTP Response. If your database connection fails, there’s likely not much you can do for the user right now, so immediately terminating is often the best option.
 Do It Yourself
Get the basic_pdo folder and the grades.sql file from the data folder of the Full Stack Example Pack.
On XAMPP, import grades.sql into an existing database to get the grades table, then modify the connect.php script to contain the PDO connect code shown below with your details filled in. If you’re on XAMPP your userid is “root” and your password is the empty string, but you will have to fill in the name of the database you’re connecting to:
try {
    $dbh = new PDO("mysql:host=localhost;dbname=YOUR_DATABASE", "root", "");
} catch (Exception $e) {
    die("ERROR: Couldn't connect. {$e->getMessage()}");
}

echo "<p>It worked!!!</p>"; // success message
Now go to a browser and try to run the connect.php script (e.g., http://localhost/basic_pdo/connect.php). If you’re lucky, you’ll get the success message which means the attempt to connect was successful. Once you get it working, you should remove the success message so it succeeds silently in future.
Troubleshooting: If it doesn’t work, read the error message on the page. It could be your database name, your login info, or it could even be that the connection is timing out because you forgot to start your MySQL server. Make the necessary changes and try again.
Tip: Write once, use everywhere. You can clone and tweak the code in connect.php and use an include statement to load it from other scripts. This is convenient and it also limits the number of times you have to open a file that contains your raw, unencrypted MySQL password.
2. Prepare the SQL Query
 Gotcha: Parameters
The word parameter is used in several slightly different contexts in web app development. Make sure you keep them all straight!
- Function and method parameters are used to receive arguments in a PHP or JavaScript function or method
- HTTP Request parameters are used to send data to a server-side script where the parameter values are received with filter_input
- SQL Prepared Statement Parameters are question marks in an SQL command that are filled in later with arguments
You prepare an SQL query by calling the prepare method of the database handler object. This method returns a statement object containing the compiled version of the command. Your original command string should contain question marks instead of data values. These question marks become parameters, to be filled in when you execute the statement.
$command = "INSERT into `grades` (`firstname`, `lastname`) VALUES (?, ?)";
$stmt = $dbh->prepare($command);
Note that you are creating a string that contains an SQL command. You likely won’t get any context-sensitive help from your IDE when you’re doing this, so it’s easy to get the syntax wrong and have your command fail. It’s a good idea to work out command syntax in the SQL tab of phpMyAdmin first and then copy it into your code, replacing values with question marks. It’s also a good idea to use echo statements when debugging so that you can see the command string, like this:
echo "<p>$command</p>";
3. Execute the SQL Query
You execute the prepared statement by calling its execute method, passing an array of arguments. These arguments will fill in the question mark parameters in the order that they appeared in the original command string. The execute method returns true on success or false on failure.
$args= ["Drizzt", "Do'Urden"];
$success = $stmt->execute($args);
4. Check to Make Sure it Worked
You can check the return value to determine whether or not the command succeeded, and you can use the rowCount method of the Statement object to find out how many rows were affected. For a simple INSERT, the rowCount should be 1. Here’s some example code for checking that everything worked:
if ($success) {
    echo "<p>Win!</p>";
    echo"<p>{$stmt->rowCount()} rows were affected.</p>";
} else {
    echo "<p>Fail…</p>";
}
It’s always possible that a query was “successful” (it completed with no errors) but still had no effect on the table (rowCount returns 0). For example, an UPDATE method might have a WHERE clause that doesn’t match any rows in the database. In this case, the query might succeed (i.e., it was a well formed query) but will not update any rows. So it’s a good idea to check rowCount as well as the return value of the execute method.
For more sophisticated error handling, you can also use a try… catch statement as we did for the connect script.
Do It Yourself
If you haven’t already, get the basic_pdo folder and the grades.sql file from the data folder of the Full Stack Example Pack.
On XAMPP or similar, import grades.sql into an existing database to get the grades table, then modify the connect.php script to add your login information (see previous Do it Yourself box).
Take a look at the insert_simple.php program in basic_pdo. If it works, it should insert a new row into the grades table.
- Check the structure of the grades table, and note which fields are mandatory for INSERT and which are not.
- Check to make sure you understand the PHP code. Most of it is code that was discussed in the text above.
- Run the code by loading insert_simple.php into a browser through your server. Check the result in phpMyAdmin
- Would you expect the script to work if you ran it a second time? Make a prediction, then try it out to see if you were right.
- Try changing the INSERT command and the arguments string to insert new rows specifying more or fewer fields, then run again.
- Try to create an error by creating an illegal INSERT command. Does the error message on the page make sense?
Getting Data from a Form
For many PHP applications, the data for INSERT, UPDATE, and DELETE comes from HTTP GET and POST parameters, often sent by a user interacting with an HTML form. The PHP script receives the parameters in the usual way, checks to make sure the values are ok, and then substitutes them into the prepared expression as above. Here’s an example of what that might look like:
// receive two parameters
$fn = filter_input(INPUT_POST, "first", FILTER_SANITIZE_STRING);
$exam = filter_input(INPUT_POST, "exam", FILTER_VALIDATE_INT);

// make sure they're ok
if ($fn !== null && $exam !== null && $exam !== false) {
    // prepare the query
    $command = "UPDATE `grades` SET `final_exam`=? WHERE `firstname`=?";
    $stmt = $dbh->prepare($command);

    // use the parameters to execute the command
    $args= [$exam, $fn];
    $success = $stmt->execute($args);

    // check $success and rowCount then continue the program...
    ...
}
Gotcha: Code Injection Attacks
When you accept a string that a user typed into a form and then use that string to write SQL code, you are opening yourself up to an SQL injection attack from a malicious user. In an SQL Injection attack, the user types SQL code into an HTML form knowing it will get concatenated onto an SQL command and sent to the database management system. If they guess right about the structure of your SQL commands they can force your app to execute their malicious SQL.
Two key defenses against code injection attacks:
- Always use the filter_input functions to receive GET and POST parameters, and use the appropriate SANITIZE or VALIDATE filters. This will remove or reject many of code injection attempts. (There are other ways to retrieve GET and POST parameters. Don’t use them!)
- Always use parameters in your queries instead of concatenating information you received from a form. This ensures information from the user is treated as data rather than part of the code.
More on this in the Avoiding Injection Attacks chapter.
Gotcha: Timezones
When inserting time and date data into a database, make sure that the server is configured correctly. To set the default timezone in PHP, we use the following command.
date_default_timezone_set("America/Toronto");
Valid timezone names can be found in the PHP manual.
Note that you should always use POST for INSERT, UPDATE, and DELETE. If you use GET, a user can bookmark the URL along with all the form data in it and then repeat the operation indefinitely. This could lead to unexpected changes to the database. (Technically, you should actually use a third HTTP Request method, PUT, for INSERT operations, not POST. But we’re going to ignore that complication here.)
Do It Yourself
If you haven’t already, get the basic_pdo folder and the grades.sql file from the data folder of the Full Stack Example Pack.
On XAMPP, import grades.sql into an existing database to get the grades table, then modify the connect.php script to add your login information (see previous Do it Yourself boxes).
Take a look at insert.html and insert.php in the basic_pdo folder. The form in insert.html redirects to insert.php, which performs an INSERT operation based on the user’s data.
- Try out insert.html to make sure it works on your system. Check the result in phpMyAdmin.
- Try to submit the insert.html form without filling it in. Look at the HTML code and make sure you understand how the page is constraining you.
Take a look at update.html and update.php in the basic_pdo folder. The form in update.html redirects to update.php, which performs an UPDATE to change the final exam grade for everyone whose first name matches the name the user typed.
- Try out update.html to make sure it works on your system. Check the result in phpMyAdmin.
- Try to submit the update.html form without filling it in, or with bad data. Look at the HTML code and make sure you understand how the page is constraining you.
 Check Your Understanding
 Coding Practice
If you haven’t already, get the basic_pdo folder and the grades.sql file from the data folder of the Full Stack Example Pack. On XAMPP, import grades.sql into an existing database to get the grades table, then modify the connect.php script to add your login information (see previous Do it Yourself boxes).
Tips: Use GET while developing so that it’s easy to see and tweak the parameters in the URL, but always convert to POST parameters for INSERT, UPDATE, and DELETE in the final version of your app.
- INSERT: Modify insert.html and insert.php so that the user can specify the assignment grades for a new user as well. Make sure you filter all the parameters and use ? in the command string. Check using phpMyAdmin to see if the records got inserted.
- DELETE: Create a form that allows the user to delete all students with bad grades. The form should have one field for maximum grade, then it should redirect to a PHP program that deletes all the students with a final exam grade lower than this maximum. Check using phpMyAdmin to make sure it works.
- UPDATE: Create a form that allows a student to change their name. It should allow them to enter their student ID and a new first and last name, then redirect to a PHP program that changes the name for them. Make sure to constrain the user so they can’t submit an unfilled form. Check using phpMyAdmin to make sure it worked. If 0 rows were affected, they must have entered a bad student id. Give them a message to let them know what went wrong.
- VOTE: Create a form that allows someone to vote in a poll. You should already have a poll table you could use for this, but if not you can import polls.sql from the data folder of the Full Stack Example Pack. To vote in a poll, the user must enter the poll id and the option they would like to vote for (1, 2, 3, or 4). Try to constrain the user to force them to enter legal values as much as you can. When the form is submitted, prepare and execute an UPDATE query to increment the correct option for the chosen poll. You should thoroughly error check and let the user know whether or not their vote was recorded. If it was not recorded, tell them why – invalid poll id, invalid option, couldn’t connect to the database, etc. Remember – never paste user input directly into an SQL query string.
(Of course, this is a very user-unfriendly way to vote in a poll! In the next chapter, we’ll see a way to make it a much nicer user experience.) - UPLOAD: If you have been working locally and you access to a remote server, you should host your solutions on that remote server. You’ll have to export the database or the grades table from XAMPP and then import it to the remote. Then upload all the files to the correct location and modify connect.php to login to the remote instance of MySQL.

Feedback/Errata