Programming on the Server Side
32 HTTP Parameters
 Learning Outcomes
When you have completed this chapter, you will be able to:
- Design simple forms that submit data to a PHP script using HTTP request parameters.
- Describe the difference between GET and POST parameters in HTTP requests.
- Implement simple PHP scripts that receive, validate, and sanitize user input before using it to generate custom content in the HTTP response.
 So far, your PHP programs have not been able to get any input from the user. In a simple server-side app, user input is collected with an HTML form that contains input elements. The values in the input elements get sent as parameters along with the HTTP Request when the form is submitted.
You should have already worked with input elements in the client-side chapter on Input Elements. If you feel a little rusty, you should go back to brush up on input element attributes and styling.
A Basic HTML Form
The form element is an optional container for input elements. Here’s a simple example:
<form action="nextpage.php">
    <input type="text">
    <input type="submit">
</form>
The attribute type="submit" in the second input element is new. It creates a button that, when pressed, acts like a link and launches a new HTTP Request. The action attribute of the form element indicates that this form launches requests to nextpage.php when it is submitted. (Many browsers will also submit forms when the user hits enter while an input element in the form has focus.) You can change the text of the submit button by adding a value attribute.
 Do It Yourself
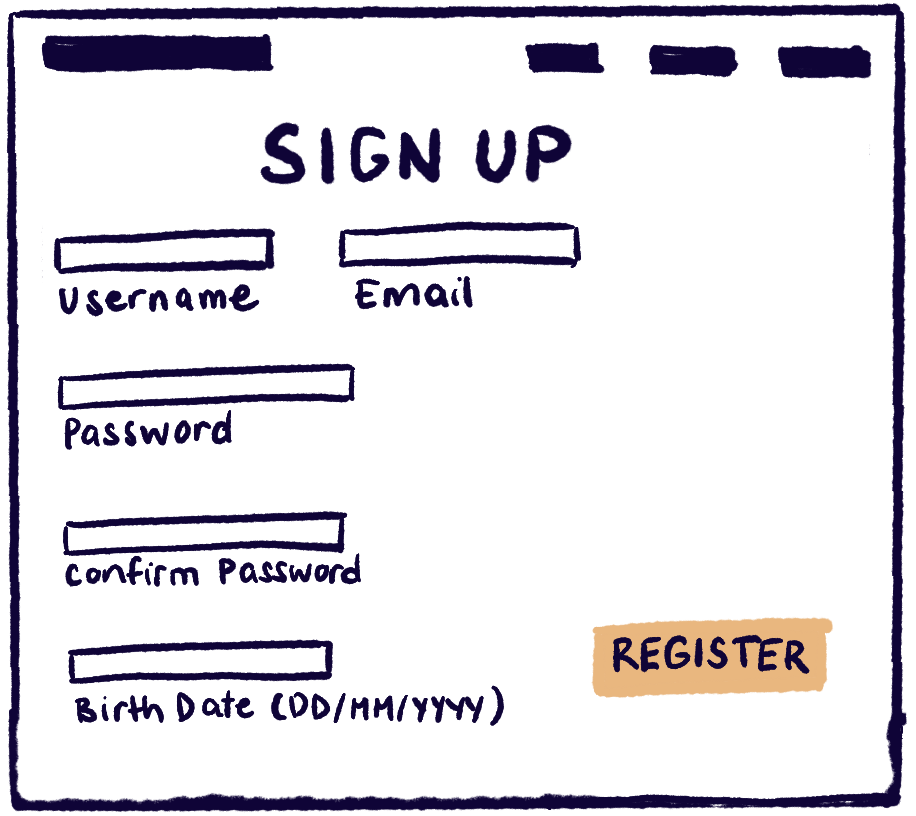
Create a new page using template.html from the Full Stack Example Pack. Include this form element in the body:
<form action="nextpage.php">
    <input type="text">
    <input type="submit">
</form>
Load the page and press the submit button. What happens – does the result make sense?
Now remove the action attribute from the form element and try the page again. Where does it redirect to now?
Finally, add a value="Go!" attribute to the input element with type="submit". Load the page and note the difference this makes.
Sending Form Data
In a client-server web app, the programmer usually wants the form data to be sent to the server when the form is submitted. You can configure the form to send the data by giving every input element a name attribute.
You should also constrain the user as much as possible by using input element attributes like min and max (see the Input Elements chapter). On most browsers, these attributes will prevent the form from being submitted when their constraints are violated. You can also use the required attribute (no value needed) to indicate that an input element must be filled in before the form can be submitted.
Do It Yourself
Create a new page using template.html from the Full Stack Example Pack. Include the form shown below in the body of the page.
<form action="nextpage.php">
    <input type="number" name="streetnumber" required min="1">
    <input type="text" name="streetname" required>
    <input type="submit">
</form>
First try submitting the form without filling it in, or with a number less than 1. Note the errors from Chrome.
Now fill in the form and press submit. Examine the URL and see if you can find the data you entered.
Finally, open the Chrome Developer Tools and go to the Network tab. Resubmit the form, then click the HTTP Request in the Network tab and look at the “Payload” to see the parameters. See Figure 1 below for an example of what this might look like.
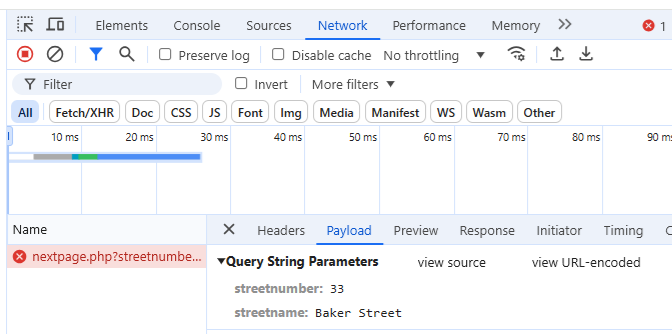
In the form from the Do it Yourself box above, when the user presses the submit button, nextpage.php will load, and will be sent the data from the text and number fields. When the form is submitted, you will be able to see the parameters in the URL. They will look like something like this:
http://localhost/myfolder/nextpage.php?streetnumber=88&streetname=Elm
The question mark in the URL separates the path from the data. The data is in the form parameter=value, and each parameter/value pair is separated using an ampersand (&) character.
You can also see the parameters in the Network tab of the Chrome Developer Tools (look in the “payload” tab for any HTTP Request that had parameters attached).
GET vs. POST Parameters
The form element also allows you to add a method attribute. You can use method="get" or method="post". If you don’t specify a method, the default value is “get“. Here’s an example of a form that uses the post method.
<form action="nextPage.php" method="post">
    <input type="number" name="streetnumber" required min="1">
    <input type="text" name="streetname" required>
    <input type="submit">
</form>
If you use post, the parameters will be sent in the body of the HTTP Request, rather than in the header as part of the URL. You will still be able to view them in the Network tab of the Chrome Developer Tools, but they will not be easily visible to the user. You should use post for sensitive information like passwords and credit card numbers, and for very long pieces of information such as multi-paragraph social media posts that might exceed the maximum length of the URL.
Using post does not encrypt the data or make its transmission secure. But it does stop someone from reading it over the user’s shoulder, and it stops the user from accidentally bookmarking it or sharing it with somebody as part of the URL.
Do It Yourself
Go back to the page you created in the last Do it Yourself box and change the form’s method to post. Then open the page and submit the form. Note the lack of data in the URL. However if you go to the Chrome Developer Tools and look at the Network tab, you should still be able to view the payload.
Receiving Form Data
There are several ways to retrieve parameters from an HTTP Request. We’re going to use the PHP filter_input function because that is one of the safest and most secure ways of receiving parameters. Later in the Introduction to Security Issues chapter, we’ll talk about why this is so important.
Receiving Integers
The URL below can be used to launch an HTTP request for the nextpage.php file. It contains two get parameters named streetnumber and streetname.
http://localhost/myfolder/nextpage.php?streetnumber=88&streetname=Elm
To receive the streetnumber parameter, we would include the following code in the nextpage.php program:
$streetnum = filter_input(INPUT_GET, "streetnumber", FILTER_VALIDATE_INT);
The filter_input function looks for a get parameter named streetnumber. It will return:
- null if the parameter is not found (i.e. the client didn’t send it)
- false if the parameter was found but is not an integer (e.g.
streetnumber=idontknow) - an int if the parameter is found and is correctly formatted
If you want to check that you got a properly formatted parameter, you’ll need if statements to make sure $streetnum isn’t null or false. You must use strict equality or inequality (=== or !==) for this. Because of PHP’s weak typing, if $streetnum is 0, $streetnum == null and $streetnum == false will both evaluate to true.
 Gotcha: 0 == null
Because PHP is weakly typed, 0 == null and 0 == false are both true. This means that when you’re receiving parameters with filter_input, you must use === to check both the type and the value that it returns, especially if you’re expecting a numeric value.
INPUT_GET is a pre-defined global constant. Change it to INPUT_POST if you want to receive POST parameters.
FILTER_VALIDATE_INT is also a pre-defined global constant. It signals that filter_input should attempt to interpret the parameter as an integer.
Do It Yourself
This activity continues from the previous Do it Yourself boxes.
Create nextpage.php by copying template.php from the Full Stack Example Pack. Make sure nextpage.php is in the same folder as the HTML file with the form that you created previously. Make sure the form is sending get parameters, not post parameters.
Include the code below in a <?php ?> tag in the body of nextpage.php:
$streetnum = filter_input(INPUT_GET, "streetnumber", FILTER_VALIDATE_INT);
if ($streetnum === null or $streetnum == false) {
    echo "<p>Parameter Error</p>";
} else {
    echo "<p>Received $streetnum.</p>";
}
Now fill in the form you created previously and submit it. You should see the success message.
To see the error message, you can load nextpage.php directly without going through the form (or just remove the parameters from the URL) or you can change the get parameter in the URL to an invalid integer.
Do It Yourself
See hellonum.php and hellonum2.php in the php_forms folder of the Full Stack Example Pack for more examples of receiving an integer. Copy this folder into your htdocs folder in order to run it through XAMPP.
Receiving Strings
To receive the streetname parameter from the URL above, we would include the following code in the nextpage.php program:
$streetname = filter_input(INPUT_GET, "streetname", FILTER_SANITIZE_SPECIAL_CHARS);
The only thing different here is the use of FILTER_SANITIZE_SPECIAL_CHARS. This is a pre-defined global constant for a sanitize filter rather than a validate filter. It makes sure that special characters get replaced with codes known as HTML entities so that they will display correctly when you echo them onto your web page. For example the character ‘<‘ gets replaced with the html entity <. If you were to echo ‘<‘ directly into the HTTP Response, the browser would treat it as if it were the start of an HTML tag. (You can read more about HTML Entities at w3Schools.)
In the case of FILTER_SANITIZE_SPECIAL_CHARS, the filter_input function will return:
- null if the parameter is not found (i.e. the client didn’t send it)
- a string with special characters “sanitized” for safe output if the parameter is found
You should use $streetname === null or $streetname !== null to make sure the parameter was received properly.
Do It Yourself
This activity continues from the previous Do it Yourself boxes.
Modify nextpage.php so that it also receives the street name.
$streetnum = filter_input(INPUT_GET, "streetnumber", FILTER_VALIDATE_INT);
$streetname = filter_input(INPUT_GET, "streetname", FILTER_SANITIZE_SPECIAL_CHARS);
if ($streetnum === null or $streetnum == false or $streetname === null) {
    echo "<p>Parameter Error</p>";
} else {
    echo "<p>Received $streetnum $streetname.</p>";
}
Now fill in the form and submit it. You should see the success message.
To see the error message, you can load nextpage.php directly without going through the form (or just remove the parameters from the URL) or you can change the get parameter in the URL to an invalid integer.
Finally, refactor the code along the lines of hello2.php in the php_forms folder of the Full Stack Example Pack. This file receives parameters in a <?php ?> element at the top of the page, then outputs the results in the body element.
Other Validate Filters
If you are receiving parameters containing numbers or specially formatted strings, you should use a validate filter that matches what you are expecting to receive. Some pre-defined constants for filters are shown below. The names of the filters indicate what they are intended to validate:
- FILTER_VALIDATE_INT
- FILTER_VALIDATE_FLOAT
- FILTER_VALIDATE_EMAIL
- FILTER_VALIDATE_URL
All validate filters will return null if the parameter is not found, false if it’s not formatted correctly, or a value of the appropriate type otherwise.
One Page PHP Apps
A small PHP app doesn’t really have to have separate pages for the input and output. You can create a one-page app with a form on it that redirects back to the same page instead. In an app like this, whenever the page is loaded, a PHP script checks to see if the correct parameters were sent from the form (i.e. it checks to see if filter_input returns null or false). If it finds valid parameters, it processes them and displays the results. But no matter what, it still presents a form that redirects back to the one page app again. If there are no parameters present, the page should just display the form.
For example, a simple restaurant tip calculator might have a form with two number inputs to fill in (one for bill amount, one for percentage to tip). Submitting the form would reload the app. If the app received two valid numeric parameters, it would display the correct tip amount, then show the form again so the user can calculate another tip.
Do It Yourself
The onepageapp.php example in the Full Stack Example Pack, is a demonstration of how this could work for a simple addition app.
Aside: JavaScript for Form Validation
Sometimes the input element attributes like min, max, and required are not enough to fully validate a form. For example passwords and userids have rules that must be followed, email addresses are often collected twice to make sure they match, and so on.
If special validation is required, you can attach a JavaScript event listener to the form. The event to listen for is the submit event. The event listener function will be called when the form is submitted, but before the page reloads. It can retrieve the values of the input elements and check them to see if they are correct. If they are not correct, the JavaScript function should give feedback, and stop the form from being submitted. The event object contains a preventDefault method that can be used to stop the browser from performing the default action in response to an event. In this case, it will stop the form from submitting.
Here’s the general structure of the JavaScript code you would need to write, showing a submit listener and event.preventDefault().
myform.addEventListener("submit", function (event) {
    // check form values
    if (something is wrong with the form) {
        // give feedback
        event.preventDefault();
    }
});
Do It Yourself
In the php_forms folder of the Full Stack Example Pack, you will find form_validation.html and setpassword.php files that work together to demonstrate form validation with JavaScript.
 Check Your Understanding
 Coding Practice
- A counting app.
- Create an HTML form for your counting app (Coding Practice exercise 1 from the last chapter) that allows the user to specify a start, end, and how much to “count by”. Use HTML input elements of
type="number"for this. - Modify the counting app to receive the parameters from your form and then count according to the parameters. For example, if the user specifies
start=5,end=100, andcountby=3, it should show the numbers 5, 8, 11, … 98. - Make sure that your program is robust. Print an error message if parameters are missing, empty, or invalid. Display a warning message if the values entered will cause more than 50 lines on the page and cut off the output after 50 lines.
- Create an HTML form for your counting app (Coding Practice exercise 1 from the last chapter) that allows the user to specify a start, end, and how much to “count by”. Use HTML input elements of
- A tip calculator.
- Create an HTML form with fields for server name, customer email address (twice to confirm), amount of bill (use
type="number"andstep="0.01"), percentage tip (an integer), and credit card number (just usetype="text"for this). Make the form robust so that the user cannot submit with empty fields or negative amounts. Use POST to hide the credit card information - Then create a PHP app to compute and display the bill with all the information nicely formatted. Make sure to display the original amount, the tip amount, and the total. If parameters are missing or badly formatted, the emails don’t match, or the credit card number is not 16 digits long, print an error message and nothing else on the page.
- Convert this into a one-page app (on the model of onepageapp.php from the Full Stack Example Pack) by putting the form and the nicely formatted bill on the same page.
- Optional: Add some JavaScript code to prevent submission in the event that the two email addresses don’t match.
- Create an HTML form with fields for server name, customer email address (twice to confirm), amount of bill (use
- Make a one-page app (on the model of onepageapp.php from the Full Stack Example Pack) that plays rock-paper-scissors with the user. It should allow the user to choose rock, paper, or scissors. If it receives a parameter, it should generate a random move of its own. It should display appropriate images for both moves and then state who won.
- Go back to the multiplication table exercise from the previous chapter.
- Make it get the number of rows and columns from parameters. If the parameters are missing, assume a default value of 10 for each. Put a warning on the page in red text if either parameter is missing.
- Create an HTML form in a separate file so that you can specify the parameters for exercise 3 more easily.
- Add form elements and corresponding PHP code to allow the user to specify a title for the table as well as foreground, background, and heading background colors.
- Add more form elements to allow the user to specify addition, subtraction, or multiplication as the operation.
- Police sketch app. This exercise is kind of silly looking, but it’s a tricky challenge. The file sketch.html in the Full Stack Example Pack uses div elements with absolute positioning to draw a face. Convert the HTML file to a PHP file, then make a form to send parameters which will customize the face. Validate the parameters on both the client and server side and resort to default values if any parameters are missing.
- Allow the user to set the color of the face and eyes separately.
- Allow the user to specify the size of the eyes and nose.
- Allow the user to specify how wide or close together the eyes should be (use a slider and do some math to keep the eyes centered on the face)
- Allow the user to choose a mood for the face (happy, sad or neutral) and alter the CSS to show the mouth curling up or down or neither in response.
- Add anything else you can think of to customize the face even further.
Note: This will be hard to debug because you will have script tags in a stylesheet. This means any error messages will be placed in the stylesheet, and they will not be visible on the page. You’ll have to view page source and dig through the HTML to see these errors.

Feedback/Errata