Creating an Exam in BetterExaminations
“How To” Video
This video details the process of creating an exam in BetterExaminations (for those who prefer watching a video than reading about it).
Select the External Player ![]() option if you want to view the video on full screen. (will open in a new window)
option if you want to view the video on full screen. (will open in a new window)
Step-by-step Instructions
Here are the steps that would help you create a new exam in BetterExaminations.
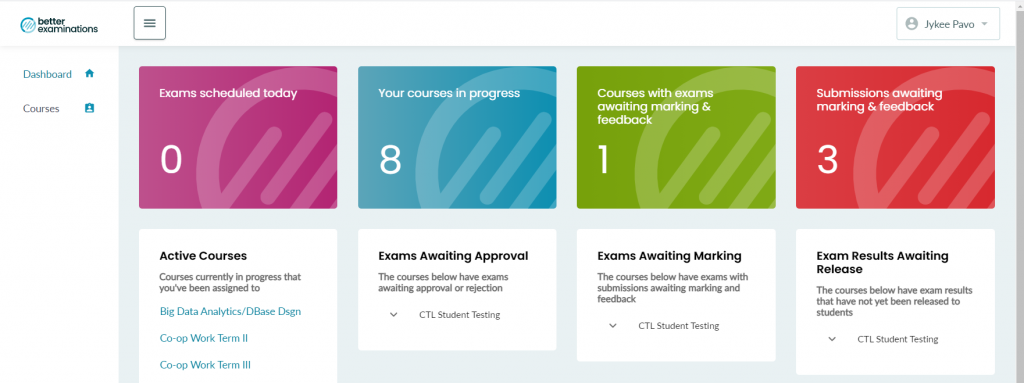
Step 1: Access the University of Windsor BetterExaminations (opens new window) from Blackboard as shown in the Sign-in chapter of this eBook. If you are successful, you will be greeted with your BetterExaminations (BE) dashboard.
Note: On the right-hand side of the Dashboard are the tiles that contain essential information that might be useful to the user. It also provides quick access to exams or courses that needs the users’ immediate attention. On the left-hand side is the navigation menu. Users can utilize it to navigate to other sections within BE.
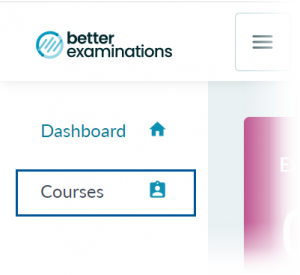
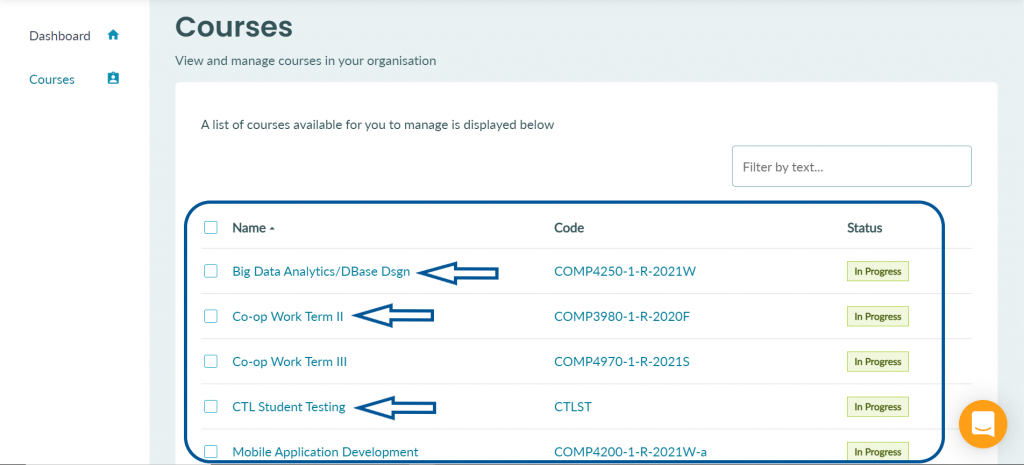
Step 2: Click the Courses tab on the left menu to view all courses associated with your account. (If you don’t see the left menu, select the![]() icon)
icon)
Step 3: Select the course you want to create the question bank for from your list of courses.
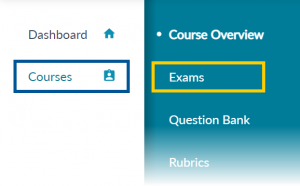
Step 4: After selecting a course from the Courses option, the user must select the Exam option within the Course Overview menu to begin creating or to edit exams from the course currently selected.
Step 5: Select the Create new Exam button on the right-hand side of the screen
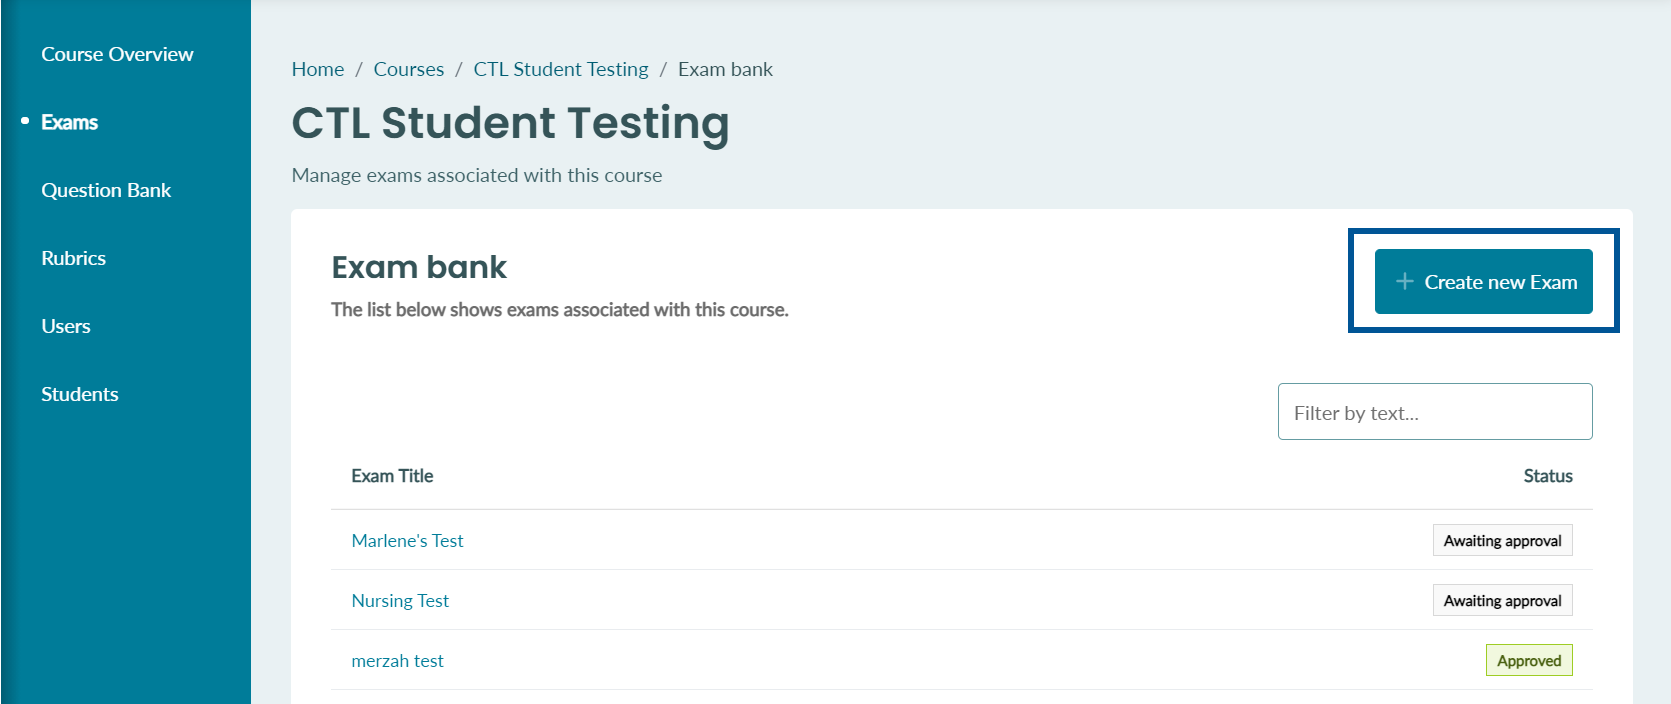
Step 6: Enter a title in the Name text field.
Step 7: Click the Create exam button on the right-hand side of the screen.

Step 8: Within the Exam editor tab, the user can add exam questions by either importing an existing question bank by selecting the Add from Question Bank button or creating new questions from scratch by selecting the Create new Question button.
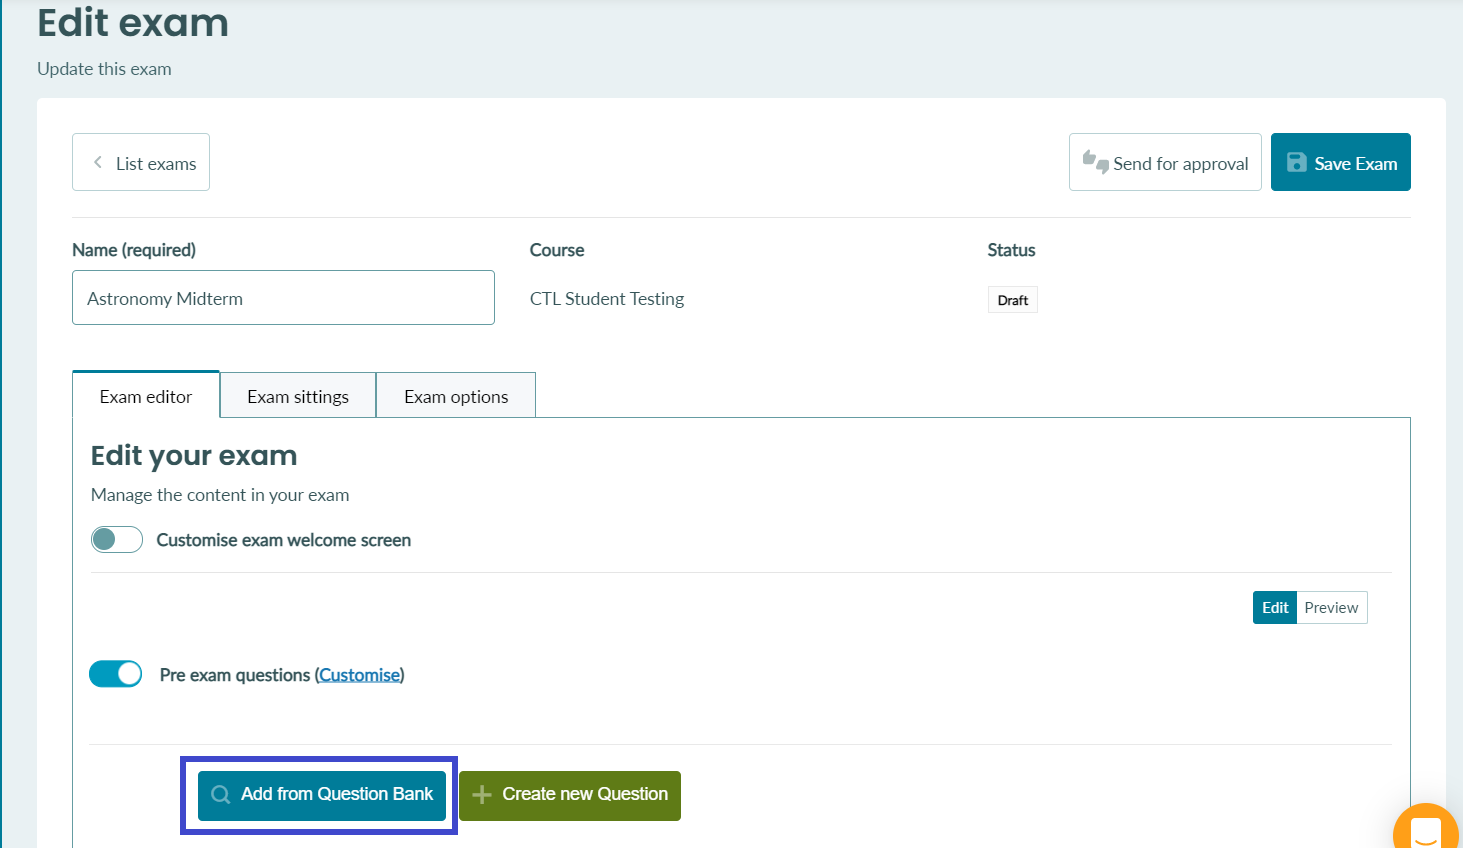
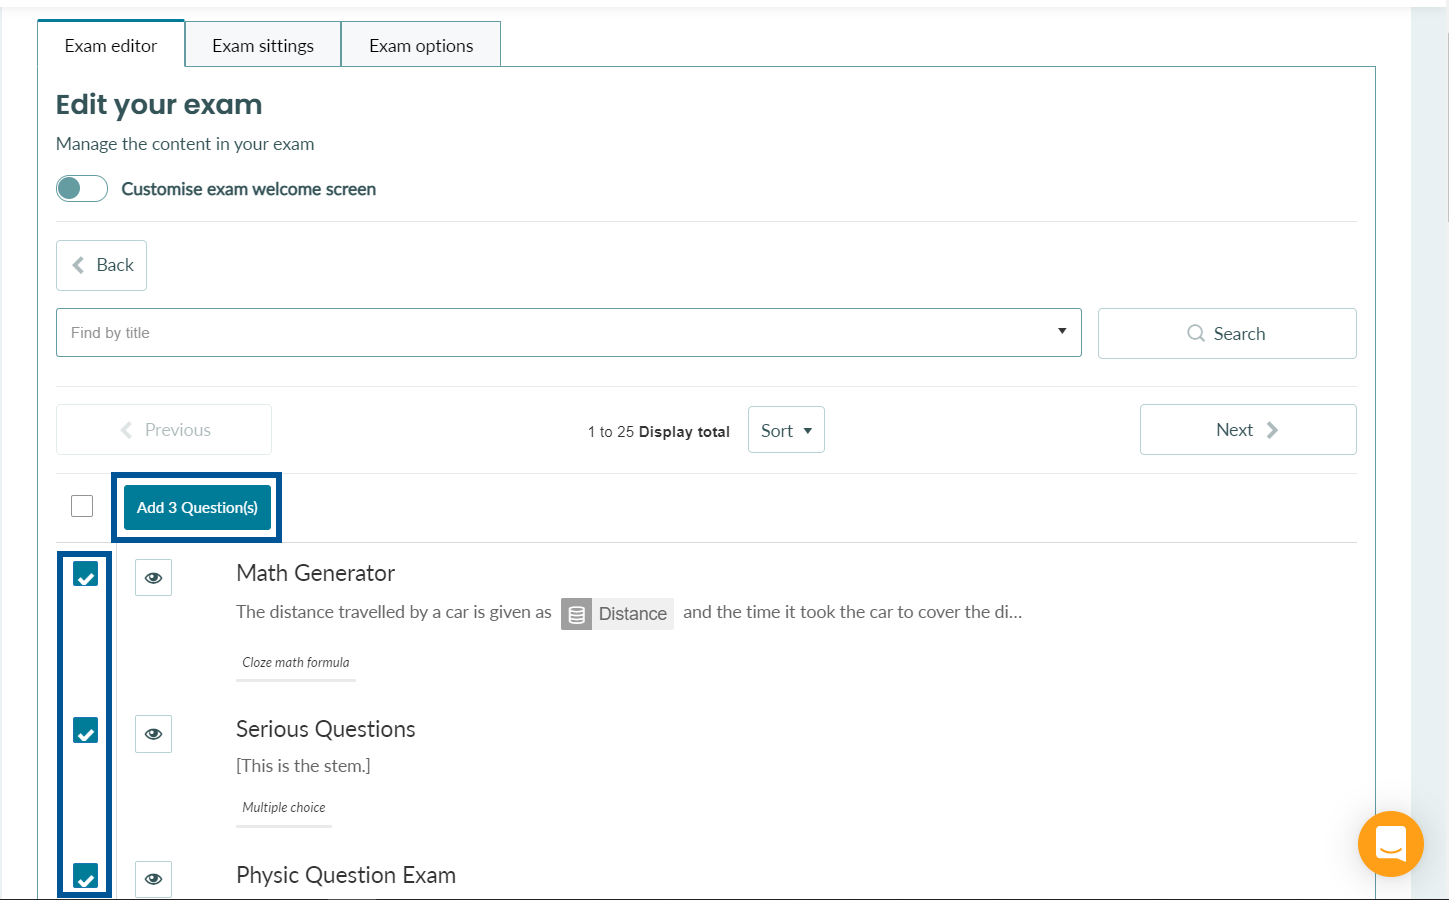
Step 9: From the list of question banks, select the one(s) that you want to be included in the exam by marking the check box(es) to the left of the question banks. Use the search bar to find a specific question bank.
Step 10: Once you’ve selected all the question banks that you wish to be in the exam, select the Add # Question(s) button near the top of the list.
Step 10: Review the questions that are currently in the exam. You can view the preview of each question by clicking on the ![]() icon. If the user is not satisfied with the state of the current exam, they could add, remove or rearrange the order of the question bank within the exam.
icon. If the user is not satisfied with the state of the current exam, they could add, remove or rearrange the order of the question bank within the exam.
Note: Click the Preview button to view the exam or click the Edit button to exit the Preview.
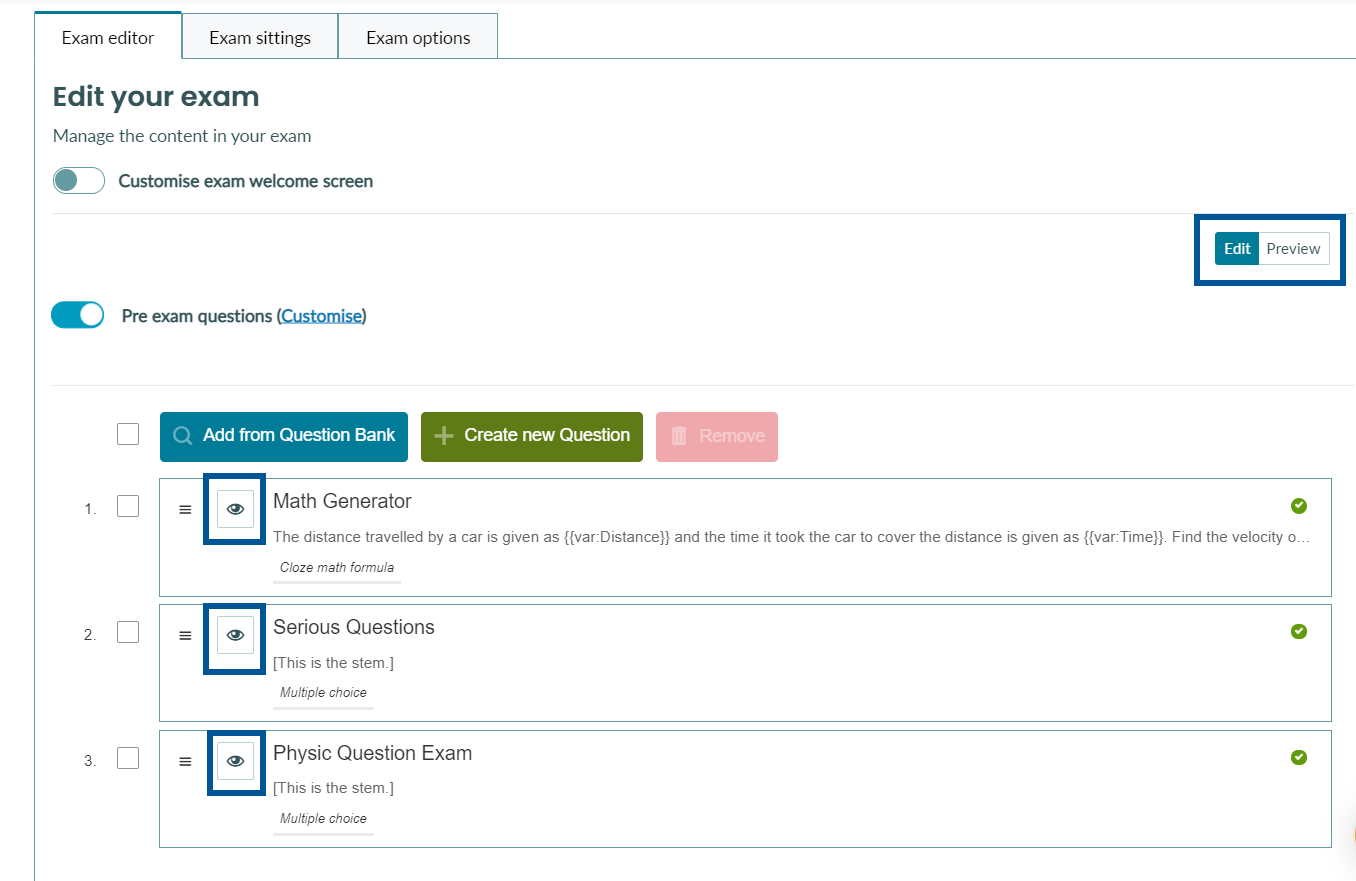
Step 11: Once you are done reviewing the exam, click the Save Exam button to complete.

Step 12: BetterExaminations is designed around a quality assurance process that includes the ability to send exams to others for approval. If this isn’t available, instructors can approve their own exams. Click the Send for approval button to proceed to the next step after approving the exam.

Step 13: Approve the exam yourself if you don’t need another user to review the exam. Once the exam status has changed to Approved, the exam is ready to be scheduled for an exam sitting. To start scheduling the exam in BetterExaminations, Click the Schedule exam button.


