Scheduling an Exam in BetterExaminations
“How To” Video
This video details the process of scheduling an exam in BetterExaminations (for those who prefer watching a video than reading about it).
Select the External Player ![]() option if you want to view the video on full screen. (will open in a new window)
option if you want to view the video on full screen. (will open in a new window)
Step-by-step Instructions
Here are the steps that would help you schedule a BetterExaminations exam in Blackboard
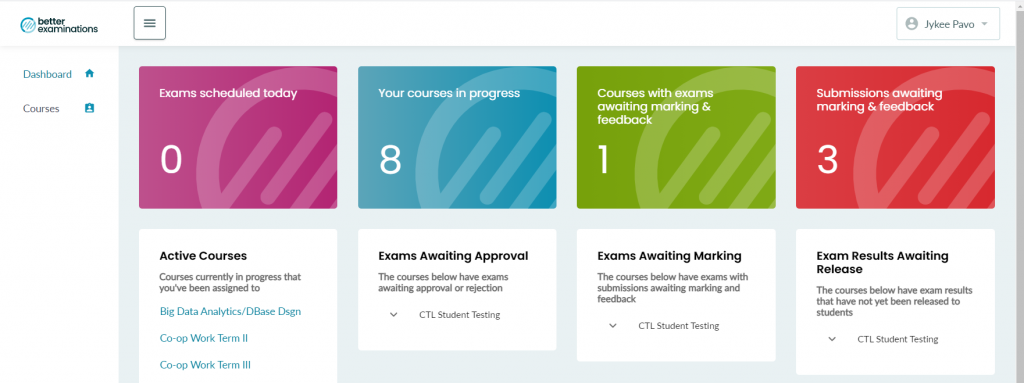
Step 1: Access the University of Windsor BetterExaminations (opens new window) from Blackboard as shown in the Sign-in chapter of this eBook. When you are successful, you will be greeted with your BetterExaminations (BE) dashboard.
Note: On the right-hand side of the Dashboard are the tiles that contain essential information that might be useful to the user. It also provides quick access to exams or courses that needs the users’ immediate attention. On the left-hand side is the navigation menu. Users can utilize it to navigate to other sections within BE.
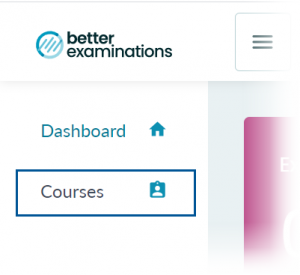
Step 2: Click the Courses tab on the left menu to view all courses associated with your account. (If you don’t see the left menu, select the![]() icon)
icon)
Step 3: Select the course you want to schedule an exam for from your list of courses.
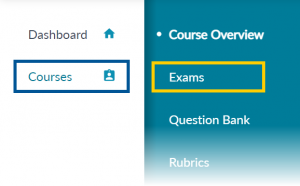
Step 4: Click the Exams option on the navigation menu.
Step 5: Select the Approved exam you want to schedule a sitting for from the Exam bank list. If the exam status is Awaiting approval, make sure to visit the Exam Approval section of the previous chapter and follow the steps.
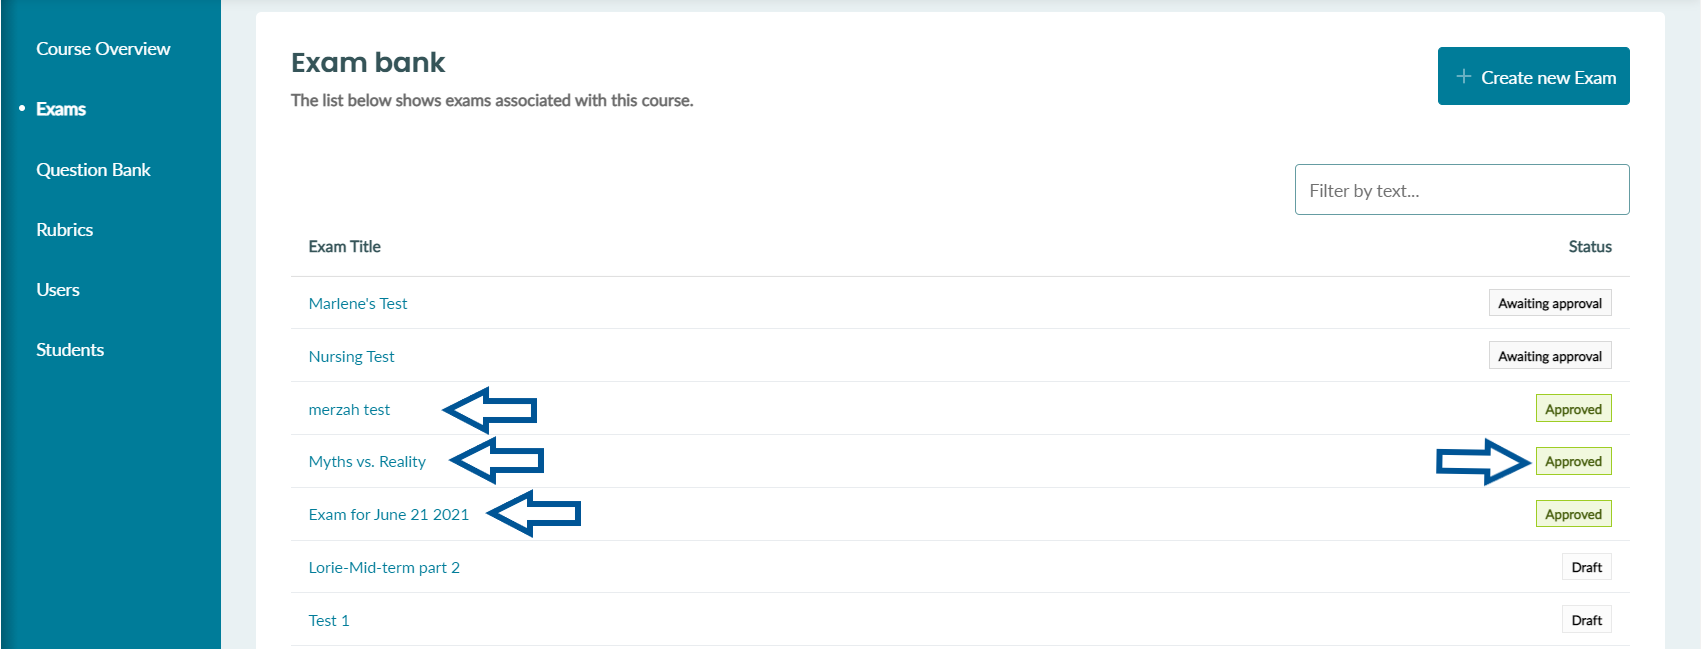
Step 6: To start scheduling a sitting for the exam, click the Schedule exams button.

Step 7: Complete the Exam sitting name (required) text field.
Step 8: Select which student/s will take this exam sitting by marking the checkbox beside their Given name. You can use the filter text field to find a specific student quickly by replacing the Filter by text with the student’s name.
Note: You can enable multiple sittings for the same exam to facilitate students needing different options (e.g., extra time). Be careful not to miss students or duplicate exams in separate sittings.
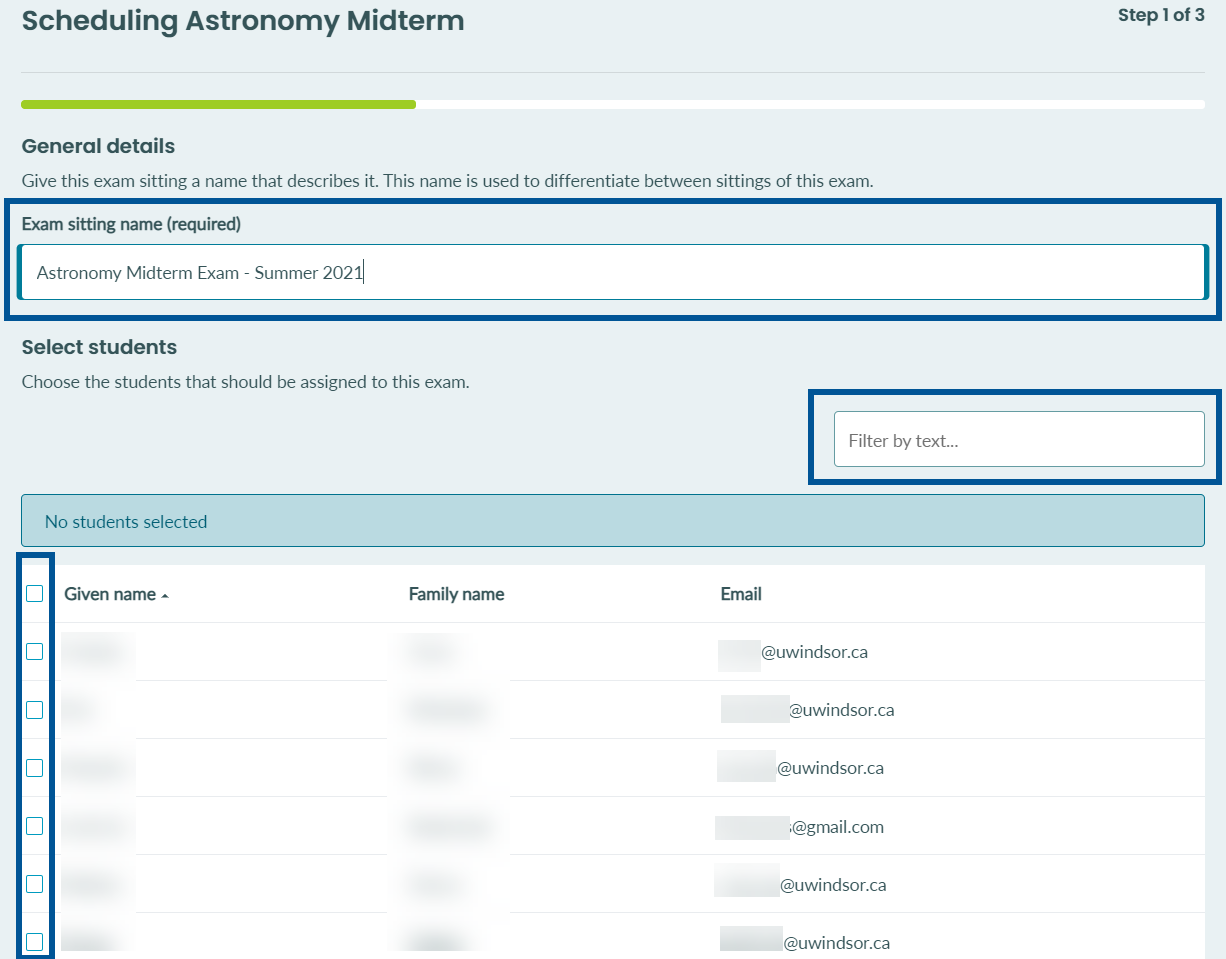
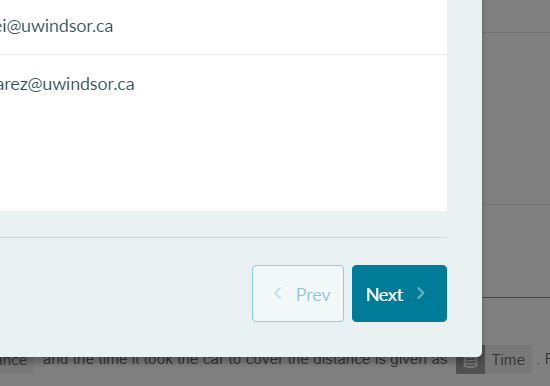
Step 9: Once you are done selecting which student/s will take the exam sitting, click the Next button in the bottom right corner of the panel
Step 10: Click the Start at a specific date and time button within the scheduling panel.
Step 11: Fill out the Start date and time text field by clicking the date picker and using the built-in time and calendar option to select the start time of the exam. The specific date and time option is suitable for exams only for a day, while the within a range option offers students the option to begin an exam between the earliest start date & time and the latest date & time.
Note: The time interval for the starting time is set to 30 minutes (i.e., 1:00 pm, 1:30 pm, 2:00 pm, etc.). This means that you can’t have exams set to a time such as 3:45 pm or 1:10 pm.
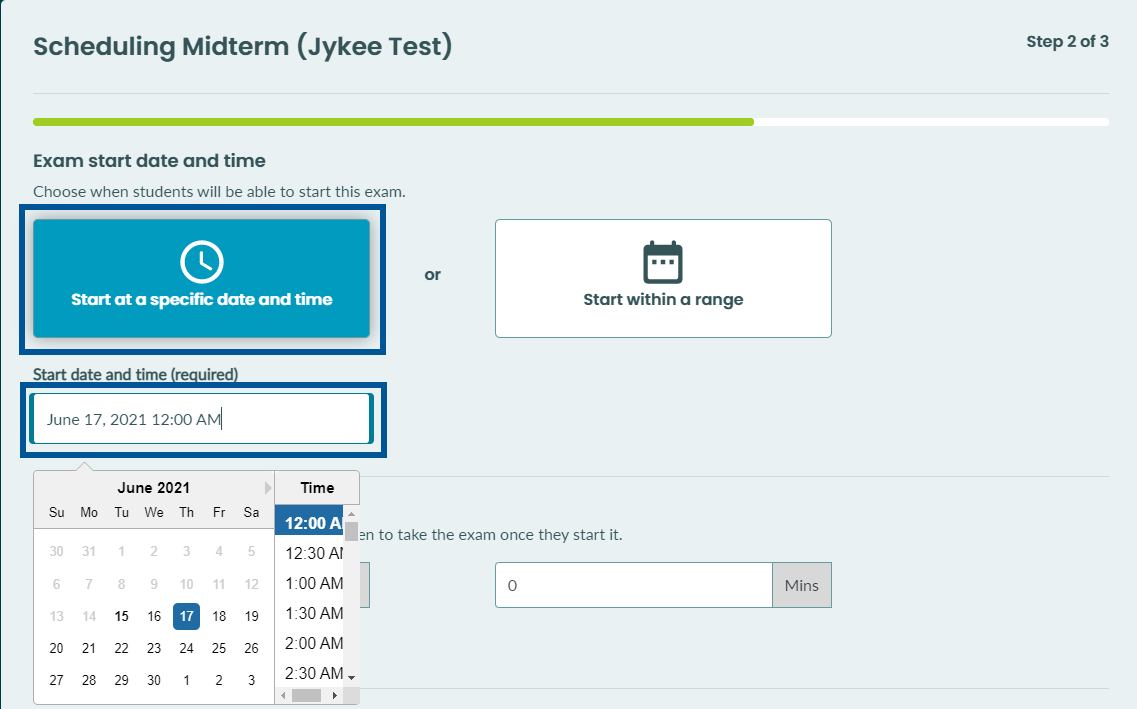
Step 12: Set the exam length by filling out the Hours and Minutes text fields

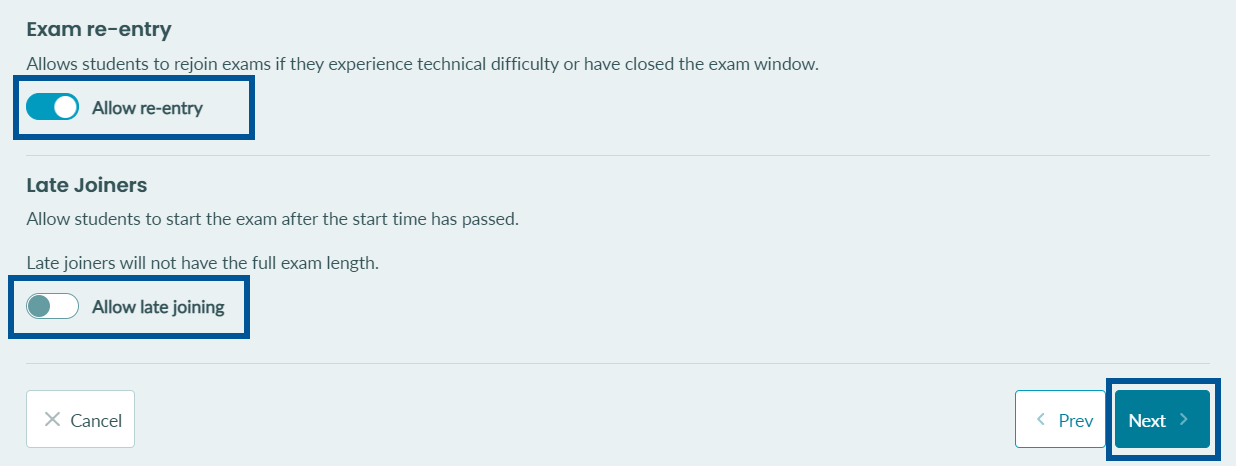
Step 13: Adjust the settings for Exam re-entry and allow Late Joiners to your preferences.
Step 14: Click the Next button to proceed to student Exam tools selection
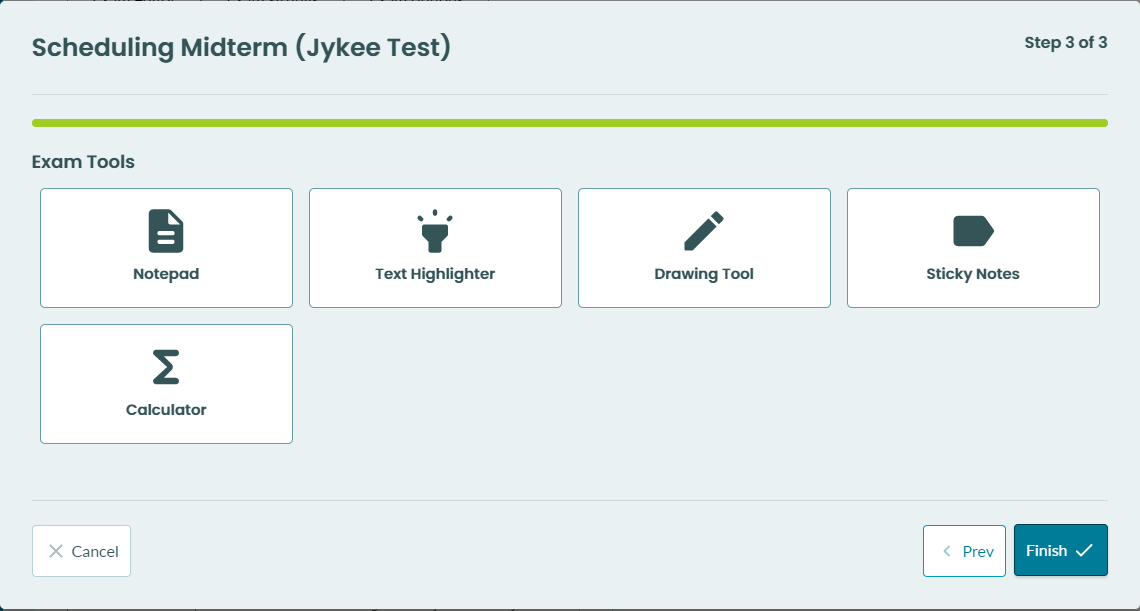
Step 15: Click on the Exam Tools you want to make available to students when they are taking the exam. Click the Finish button to complete.
