Posting an Exam in Blackboard
To post a BetterExaminations ( BE ) exam in Blackboard ( Bb ) so students can access it directly from the course and have the exam automatically synced with a Grade Centre column ( one-way from BE to Bb ), follow the steps below.
Note: Ensure that you have an exam prepared in BetterExaminations ( BE ) and already scheduled, or else it won’t be available to Blackboard.
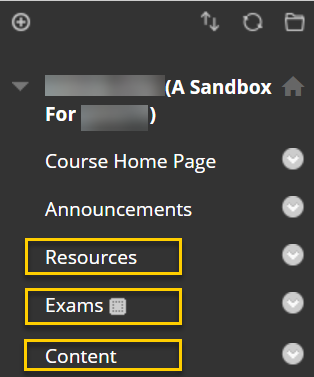
Step 1: Consider which Content Area in Blackboard you wish the exam to be located (e.g., Resources, Exams, Content).
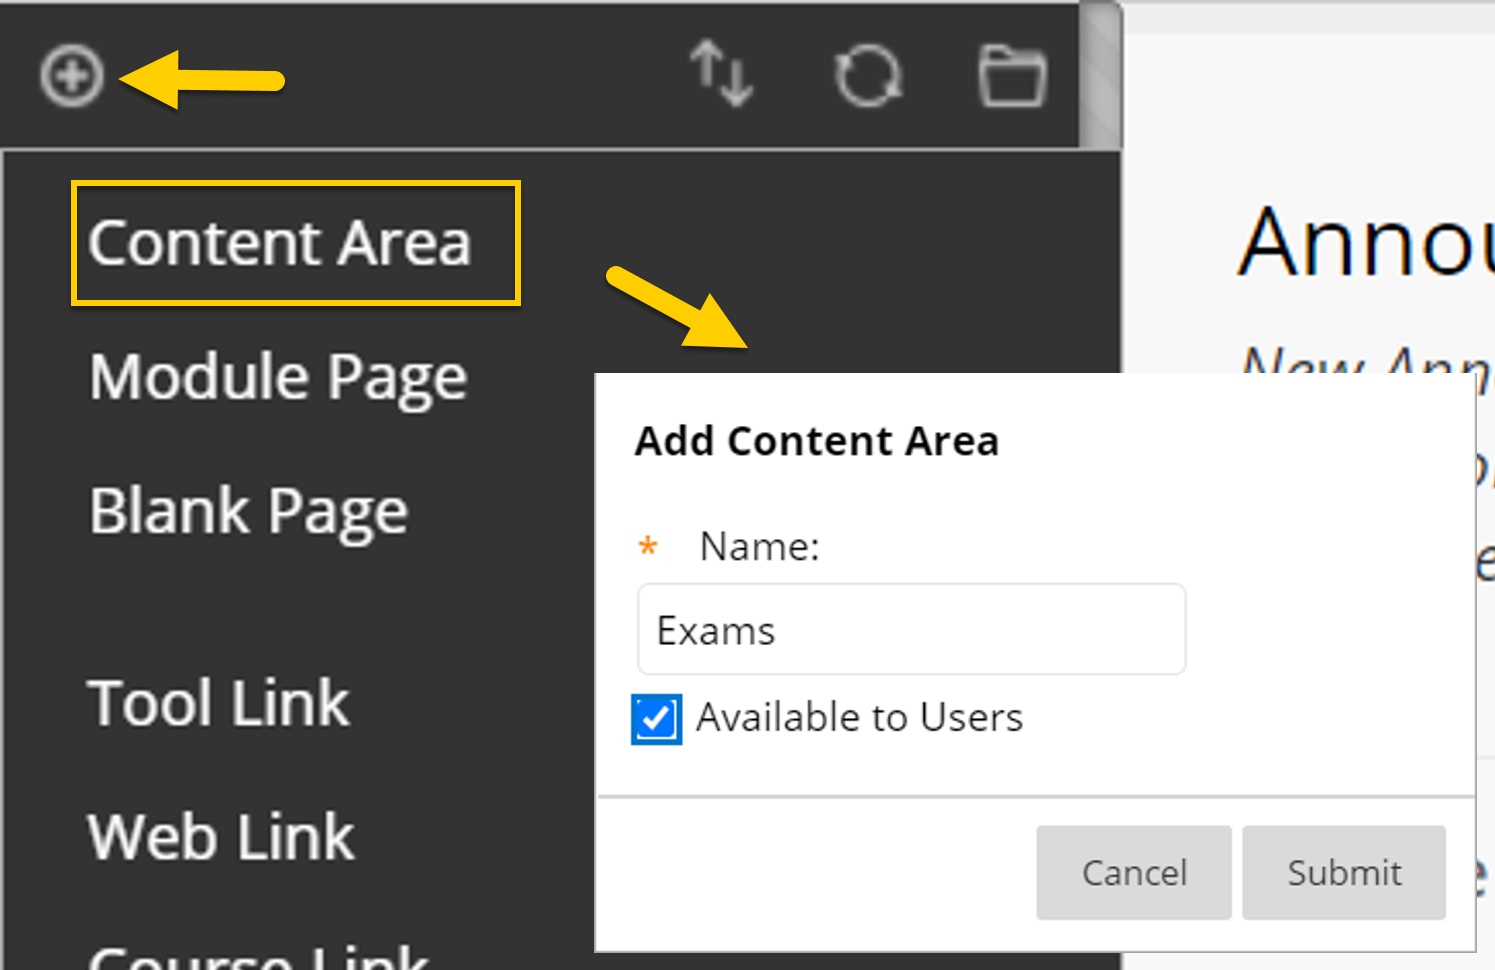
 icon.
icon.Optional Step: If you wish to create a specific Exam location, ensure that the Edit Mode is ON. Click the plus icon(+) on the top left part of the Course Menu. Select Content Area. Name it as you wish ( e.g., Exams). Choose the Available to Users checkbox when you want your students to see the menu option. Click Submit to complete. It will now be at the bottom of your course menu, visible to students. Drag it to the location you wish on your menu.
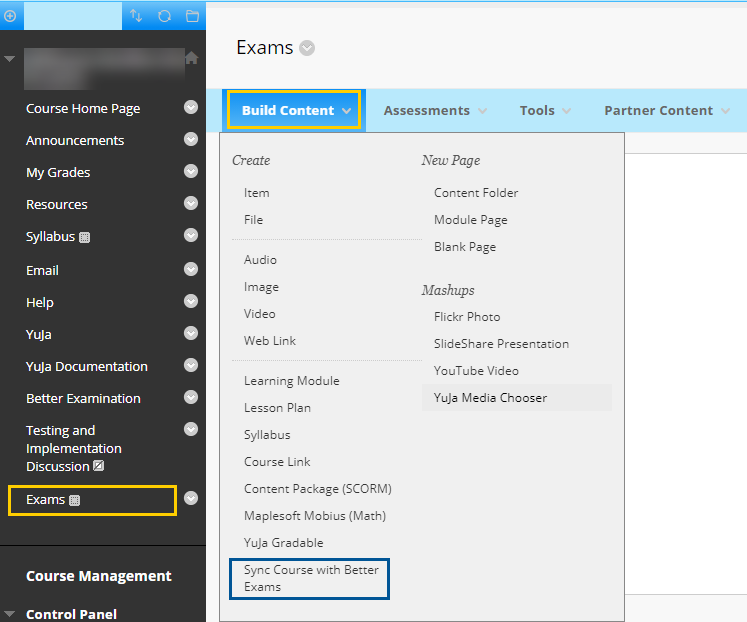
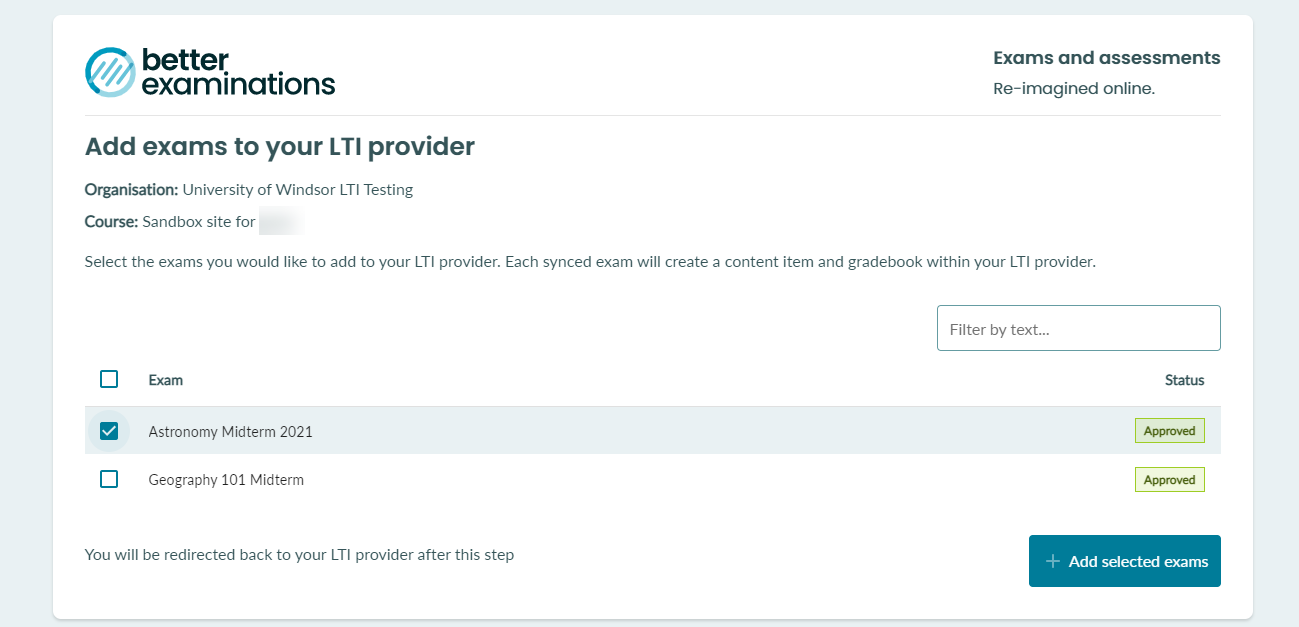
Step 2: Click Build Content > Sync Course with Better Exams. You will notice the transition to BetterExaminations through an LTI interface screen. The first time you do this, all users in your Blackboard site will be synchronized to BetterExaminations. You will need to synchronize first before posting the exam in case any registration has changed or TA/GA assistant has been added to the course. You will see a list of the Exams that you can link inside your Blackboard course.
Step 3: Choose the exam you wish to insert in your course by checking the checkbox on the left of the exam in the list, then click the Add selected exams button. You will be taken back to Blackboard.
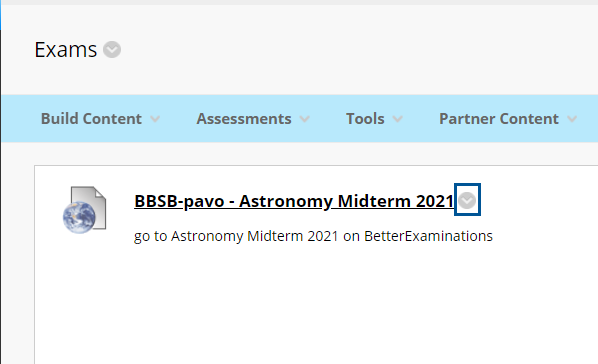
Step 4: You should now be able to see the web link of the exam in your Content Area. Click the grey Chevron beside the title of the exam, then click the Edit option.
Step 5: Adjust the Point Possible to match your BE exam, then decide to make the link visible to the students.
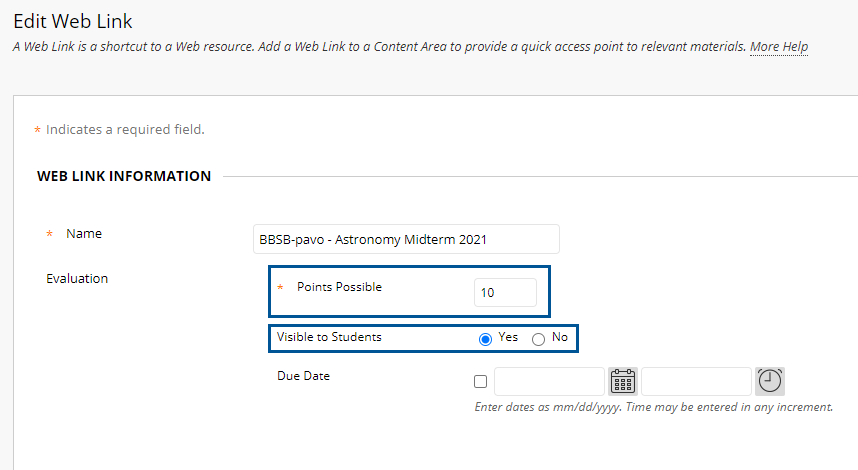
(Optional but recommended Step): You can add more information about the exam in the Description field when editing the web link. We recommend adding a Notice of Collection text in both the web link AND in your syllabus as follows:
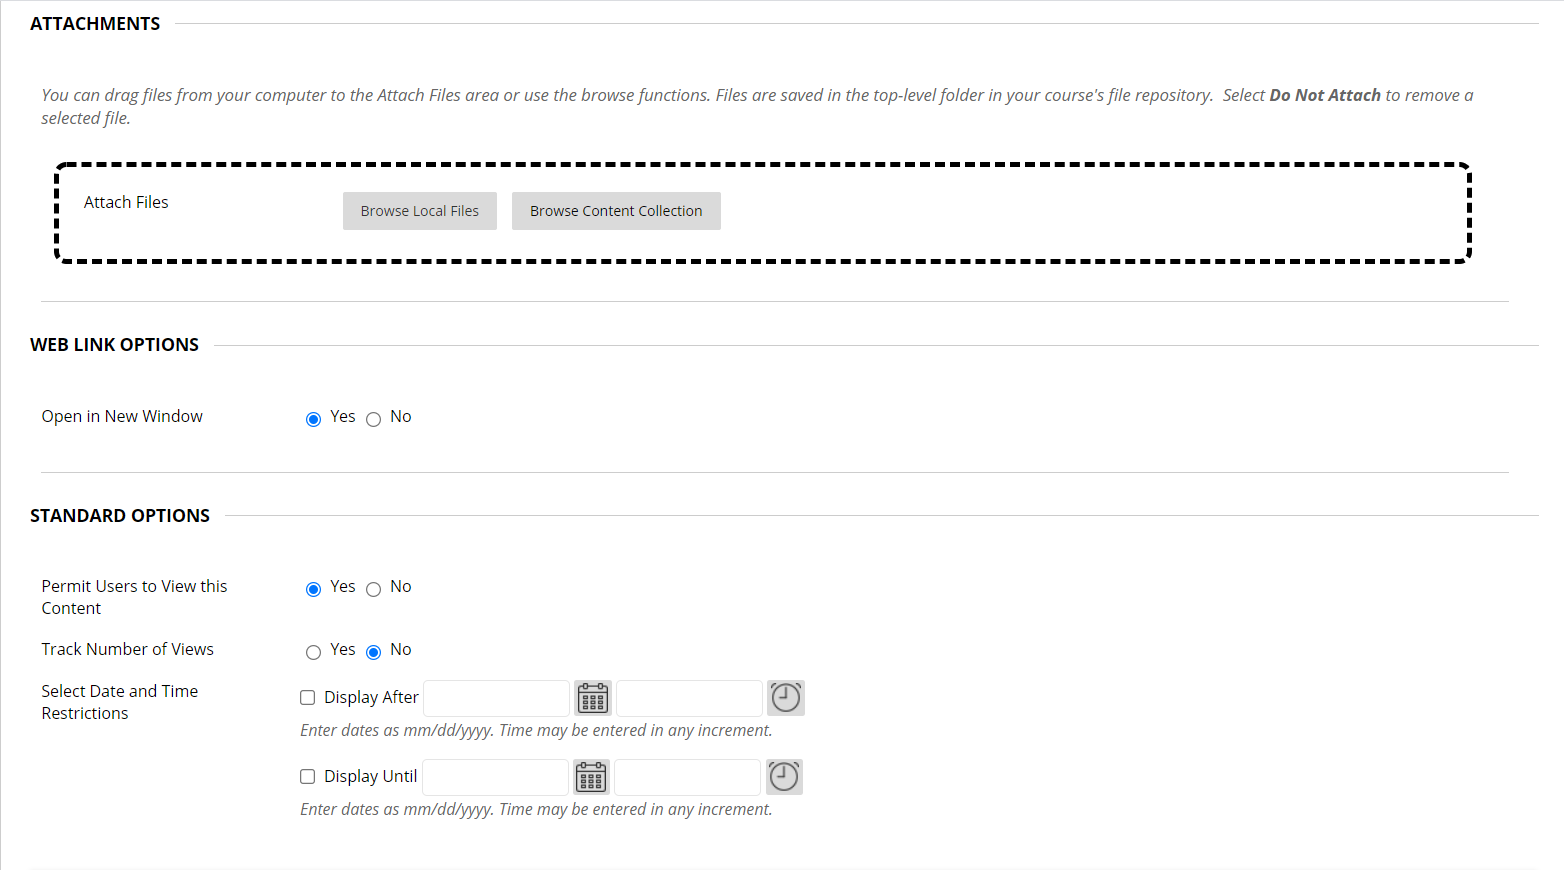
After you have edited the web link description (see image below), you can add other options such as adding an attachment or adjusting the visibility of the exam to students in the Standard Option section:
Description

Attachment, Web Link Options & Standard Options
Step 6: Once you are done editing all the options, click the Submit button to save the settings.
