Grading Exam Submission in BetterExaminations
Overview
Now that you have prepared and posted an exam, you now need to finalize the process. This section of the book will detail grading exams, releasing exams, and syncing marks to the Blackboard Grade Center.
“How To” Video
This video details the process of grading, providing feedback, and releasing grades from BetterExaminations to the Blackboard Grade Center (for those who prefer a video to read about it).
If you want to view the video on full screen, select the External Player ![]() option. (will open in a new window)
option. (will open in a new window)
Step-by-step Instructions
For those who prefer to read or print out instructions, the following will help you with these necessary steps.
Step 1: From the Dashboard, go to the Exam Awaiting Marking tile to view all submissions that need grading.
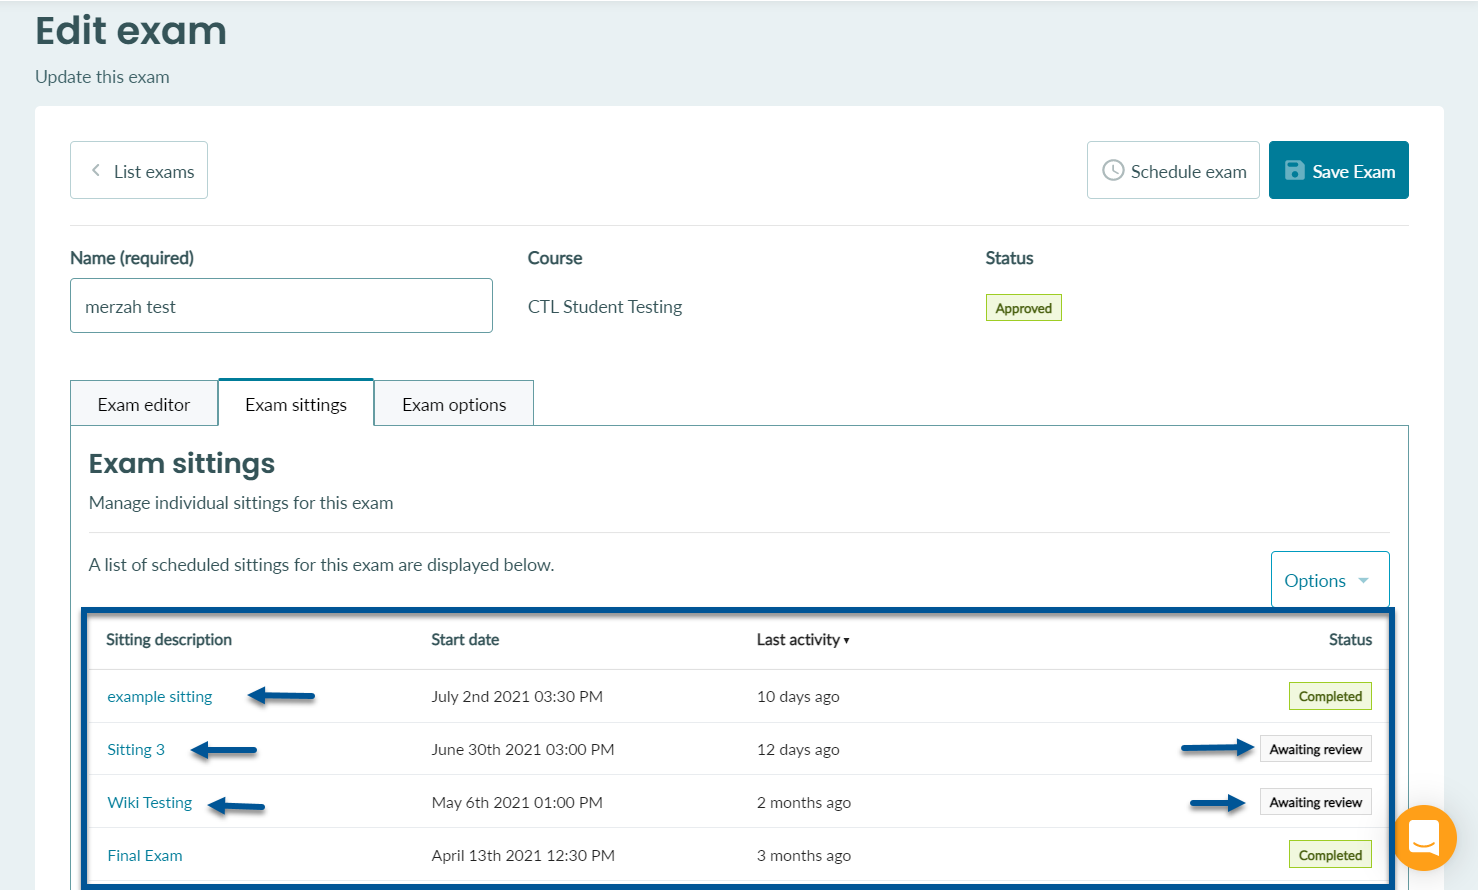
Step 2: Select the exam from the Exam Awaiting Marking tile list. This action will transfer you to the Edit exam section of that particular exam with the Exam sittings already tab selected.
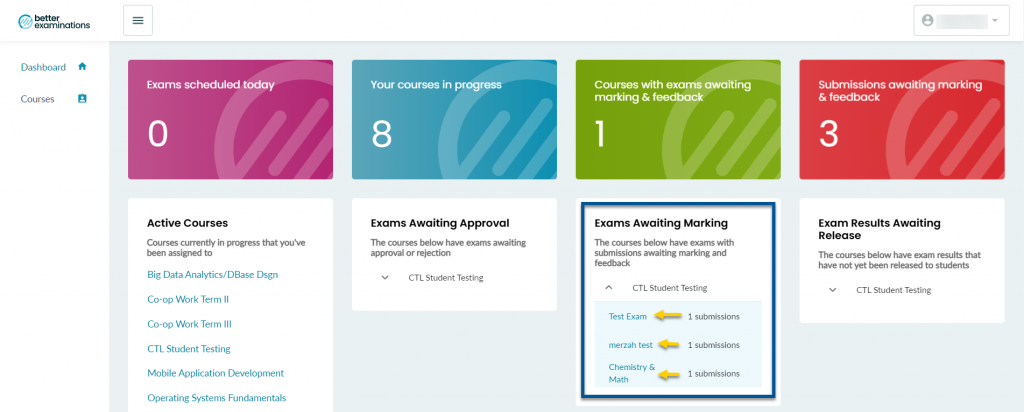
Step 3: Select the exam sitting that needs grading from the Exam sittings tab.
Note: You will know when an exam sitting still needs to be graded when its Status is Awaiting Review.
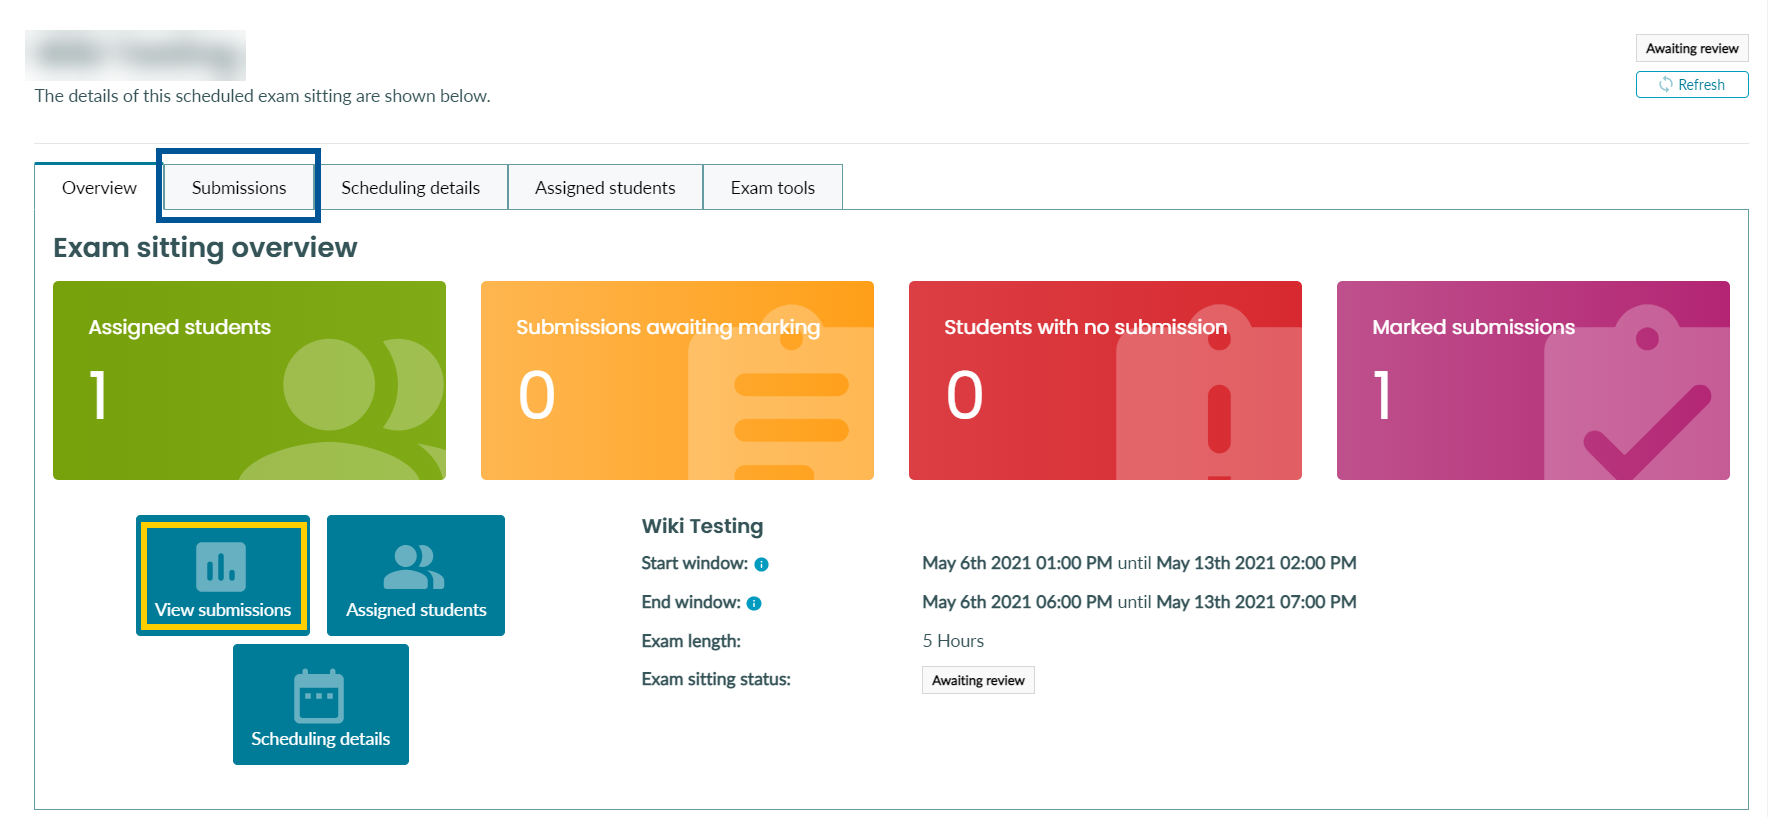
Step 4: The exam sitting detail panel will open up in your browser and shows additional information about the exam sitting. Click the Submissions tab near the top or click the View submission button to view all the submissions for this exam. The exam sitting detail panel contains essential information about the selected exam sitting, such as Submissions, Scheduling details, Assigned students, and Exam tools.
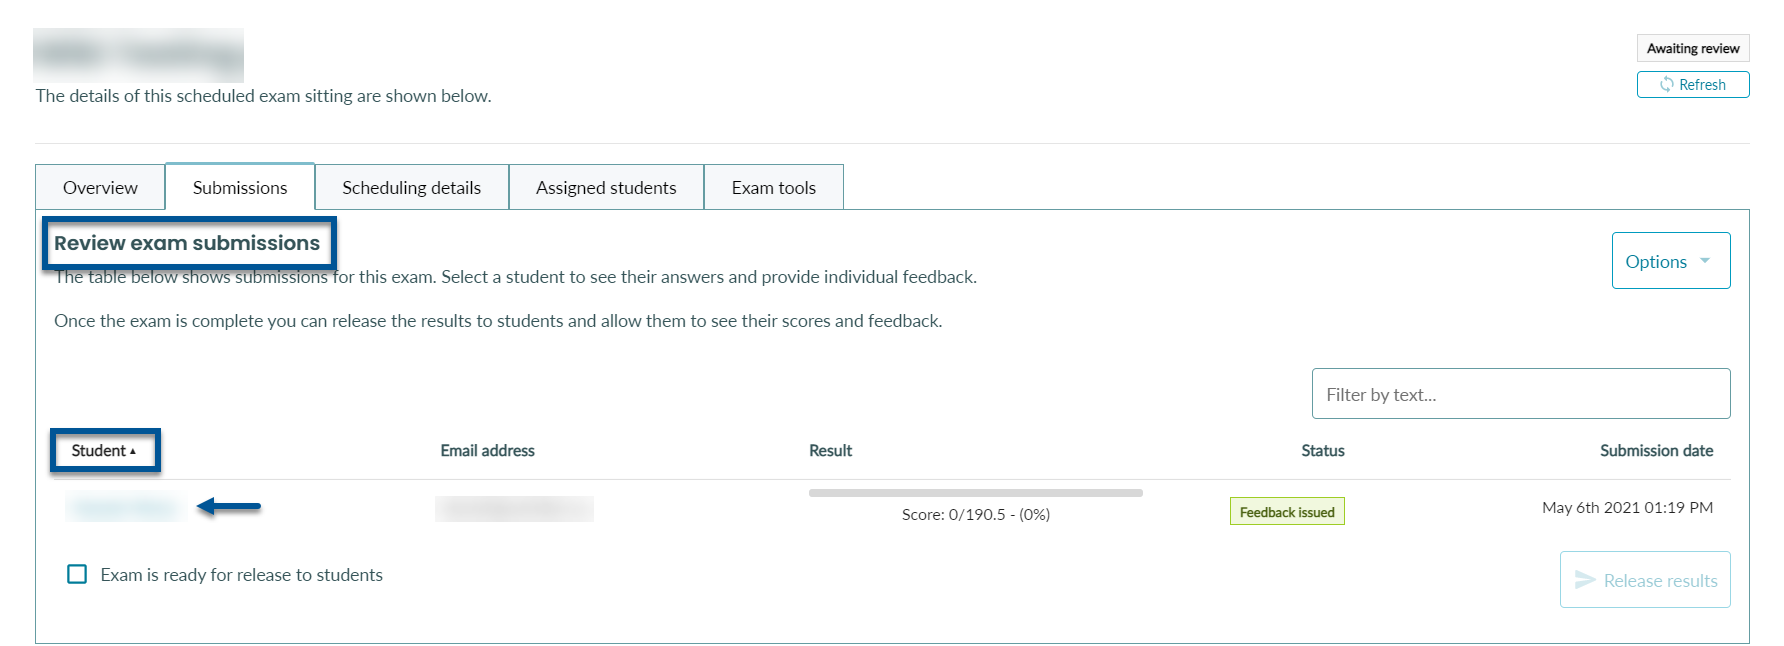
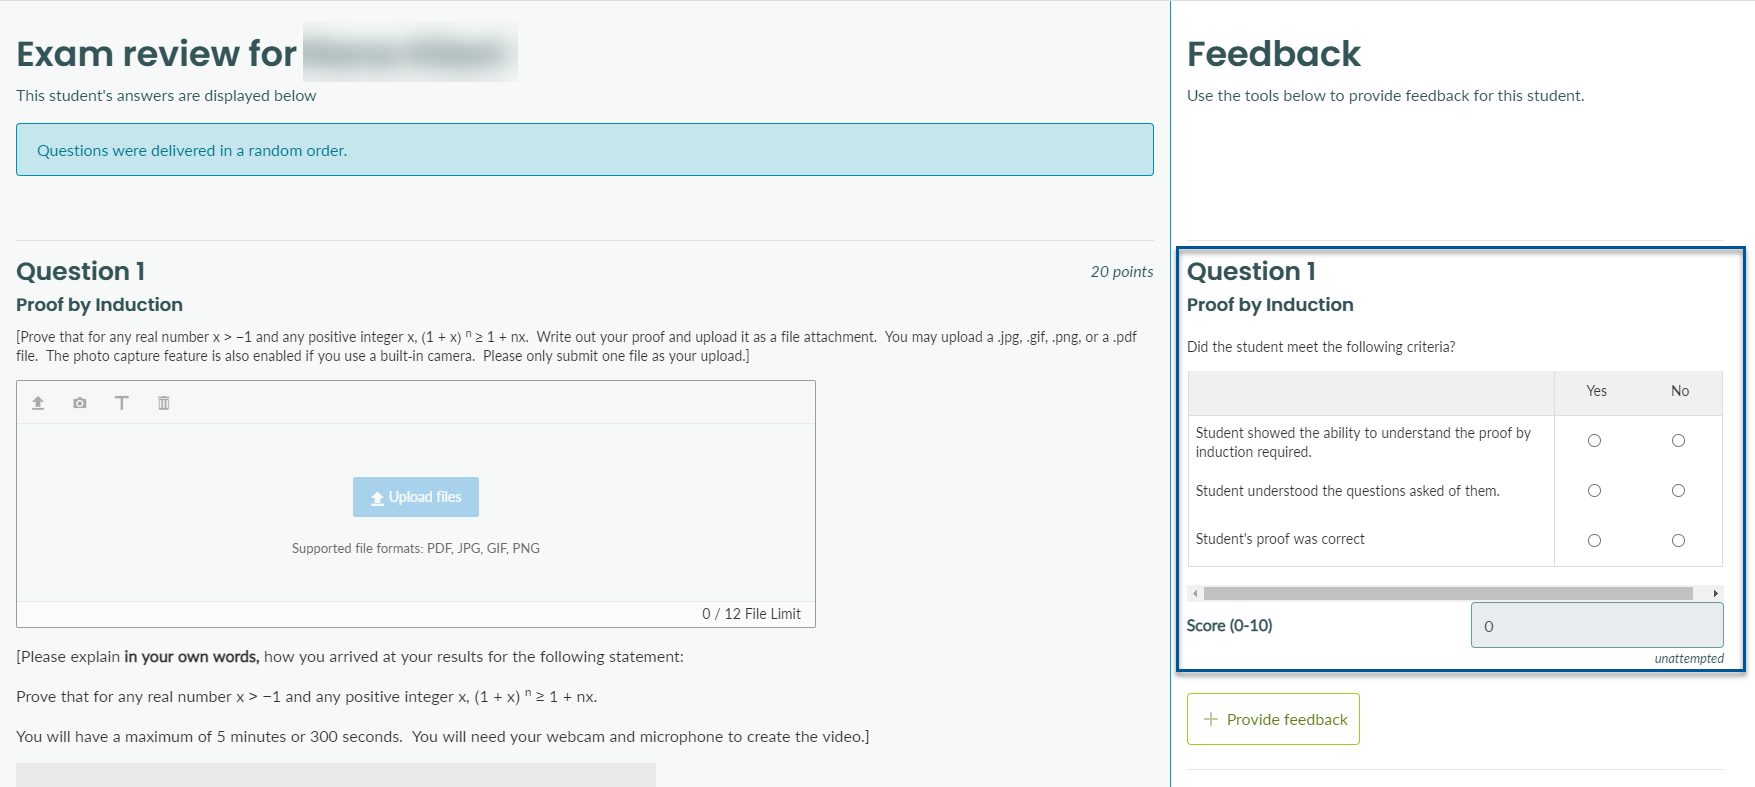
Step 5: To start grading the submissions, first select a submission from the Review exam submission list by clicking on a student’s name. Another new panel titled Exam review for Student’s Name will appear within the browser.
Note: You will know when a submission has not been graded when the Status of submission is Awaiting Feedback.
Step 6: The two major sections of the Exam review panel are the Question & Answer section and the Feedback section. Review the student’s response to the questions and provide feedback on where it is appropriate. You also will have to grade questions that don’t have auto-grading features manually if they exist within the exam (e.g., Essay, Audio file, or Video). A question would require manual grading when the Score text field within the feedback section is not grayed out.
- Question & Answer: Located on the left-hand side of the panel. Contains the exam question and the student’s response to the question.
- Feedback: Located on the right-hand side of the panel. You can manually grade questions that don’t have an auto-grading feature and provide feedback for each question within the submission.
Step 7: Once you are have provided feedback and finished manually grading the exam questions, scroll down to the bottom of the panel and enter the comment into the Overall feedback text field. Click the Save feedback button to finish grading the exam.

Step 8: Select the Close button on the upper left corner of the panel. You will be brought back to the exam sitting panel (Refer to step 4).
Note: You will notice that the status of submission that you have just graded changed from Awaiting feedback to Feedback issued.
Step 9: Perform step 5 to step 7 to all the submissions within the submission Review exam submissions list.

