26 Exporting Print Quality Images (pixel quality, size, and scale)
michealg1
Basics
When exporting print-quality images, there are only a few metrics that you must look out for. The first, and most basic, is the size of the image. The size of the image determines how many pixels can exist within the image. Larger images (3000 x 3000) have many more pixels than smaller images (500 x 500). The second metric to look out for is an export’s resolution or PPI (pixels per inch). Changing the PPI is usually a setting in the export menu of certain applications while the size of the image (also known as a canvas size) is something you have to determine prior to creating a document or in the export menu of rendering software. The basic rule of thumb is that the larger the image, the higher the quality.
Colour Profiles
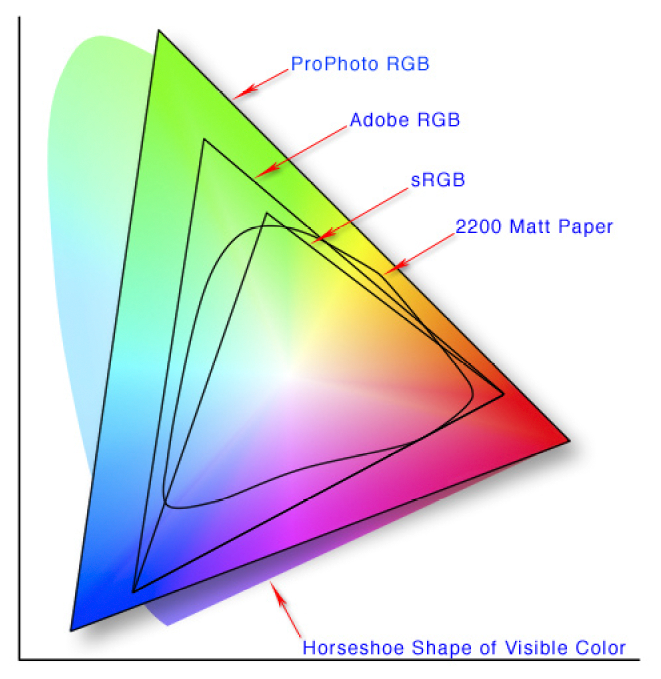
When it comes to Photoshop and other Adobe products, we want to make sure that our colour profile is appropriate to be viewed and used by any device. The issue is that many different colour profiles exist but only sRGB can be viewed across all devices. Below is an example of the colour range of different colour profiles:
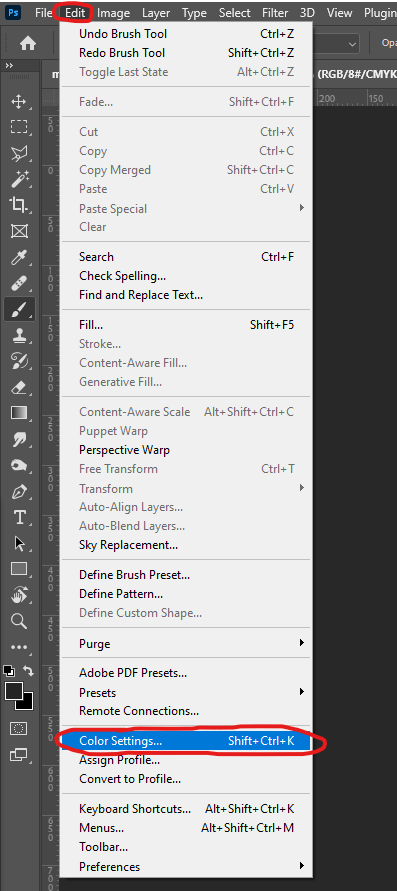
 To make sure that our colours are both appropriately displayed and exported in Photoshop, we must first set the colour profile of our workspace. To do this select the “Edit” dropdown menu from the top tray and choose the “Colour Settings” option:
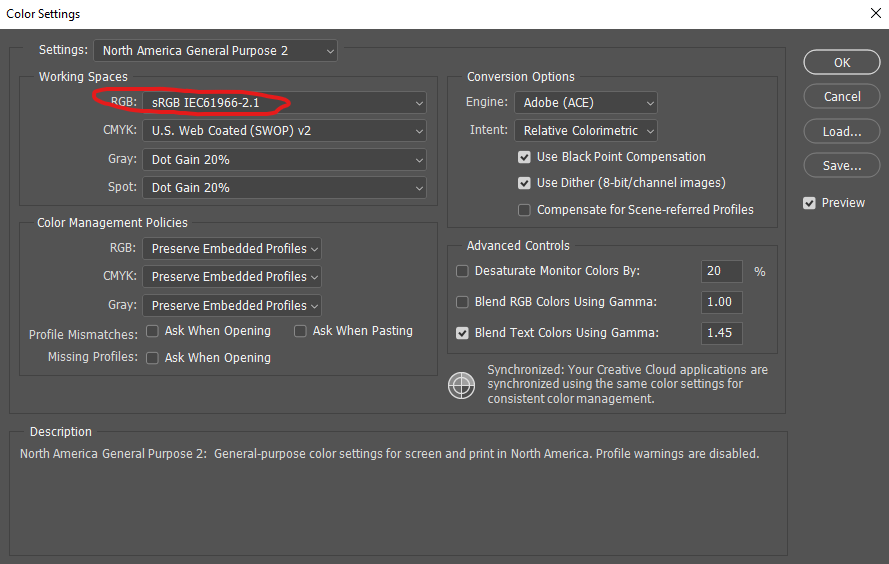
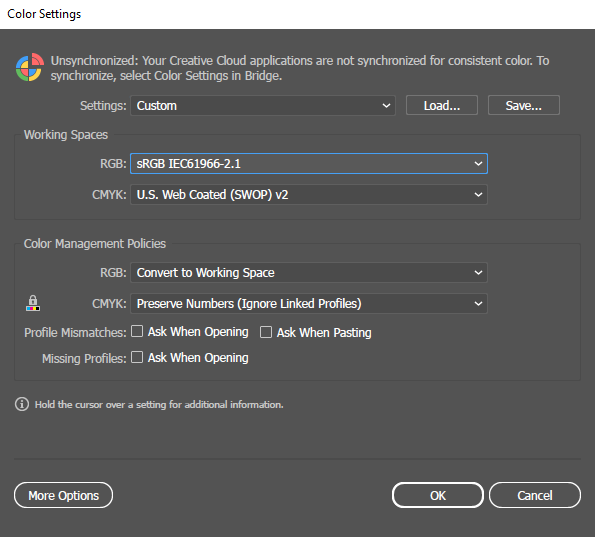
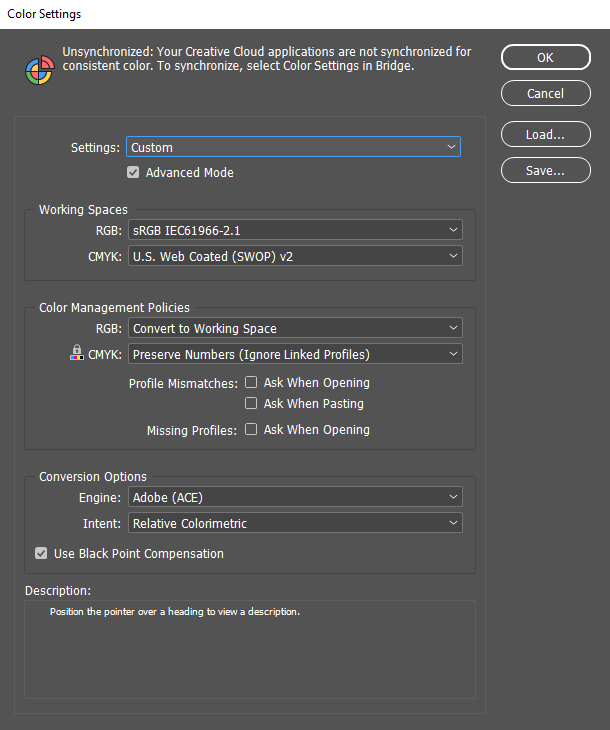
 Make sure that your settings are identical to mine. The most important setting is to switch the “Working Spaces” “RGB” to “sRGB IEC61966-2.1”:
 Similarly, the colour settings can be set in Illustrator in the same way. Make sure that you are using these settings:
 Again, these are the appropriate settings for Indesign:
Photoshop Exporting
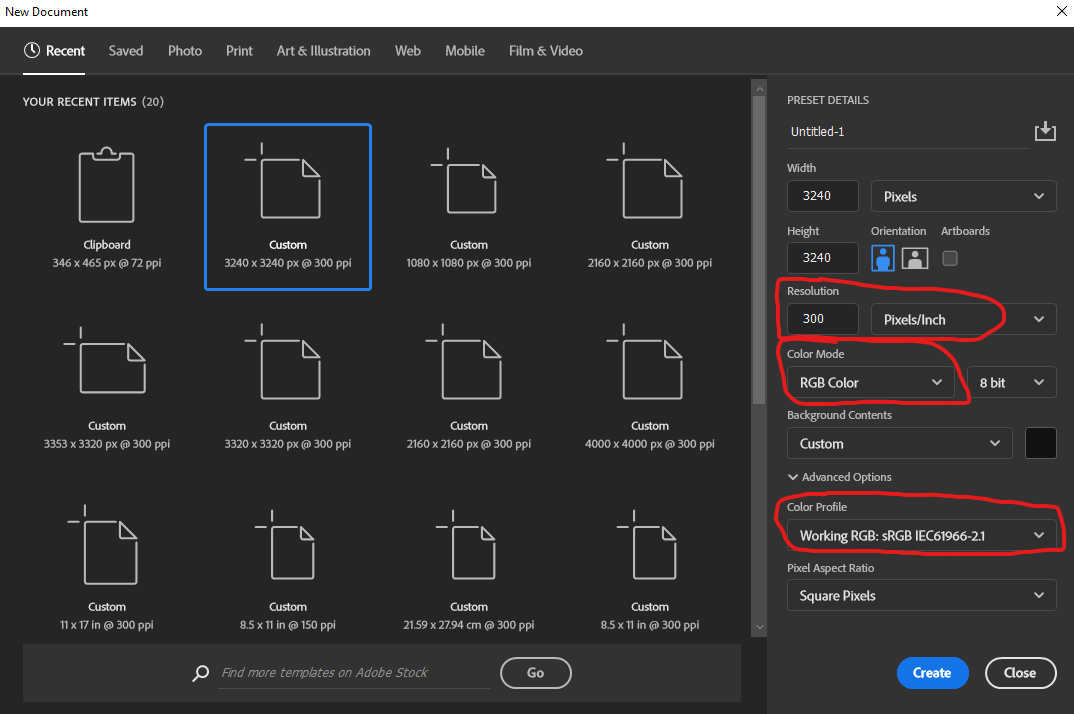
To change image settings in the creation of a new file, the following menu will prompt you to set the appropriate settings. Make sure that you have at least a “Resolution” of 300 Pixels/Inch, your “Color Mode” is set to “RGB Color”, and that your “Color Profile” is “sRGB IEC61966-2.1”:
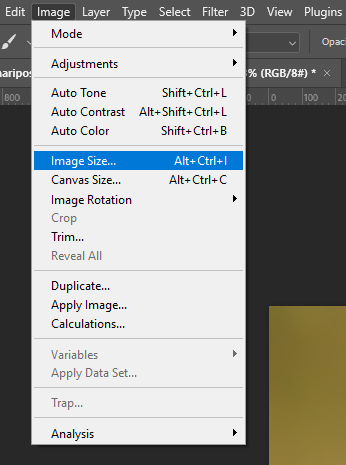
To change image dimensions within the Photoshop document, select the “Image” dropdown menu and select “Image Size”:
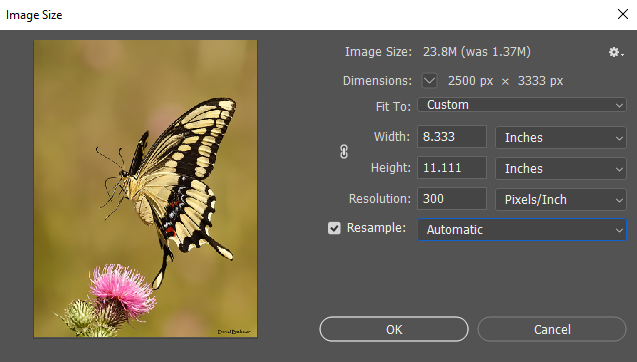
The following menu shows your current canvas settings. It is important to at least have 300 pixels per inch. If you do not have 300 pixels per inch, change the setting as seen in the following:
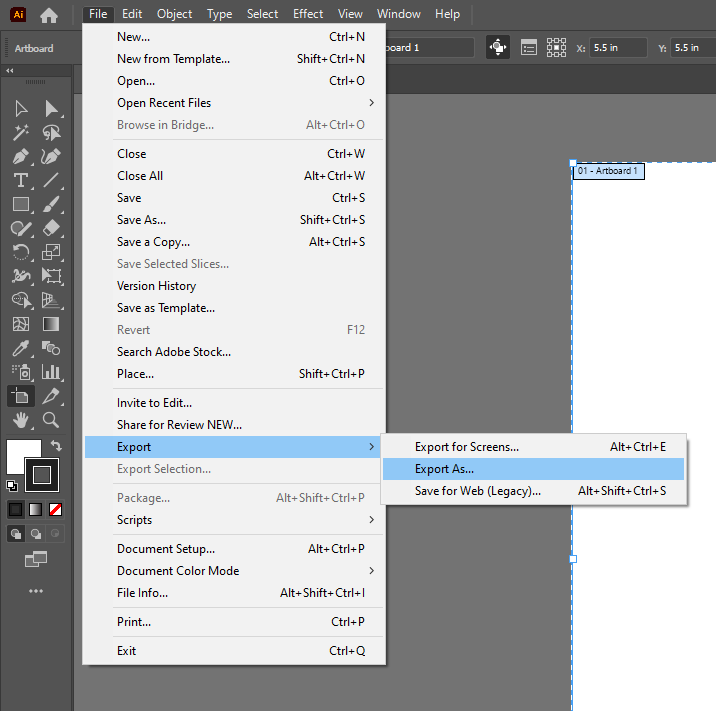
To export in Photoshop, choose the “File” dropdown menu, select “Export”, and choose the “Export As” option:
 These are the settings that I use when exporting:
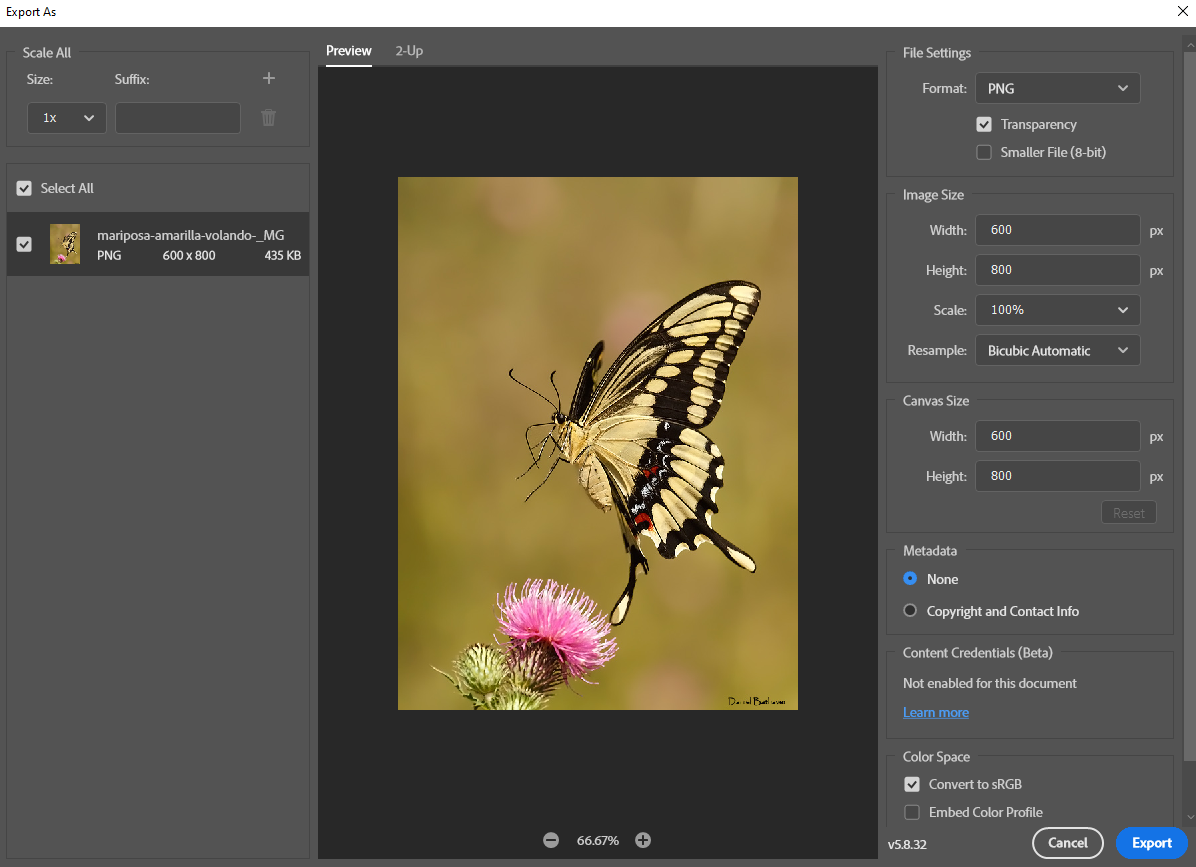 I export to PNG because it allows for transparency which is useful for creating cutouts for cross-sections or whatever else I need elements for. There is debate on whether to export in JPG or PNG which for the most part depends on the purposes or preferences of the user but I have found that PNG file formats work best for me. If you wish to make your image larger without losing quality (Photoshop automatically resamples), change the “Scale” option to something higher for a larger resolution.
Illustrator Exporting
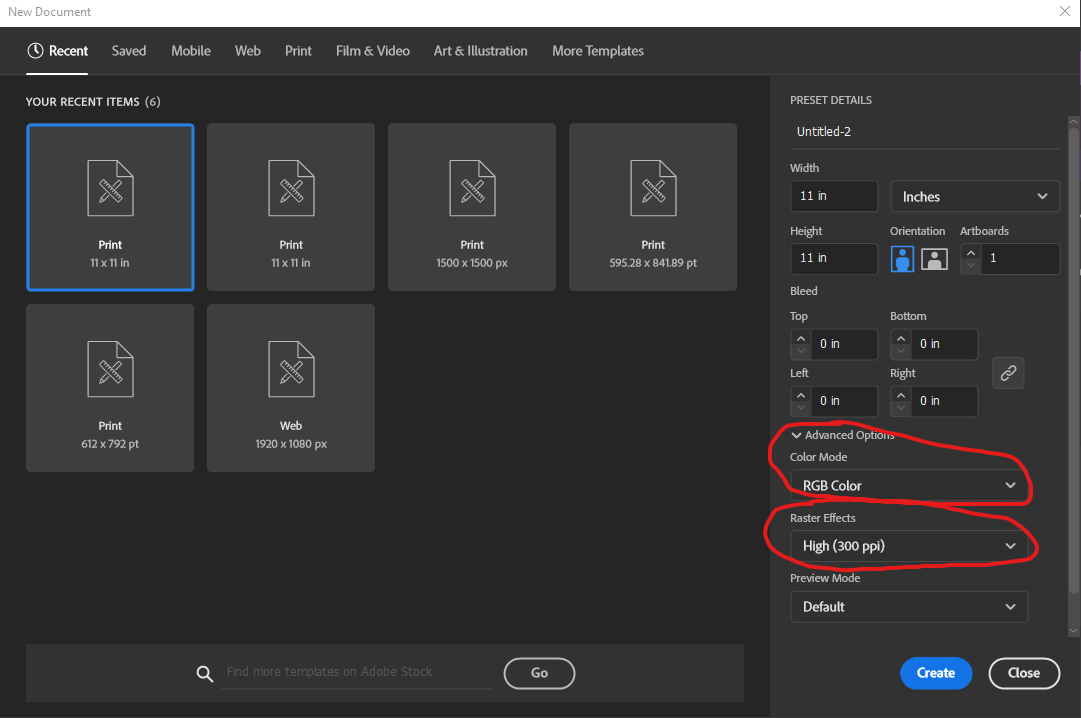
Similar to Photoshop, it is important to set the appropriate settings when creating a new document. Again, make sure that your “Color Mode” is “RGB Color” and that your “Raster Effects” are set to “High (300 ppi)”:
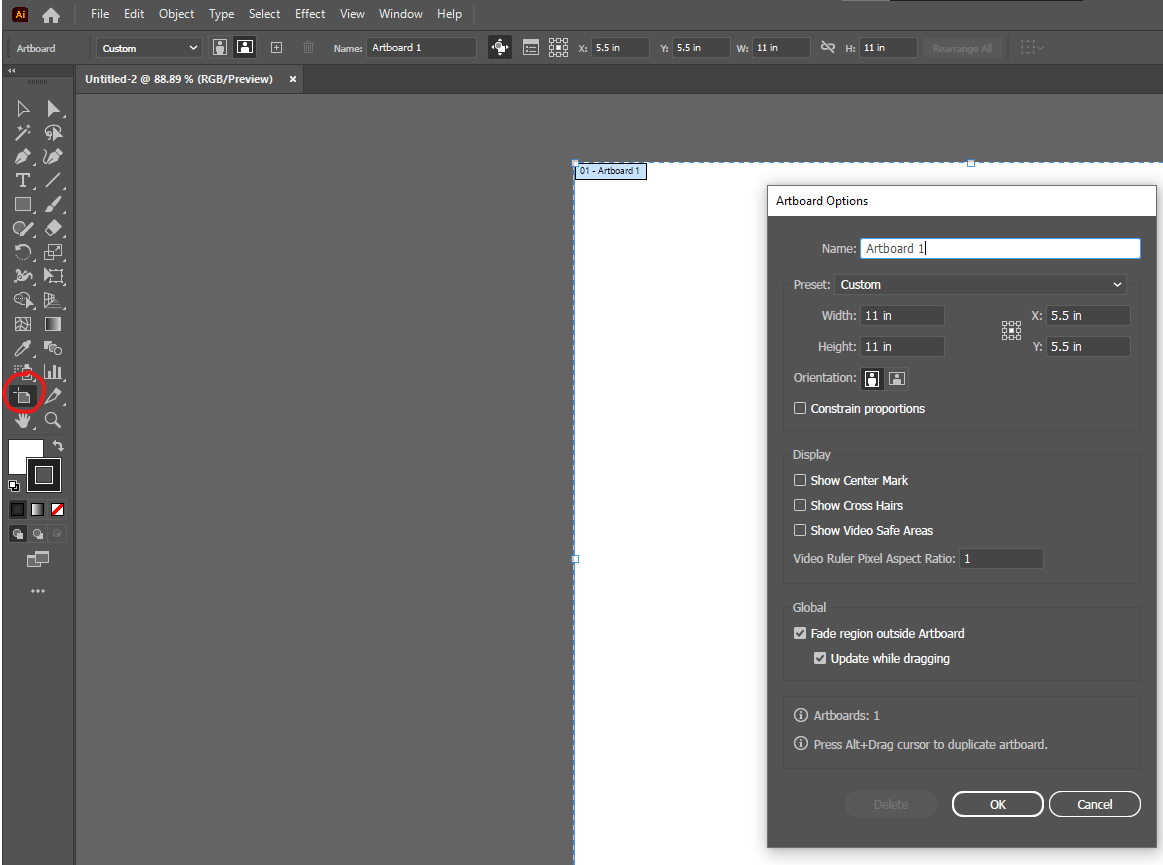
 Unlike Photoshop, you need to double-click on the “Artboard” tool located in the left tray to edit the size of your artboard. Otherwise you can just drag the anchor points of the artboard with the tool to resize:
To export in Illustrator, choose the “File” dropdown menu, select “Export” and “Export As”:
Save to your desired destination as you normally do but make sure to have the “Use Artboard” setting checked off:
 The Following menu will appear to give you further settings to change:
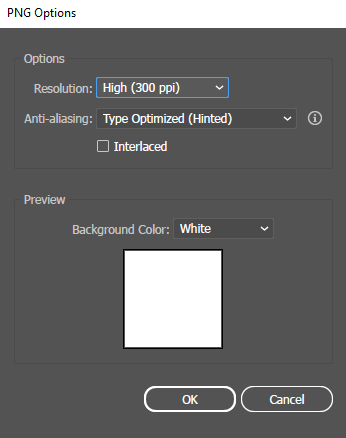 A different menu will appear depending on the type of file that you are saving. The PNG menu allows us to change the “Background Colour” to transparent. Within this menu, make sure that your resolution is set to “High (300 ppi)”.
Indesign Exporting
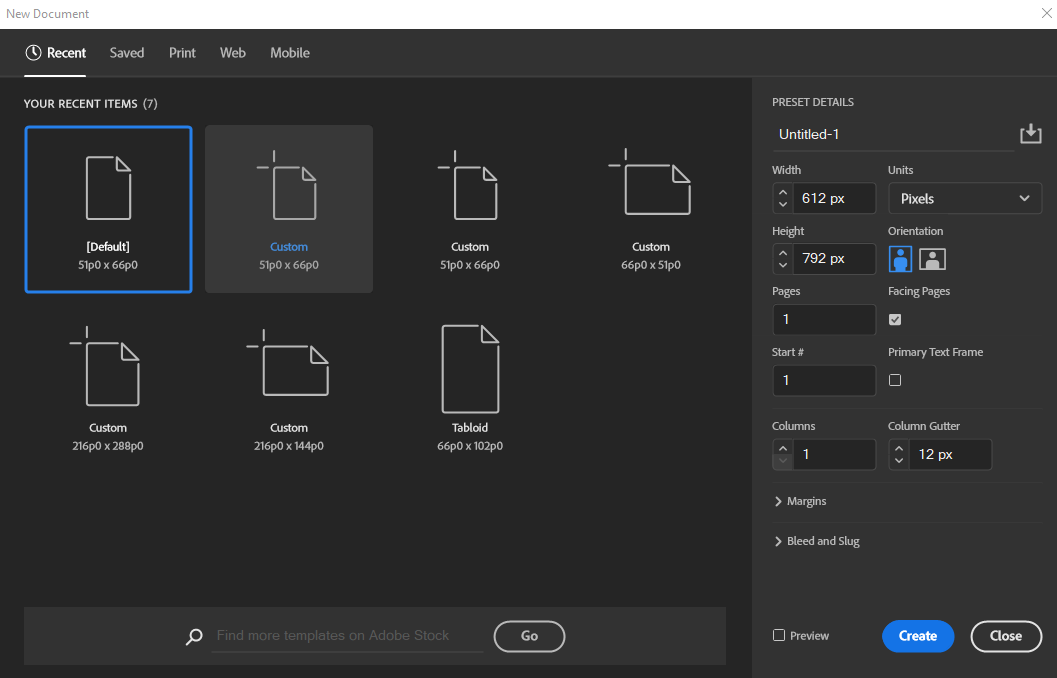
Besides the size, there is little that can be changed in the Indesign “New Document” creation menu that affects print quality:
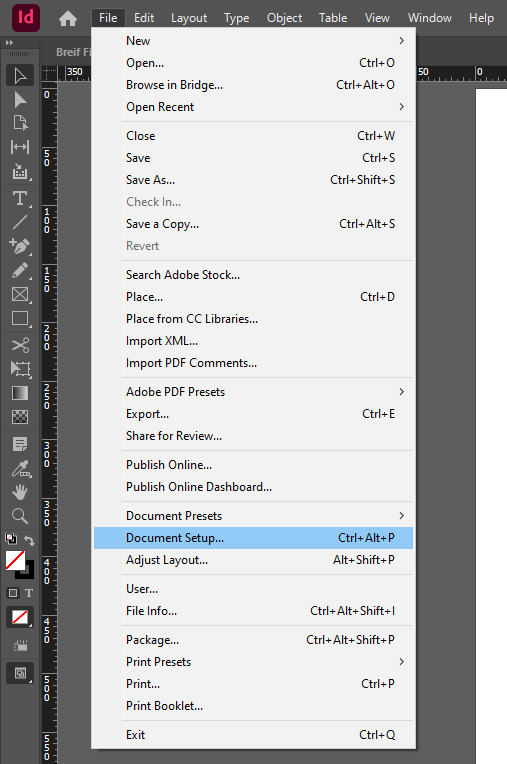
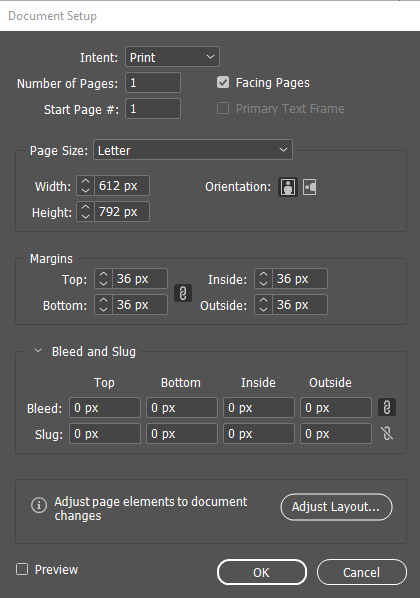
 You can change all of the same settings in the plus more in the “Document Setup” menu under the “File” dropdown:
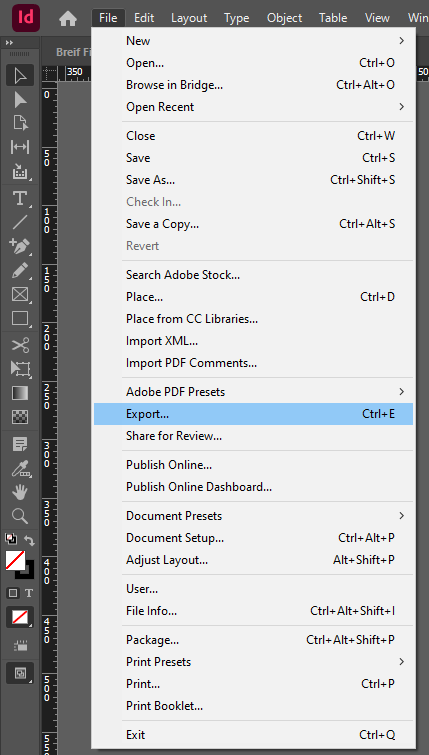
To export, select the “File” dropdown menu and select “Export”:
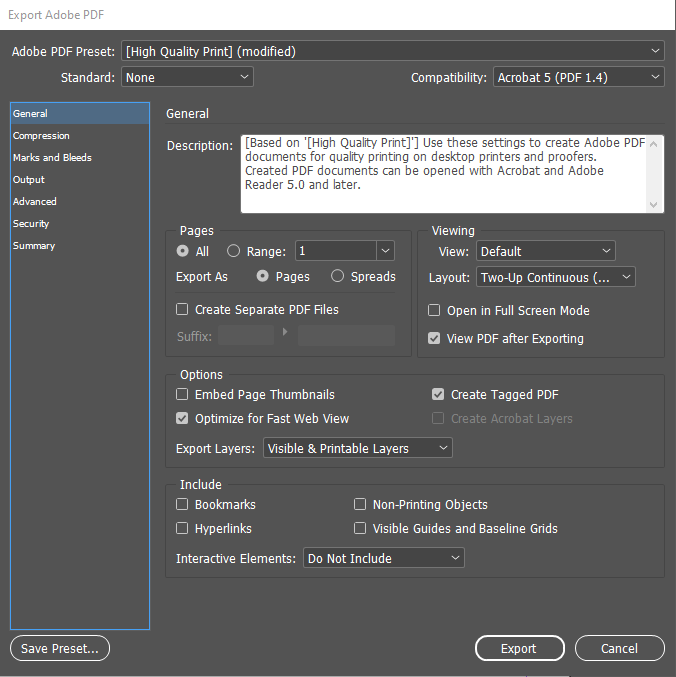
 Choose your desired destination and format for your file. After clicking “Save”, the following menu will appear:
There are a lot of settings here that can be fiddled around with but for the purposes of quality, we will be working within the “Compression” menu:
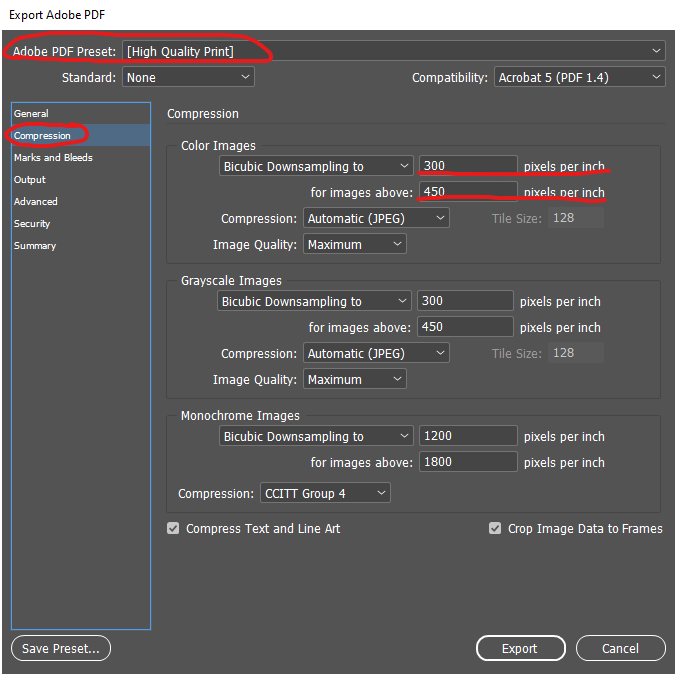 For the sake of simplicity, Indesign actually offers presets. I selected the “High Quality Print” from the “Adobe PDF Preset” options. These settings are perfectly fine but you might find that your file is very large when exporting (especially portfolios). To downsize, we can compress the ppi of our coloured images to `150 for images above a certain pixel count. This setting is completely in your control and use it as the need arises.
Author: Micheal Glazyrin
