14 Drawing Type: Rendered Site Plan
Learning Objectives
This tutorial will teach out how to create a general site plan using Adobe Photoshop, or by hand.
Skills you will learn:
- How to use the magic wand tool, pattern fill tool, drop shadowing, and more
- Tips for best practices when creating and exporting documents
- How to sketch a site plan
- How to choose a colour palette
Site plans provide a comprehensive depiction of a location and its urban design features, offering a bird’s eye view in two dimensions. These visual representations showcase the spatial organization, intended land use, and landscape design elements within a specific area. Typically used for diagrammatic purposes, site plans can also be applied to marketing or artistic applications. Whether rendered through 3D modelling software, graphic design tools like Illustrator or Photoshop, or by hand, site plans offer a diverse range of creative possibilities. While computer-based methods streamline the process and create very clean final products, opting to draw your illustrative site plan by hand adds a unique, stylized charm to your representation.
Making a Digital Site Plan
Tutorial by Urooj Khan
Part 1: Setting up the document
Setup:
Create a free CADMAPPER account: https://cadmapper.com/
Have access to Photoshop and Illustrator
Download FREE data under 1km2 on CADMAPPER. Set up your download/export like the image below.
Leave topography off for now.
Make sure to also take a screenshot of this screen for later reference when we need to make the scale.

For the purpose of this tutorial, we’ll be creating a base image/ site plan for a greenspace outside of Waterloo’s Environment 3 building. This tutorial will be developing the greenspace into a multi-use outdoor rec space, but feel free to use the tutorial and turn it into a space of your choice.
Note that Photoshop is not one of the options to in the “select your design program” option. Therefor we will briefly begin our work in Illustrator, then move into Photoshop
Once you’ve created the file and downloaded it, open it up in Illustrator. We will edit the Illustrator file briefly to make it easy to edit later in Photoshop
Once opened in Illustrator, it should look like the image below.
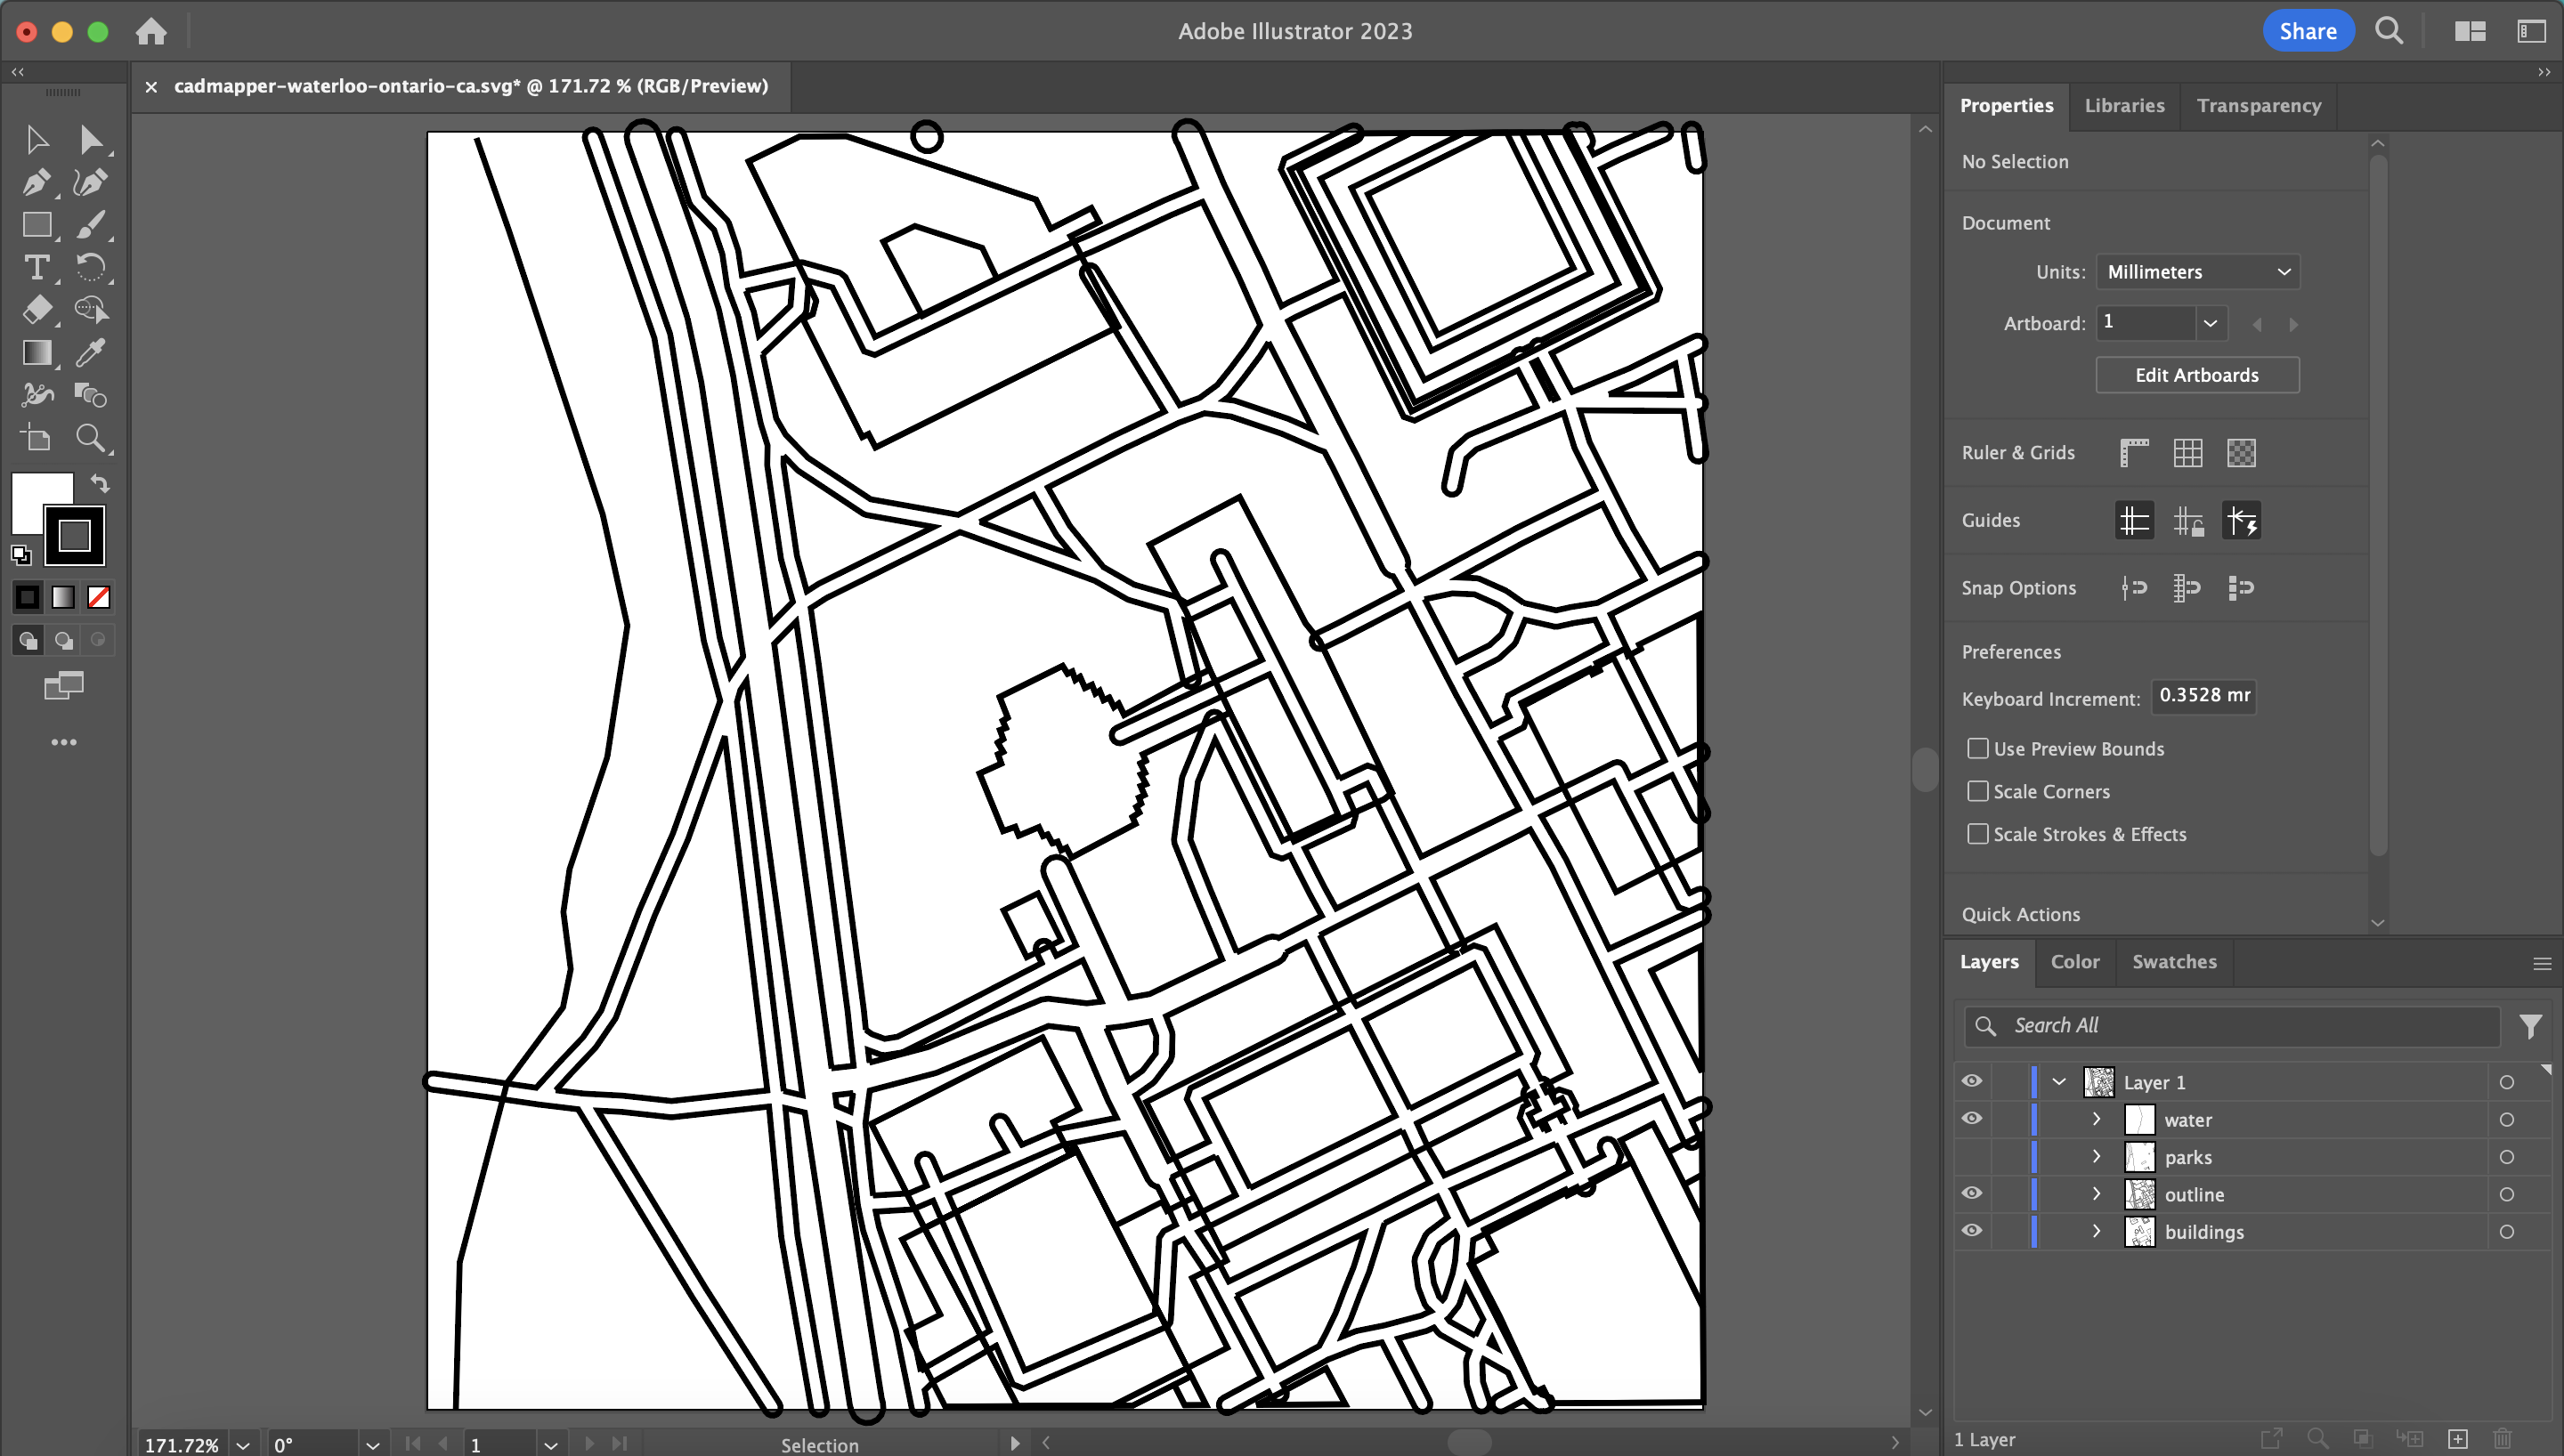
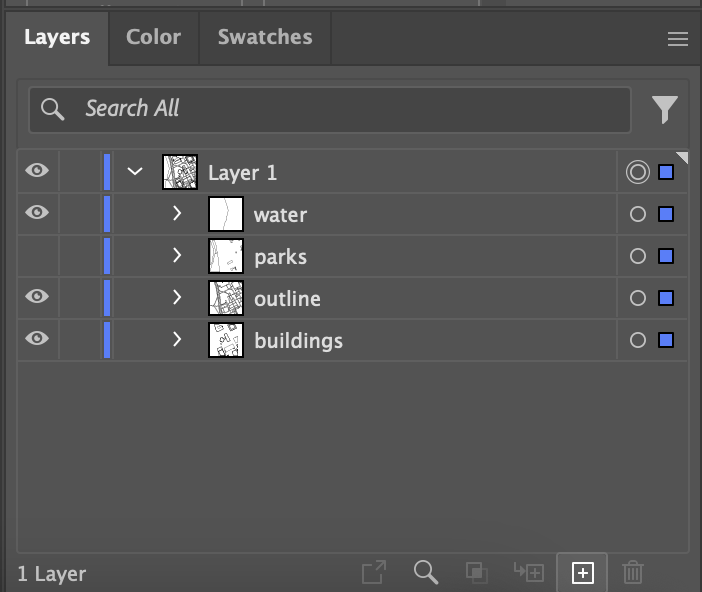
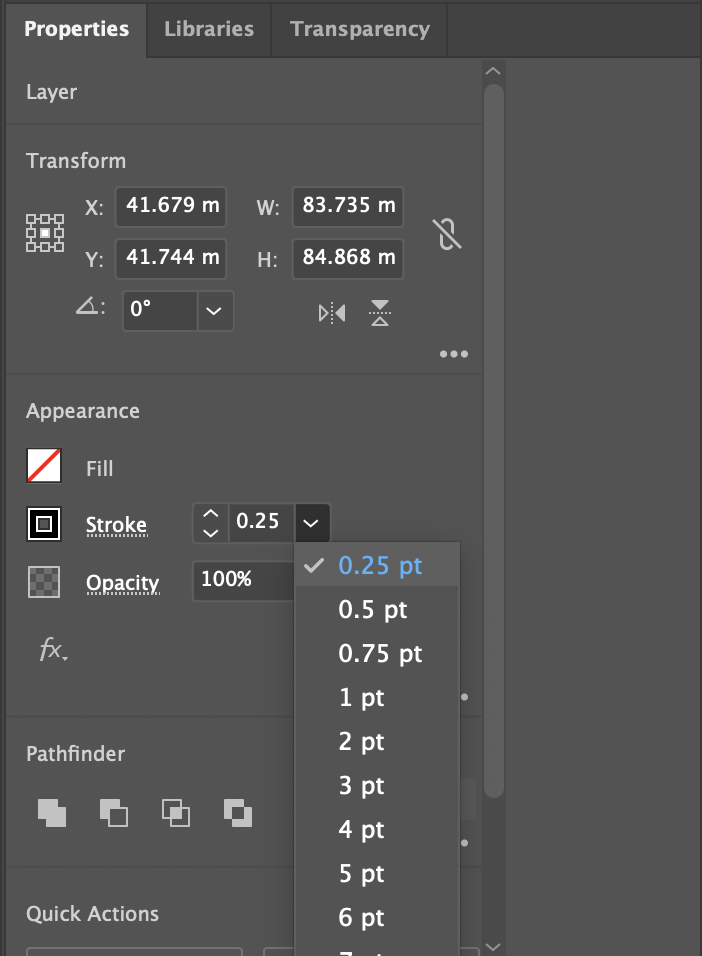
Upon personal preference, select all the layers by pressing the circle next to Layer 1, and change the width of the lines if you’d like in the properties tab on the right. Thinner lines can be associated with a cleaner look
 . .
. .
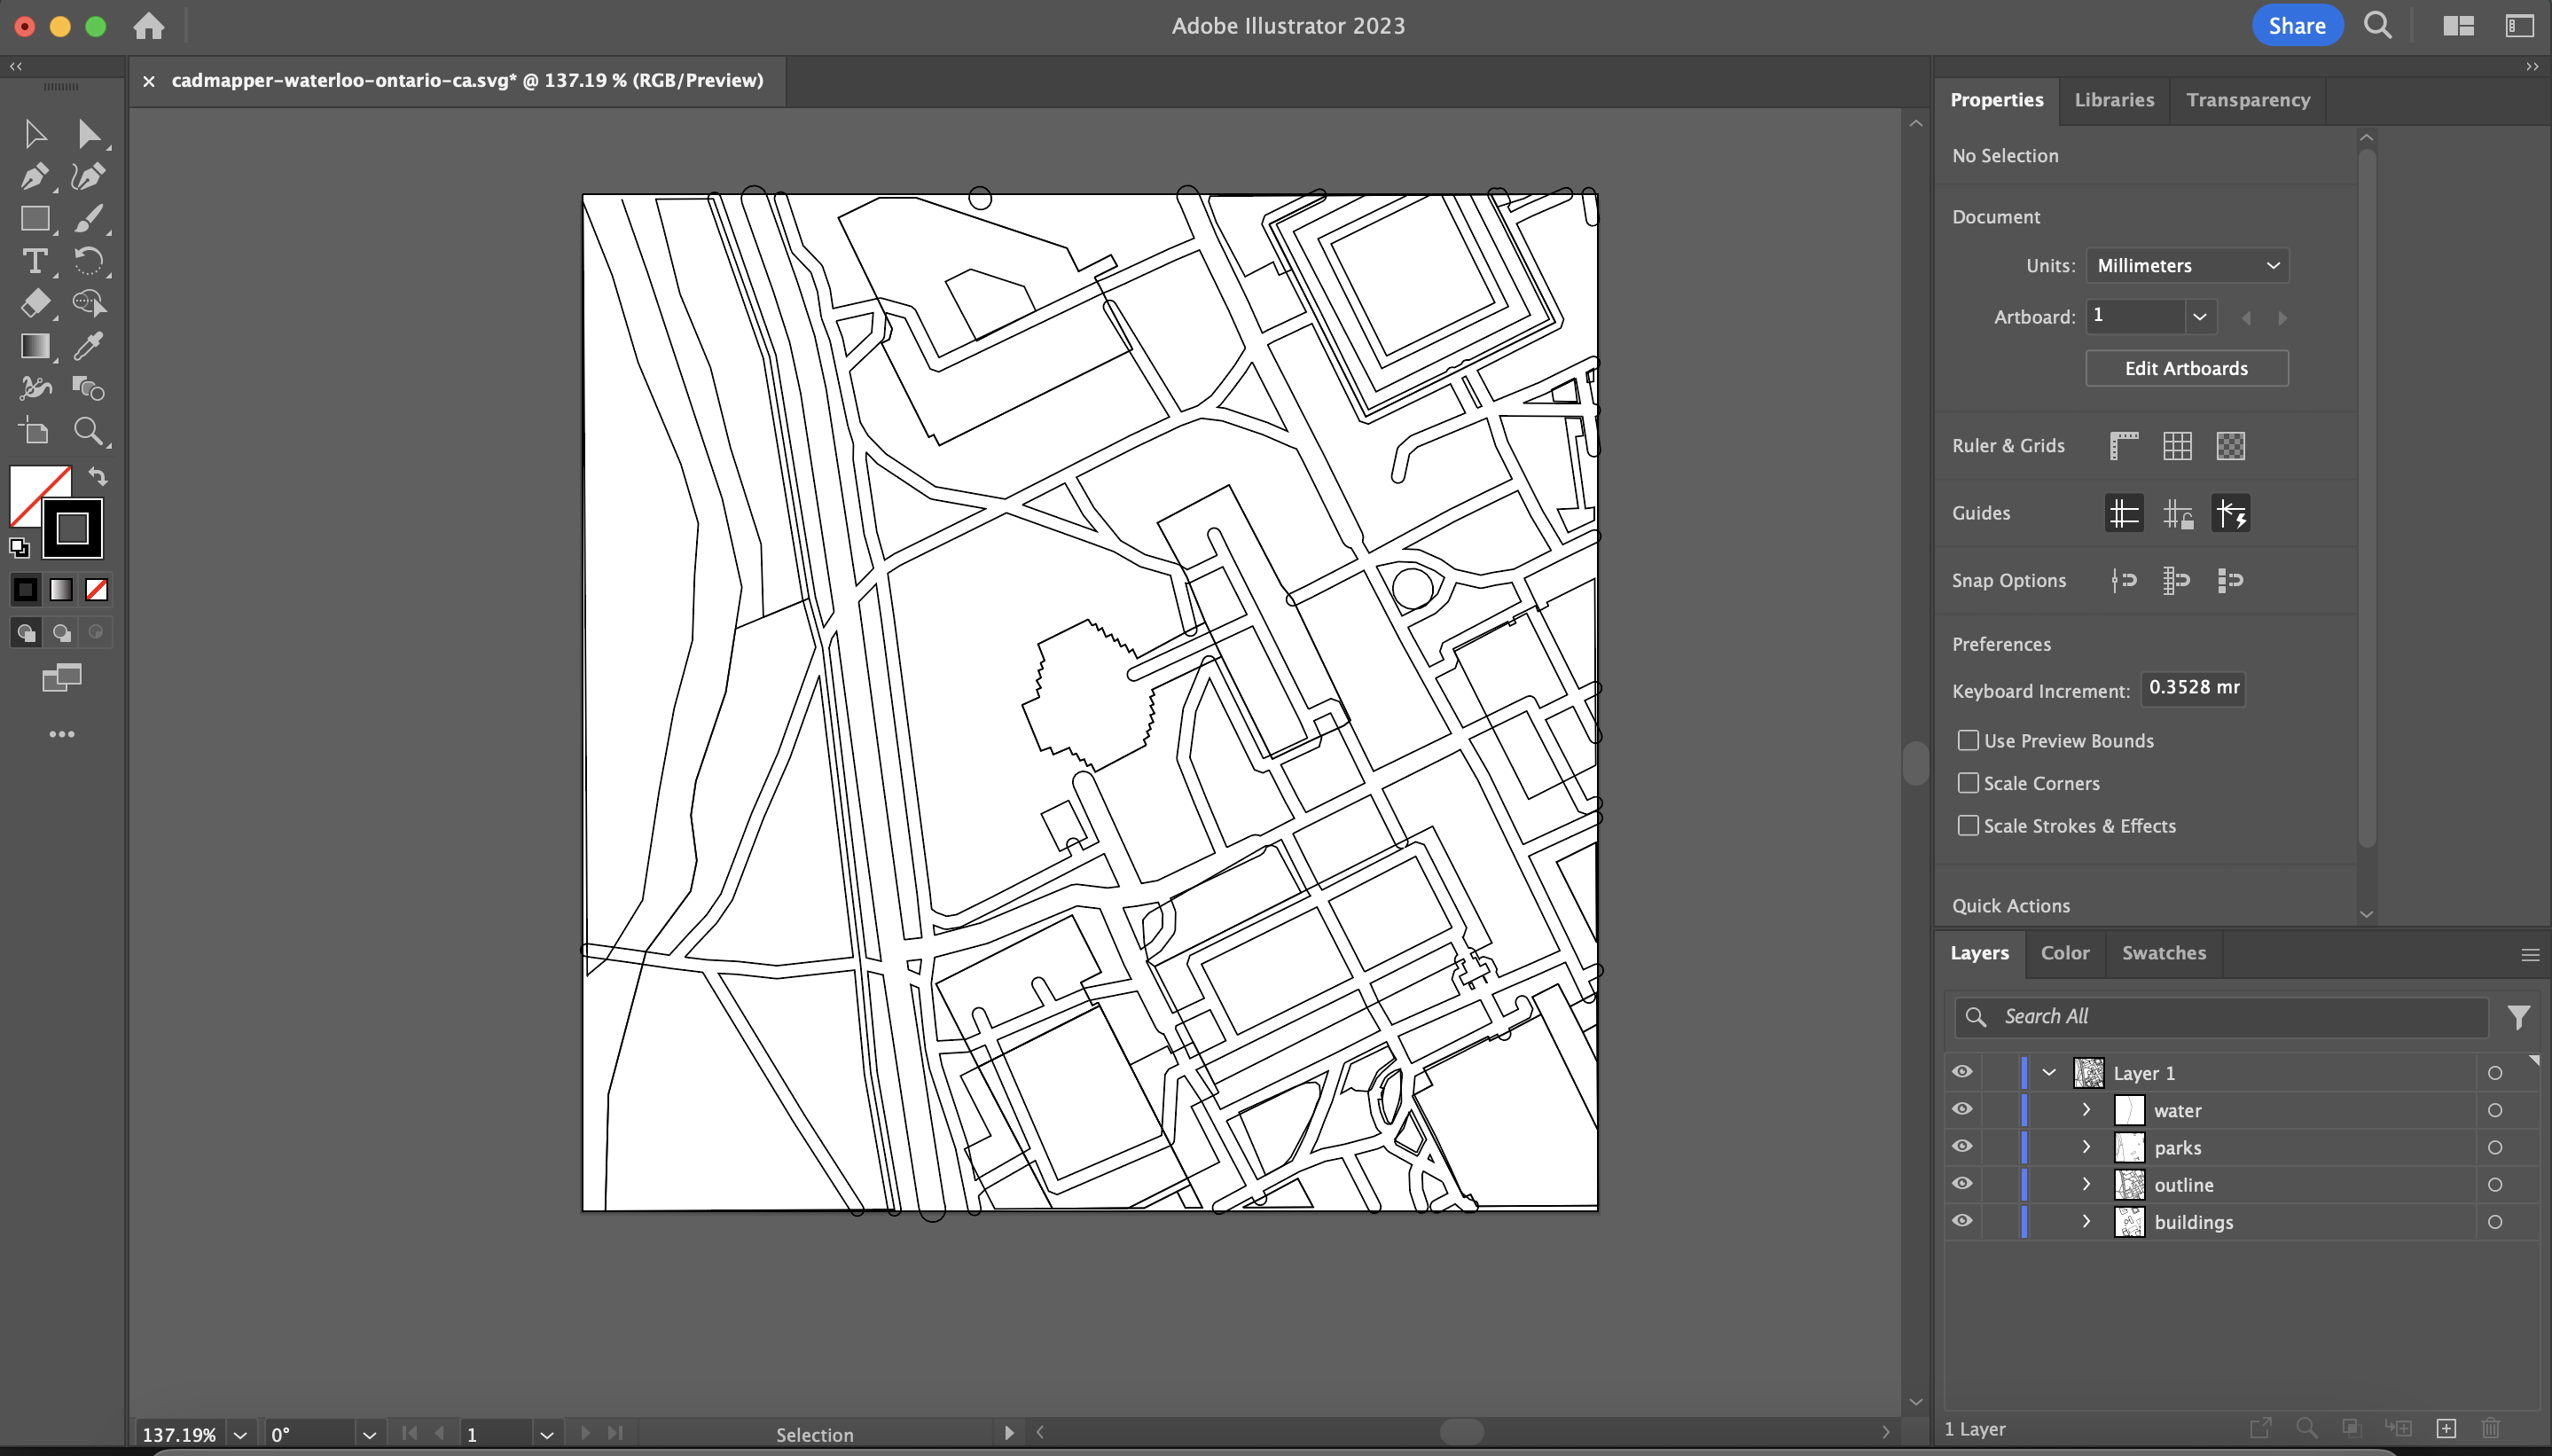
Your canvas should look like this now.
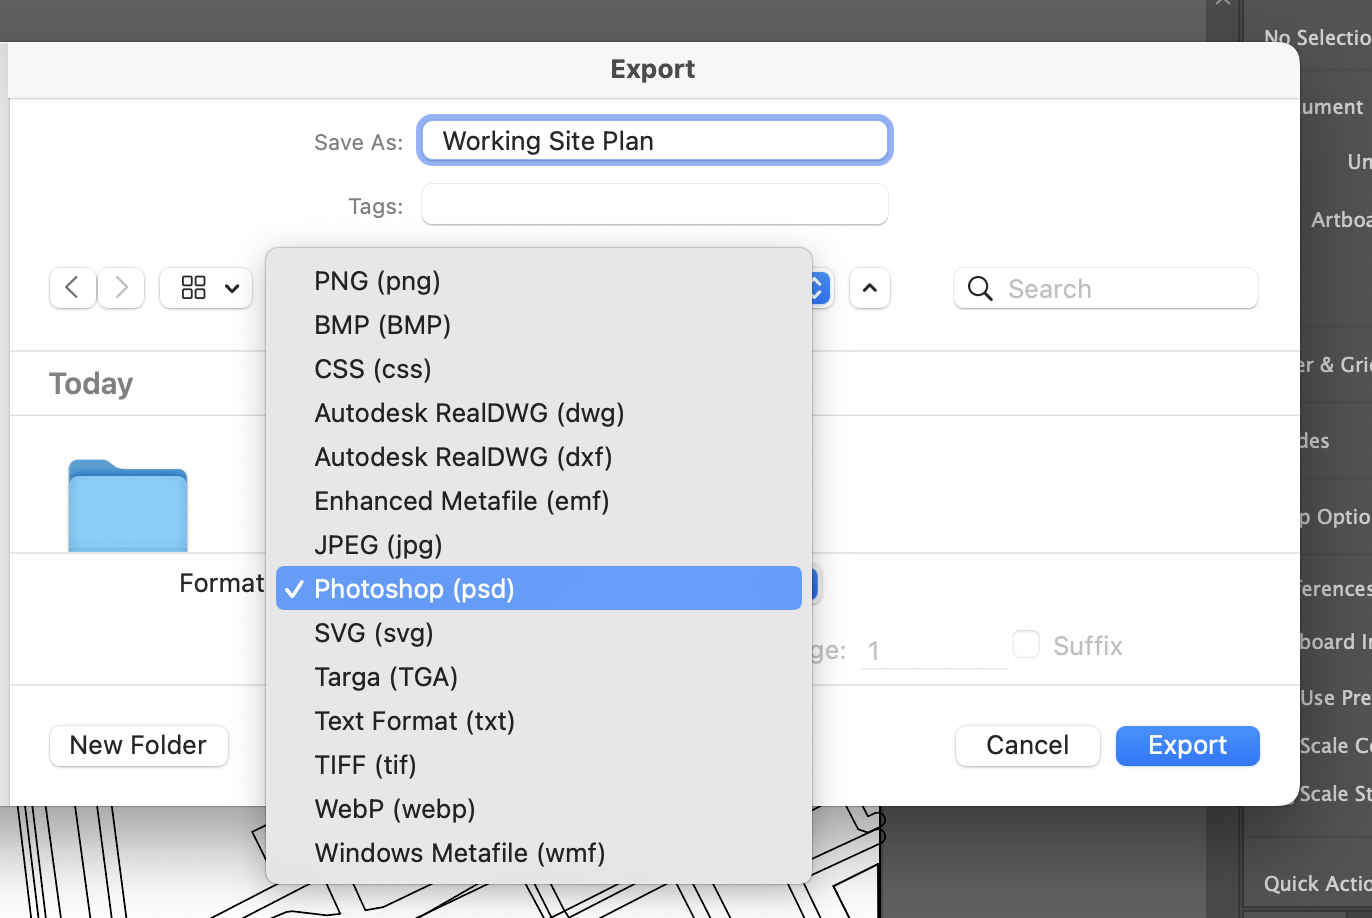
Now we will export the different layers separately and bring them into Photoshop.
Go to File > Export > Export As, and choose Photoshop (PSD)
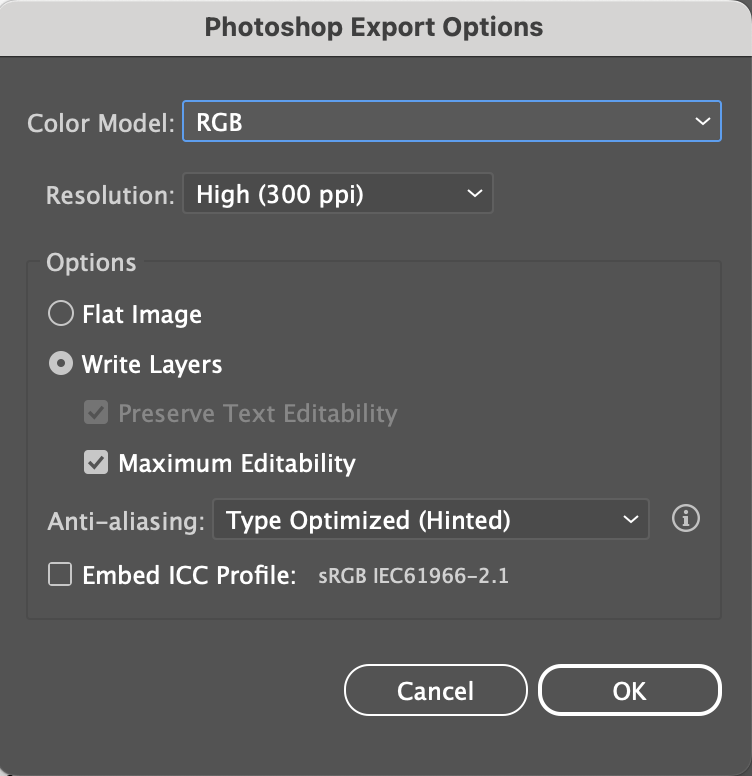
 Additionally, choose the following export settings to ensure high quality and resolution.
Try to always make sure your adobe documents’ resolution is set to 300 ppi. (Best overall quality)
Open the Photoshop file you just saved.
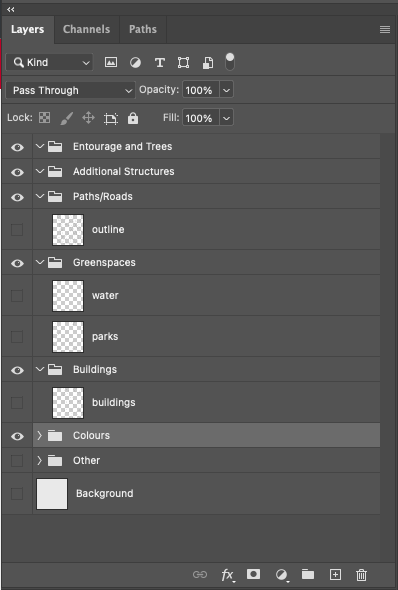
For best practice I will now create folders for each type of category of work we are about to do. Create layer folders for your paths, greenspaces, buildings, and other.
My photoshop screen currently looks like this. Your screen might look different with your panels oriented a different way. That is okay. 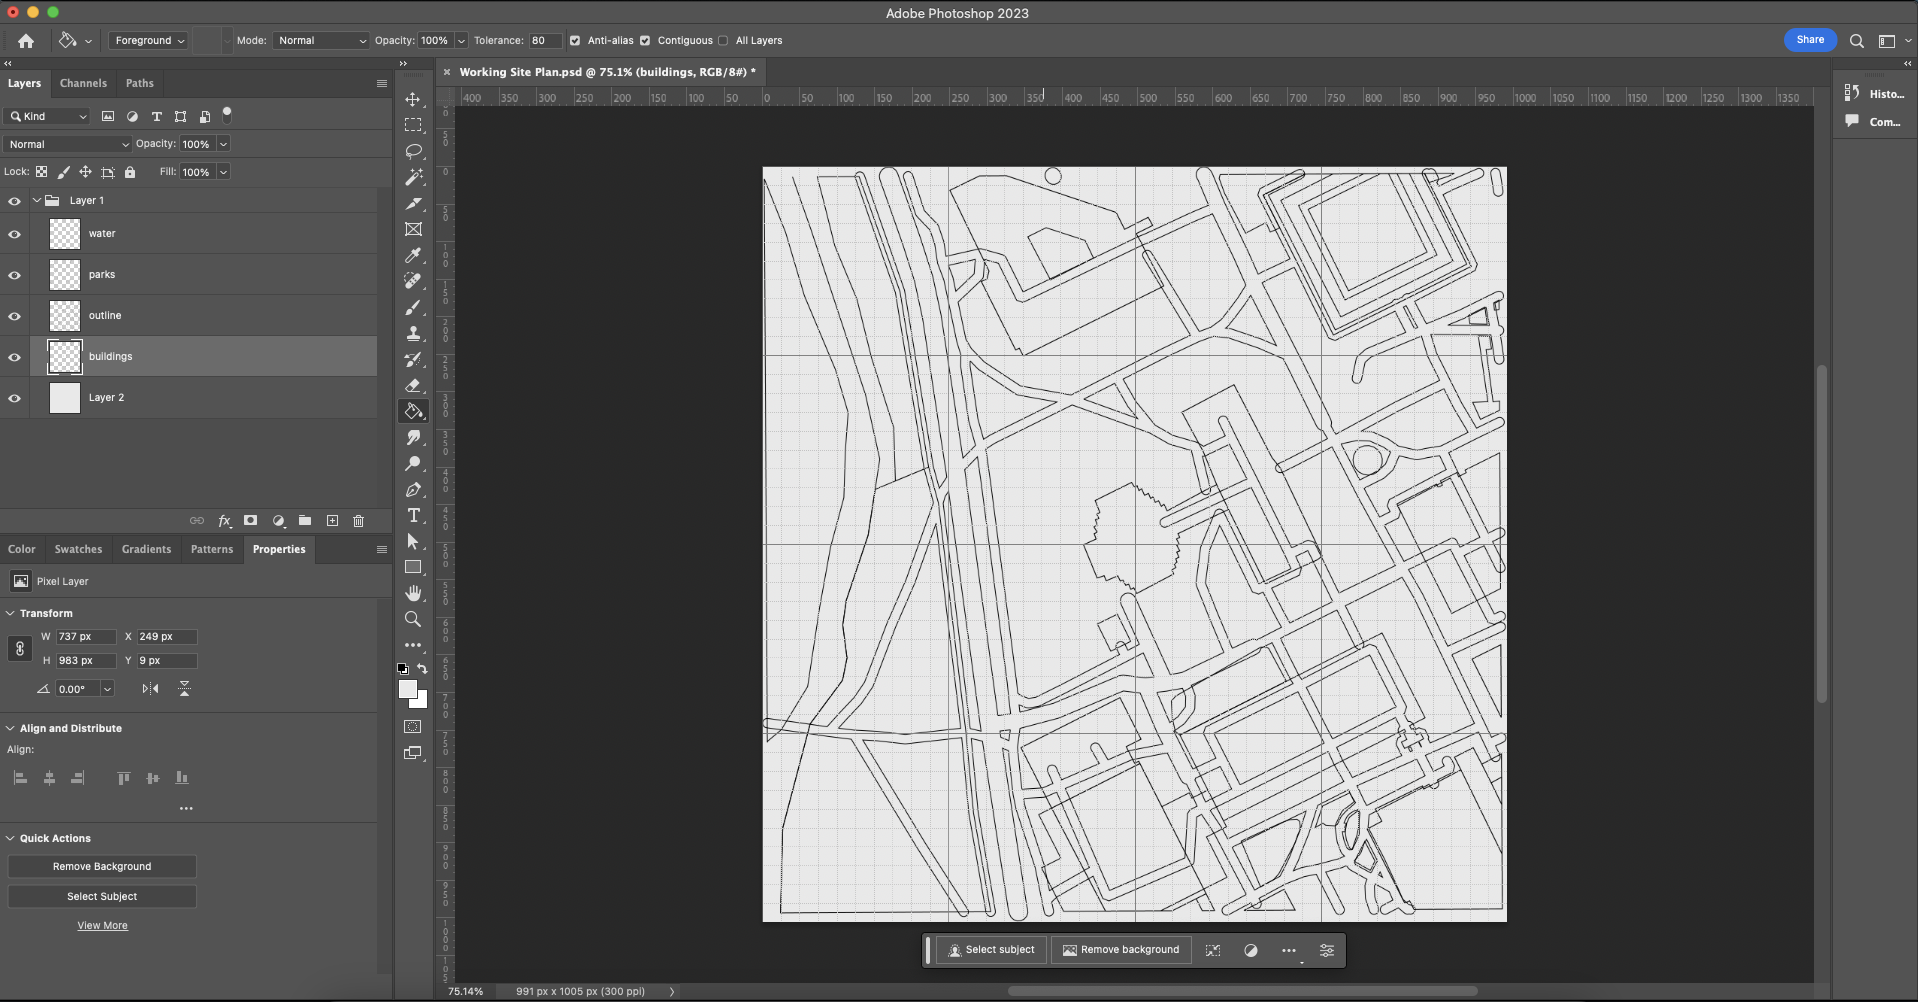
Use the two circled buttons below to create layer folders and to create new layers
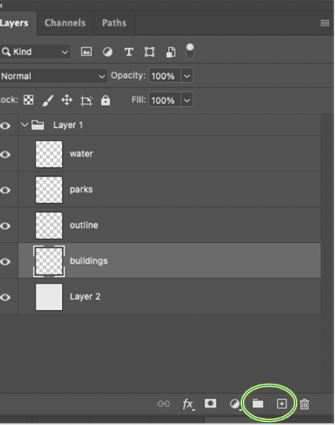
Here is how I’ll be organizing my work. It’s best to organize your layers in relation to what objects are closer in your field of view. Buildings and trees will be closer to the pov of a bird’s eye view so those layers should be on top.
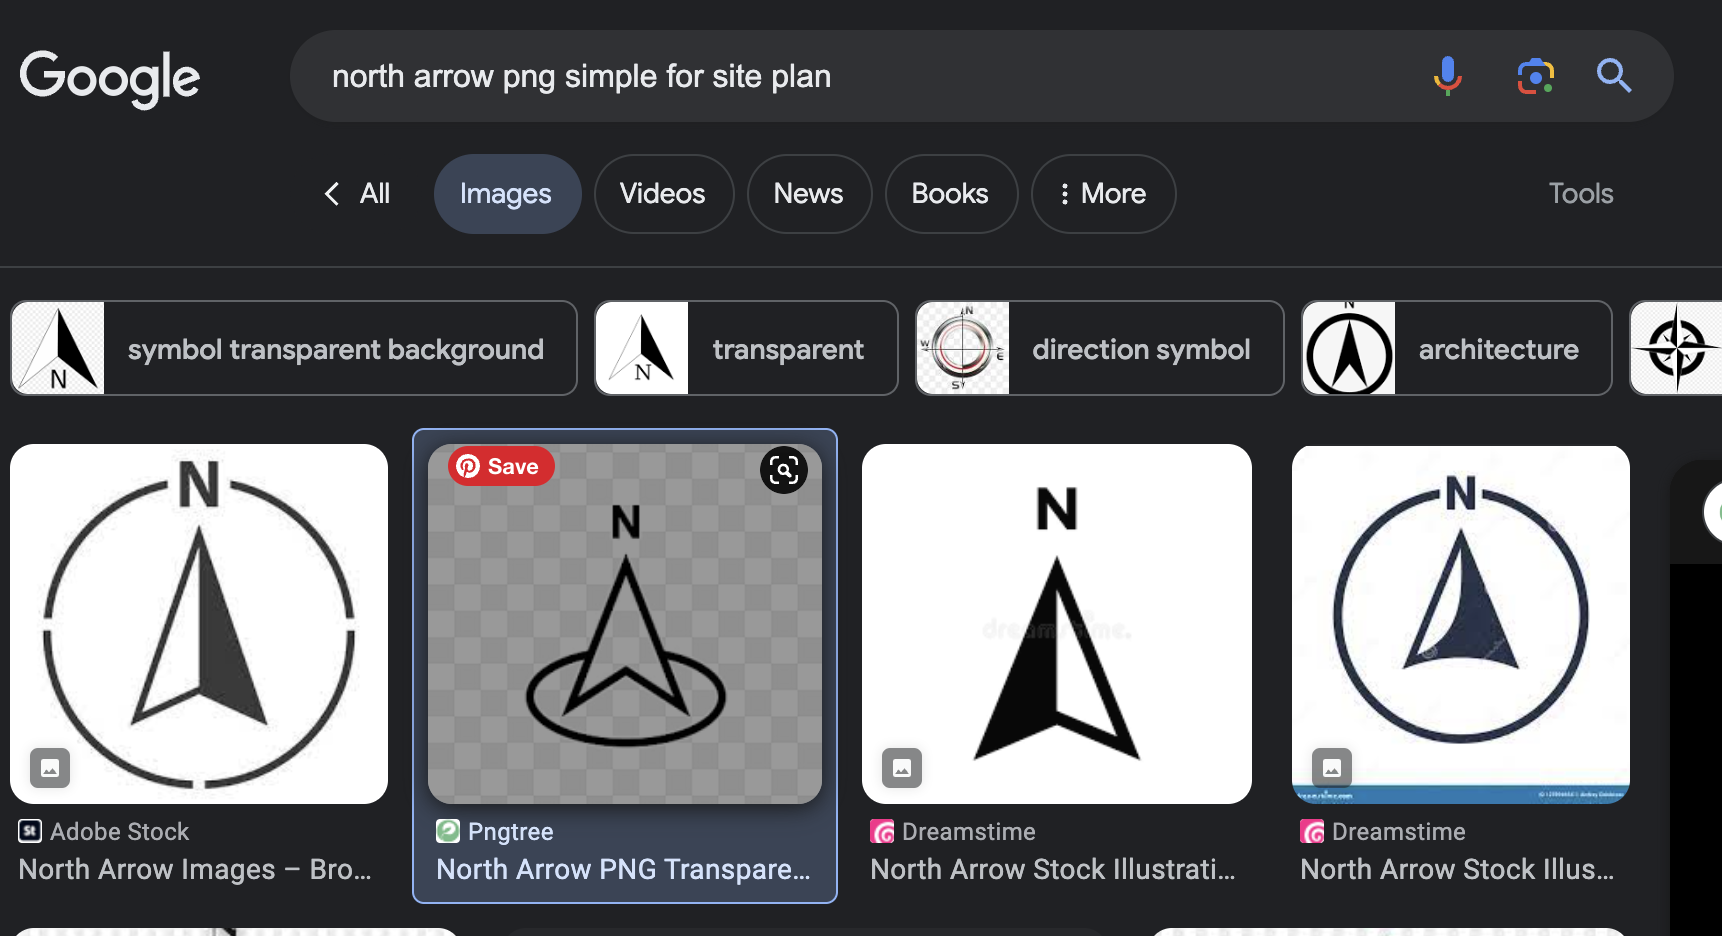
As the last part of setting up our document, choose how you’d like to orient the site and add our north arrow.
Find a north arrow png online as show below and save it to your computer
Out of personal preference, I will be zooming into the focus area in our current file, since I only plan on redeveloping a particular area.
To do this, I used the rectangle selection tool and selected the area I’d like to zoom into. Then I right-clicked, and pressed select inverse. I then went to each layer and pressed delete while my selection was still active. 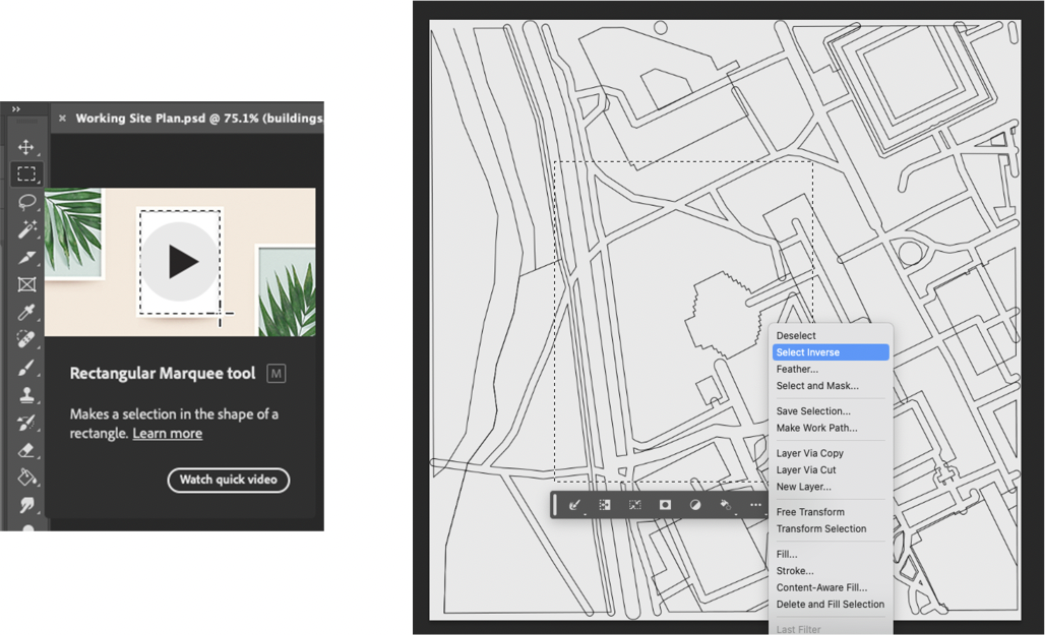
One by one elements outside of your focused area will be deleted and you’ll be left with something like this.

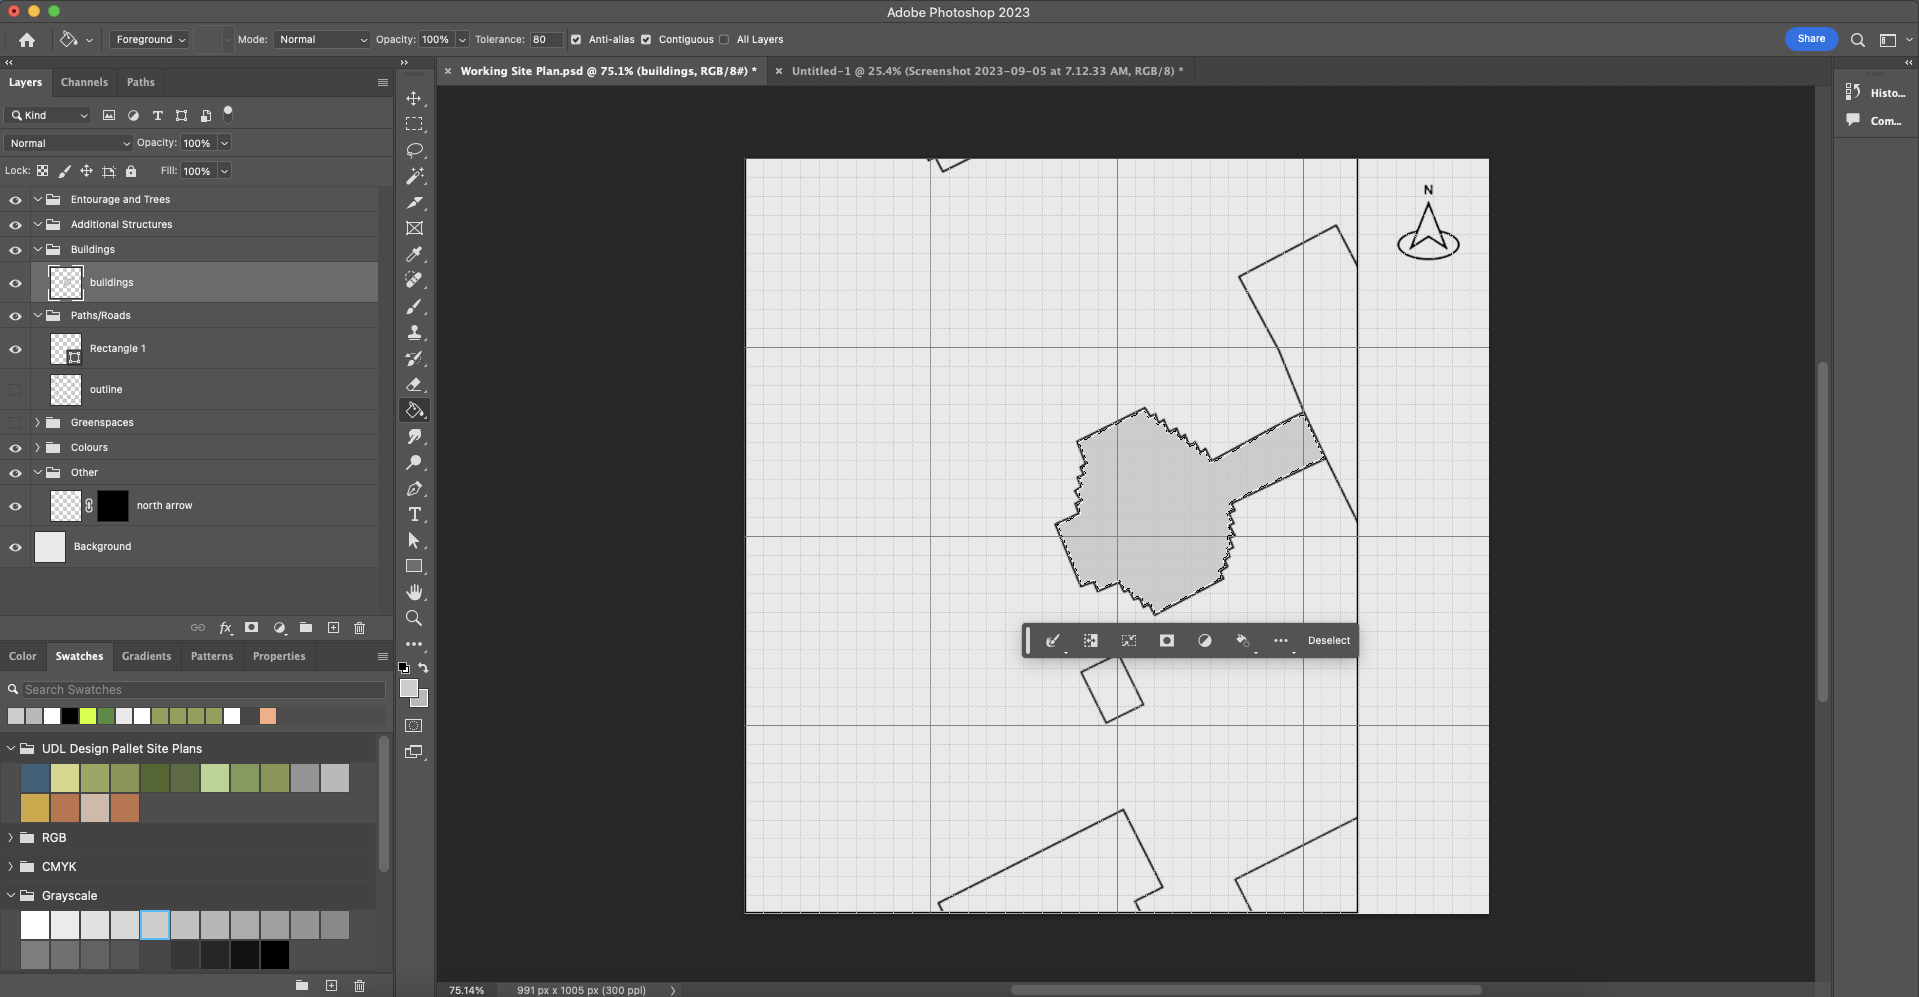
Next I added a rectangle border around our focus area.
Bring in your north arrow png and leave it somewhere above your site.

Use the Command T tool to resize your image to takeup the whole screen.
Now lets begin designing our site.
Part 2: Designing our site plan
Lets start by filling in our buildings. We will be using the magic wand selection tool to select the areas, and using the pattern fill tool to fill it.
First make sure you are on your buildings layer. You can hide the other layers for now. Use the magic wand tool to select your first building and then fill it with a light grey colour using the paint bucket tool as so. 
Repeat this for all the buildings

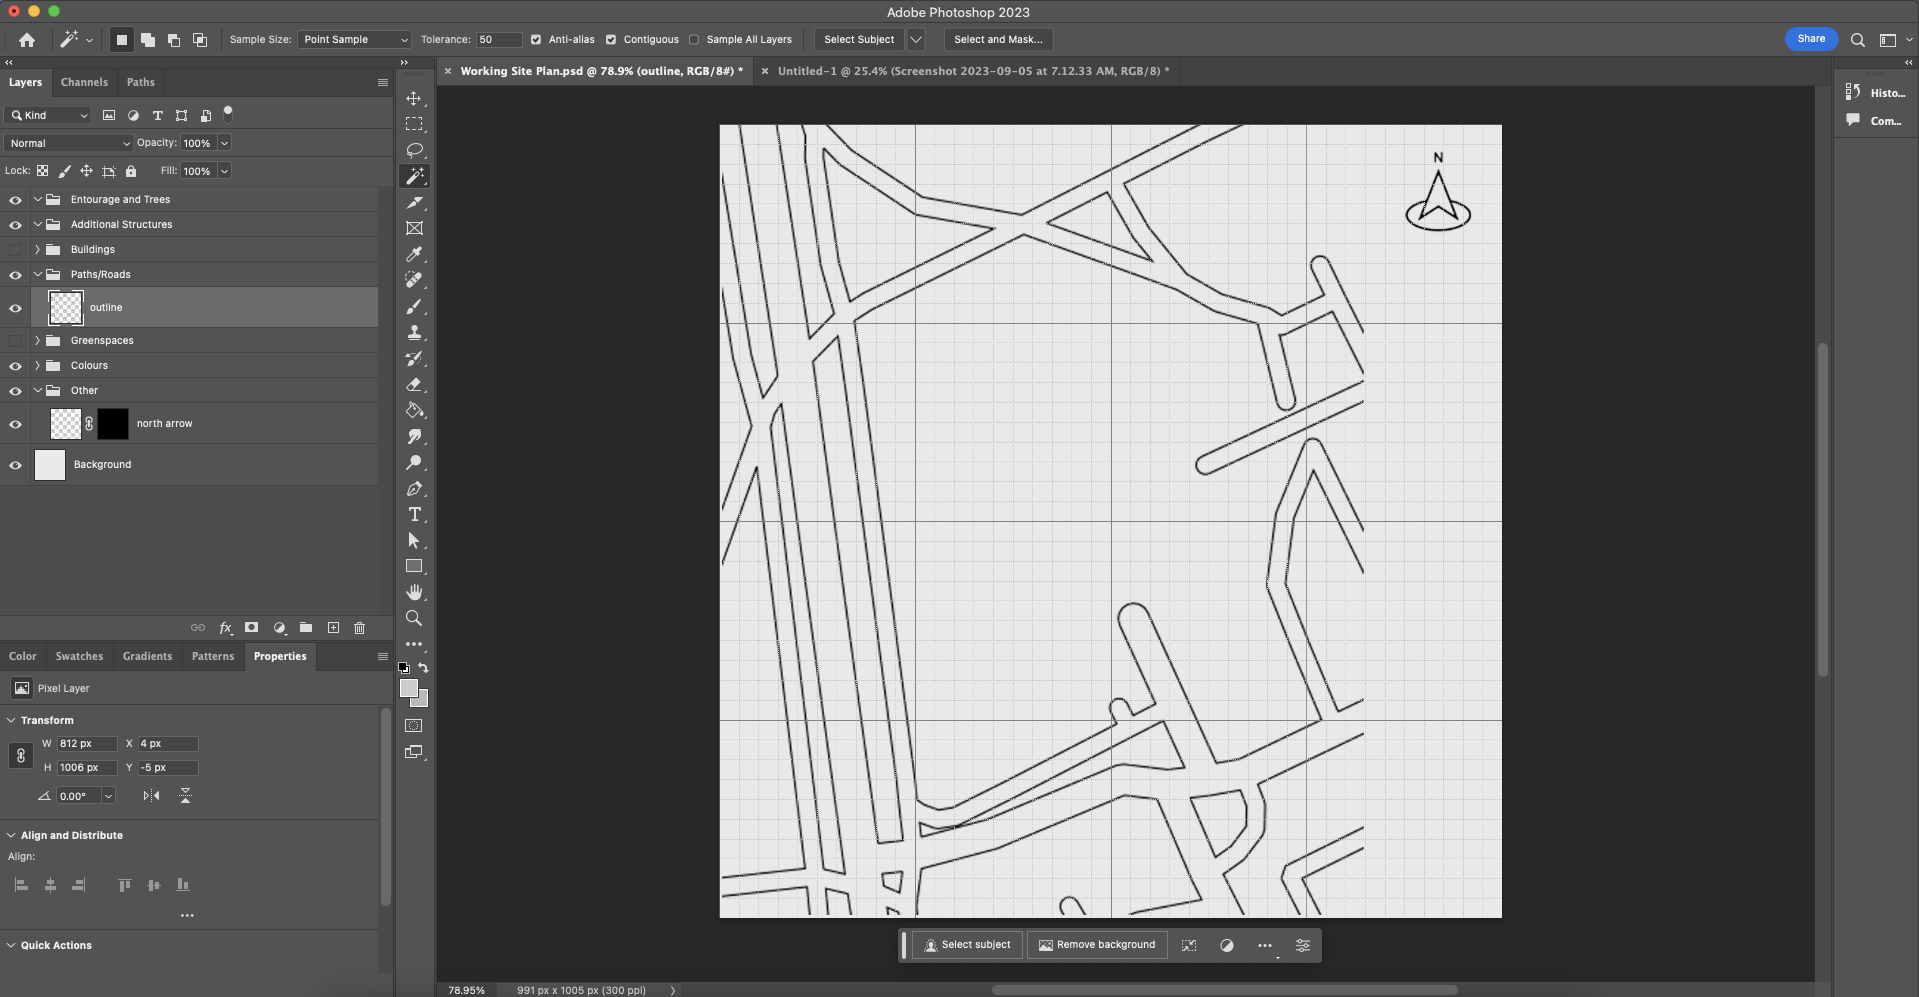
Make sure you have the outlines/paths layer selected, and showing. Hide the buildings layer.
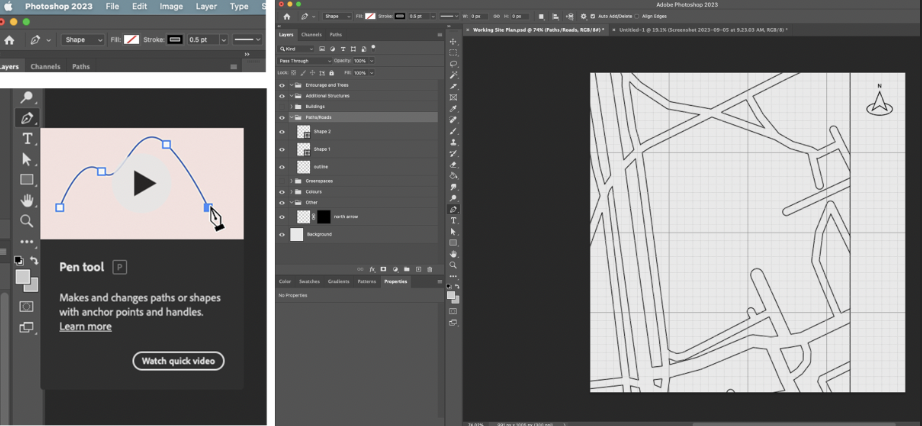
Now you’ll be able to see any unclosed paths, use a pen tool (and the specific settings shown below) to close them. Pay close attention to the edges as well. Any unclosed paths will make it difficult to make selections and fill them with pavement patterns.
How to create patterns in Photoshop
Before we can start filling and selecting, we must gather our patterns from online resources and save them in Photoshop.
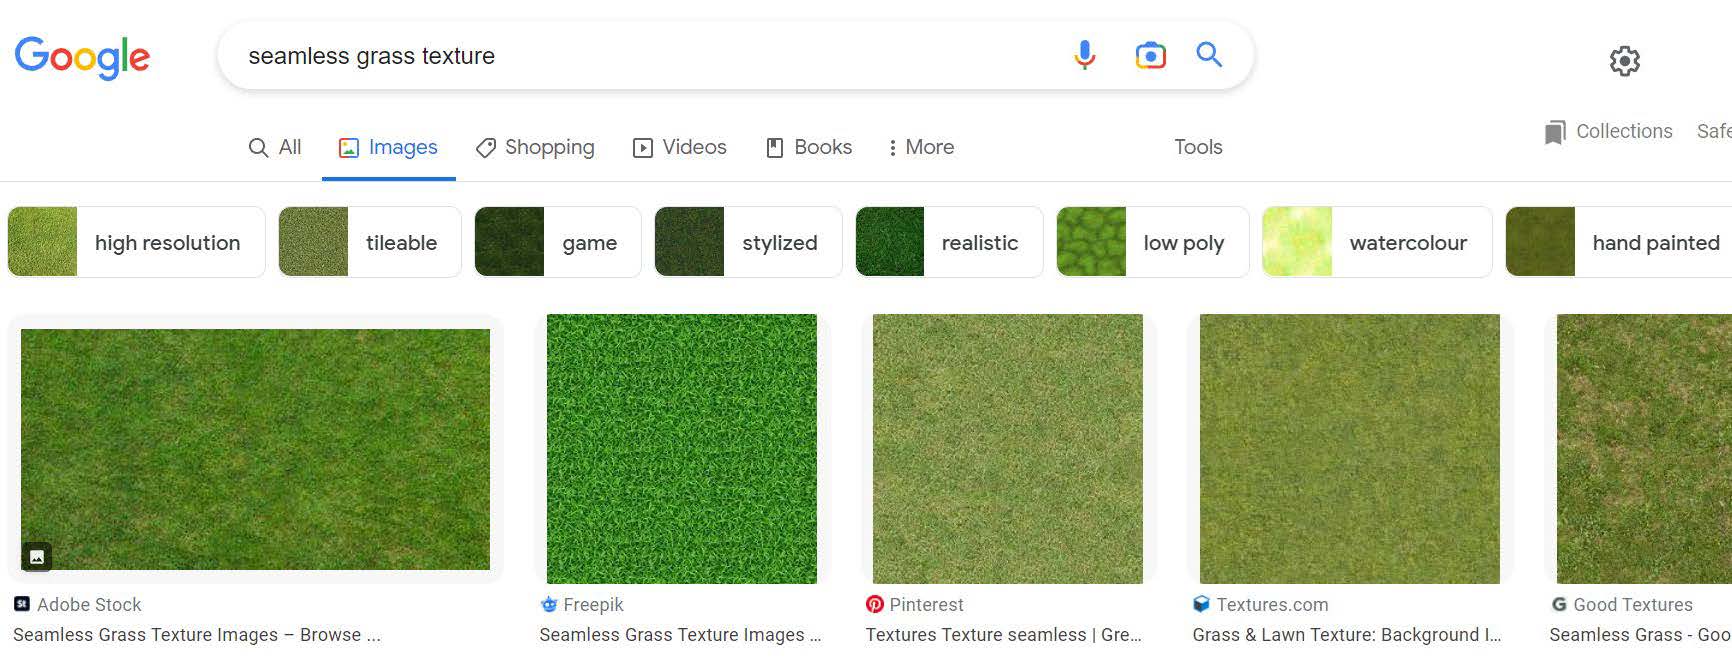
Open Safari and search seamless images for different textures you want on your site.
Metal, Grass, Water, Glass, etc.
Save these images in documents and double-check that they’re being saved as . PNG files
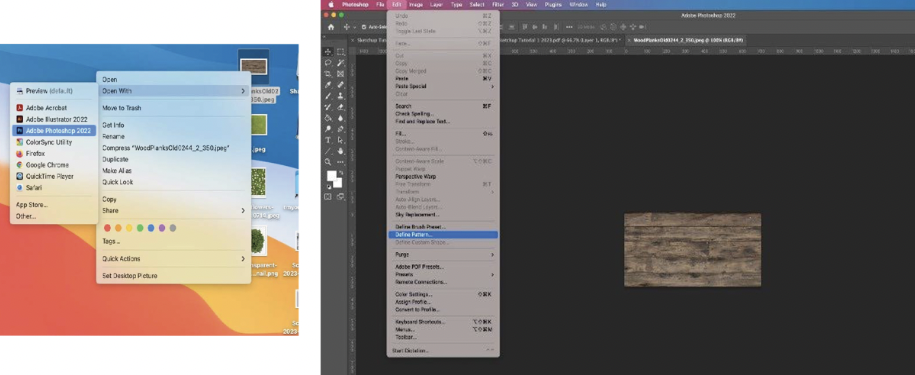
Go to saved seamless images in your documents.
Right-click and open in Photoshop.
Click edit (top left corner).
Select Define pattern.
This will then allow you to use the textures on your site.
Back to the tutorial
Lets fill in all the paths with a pavement pattern.
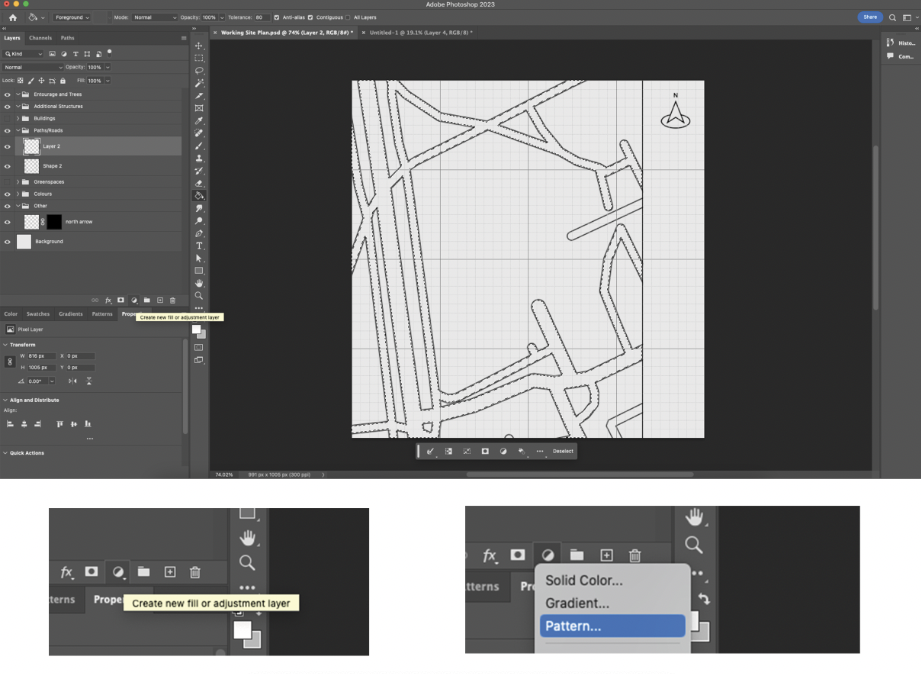
Using the magic wand tool, select the paths just like we did buildings, then go to the half-shaded circle icon to create a new fill.
A drop-down menu will appear, go to pattern.
By default, your selection will be filled with a green plan and the following pattern fill menu will popup.
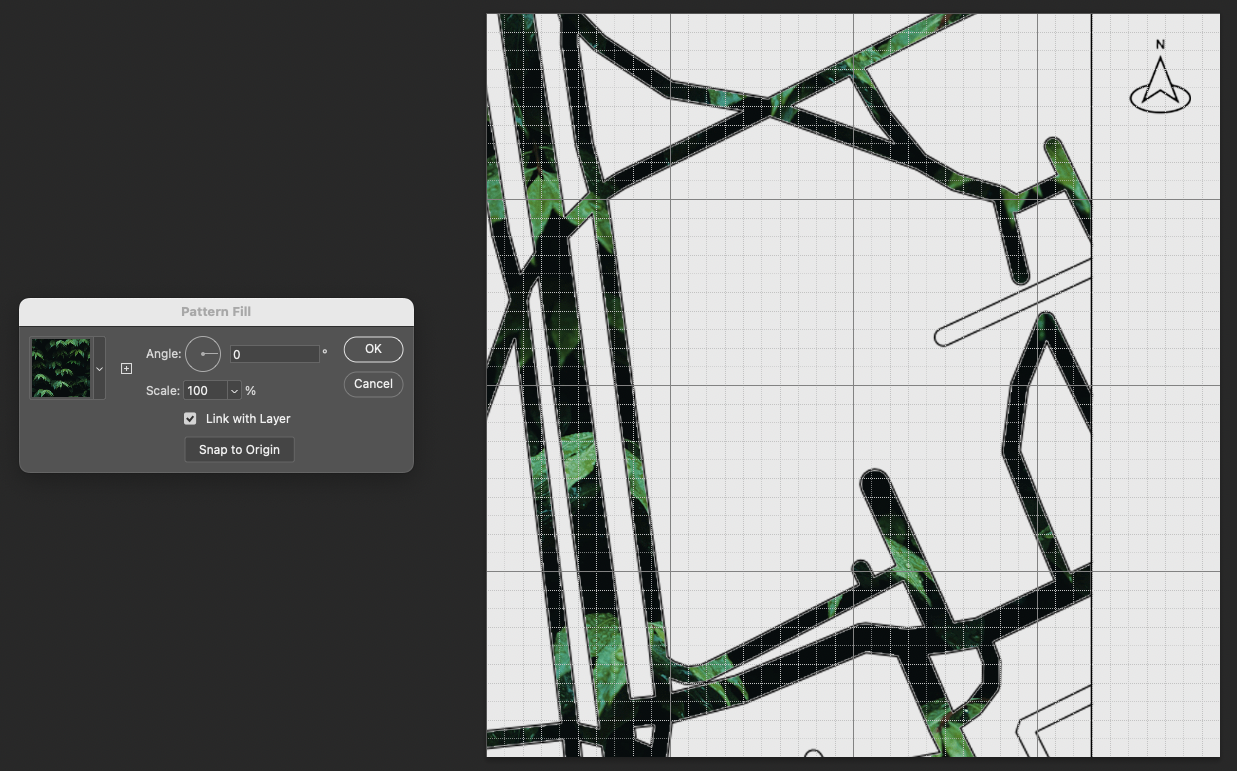
Go to the drop down menu next to the pattern and select a seamless pattern of choice. Play around with the scale and angle, try to keep in mind how big your site actually is and if from a birds eye view you’d be able to see each grain of grass to each paver. Most likely you won’t be able to so reduce the scale between 10-40.

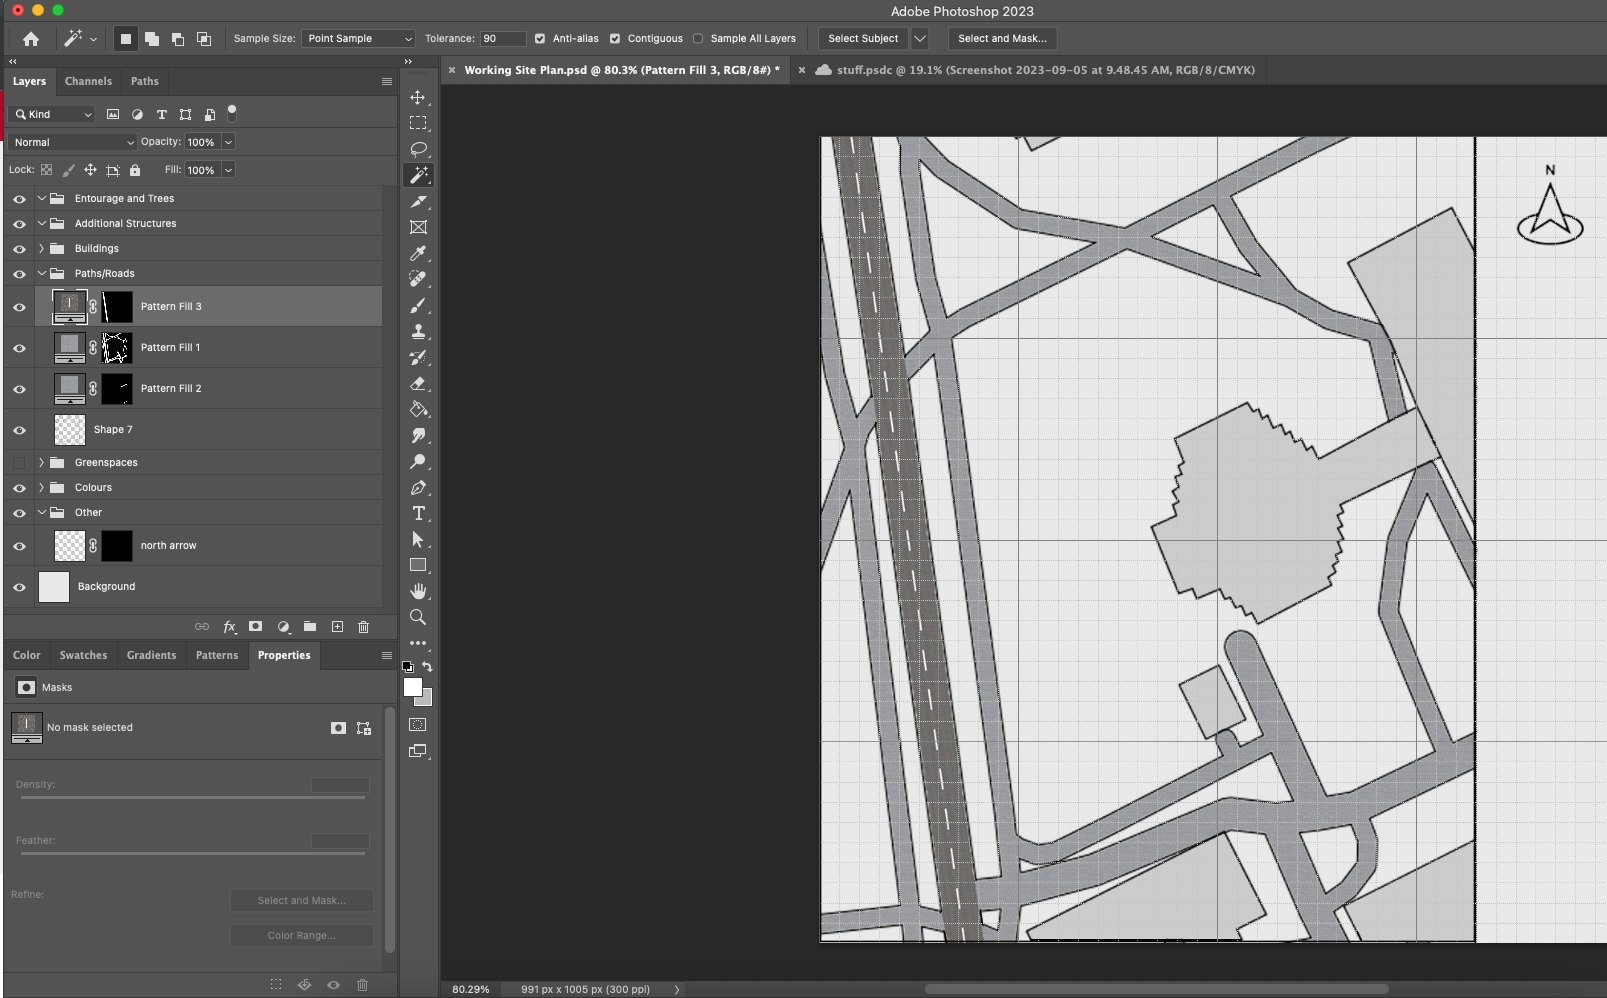
Do this for all the paths.
If you’d like to differentiate a main road from a side road, consider going back to the main paths layer, close the main paths using the pen tools and fill only select areas with a different pattern as so.
Now, let’s use the same tools for the grass or green areas.
Using the magic wand tool, select all the grass patches.
*To make multiple selections at once, hold the shift key after the first selection and a plus sign will show under your wand cursor indicating you can make additions to your selection
This time chose a seamless grass pattern to fill the selection. Reduce scale as needed
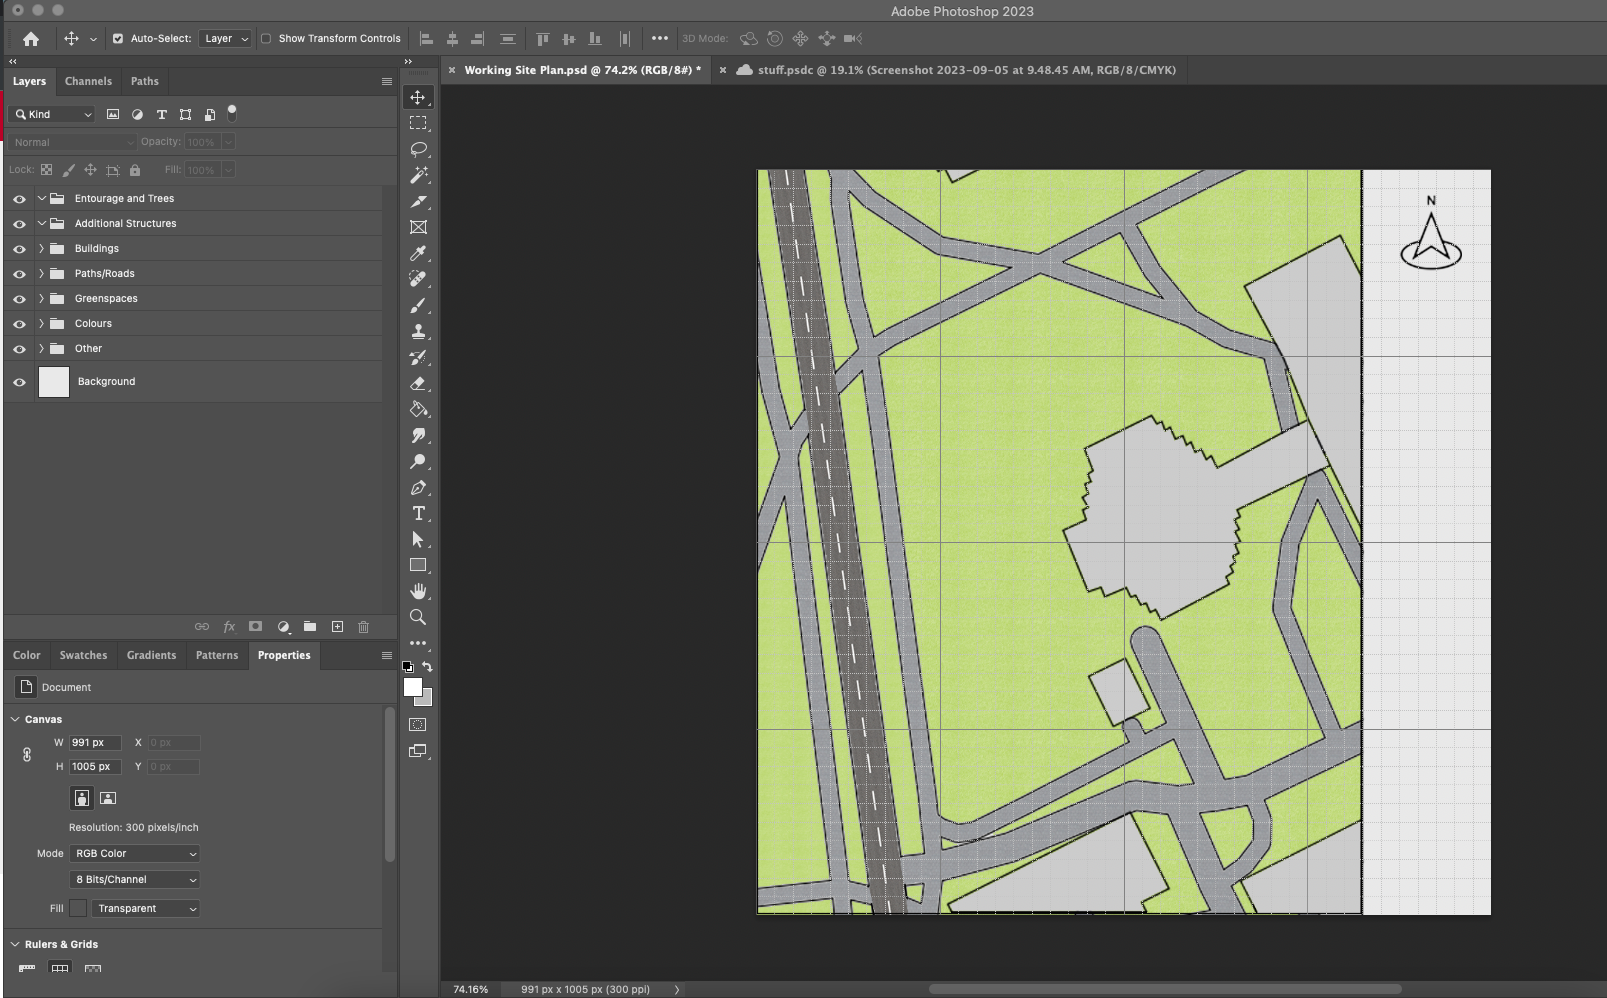
And just like that you’re done the base of your site plan
Part 3: Adding details
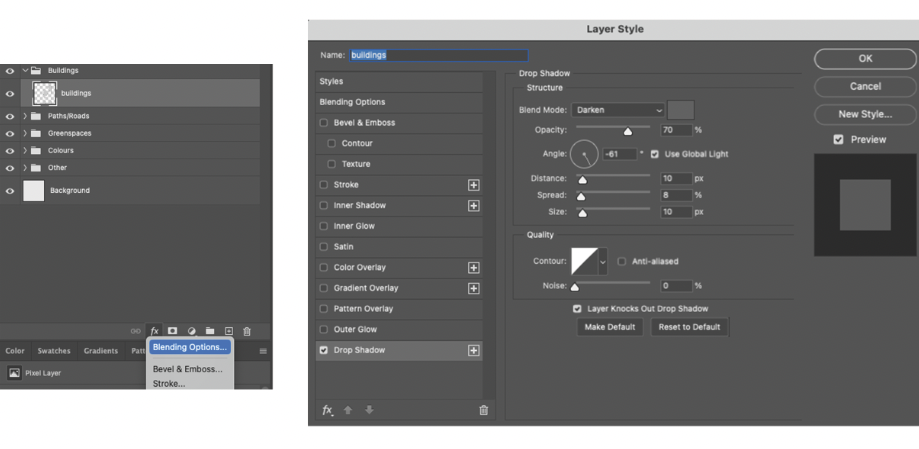
Lets add some drop shadows to the buildings to add some realism to the buildings.
Select the buildings layer > go to the effects button > blending options > drop shadow
The drop shadow settings shown below are a good starting point, feel free to adjust them however you’d like.

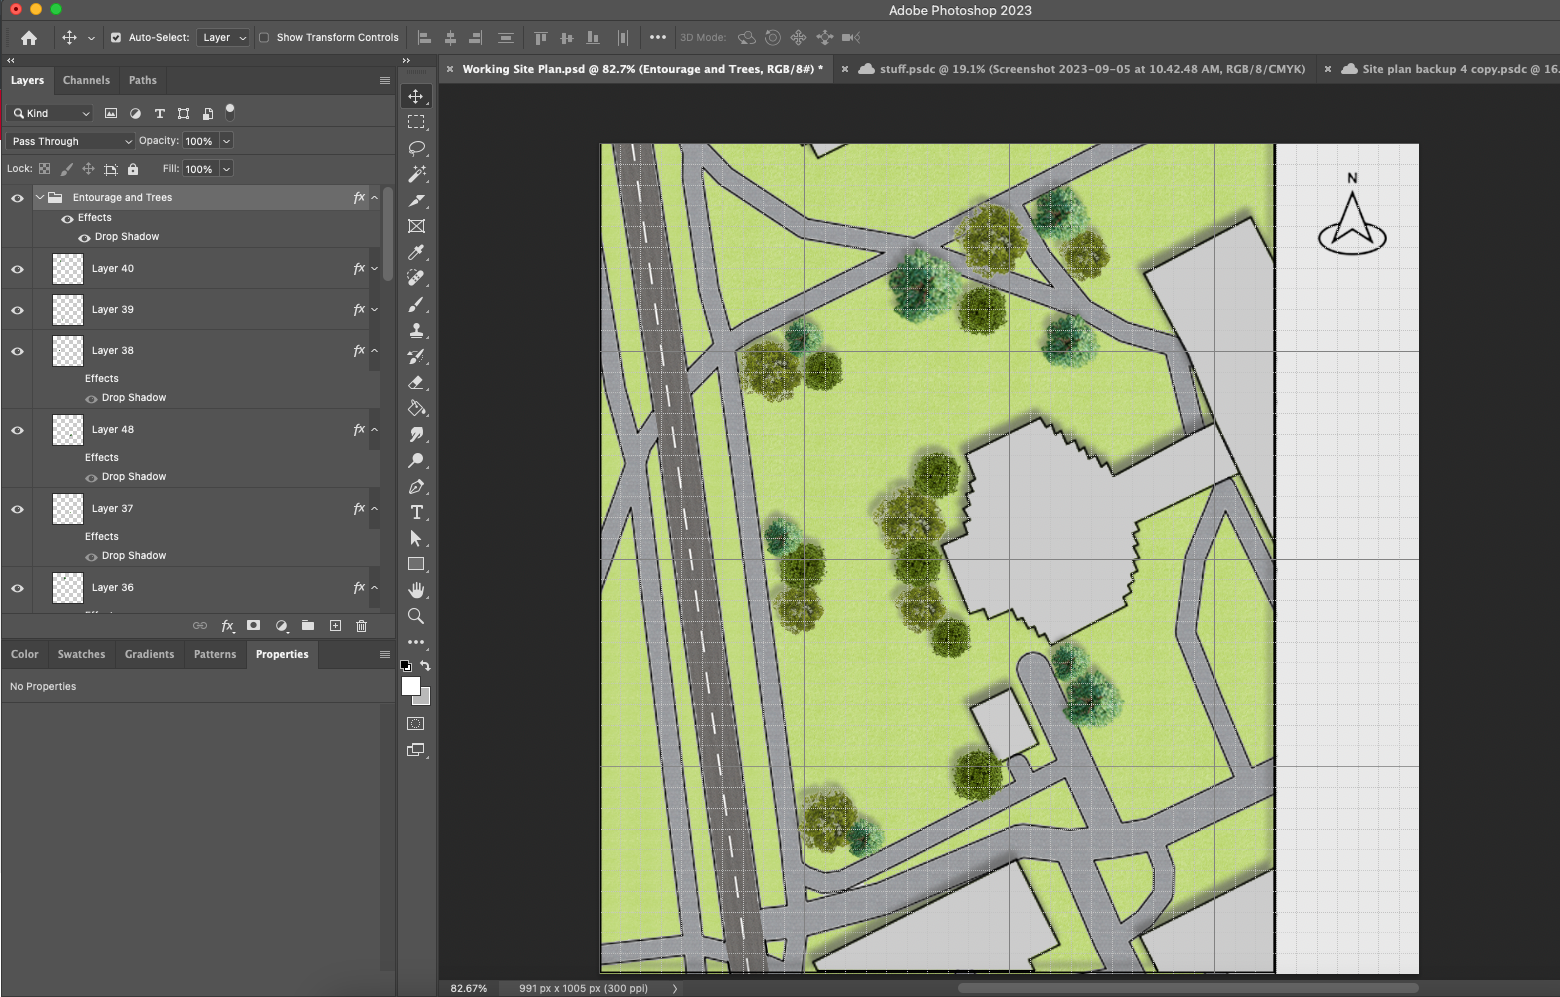
Now let’s add some trees. Start by creating a new layer for them
*Search Google for “top view of trees png” and save some pngs that suit your taste.
Once you’ve saved the png, drag and drop the png from your finder or computer, to the Photoshop file.
Try to use a few different pngs, and scale and rotate them so that they don’t all look the same height and type. Copy and paste the trees to easily create more.

Add some drop shadow to the trees similar to how we did for the buildings. To select all the trees quickly, simply select the folder they’ve been put in. (See how easy it gets when you organize your work into folders). You can lessen the intensity of the shadows for trees since they typically allow for some light to pass through.
To add any more details like vehicles, people, and furniture, you follow the same steps.
Find a png top-view > bring it into Photoshop > adjust its position, opacity, and drop shadows
There’s extra space on the right side to create a legend, add a scale, and any additional items.
Example Work:
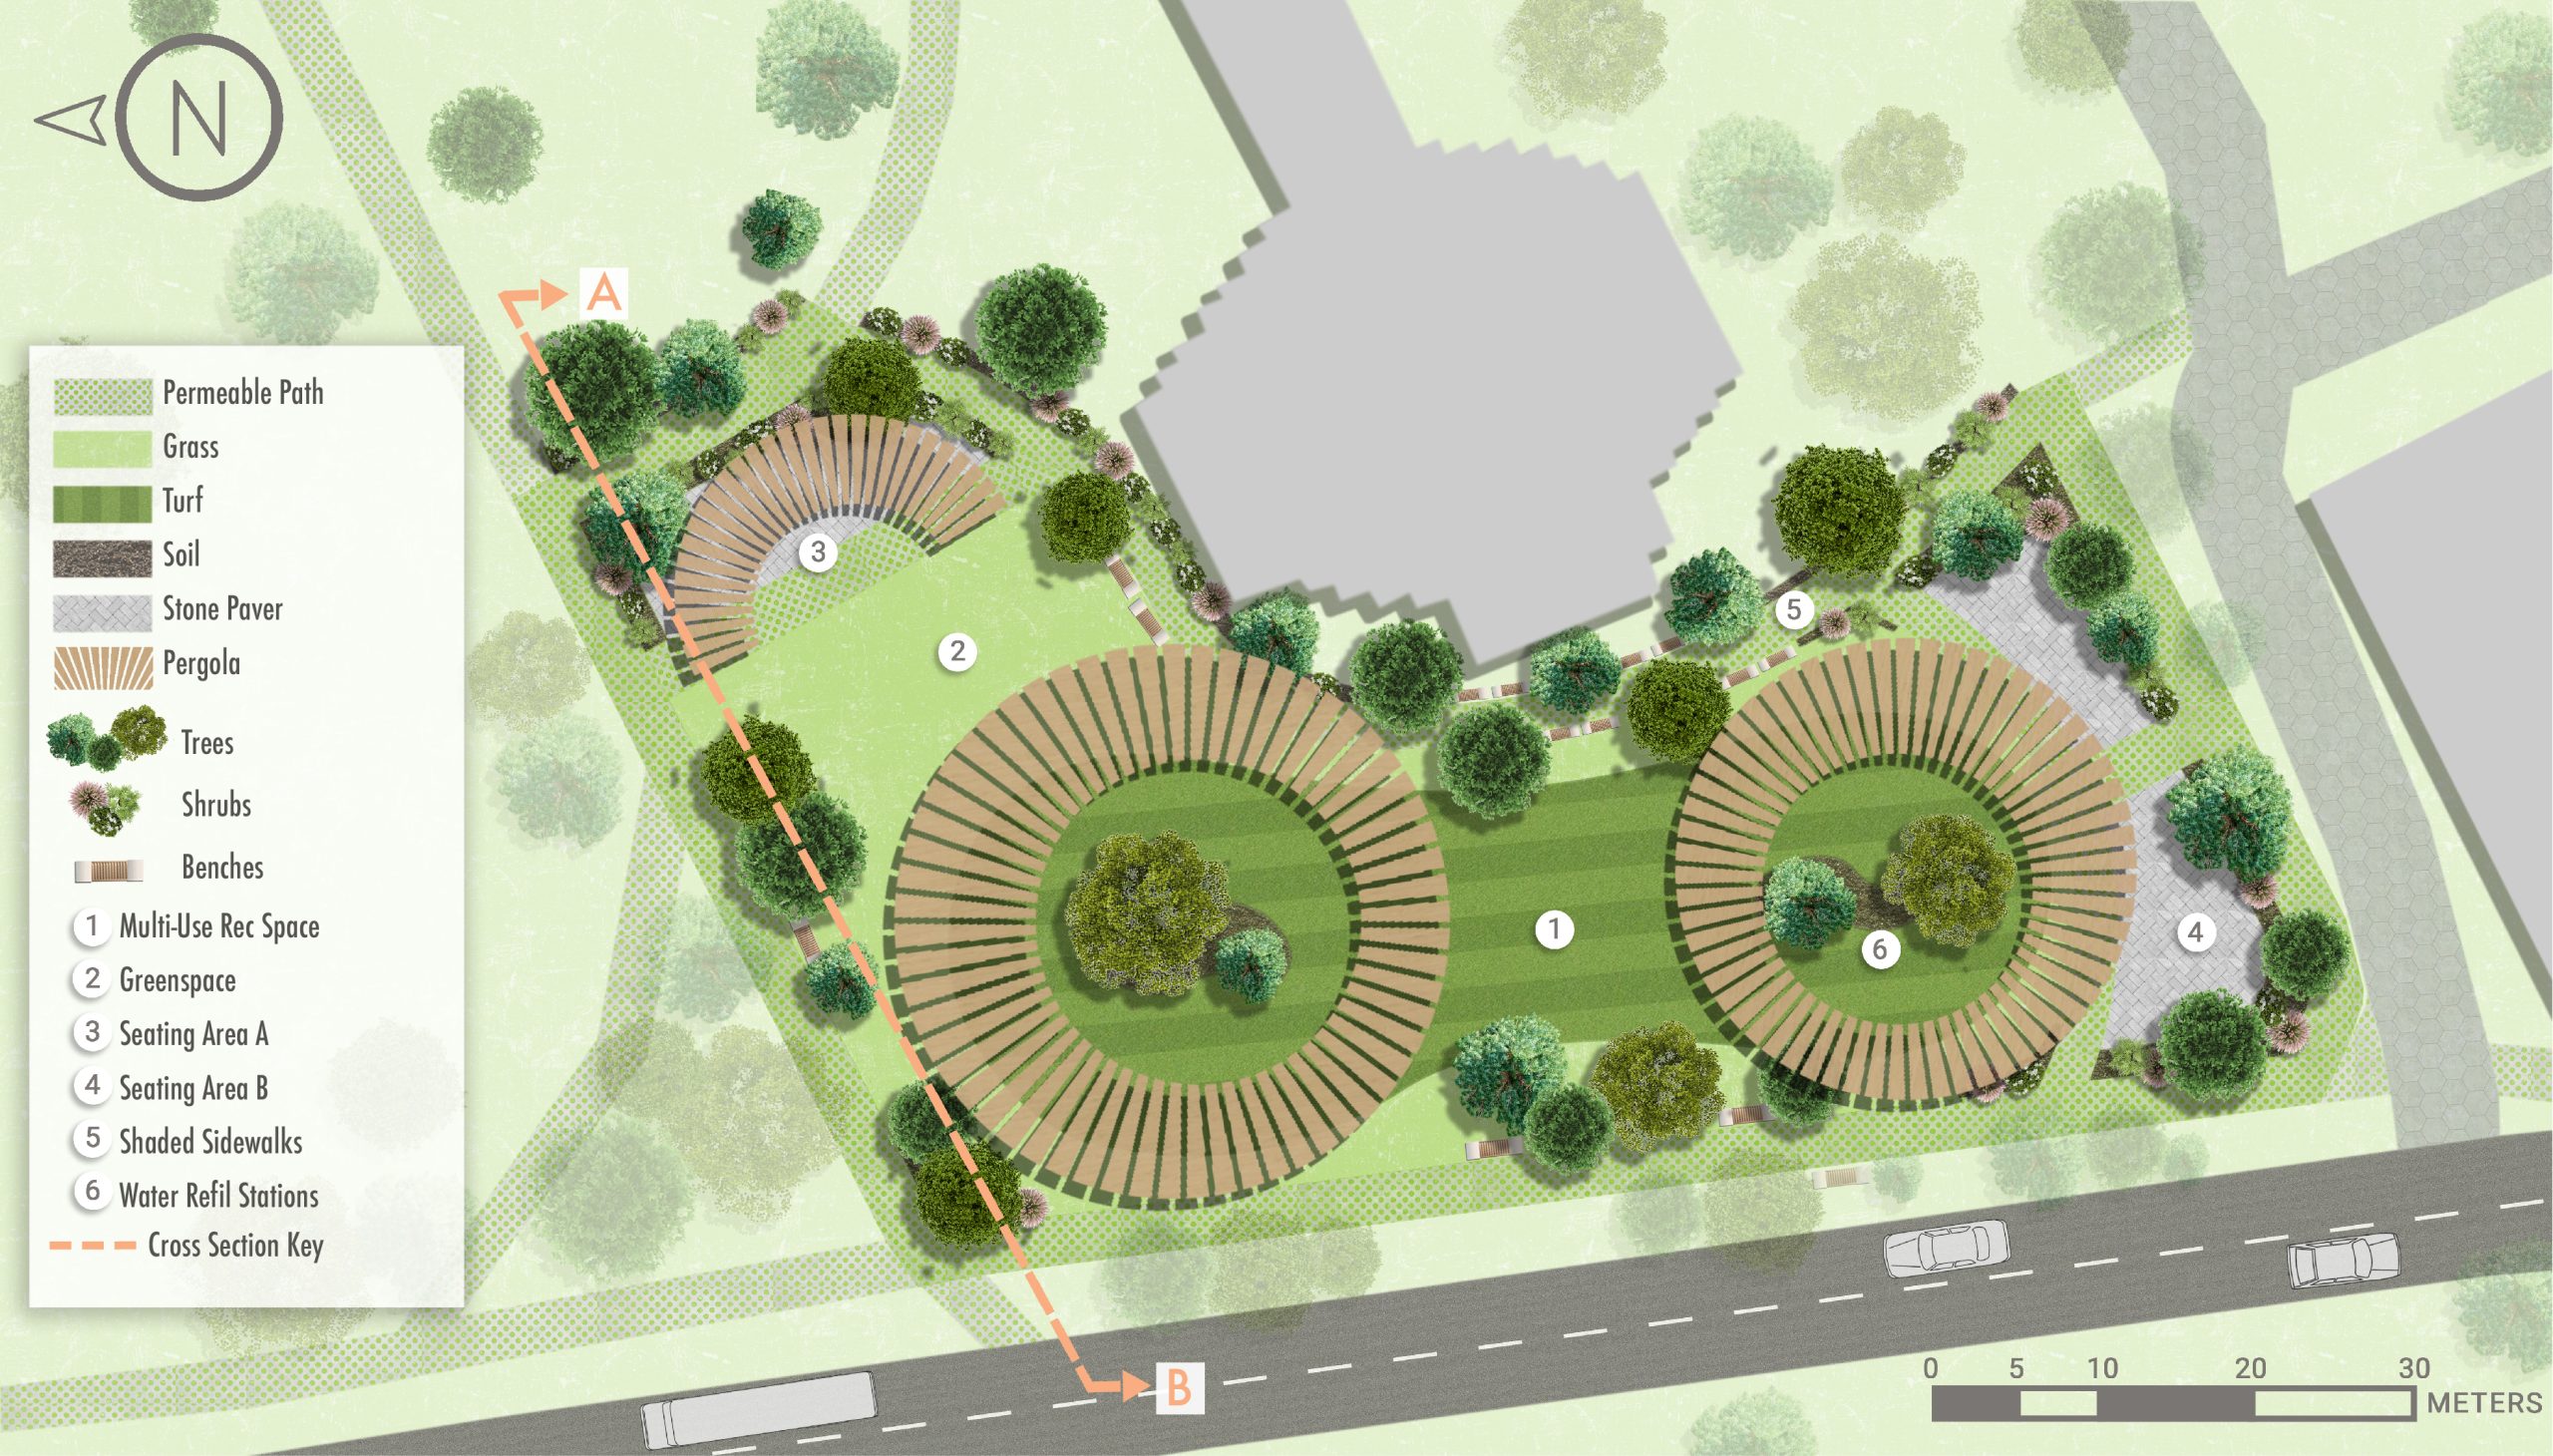
Additional tip: play around with the opacity of various elements. For example in the figure above, the focus is on the main site and the surrounding features are more muted and less opaque.
Making a Hand Drawn Site Plan
Tutorial by Khalil Heron
Materials:
- 1+ sheet(s) of paper
- Pencil
- Eraser
- Ruler
- Your choice of colouring medium (Markers, paint, pencil crayons, pastels, etc.)
Part 1: Sketching
The initial step in creating your site plan involves a preliminary sketch. If you’ve previously designed your site, consider copying or tracing the plan onto your paper. Alternatively, if you’re starting from scratch, begin by sketching the property line of your site and its immediate surroundings, such as buildings and trees. Assuming you’ve gathered essential information regarding your site’s topography and zoning, introduce design elements starting with the most prominent features such as buildings and green spaces. Prioritize simplicity in shapes; unlike an architectural floor plan, include details only if they enhance rather than compromise the legibility of your drawing.
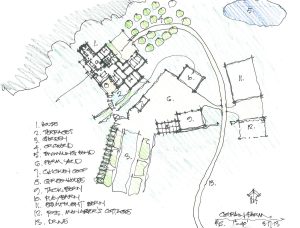
[Image: Rough sketch of site plan (https://roughsketchllc.com/services/site-planning)]
You can keep iterating on your design if you are not happy with it, you can even use colour if it’s a rough draft, but by the end, you should have a light sketch of your design.
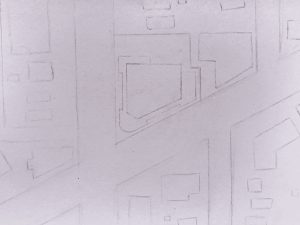
[Image: Light sketch of a site plan]
Step 2: Adding Colour
The first step in colouring is choosing a colour palette. Depending on your medium, you may be restricted in your choice, or you may be able to use any colour imaginable. Nevertheless, it’s important to test your colours on another paper before committing to it on your final copy.
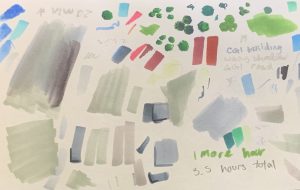
[Image: Colour test sheet using alcohol markers]
When choosing a colour palette, it’s important to make sure the colours don’t clash. A good tip to make sure most of your colours should all be of a similar saturation and vibrancy, to maintain a consistent mood. However, don’t be afraid of contrast, as it can make the most important elements of your site plan stand out more. If your drawing includes a lot of the area surrounding your site, you may also want to pick some more muted versions of the colours you chose to represent these areas.
Websites like coolors.co offer many tools that can help choose your colour palette. You can generate random colour palettes, browse popular palettes, choose colours from an existing image, and test your palettes on existing graphics to make sure they work for you.
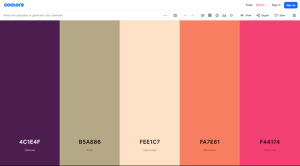
[Image: Palette Generator on coolors.co]
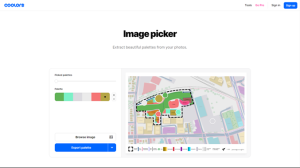
[Image: Image picker on coolors.co]
Once you’ve landed on a palette, you can start colouring. Start with your lightest colours as you can always make them darker later, but not the other way around. Make sure your colours are consistent and evenly applied. As to not look messy. Depending on your medium of choice you can layer colours on top of one another to create shadows, highlights and more.
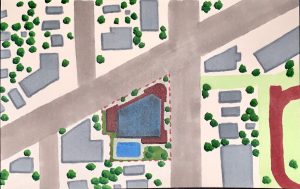
[Image: Illustrative site plan using alcohol markers; note the use of dark outlines on buildings and darker greens on trees to create a shadow effect]
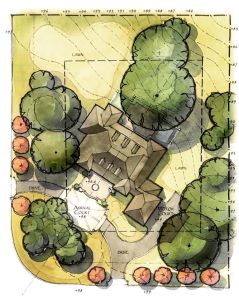
[Image: Watercolour site plan by @cbrandoningram on Instagram; dark outlines can help make your site more legible and draw attention to the most important parts of your site plan]
Part 3: Finishing touches
Depending on the intended use of your site plan, you may want to add some finishing touches like labels, a scale bar, a north arrow, and a legend. While these elements may not be necessary for marketing purposes, they are for site plans being submitted for assignments, or competitions.
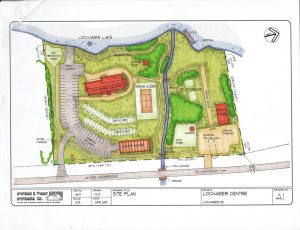
[Image: Illustrative site plan with a border, title, labels, north arrow, scale, date and more. (https://upload.wikimedia.org/wikipedia/commons/9/9b/Lochaber_Centre_Site_Plan.jpg)]
