2 Viewpoints: 1-Point Perspective Sketch
Pre-Drawing Setup: Find a scene or an image you’d like to replicate.
- Gather your drawing materials:
-
- Pencil
- Paper/drawing surface
- Ruler
- Eraser
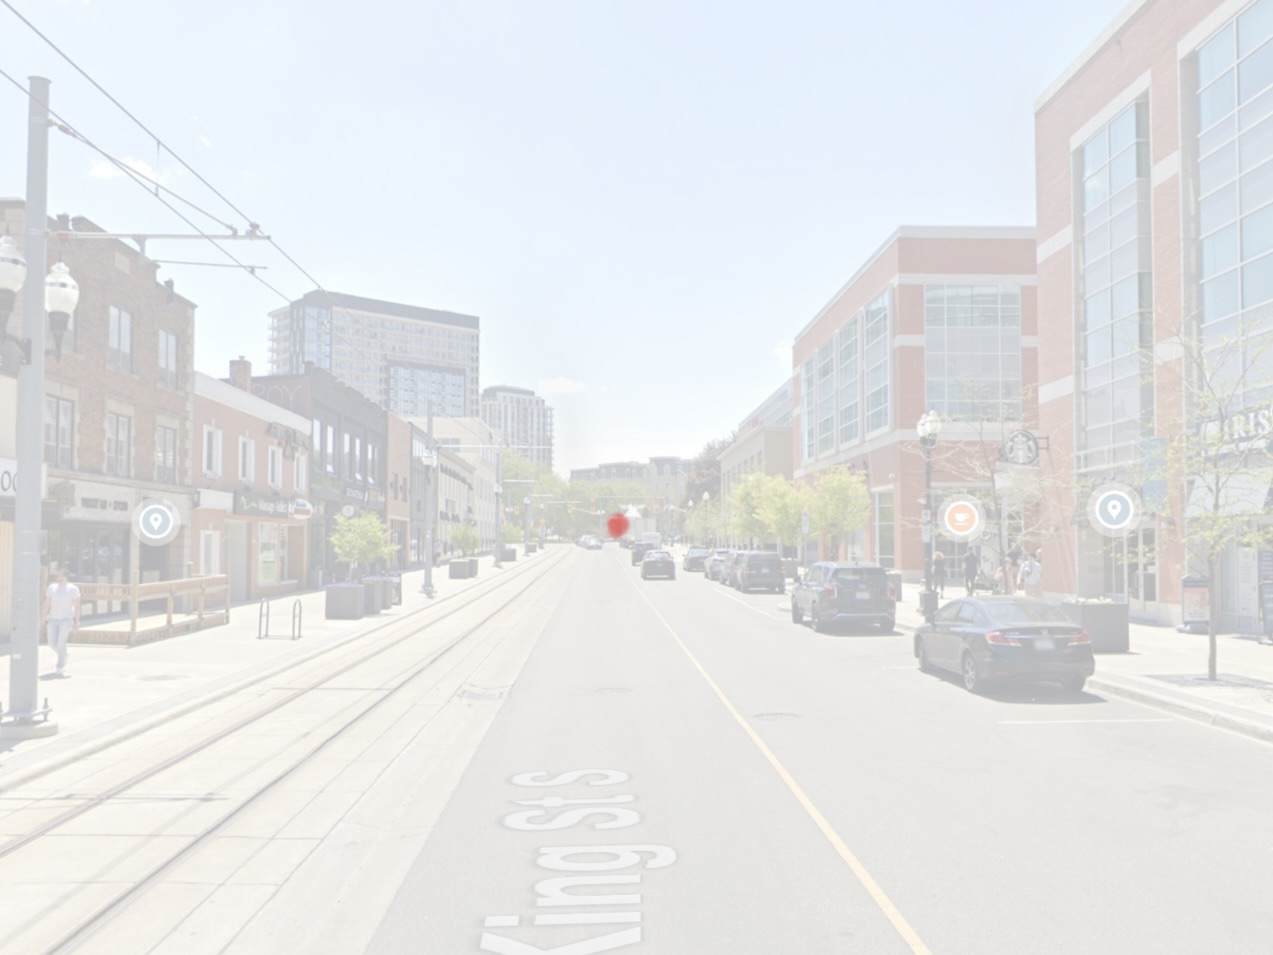
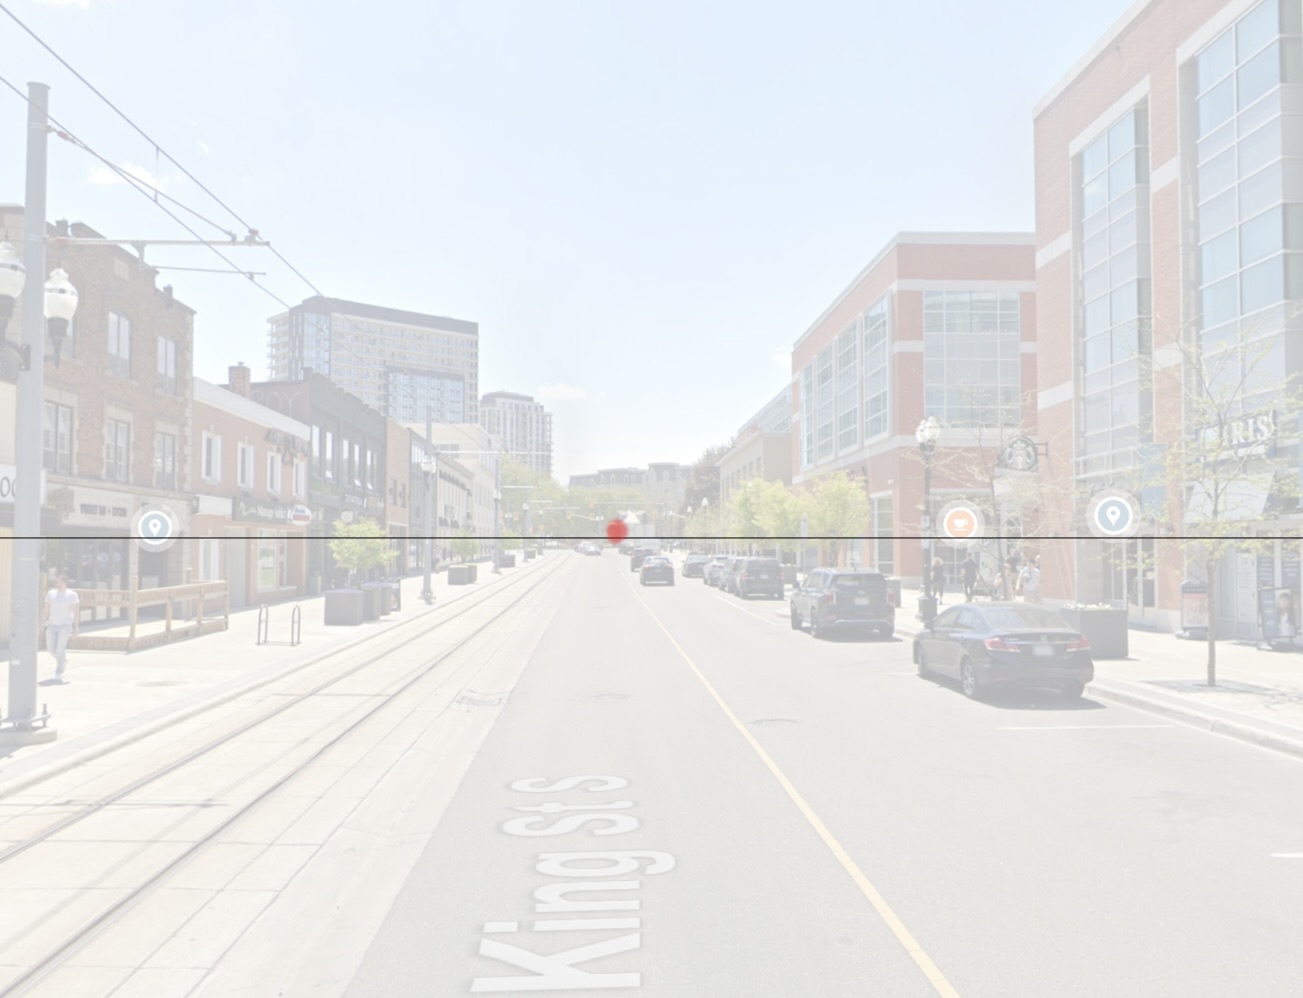
- A reference image or scene. (For the purposes of this tutorial, we will be using the photo of _____ named Figure 1.)
- For this tutorial the author uses the Autodesk Sketching app, but you can use any medium or app.

- Establish your vanishing point with a lightly marked dot.
-
- Keep it roughly in the middle of the page
- This will be your perspective point
- Any diagonal lines will lead toward this point
- Draw the horizon line.
-
- Using a ruler, lightly draw a straight horizontal line across the page
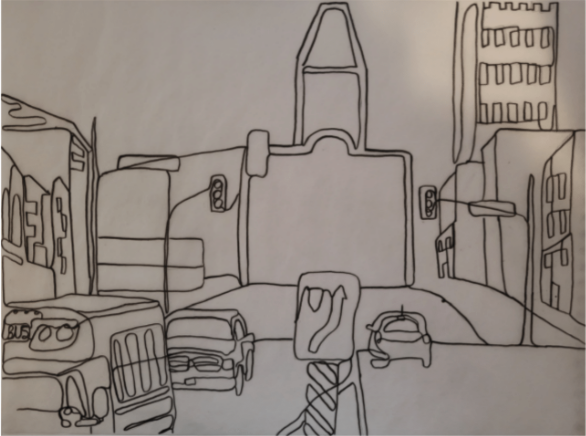
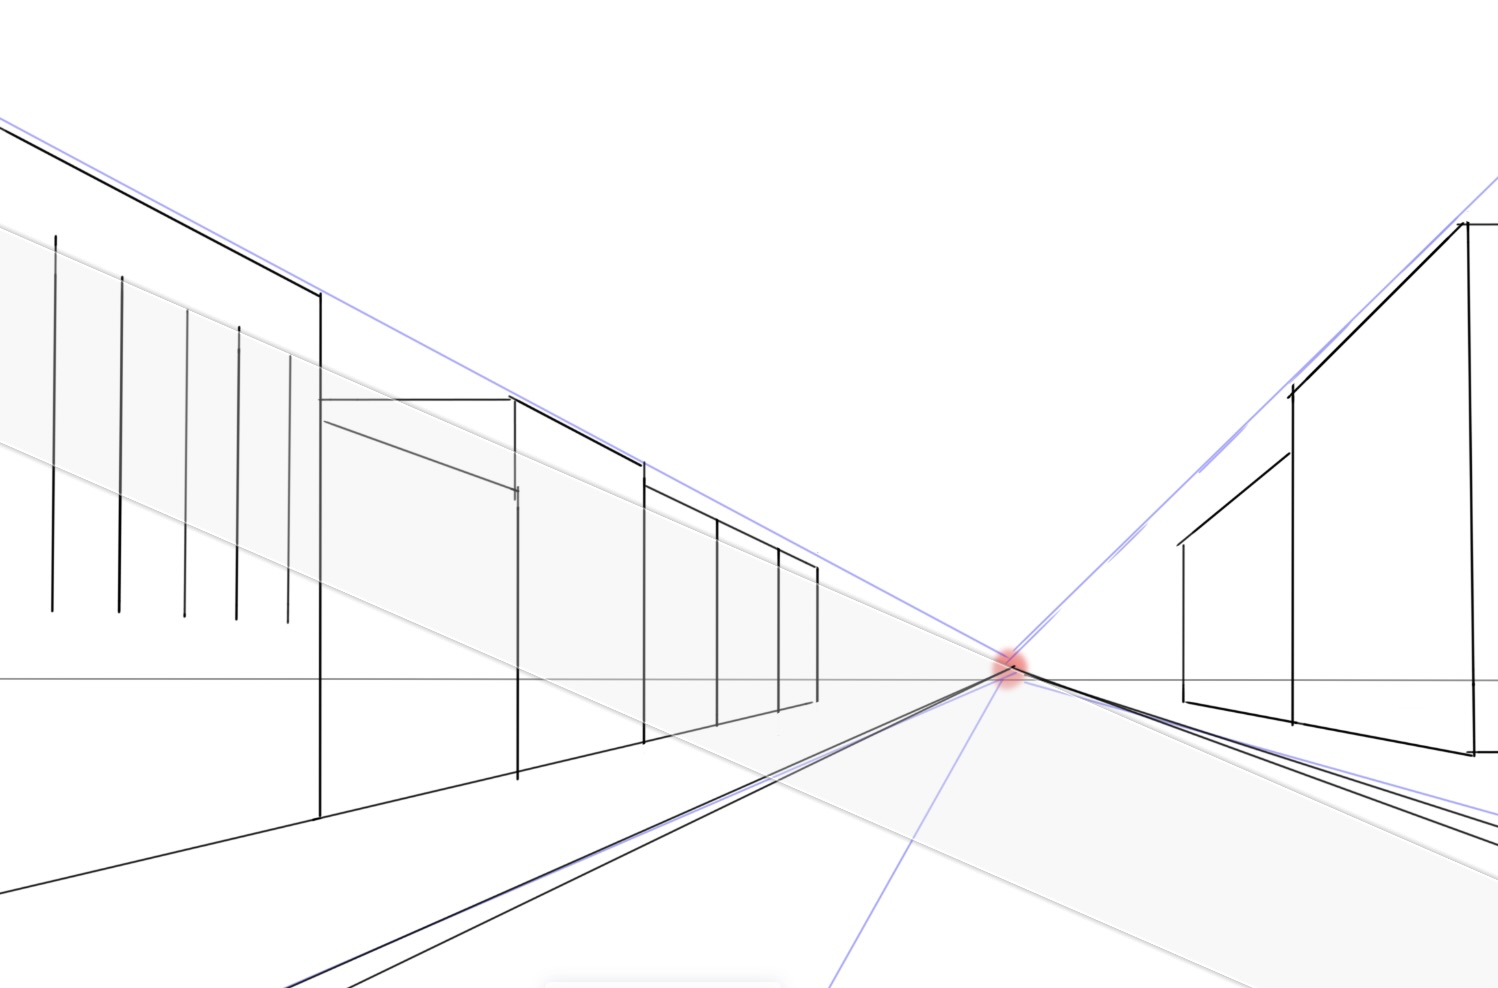
- Before you begin to draw the elements in the scene, simplify the scene into basic shapes like showed below
-
- By simplifying the buildings, roads, and paths, into squares, rectangles, and triangles. It will help to not get caught up in the details
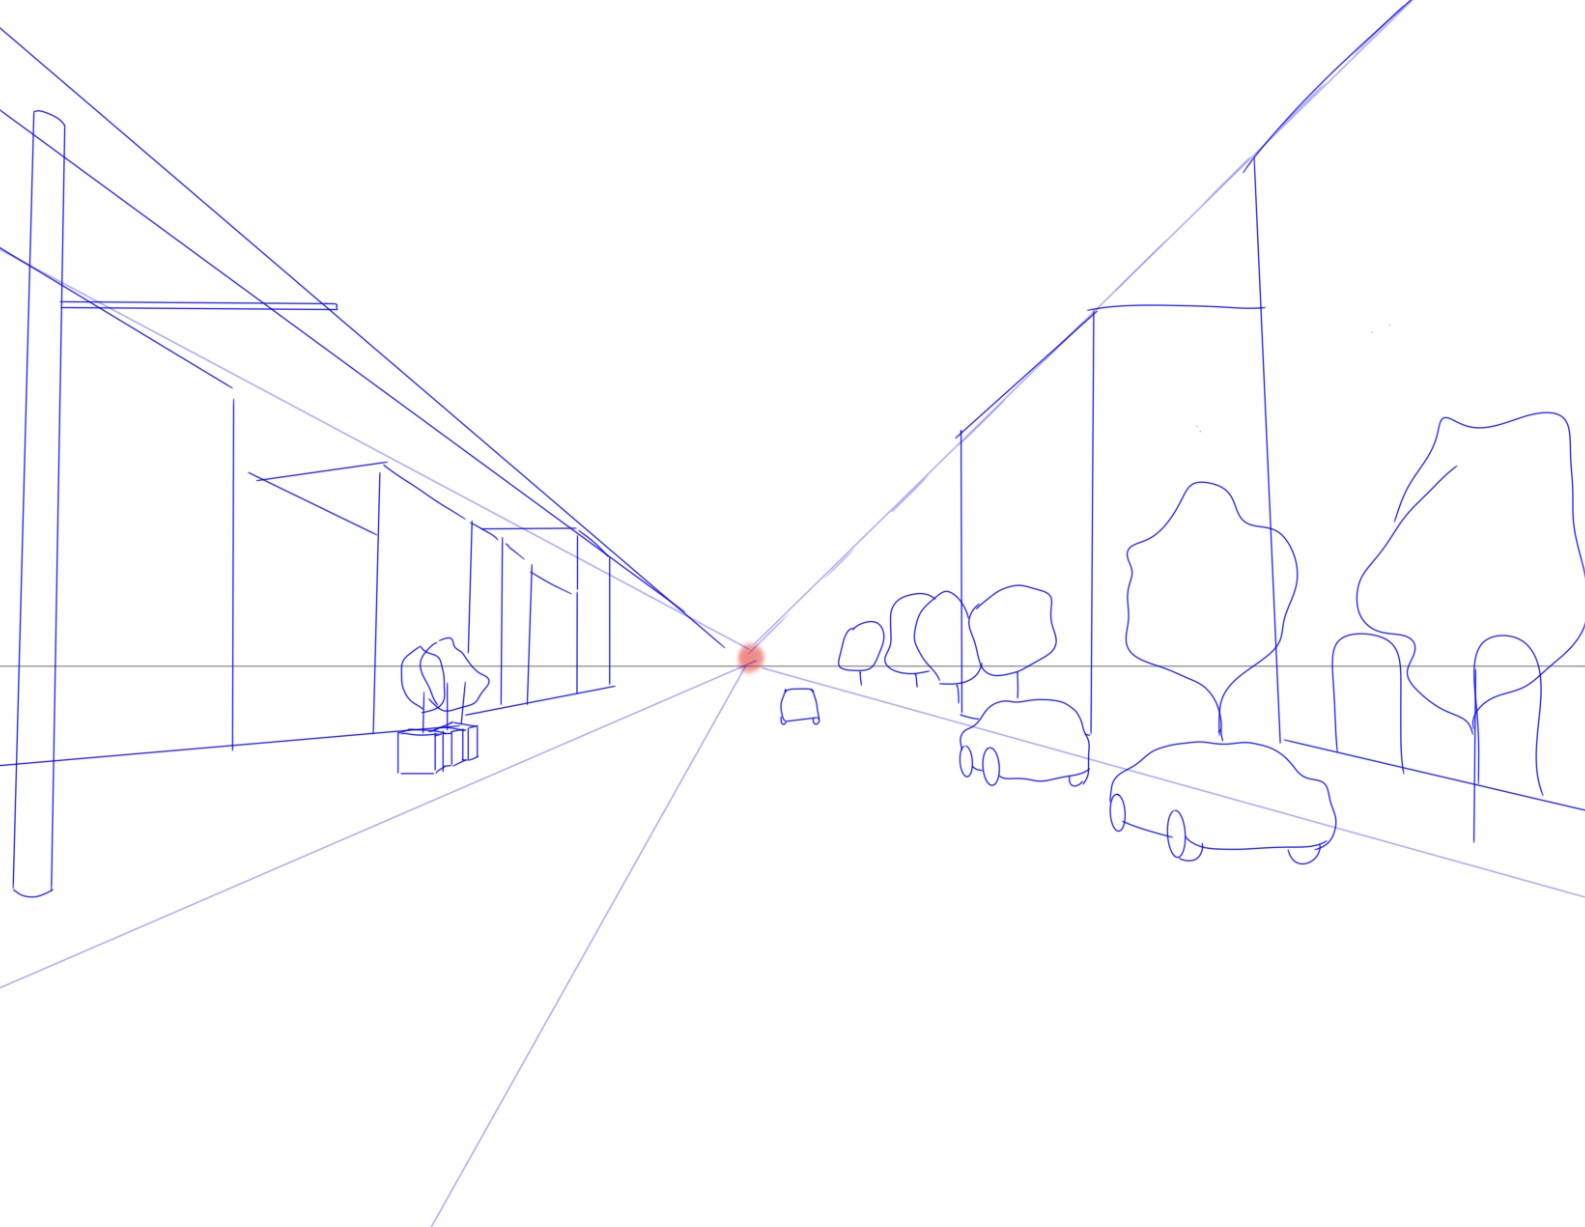
5. To draw the road, draw two lines leading from the vanishing point towards the bottom corners.
- This line would represent the curb/ where the road meets the side walk or where pavement changes
- Try making a guideline first, and experiment with the placement of this line. The line doesn’t have to end at the bottom left corners.

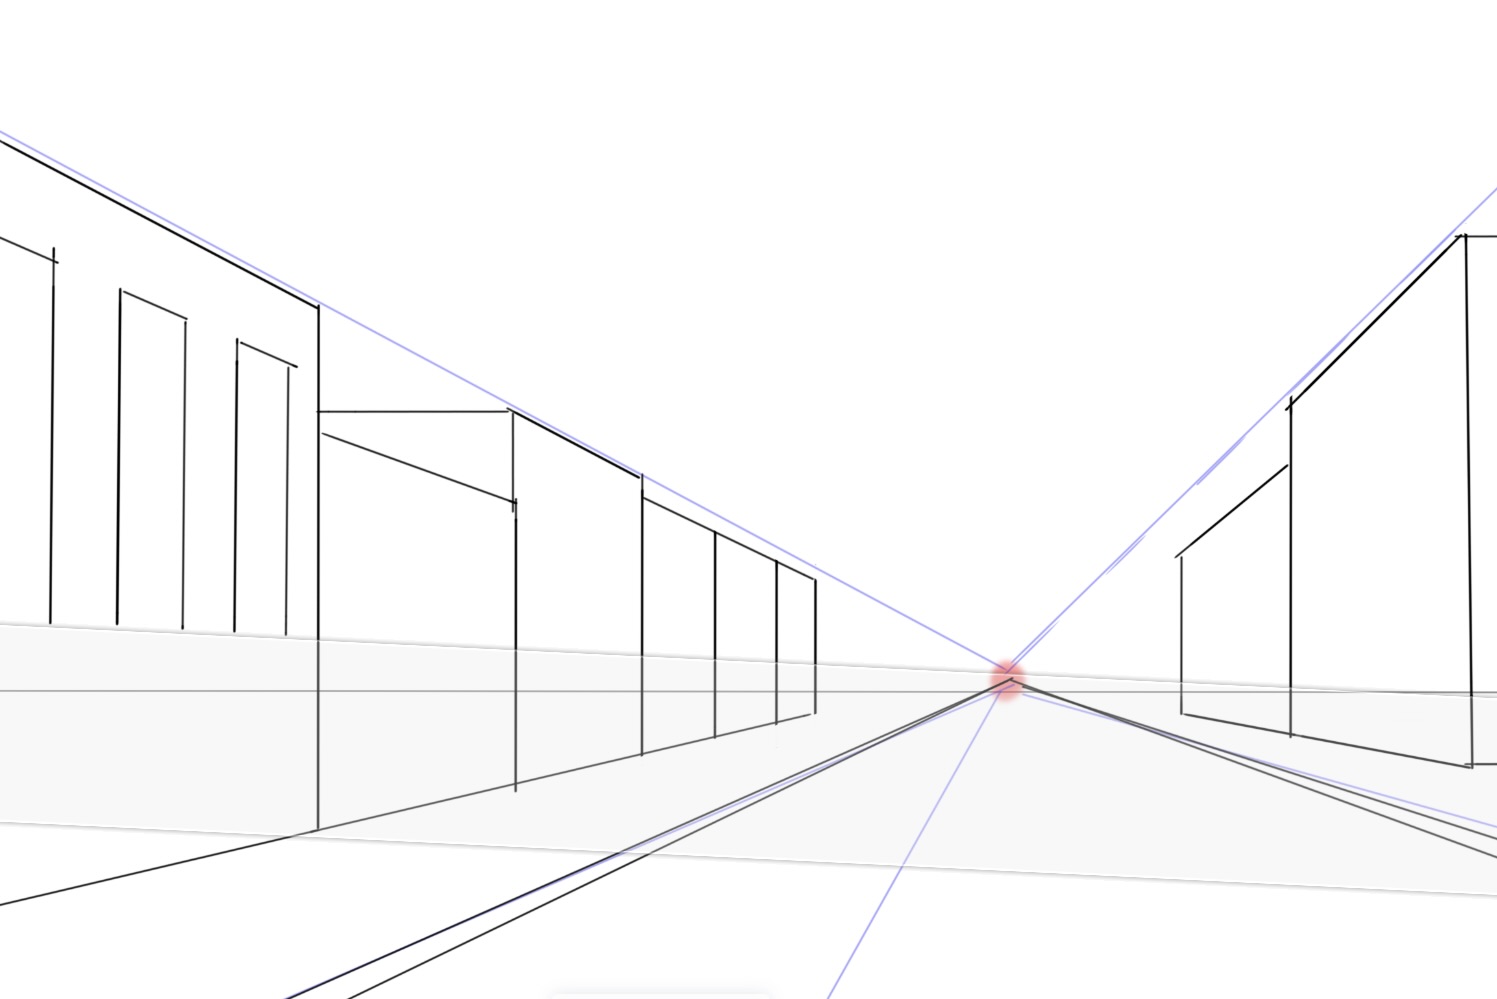
6. To draw the buildings, draw the vertical edges straight up unless a building has a slanted feature. Lead the horizontal lines that would face the street towards the vanishing point.
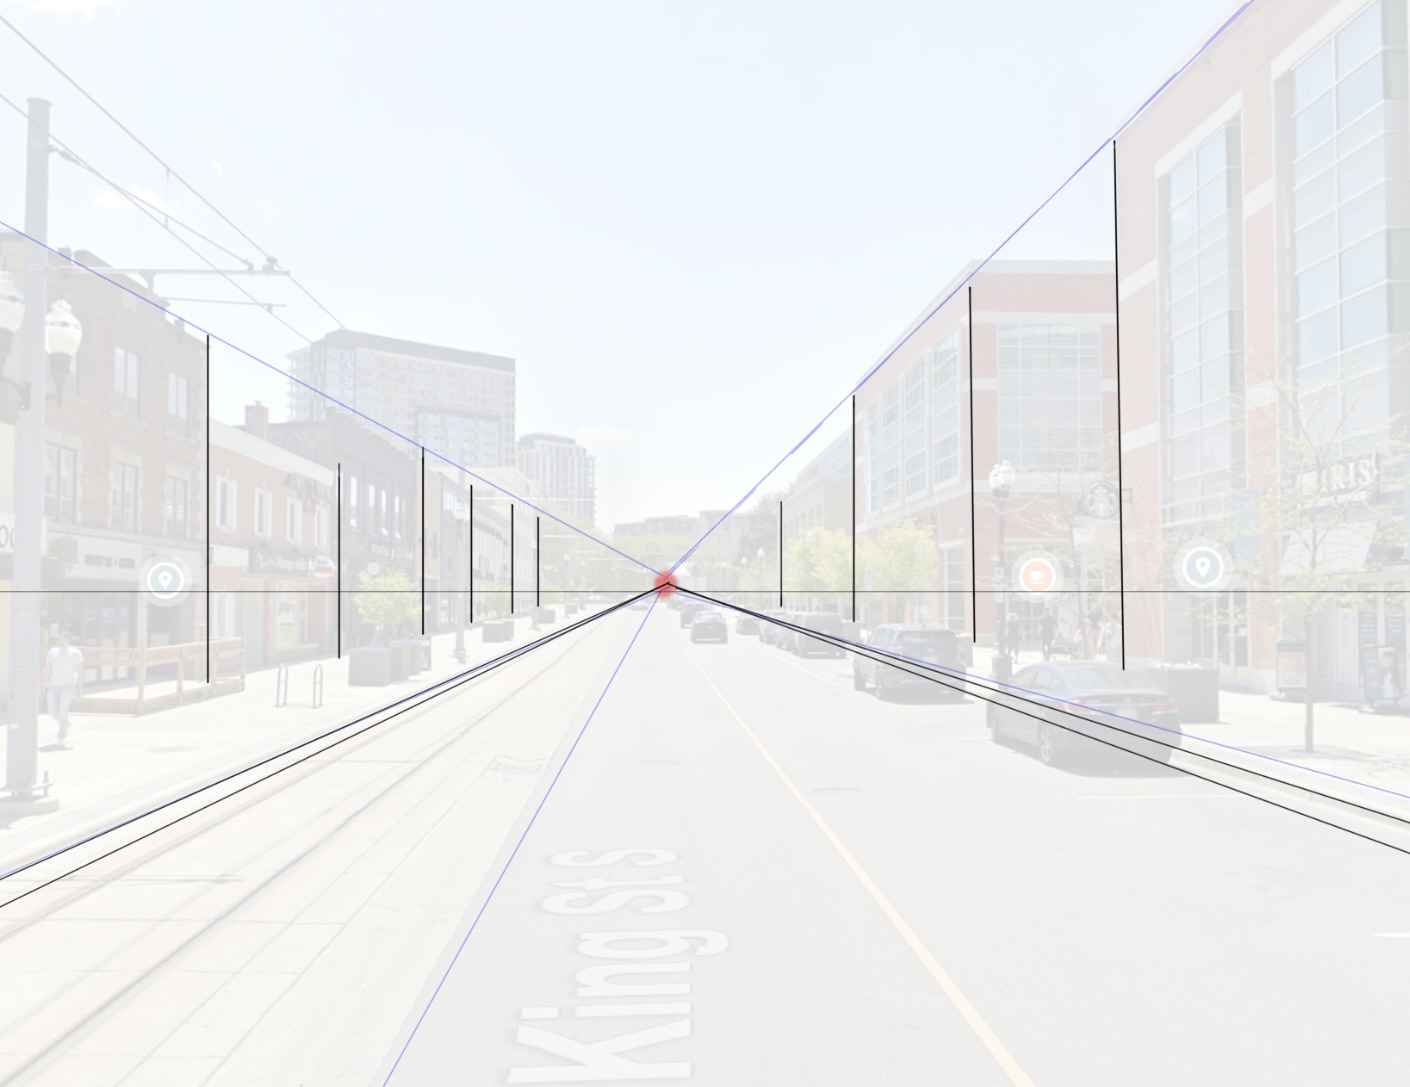

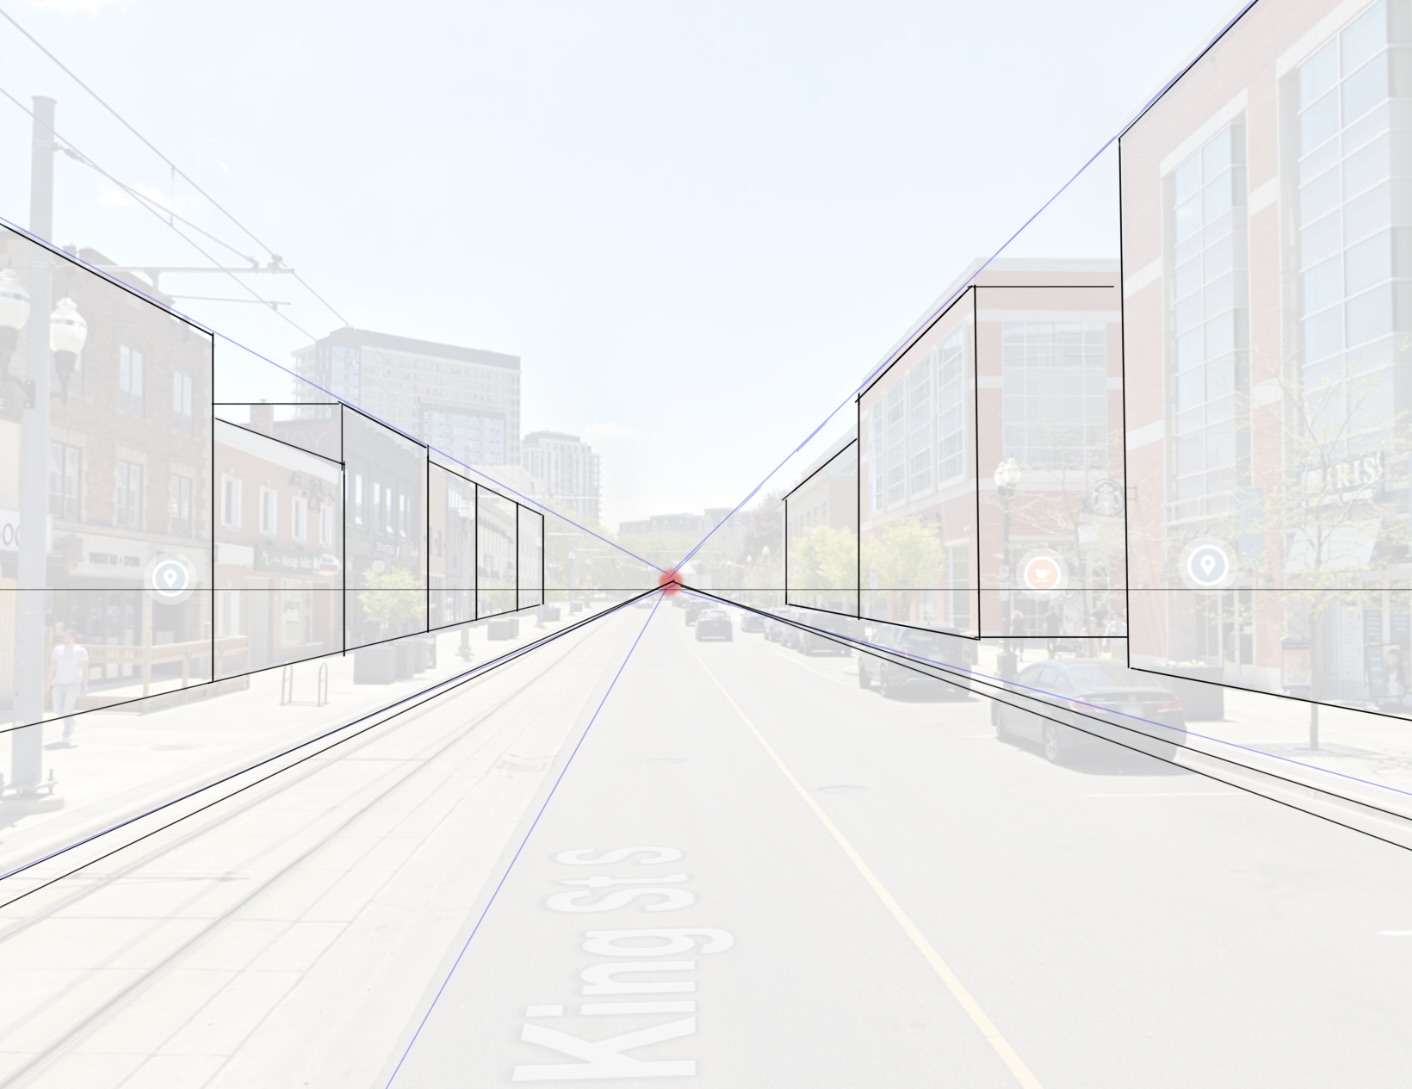
7. Start adding details to your drawing such as windows and doors. Vertical lines will go straight up. But horizontal lines lead into the vanishing point.
- Notice how one end of the ruler is touching the window, and the other end leads through the vanishing point.
- Keep doing this for all the doors, windows and entourage that are on the buildings and face the street
8. Carefully erase guiding lines, points, or marks that are no longer needed
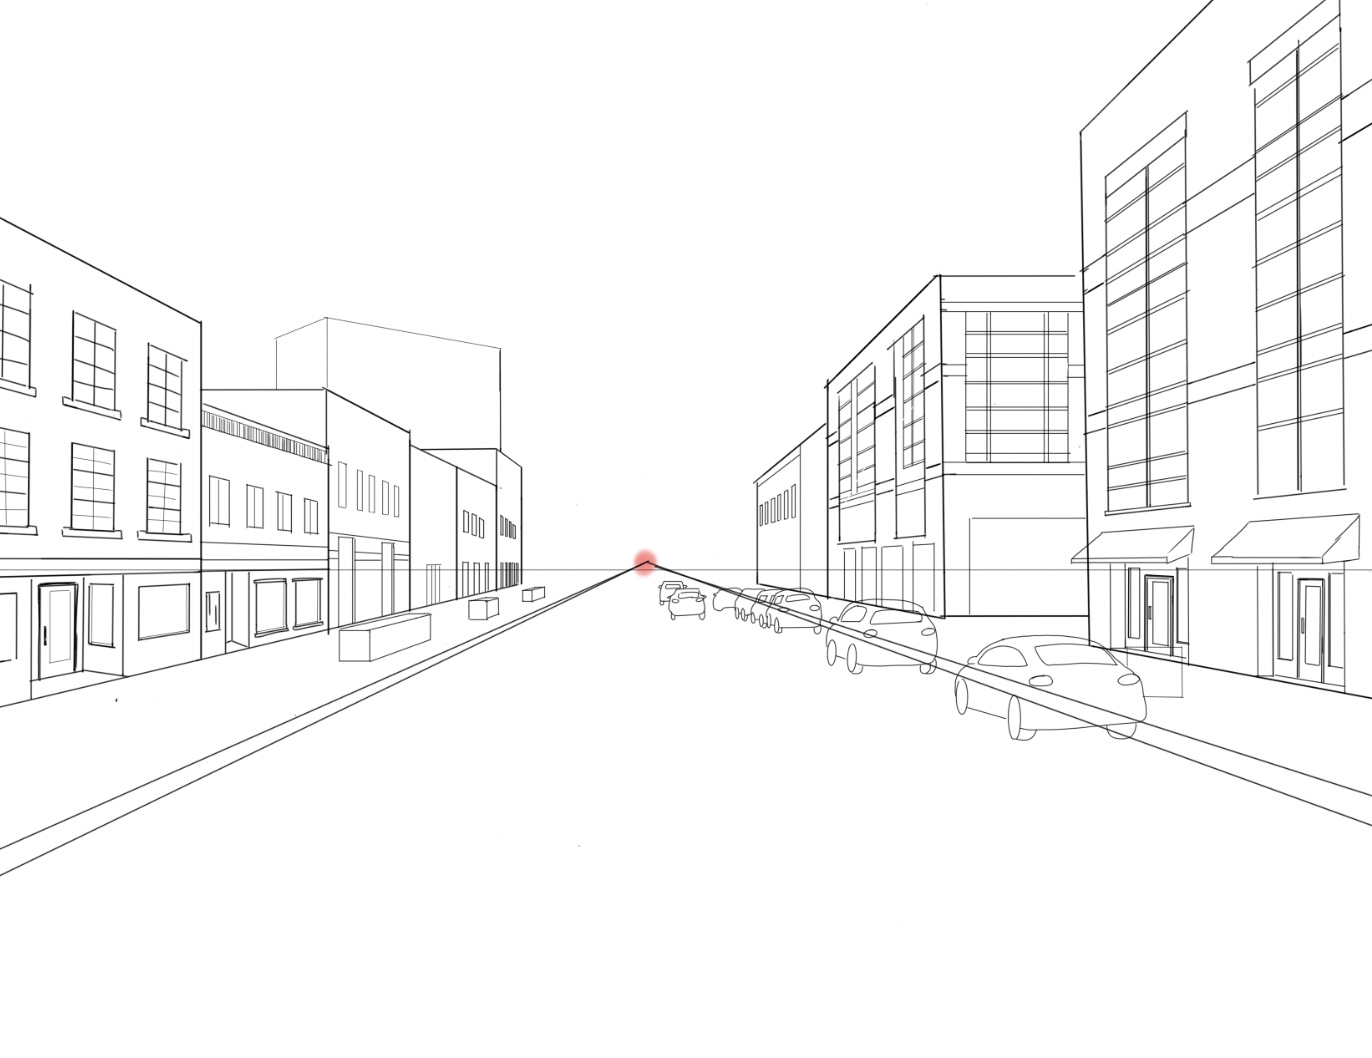
9. By now you should have a basic scene sketched out with primarily the buildings, with some detail. To add additional detail and entourage see steps 10 and 11
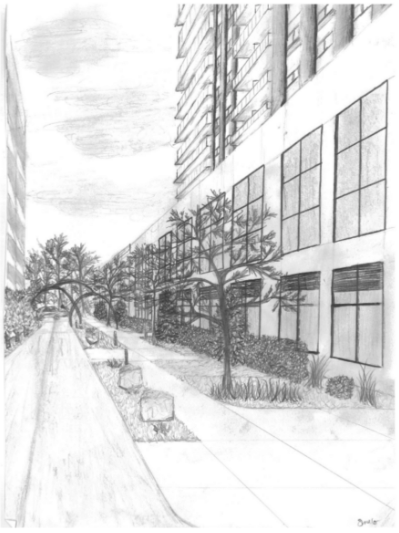
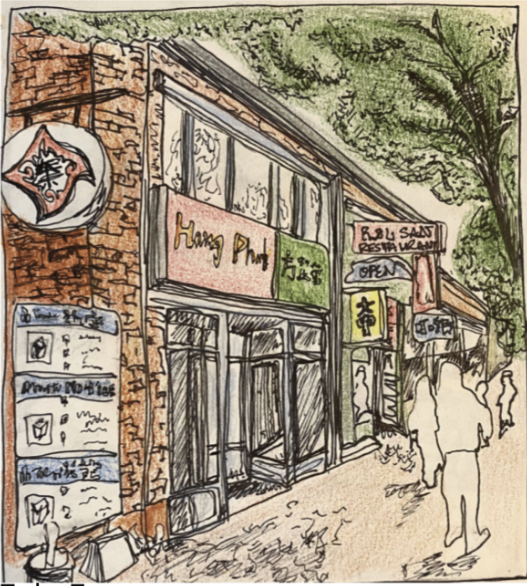
- Note there are many different styles or ways to sketch an entourage. For the purposes of this tutorial the author uses a sketchy and beginner friendly style. See examples attached below for medium to intermediate detailed drawings.
EXTRA
10. A simple way to draw trees is to create a rough outline of the tree canopy and then add branches that follow the shape of the canopy.
- Our scene only has planters on the sidewalks, so we start by drawing a cube for the planter. Then add a trunk as a base. Next add branches that are thicker at the bottom stemming from the trunk, and that thin out as they get higher.
- There are many more ways to draw trees more realistically and in different styles. Here are some extra links:
- x
- y
- z
11. To add people, start by creating rough shapes of their head, torso, legs, arms and feet.
- PRO TIP: Keep the head of the entourage around the height of the horizon line. Make exceptions for any entourage sitting down, jumping, or to differentiate adults from children.
- As a general rule of thumb try to keep the adults head around the horizon line.
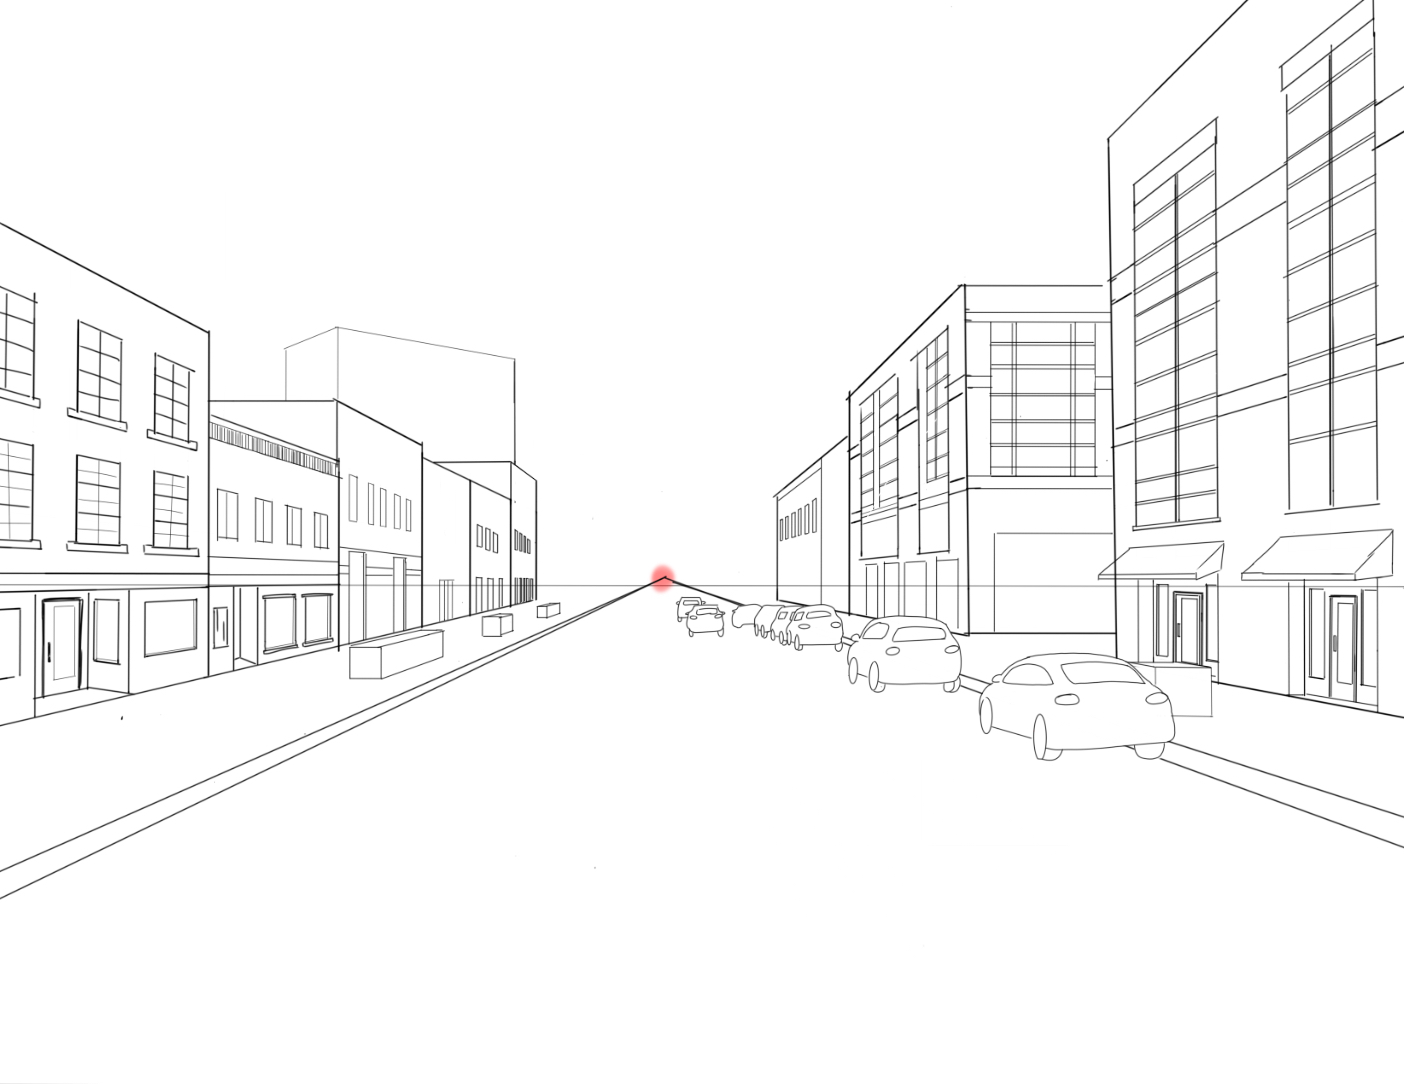
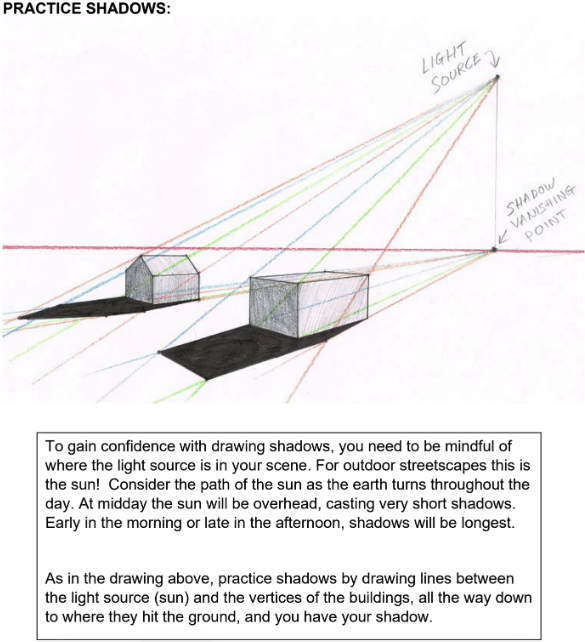
12. To further add realism to the drawing, determine where the sun is in your scene and start adding some shadows in the direction the sun is being casted in
- Consider where the sun is. Shadows would be cast in the opposite direction.
- In Figure 1 the sun is roughly at peak afternoon height and so shadows would be casted straight down. However this would be different if the sun were lower in the sky.
Additional examples of 1-point perspective drawings