Rehearsal and Filming Day
Once you have chosen your filming equipment, learned how to use each piece of equipment, and practiced on your own time, it is time to rehearse with the virtual gaming simulation team.
Rehearsal Day
During the rehearsal, you want to:
- Introduce the team to each other and begin to establish a psychologically safe environment by role modeling inclusive language and behaviours.
- Check the safety of the physical environment by taping down wires, using sandbags on equipment, and orientating the team to their surroundings.
- Orientate the team to the film locations (e.g., set, dressing room, break room).
- Collect and complete consent forms for filming and confidentiality.
- Outline the ground rules during filming day (e.g., arrival, preparation, behaviour while on set).
- Rehearse each shot using the camera or a phone to visualize the script and to ensure flow.
- Encourage the actors to try different emotions, movements, and wording to fit their personal style, as well as to achieve the virtual simulation goals. Sometimes your original wording in the script may not fit the persona of the actor. A few minor tweaks in wording and movements, but still maintaining the main message, can strengthen the actor’s performance and overall shot.
- Bring a master copy of the script to make edits as needed according to the rehearsal outcome.
- Debrief the overall day with the team.
- Review expectations of each filming day. For example, filming dates and times, including when each actor should arrive at the set, props, and costumes.
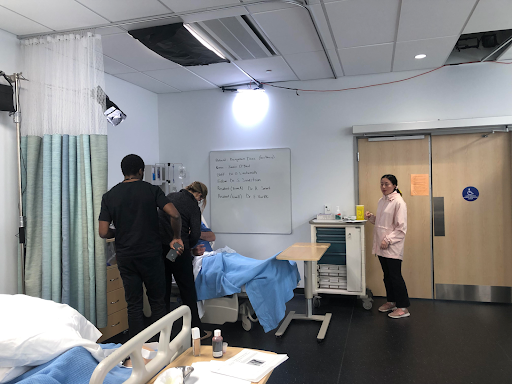
Filming Day
On the first day of filming, everyone’s energy will be palpable! It is the day that you and the team have been working towards. You want to maintain focus, as well as keep up the positive energy. Filming day focuses on setting up the scene, filming the shots, and wrapping up the day.
If you have a professional filming crew, the crew will prepare the filming set with their equipment, provide instructions about filming, film each shot, and break down the set. Your role will be directing each shot, making sure the correct props are on set, and instructing the actors on their positions and how to portray the characters in the script.
If you are filming on your own with your team, we recommend creating a checklist for the set-up, filming, and wrap up stages. Here are a few points to consider to help you organize your filming days.
The set-up involves getting the set ready for filming. Your checklist can include:
- Set up a separate room with refreshments for actors and crew when on breaks.
- Position lighting to highlight actors and scenes, hang up black-out curtains to block natural or unwanted lighting as needed, tape down wires, position audio equipment, cameras, and add props to set.
- Remove clocks from walls and watches from actors’ wrists. Or, if the actor has a smart watch, you can make the face of the watch blank so it does not show the time. This will avoid viewers seeing the time difference between takes.
- Remove or hide labels from products and actor’s clothing.
- Re-orientate the actors to the location site.
- Discuss the ground rules on set.
- Bring copies of the master script to make edits and share with the actors as needed.
- Review the day’s agenda (e.g., what takes will be filmed, break times).
- Confirm the actors have the required costume (e.g., hospital gown, shoes), props, and are aware of their position landmarks.
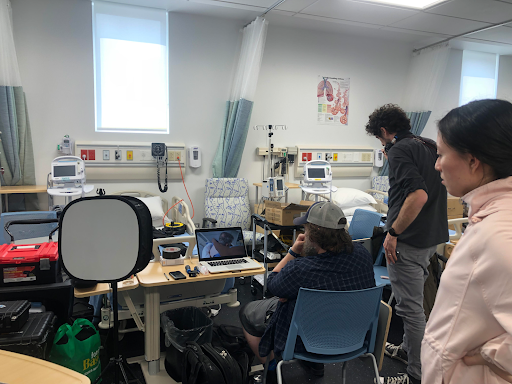
When preparing to film each shot, your checklist can include:
- Bring copies of the master script to make edits and revisions as needed.
- Record the number of takes and the quality of each take on the master copy.
- Appoint a team member to watch the external monitor video when recording and note any errors. (e.g., shadowing from lighting on actors, boom in shot).
- Film 1–2 dry runs. This will help with camera positioning and the actors’ performance.
- After the first few recordings, review the video to listen to the audio to ensure the sound quality (e.g., no muffling from microphones).
- Organize each take by using a clapboard or a white board at the beginning of each take. For example, DP1, Option 1, Take 1 (2, 3, …). Use a system that works for you.
- Film 2–5 minutes of ambient sound or room tone. This audio can be used to correct distracting noises or errors during filming by overlapping the room’s ambient sound over the errors.
- When you are ready to film, use verbal affirmation.
- First tell everyone to be quiet on set.
- Begin recording and get into position.
- When ready to film, the actors state “Action” in a loud voice so everyone can hear.
- At the end of the scene, state “Cut” to inform everyone filming has stopped.
- Ask the actors to count to 5 before starting their lines and at the end of each scene. This additional time will help with editing the videos later.
- Take a picture at the end of the last shot to help remember where to begin the next shot. This will help with flow between each scene.
- On the master script, rate each take as the “best,” “okay,” and “not good,” including the rationale (e.g., noise, can see boom). This will help when reviewing the takes later.
- Back up your videos during breaks.
- Bring two sets of batteries and chargers for the equipment. Charge and change the batteries during breaks.
- Debrief at the end of each day to reflect on everyone’s experience and continue to support an inclusive environment.
- Lock up the equipment if you are leaving it on site.
- If you are taking the equipment home, note landmarks where the equipment was placed to ensure consistency when filming the following day.
End of Filming
- Back up all your videos on two separate drives.
- Organize and label each take to help you review and find videos more easily when needed.
- If you are editing your videos, schedule a few days just for editing.
- It’s important to watch all the takes, make notes of the best ones, and begin the editing process. Editing takes time and you want to be able to fully concentrate on the task without distractions or disruption. It is also important to take breaks during the process.
Educator Tip
Filming with a GoPro
When filming with a GoPro, or other DSLR camera, make sure to have all the supplies ready for filming. Some key points to remember are:
- Watch tutorials for tips on using the GoPro.
- Download GoPro App to pair external camera/tablet devices.
- Buy extra batteries (90 min) and charger to help stay on time.
- Choose the correct setting prior to filming (e.g., resolution, field of view).
- Charge the GoPro/batteries during breaks.
- Buy a SD card with a large memory of several gigabytes (GB) and extra SD card in case you film various angles and longer than expected.
- Bring additional GoPro equipment, attachments, and mounting devices.
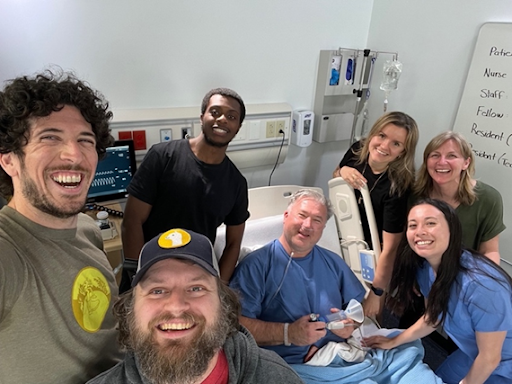
Student Cinematic Explorations: Capturing Creativity on Filming Day
Reflecting on the remarkable journey behind the creation of our virtual simulation, it was truly surreal to finally reach the long-awaited filming stage of this project.
It feels like just yesterday that the team was brainstorming ideas for the simulation, Client with COPD and Complex Medication Profile. Now skip ahead to May 2023, we find ourselves ready to film at the Daphne Cockwell School of Nursing at the Toronto Metropolitan University. Led by nursing professors Michelle Hughes from Centennial College and Dr. Kateryna Metersky from Toronto Metropolitan University, the project included film crew members Aaron Peacock and Aidan Kennedy from Two Blue Shirts, along with actors Tyler Morgan and Garrick Meyers. Although one of my primary roles was acting as the covering nurse in the simulation, I was pleasantly surprised to find myself actively involved in different aspects of the day:
In addition, I had the privilege of taking on several other roles:
- Rehearsing lines with the actors during the filming days.
- Assisting with the arrangement of the filming set and providing feedback on the scene compositions, including language and tone.
- Updating the script throughout the filming days.
- Helping direct the scene.
- Facilitating the smooth flow of the day’s events and assisting in directing the scene.
Reflecting on these experiences, I recommend the following three valuable tips for students working on film sets:
- Bring a reusable water bottle and wear comfortable and quiet shoes and clothing.
- Be open-minded to different opportunities throughout the day and always ask how you can get involved.
- And most importantly, have fun!
– Caitlin Cosgrove, Toronto Metropolitan University Student