19 Quick Image Adjustment with Photo Tools (Windows & MAC)
Introduction
The image editing software that is used by default on a Mac is called ‘Preview’ and on Windows its called ‘Photos’. Although these tools have many different features, this tutorial will only be focusing on how to resize an image. However, there will be a YouTube video after each section that walks you through other features if you want to learn more.
Warning: Using Preview on Mac
When you go to save your image in Preview, it is more than likely you will be overwriting your original image. To prevent this, you should copy or ‘duplicate’ your image before you save so you don’t lose the original image. If you don’t need the original image, disregard this warning.
Using Preview: Mac
1. Open your image by double clicking or right clicking and selecting ‘Open’ from the menu.
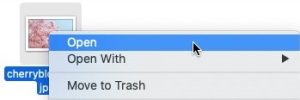
If Preview doesn’t open, you can choose which software you want to open the image with by right clicking the image file and selecting ‘Open With’. You will see another menu appear where you can select ‘Preview’. This will force the image to open with Preview.
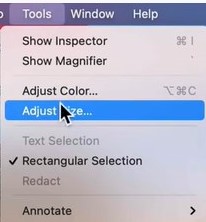
2. Click on the ‘Tools’ tab at the top of the page and from the menu that pops up select ‘Adjust Size…’.
3. Here you can input your desired width and height or select a predefined size by selecting an option from the ‘Fit into:’ box. You can also change the resolution and units of measurement if you wanted.
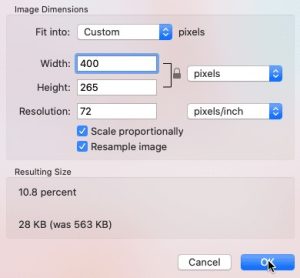
4. Once your done, click the ‘OK’ button.
‘Scale proportionally’ should always remain checked when resizing.
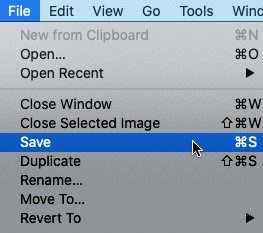
5. We still have to save our edited image. To do that, click on the ‘File’ tab at the top of the page and from the menu that pops up select ‘Save’.
Using Preview On a Mac – YouTube Tutorial
https://youtu.be/HF-nJiDKmN8
Using Photos: Windows 10
1. Open your image by double clicking or right clicking and selecting ‘Open’ from the menu.

If Photos doesn’t open, you can choose which software you want to open the image with by right clicking the image file and selecting ‘Edit with Photos’. This will force the image to open with Photos.
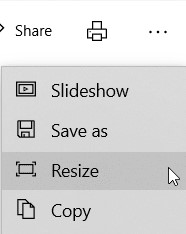
2. Next, we need to open the more options menu by clicking the 3 dots towards the top right of the screen. From the menu that pops up, click on ‘Resize’.
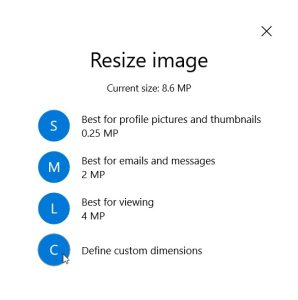
3. This will open a panel where you can select a predefined size (Small, Medium, or Large) and it will shrink your image to that size. If you know the exact width you want to set your image to, you should select the ‘Custom’ option, which is located at the bottom of the list.
4. After selecting the custom option, you will be brought to another panel where you can input your desired width and height and adjust the quality of the image.
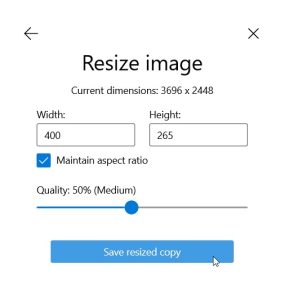
5. Once you are done editing, click ‘Save resized copy’.
Maintain aspect ratio should always remain checked when resizing.
