30 Videos and Captioning in MS Stream
Videos and Captioning in MS Stream
MS Stream is an easy way to share video recordings of lectures with your students. Only students and staff with a St. Clair log in will be able to view your videos and access can be further restricted to only certain groups of people or to individuals you designate.
Navigating to MS Stream
1. Go to MS Stream website and sign in.
2. From the menu on the left side of the screen, select MS Stream. You may need to use the Apps icon at the bottom of the list to find MS Stream.
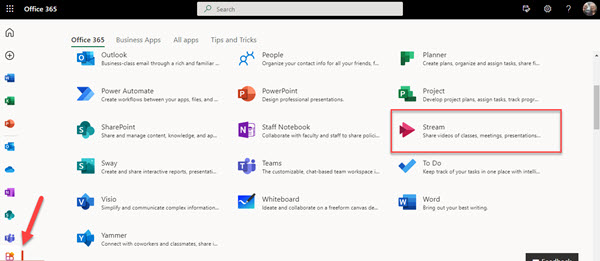
3. Use the menu at the top of the MS Stream window to (1) view your contents or (2) create a new stream (upload a video).

To Upload and Caption
1. Select the “Upload” button on the right side of the “Quick access” menu
![]()
2. Upload the video file from your computer or other storage device.
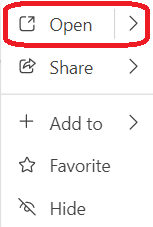
3. Hover over the recording and select the “More options” button on the right side of the window

4. Navigate to the “Open” button from the drop-down menu
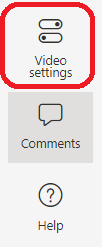
5. Expand the “Video settings” tab on the right side of the window
6. Navigate and expand “Transcript and captions” tab on the “Video settings” panel
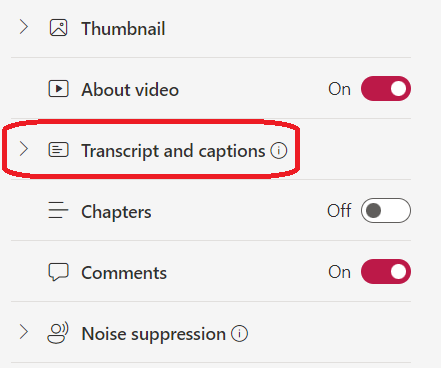
7. Select the “Upload” button if you have a transcription file ready, or select the “Generate” button if you would like the website to generate captions automatically
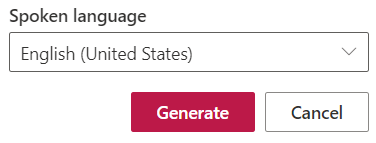
8. Choose the spoken language from the pop-up window and then select the “Generate” button if you decided to add automatic captions
Watch a short video explaining how to upload captions into MS Stream.
Instructions from Microsoft on how to use MS Stream:
- To upload a video – this article includes uploading your video and setting permissions.
- To add subtitles and captions – this article includes how to create a transcript.
