18 Image Optimizing with Befunky and Optimizilla
Terms to Know:
-
Image Compression: The objective of image compression is to store image data more efficiently, thus removing any redundant or unnecessary data, and shrinking the file size in the process.
-
Online Image Compressor: An online tool used to compress image size.
Editing An Image: Befunky
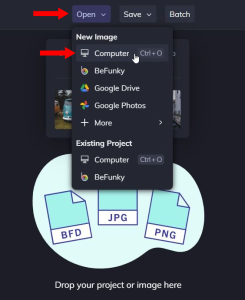
1. Opening your Image:
Upload your image by clicking ‘Open’ and selecting your image.
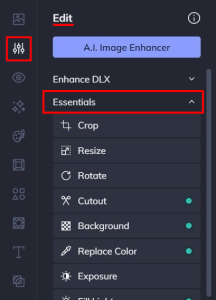 On the left-hand side, make sure you are in the ‘Edit’ tab and you have the sub-tab ‘Essentials’ expanded (this is the default when opening a new image).
2. Editing Your Image
In the sub-tab ‘Essentials’, You can select ‘Crop’ or ‘Resize’.
2.1 Using ‘Resize’

Adjust the width and height on the left side to change the size.
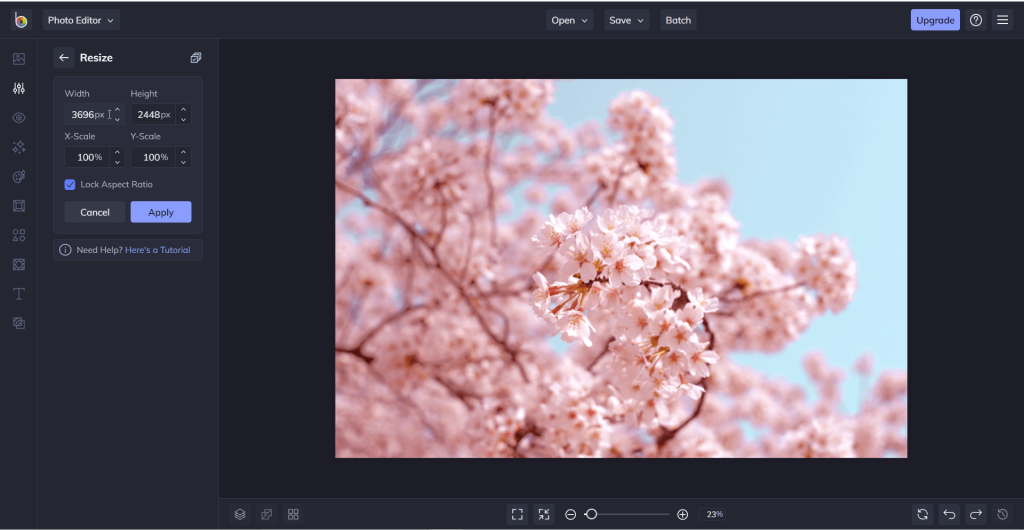
Click on ‘Apply’ to save your changes.
‘Lock Aspect Ratio’ should always remain checked when resizing.
2.2 Using ‘Crop’
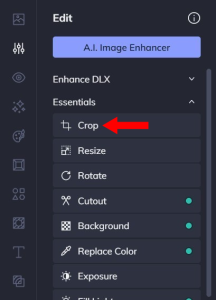
A box that looks like a grid will appear on your image. Everything that is inside of the box will appear in your image, while everything left outside of it will be cut out.
Drag the edges of the box to adjust and position it.
If you already know the width and height you need, you can also change the values directly in the width or height boxes on the left.
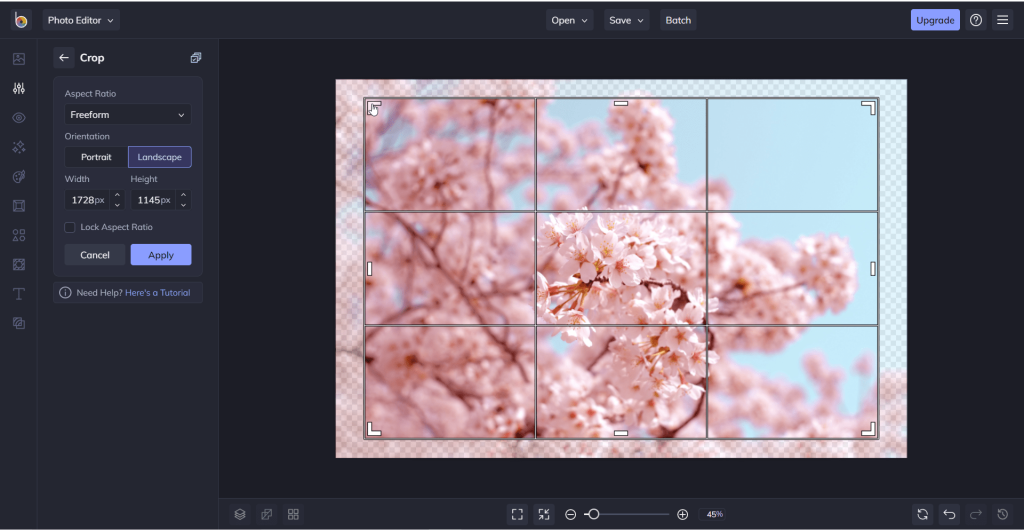
Click on ‘Apply’ to save your changes.
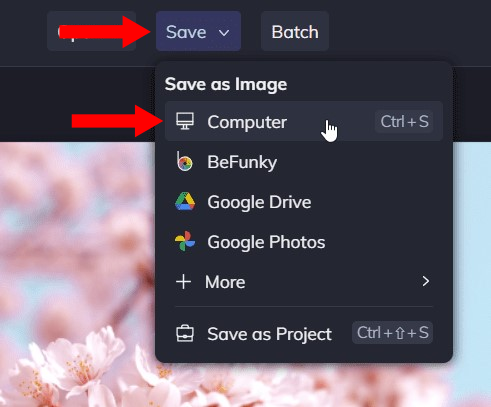
3. Saving Your Image
Once you are done editing, click ‘Save’ at the top of the screen and then select ‘Computer’ from the drop down menu.
This will not download the image immediately. Instead, you will be brought to a screen where you can change the filename, the extension type, and adjust the quality of the image. You do not have to change any of these values. However, we recommend that you use a JPG filetype.
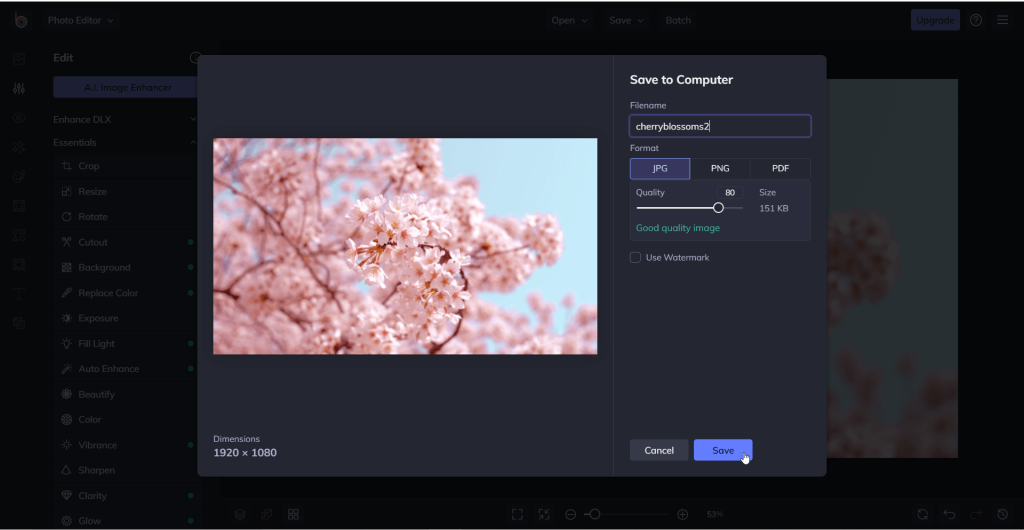
Select ‘Save’ to download the image.
Compressing an Image: Optimizilla
Once you’re on the site, scroll to the bottom if you haven’t already.
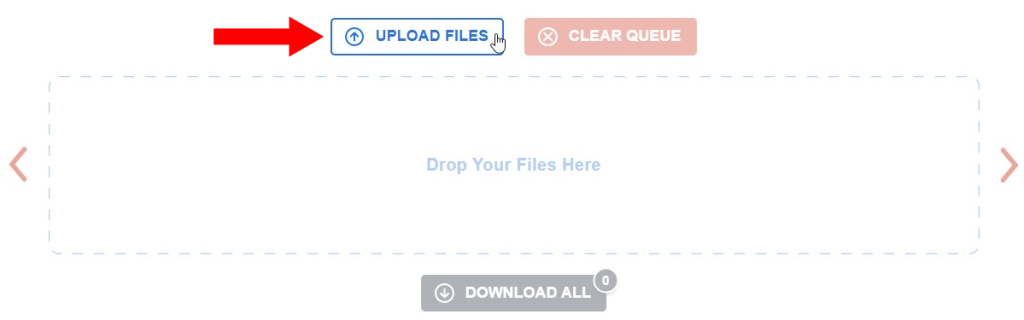
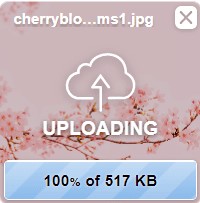
You can upload images in 2 ways, by dragging and dropping or by clicking the “Upload Files” button and selecting your image(s).
Adjust the quality slider on the right side of the screen to your desired level. You can see the original and preview image sizes at the top of the screen. You can also use the slider in the middle to compare the original image to the compressed version.
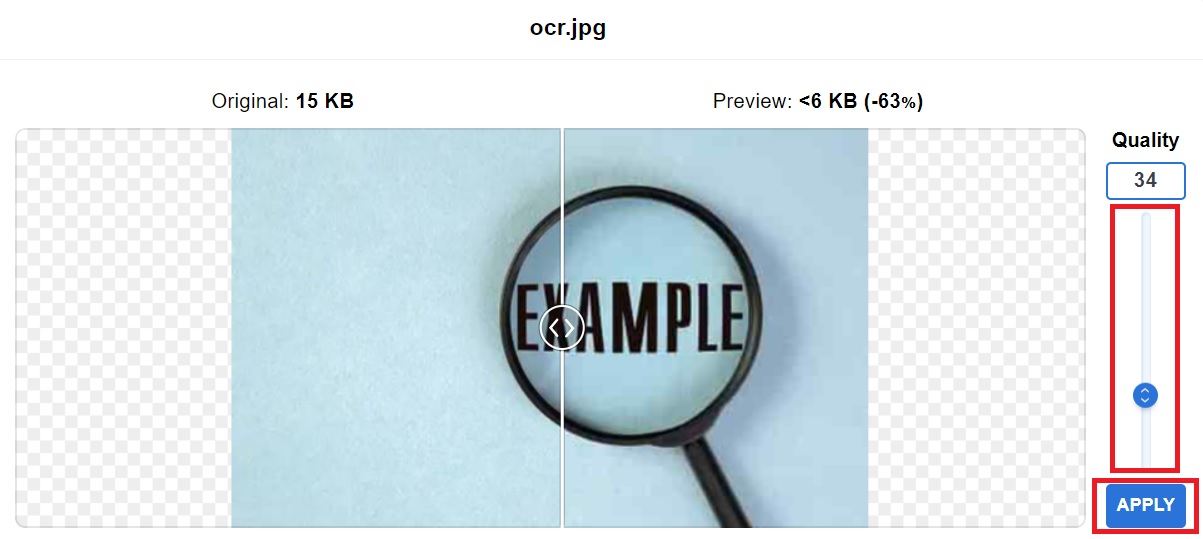
Select the “Apply” button to compress and resize the image.
The queue has a max of 20 files. Meaning, If you select more than 20 images, only the first 20 will be uploaded. You can always upload more once you are finished by refreshing the page or by clicking the “Clear Queue” button.
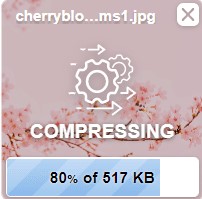
You will know when an image is compressed when the ‘Download’ button appears at the bottom of the image.
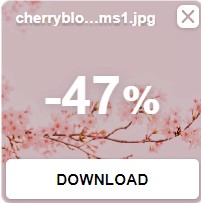
Once you see the ‘Download’ button at the bottom of the image, you can click on it to download that image.
Using the ‘Download All’ button will give you a zip file containing all of the images that were compressed. This basically “packages” all your images to ensure that no data is lost when you are downloading the file. If you don’t know how to unzip a file, download each image individually or watch the quick YouTube tutorial posted below.
The Result
By following these simple steps, you can ensure that your images meet the recommended specifications for webpage use. Resizing your images not only improves loading times but also enhances the overall learning experience for your students. Whether you choose built-in software or online tools, the process is straightforward and will make your course materials more accessible to everyone.
