29 Accessible Videos in and with Blackboard
Captions in Blackboard Collaborate Recording are a written transcript of the spoken content in a recording. They are typically displayed at the bottom of the video player, and can be turned on or off by the viewer.
Blackboard Collaborate provides several options for captions in their recordings:
- Automatic Speech Recognition (ASR): This option uses speech-to-text technology to automatically generate captions for the recording. The captions generated by ASR may not be 100% accurate, but they can be edited and refined as needed.
- Manual Captions: This option allows the user to manually type in the captions for the recording. This is a more time-consuming process but allows for more accuracy.
- Import captions: This option allows you to import captions from a file, such as a .srt file. This can be useful if captions have already been created for the recording by a professional captioning service or by another software.
- Closed captions: This option allows you to add captions to the recording and it can be turned on or off by the viewer. The captions can be edited by the user.
Adding captions to a Blackboard Collaborate recording is important for several reasons.
First, captions provide accessibility for individuals who are deaf or hard of hearing. This ensures that all students, regardless of their hearing ability, have equal access to the content presented in the recording.
Second, captions can also be beneficial for non-native English speakers, as they can help to clarify the spoken content.
Third, captions can make the recording more engaging for all students by providing a written record of what was said, which can be referred to later for review or study. In addition, captions can improve the searchability and discoverability of the recording, making it easier for others to find and use.
Instructions
- Open your web browser and go to your Blackboard course.
- Log in to your Blackboard course.
- Select course tools from the quick-access menu on the left side of the website.
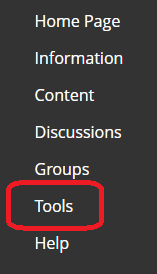
- Scroll down until you notice “Class Collaborate Ultra” link in the left column of the “Tools” menu and select this link.

How to Add Captions to a Blackboard Collaborate Recording
- Locate the recording you want to caption from the Collaborate Dashboard. The recording name always begins with the session name unless you changed it.
- Select three-dots menu on the right side of your recording.
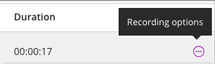
- Select “Add caption source” from the list of Recording options.
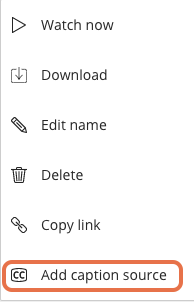
- Choose whether you want to create the captions manually or have Collaborate generate them for you using speech recognition technology from the menu.
- Select the “Enable captions” option first and then select “Create auto-caption” or “Upload/Overwrite captions” link depending on whether you need automatic captions or manually created captions.
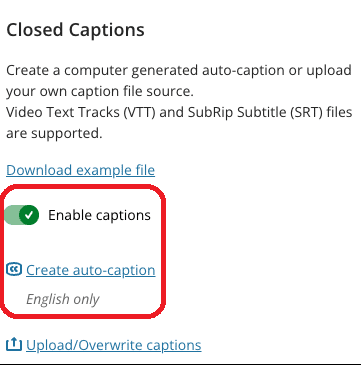
- Browse for the SRT or VTT file and upload it if you decided to add manual captions.
- Select the “Submit” button at the bottom of the screen to save and submit the changes.
Here are a few tips and tricks for adding captions to a recording in Bb Collaborate:
- Plan ahead: Before you start recording, decide which captioning option you want to use. If you plan to use ASR, make sure to speak clearly and at a moderate pace to improve the accuracy of the captions.
- Use a script: If you plan to use manual captions, prepare a script in advance. This will make it easier to type in the captions while you’re recording and will increase the accuracy of the captions.
- Edit and review: After recording, make sure to review and edit the captions to ensure accuracy. Check for errors, such as mispronunciations, and make sure the captions match the spoken content.
- Use keyboard shortcuts: Blackboard Collaborate has some keyboard shortcuts that can save you time when captioning. For example, use the “Tab” key to jump to the next caption and the “Enter” key to save it.
- Test with different browsers: Depending on the browser you use, the captioning feature might not be compatible, so it’s good to test with different browsers to ensure that the captions will be displayed correctly.
- Use Auto-Save feature: Blackboard Collaborate has an auto-save feature, which saves your work automatically, so you don’t have to worry about losing your captions if something goes wrong.
- Use captioning services: if you want professional and accurate captions, you can use captioning services that can provide captions in multiple languages and can handle special characters or symbols.
- Test the captions with your audience: Test the captions with your audience, this will help you to improve the accuracy of the captions and also to check if the captions are working well for all the students.
How to link and embed videos stored within Microsoft Stream to your Blackboard course site
How to record a lesson using Blackboard Collaborate Ultra
Read a short article that demonstrates adding captions to a recording in Blackboard Collaborate: How do I add captions to a Collaborate recording?
An overview of captions is available from Class and Collaborate Support
