26 Accessible PowerPoint Slide Decks
Regardless if you provide your PowerPoint Slides to your students before or after your class, there are a few design considerations that you can use while creating your slides that can make your Slide Decks more accessible for students.
Starting with the common Accessible Document tips, the following are recommended when creating PowerPoint Slides:
- Use a readable font – serif fonts such as Tahoma, Calibri, Helvetica, Arial, Verdana, and Times New Roman are recommended.
- Use default lists styles (bullets or numbers) to break up text and add organization.
- Use meaningful hyperlinks instead of listing the URL.
- Add alternate text to images (see our Tips on Alt-tags and Beyond Alt-tags).
- Identify document language which helps screen readers interpret your document (File – Options – Language, only needed once unless you create slides in different languages).
- Use the Accessibility Checker.
In addition, consider these tips specifically for PowerPoint:
- Use high contrast color schemes.
- Ensure color is not used as the only means of conveying information.
- Use at least 18 pt text, 28 pt is recommended for in-class presentations.
- Use a unique title for each slide.
- Use the preset slide templates and use Design after entering your text.
- Check reading order on slides.
- Avoid text on top of images.
- Avoid animations.
- Avoid adding additional textboxes.
- If the presentation is also provided as a printout, include the URL along with the hyperlink text.
- Create tables by using the PowerPoint’s Insert Table tool.
How to Use Design in PowerPoint Online
Design Ideas is available in PowerPoint Online and can help you add a professional, coordinated look to your slide presentation. PowerPoint Online is a tile available to you through the My.StClair portal.
1. Open a blank presentation and add your text and images.
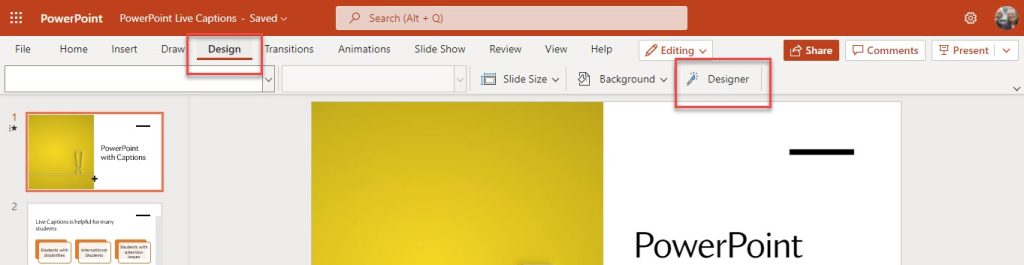
2. After you have added your content, return to your first slide and select Design and then Designer.
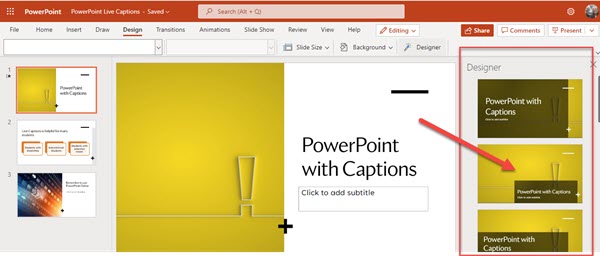
3. The Design panel will appear to the right of your slides and present you with Design Idea. When you find one you like, simply click on the slide in the panel and PowerPoint will apply the style to your slide. Move to your next slide to view the Design Ideas based on the content.
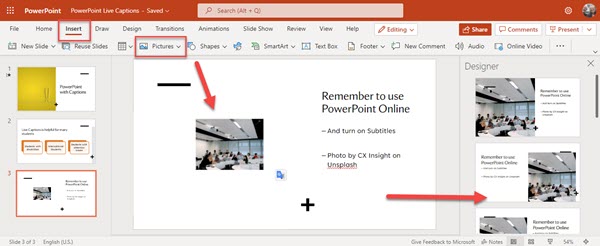
4. You can add your own images after you have entered text on your slide. Use Insert and Picture to add an image from your computer, OneDrive, or from Stock Photos. Design Ideas will show options that incorporate your image.
Microsoft Support’s Create Professional Slide Layouts with PowerPoint Designer
How to Add Alt Text to an Image in PowerPoint
- Navigate to the “Insert” tab on the ribbon at the top of the page
![]()
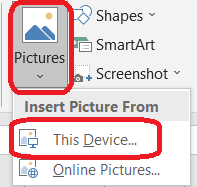
- Expand the “Pictures” option in the “Illustrations” section of the ribbon and choose “This Device…” button from the drop-down menu
- Upload an image from your device
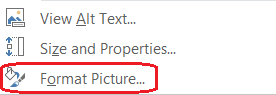
- Select the image you uploaded by using the secondary click and navigate to the “Format Picture…” button at the bottom of the drop-down menu. Using the “View Alt Text…” button is not recommended, as it doesn’t provide us with an option of creating Alt Text Title
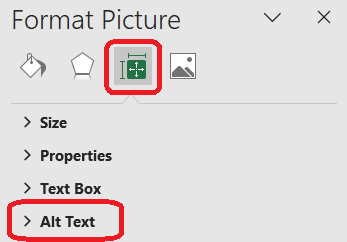
- Navigate to the “Size & Properties” option in the “Format Picture” menu on the right side of the document and expand the “Alt text” option
- Enter a brief and concise description of an image in the “Title” field and provide more information about the image in the “Description field”
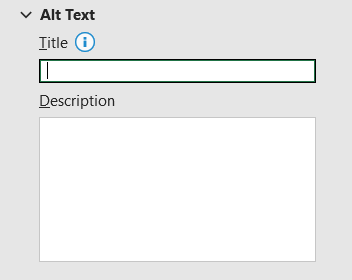
- Select the “Close” button in the upper right corner of the menu to save changes after you finish adding the alt text
![]()
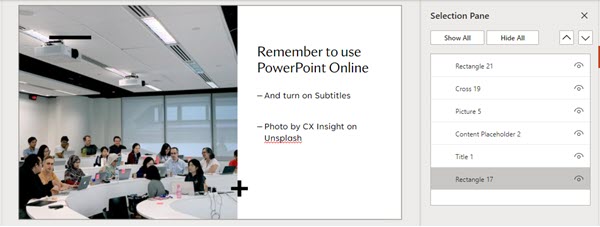
How to Check Slide Reading Order
If you have added text to an existing slide, you can alter the reading order. To check this:
- Select the Home Menu.
- Click on the three dots at the end of the ribbon.
- Click on Arrange at the bottom of the drop down menu.
- Click on Selection Pane.
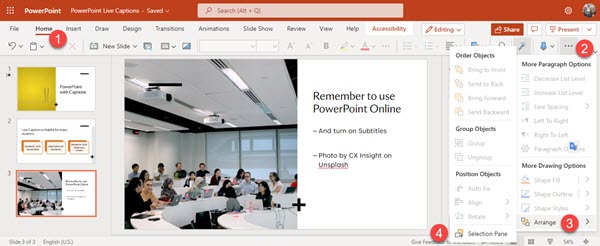
This will open the Selection Pane and list the elements of your slide. You can change the order by selecting the element and using the up and down arrows. NOTE: the selection pane shows what will be read FIRST at the BOTTOM of the pane.
Microsoft’s Support’s Make slides easier to read by using the Reader Pane.
Learn More:
Microsoft Office Make your PowerPoint presentations accessible to people with disabilities
Microsoft Support Create slides with an accessible reading order
Microsoft Support Use more accessible colors and styles in slides
Accessible Campus Using PowerPoint
