3 Launching a Nearpod Lesson
To allow your students to engage with the content that has been created, you need to launch your Nearpod lesson.
“Launching” a Nearpod lesson creates a unique link for your class to participate in the lesson and will track the students that click on the link and participate in the lesson. Nearpod will even bundle all of this participation information into a report that you can download! (More on that in another chapter.)
You can even have multiple “launches” of the same lesson at the same time if you have different groups of students that you want to track on separate reports! Keep reading to find out.
To launch a Nearpod lesson:
- Log into your account on nearpod.com and find the lesson that you want to launch.
- PLEASE NOTE: Once you launch a lesson, you cannot make any edits to that lesson or you will force the link to expire and the students will not be able to access it. Make sure any and all edits are done before you launch the lesson.
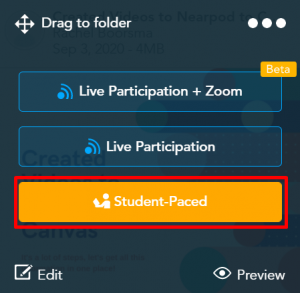
- Hover over the lesson and select the orange “Student-Paced” button. This will launch your lesson asynchronously so that the students will be able to complete it on their own time.
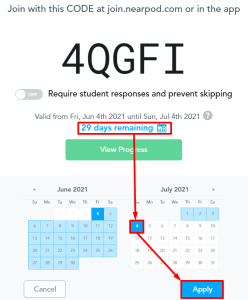
- On the pop-up that appears, adjust the expiry date by clicking on the blue text that says “29 Days Remaining”, selecting an end date on the calendar that pops, and selecting “Apply”. The lesson link will expire on the end date that you select, and the students will no longer be able to access the lesson after that.
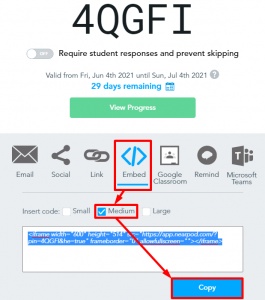
- Select “Embed” in the middle of the ribbon at the bottom to reveal the embed code. Then check the box for “Medium” and copy the code.
- The next page of this book will show you how to put that code into Canvas!
Remember: ALWAYS adjust the expiry date and NEVER make edits to a lesson after it has been launched.