Experiment 10: Bioreactor Instrumentation
Introduction
A bioreactor (fermentor) can be defined as system that supports a biologically active environment. It is a type of a chemical reactor-vessel in which a chemical process is carried out which involves microorganisms. The process conducted in a bioreactor can either be aerobic (oxygen is allowed to enter the process) or anaerobic (process executed without access of oxygen). Bioreactors are commonly cylindrical, ranging in size from liters to cubic meters, and are often made of stainless steel. Organisms produced in bioreactors may be suspended or immobilized. In our lab sessions the fermentation processess will be carried out in suspensions. The microorganisms will be suspended in liquid medium by gentle agitation of the reactor contents.
The major components of the bioreactor include:
- The Bioreactor – 3 liter glass vessel with stirrer assembly, baffles, an aeration assembly, and sensors enabling measurement of pH, dissolved oxygen, level and stirrer speed
- An ADI 1010 Bio Controller together with a power unit. The bio Controller measures process variables (pH, Temperature, dissolved oxygen, level, and stirrer speed) and calculates corresponding controller outputs in order to keep process conditions on set point.
- An ADI 1025 Bio Console that combines and supports actuators like pumps and valves.
Equipment – 3 Liter bioreactor
One of the two bioreactor types in E030 at Mohawk is a 3-liter bioreactor. The schematic overview of the system is shown in Figure 1, while Figure 2 shows the 3L bioreactor.
Figure 1: Schematic of Bioreactor

Figure 2: 3-liter bioreactor in E030 at Mohawk.
Bio-controller
The Bio Controller ADI 1010 is a controller for running bio processes in bioreactors. The available parameters that can be controlled by the system include: pH, temperature, dissolved oxygen, level, stirrer speed. The Bio Controller is shown in Figure 3.
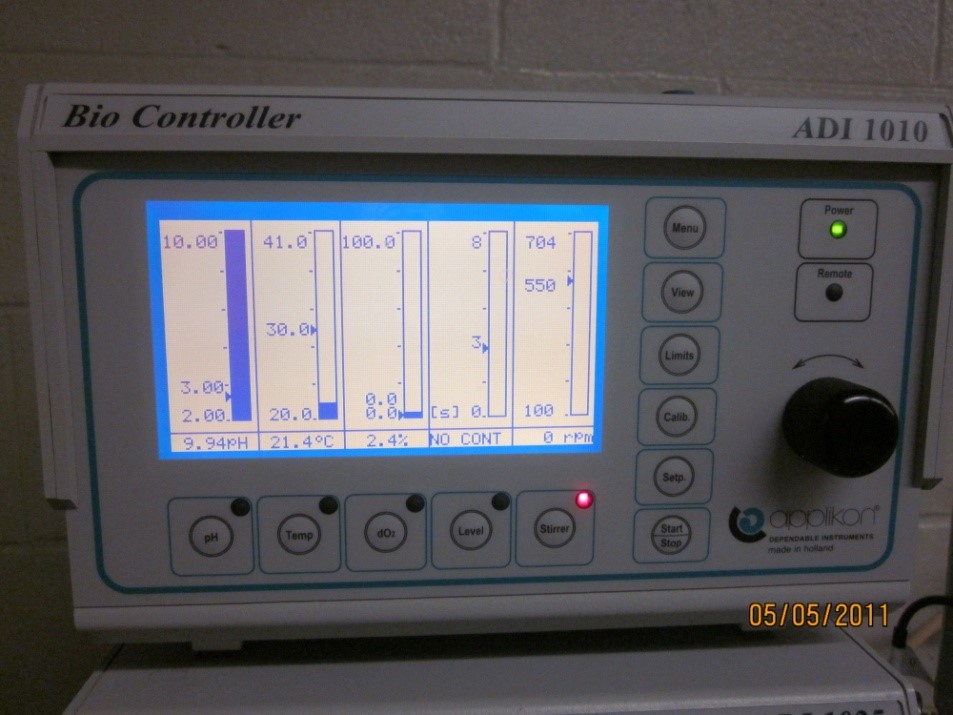
Figure 3: Bio-controller
Bio Console ADI 1025
The Bio Console is an actuator console that is used in combination with the Bio Controller. It supports gas flow regulation with rotameters, temperature control with a heating blanket, liquid addition with pumps, and level control. The Bio Console used in the lab is shown in Figure 4.
Figure 4: Bio Console with major functions highlighted.
Reactor vessel and auxiliary equipment.
The bioreactor consists of the 3 liter glass vessel and head plate made of stainless steel, as shown in Figures 5.
-
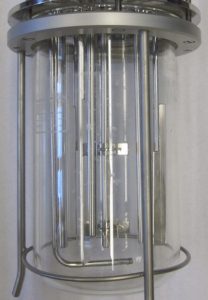
- Reactor vessel
-
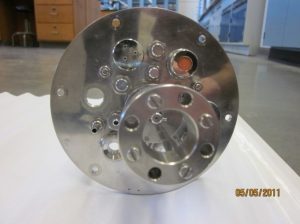
- Reactor head plate
Figure 5: 3-liter reactor vessel and head plate
The auxiliary components of the reactor include:
- Stirrer motor and agitator (shaft and impeller) to enable the stirring of the reactor contents:
-
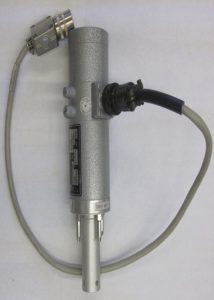
- Stirrer motor
-
- Agitator
-
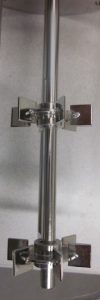
- Baffles to increase the mixing efficiency:

- L-shaped Sparger – tube immersed in the medium. Oxygen or air is added to the aerobic process through the sparger.
- Air outlet condenser. Working at elevated temperatures and using aeration of the culture might cause too much evaporation during fermentation. This can be prevented by using the stainless steel air-outlet condenser. Cold water has to be supplied from an external source to the inlet and drained from the outlet ports of the condenser:

- Addition ports: During preparation and while running the process, fluids will be added to the reactor (medium addition, inoculation, pH and level control).
- The septum holder with a silicone rubber septum can be used as an addition port by piercing it with a needle
- Medium inlet triple for addition of base and acid or antifoam agent
- Port for connecting the level sensor
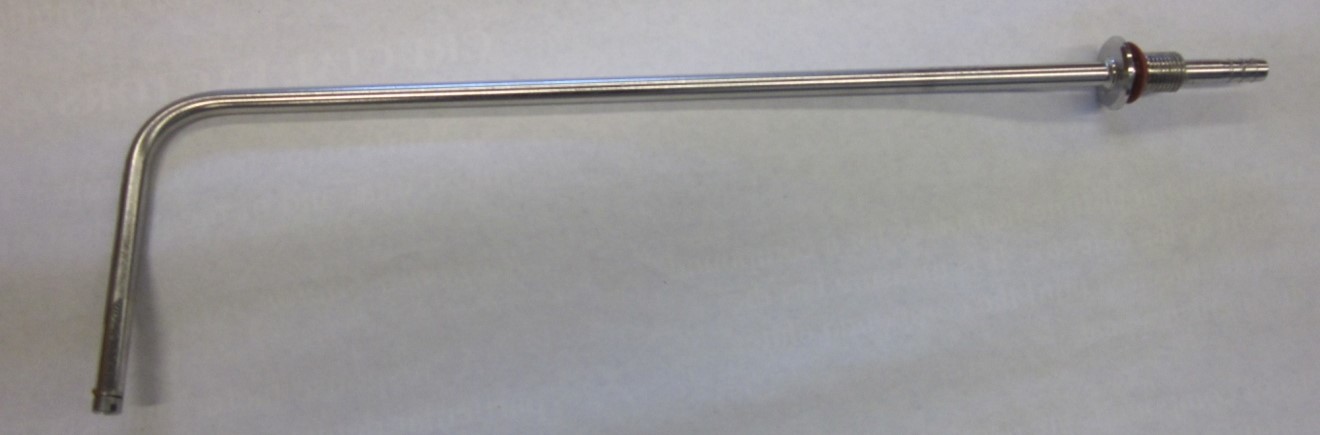
- Sampling and drain – sampling pipe reaching bottom part of the reactor can be used for sampling and level control.
- Internal heat exchanger. If additional cooling is required. This component has two ports, one input and one output for cold water hoses attached to them. The bottom part is closed so that water for cooling will not contact directly the reaction medium

- Thermowell. Pocket to hold thermocouple for temperature measurement (the end of the tube is closed; no direct contact of the thermocouple with the fermentation media)

- Ports for holding the pH sensor and the dissolved oxygen sensor.

Working with Bio controller.
Setting up the fermentation process system and entering the process parameters is done through the controller. In this run, pH, temperature, level, and stirrer speed will be controlled. The front view of the Bio Controller is shown in Figure 6.
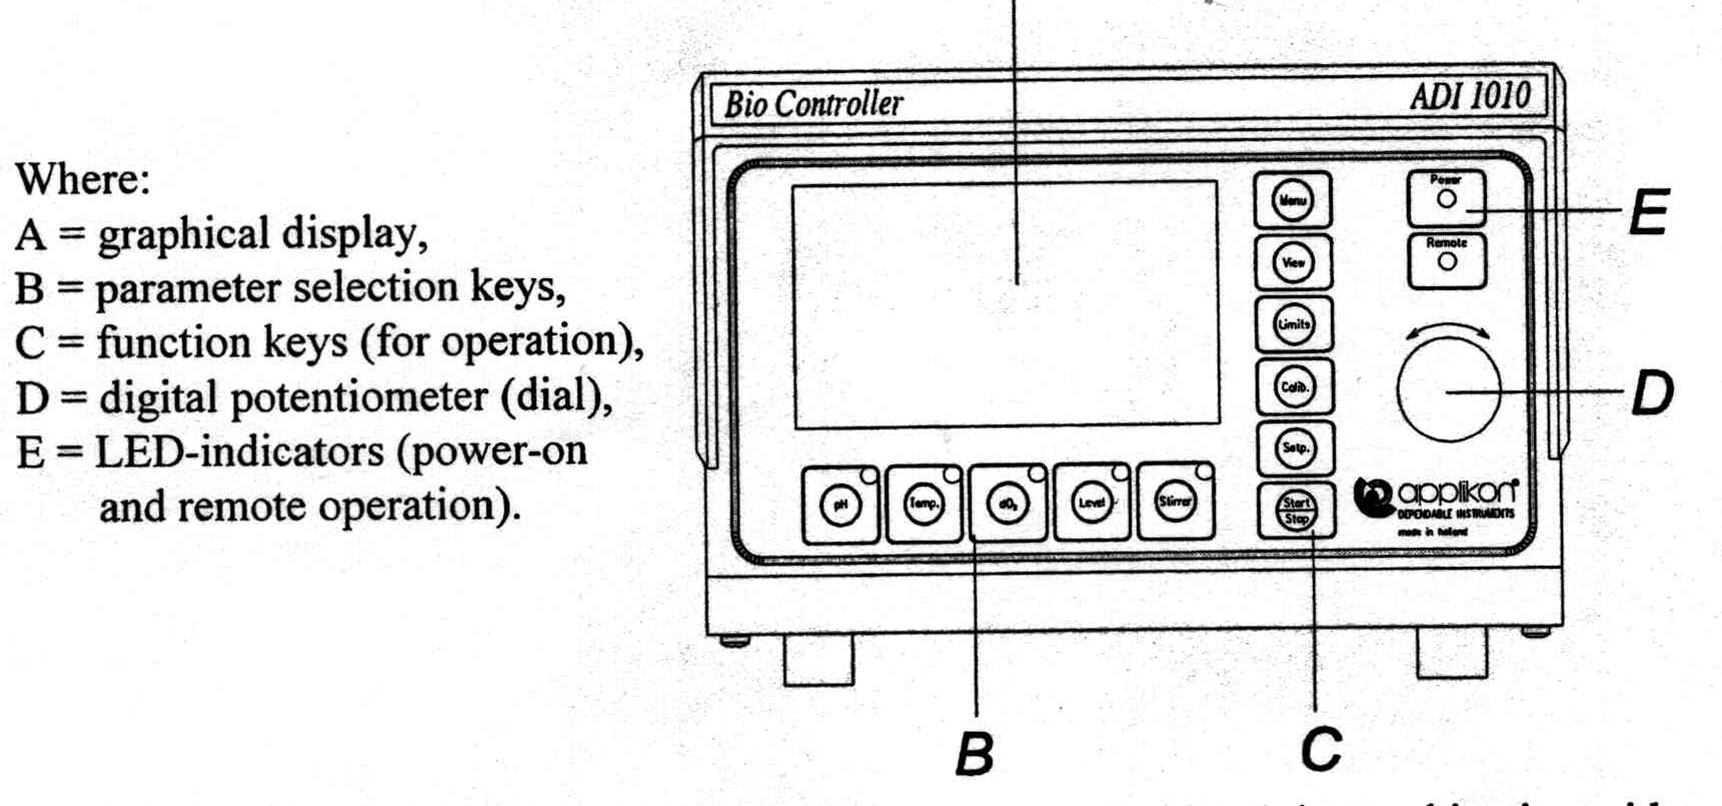
Figure 6: Schematic of the front view of the Bio-Controller
The parameter selection keys (pH, Temperature, dissolved oxygen, Level and Stirrer) in combination with a function key (Menu, view, calibration, Setup., and Start/Stop) are used to operate the Bio Controller. The digital potentiometer (dial) is used to select an option from a list or to generate values. Generating values is done by turning the dial. The higher the angular speed of the dial, the larger the numerical shift.
The keys of control loops have dual color LEDs. Green indicates controller in on mode, no alarm (within a range) and red indicates controller off, alarm (out off range). No light indicates that the Bio controller is off (power off).
When the power is switched on , the following screen appears:
Figure 6: Bio Controller during operation.
The values of the process parameters are presented both numerically and in a bar graph.
To edit upper and lower bar graphs:
- Press a parameter key
- Press limits key
- Use the dial to edit the upper setting
- Press the limits key again
- Use the dial to edit lower setting (rotate the dial in the opposite directin to the previous operation)
- After a short interval the edit mode is completed
To edit controller set points:
- Press parameter key
- Press Set point. Key
- Use the dial to edit the set point value
- After a short interval the edit mode is completed (returns to main screen)
Manipulating control loops:
Control loops can be started by pressing the buttons in the following sequence:
- Press a parameter key
- Press Start/Stop key
- The control loop is now started and green LED light is visible on the Bio Controller for a given process parameter
Running control loops can be stopped by:
- Pressing a parameter key
- Pressing Start/Stop key. The control loop is now stopped (green pilot LED is off)
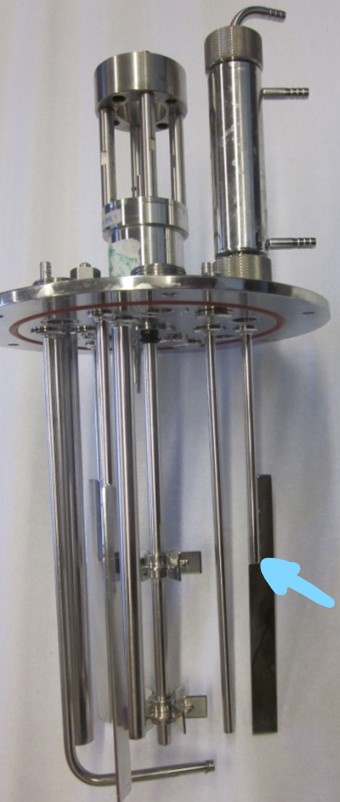
Equipment – 15 Liter bioreactor
The second type of bioreactor in the E030 lab is a 15-liter one. The reactor is shown in Figure 7.
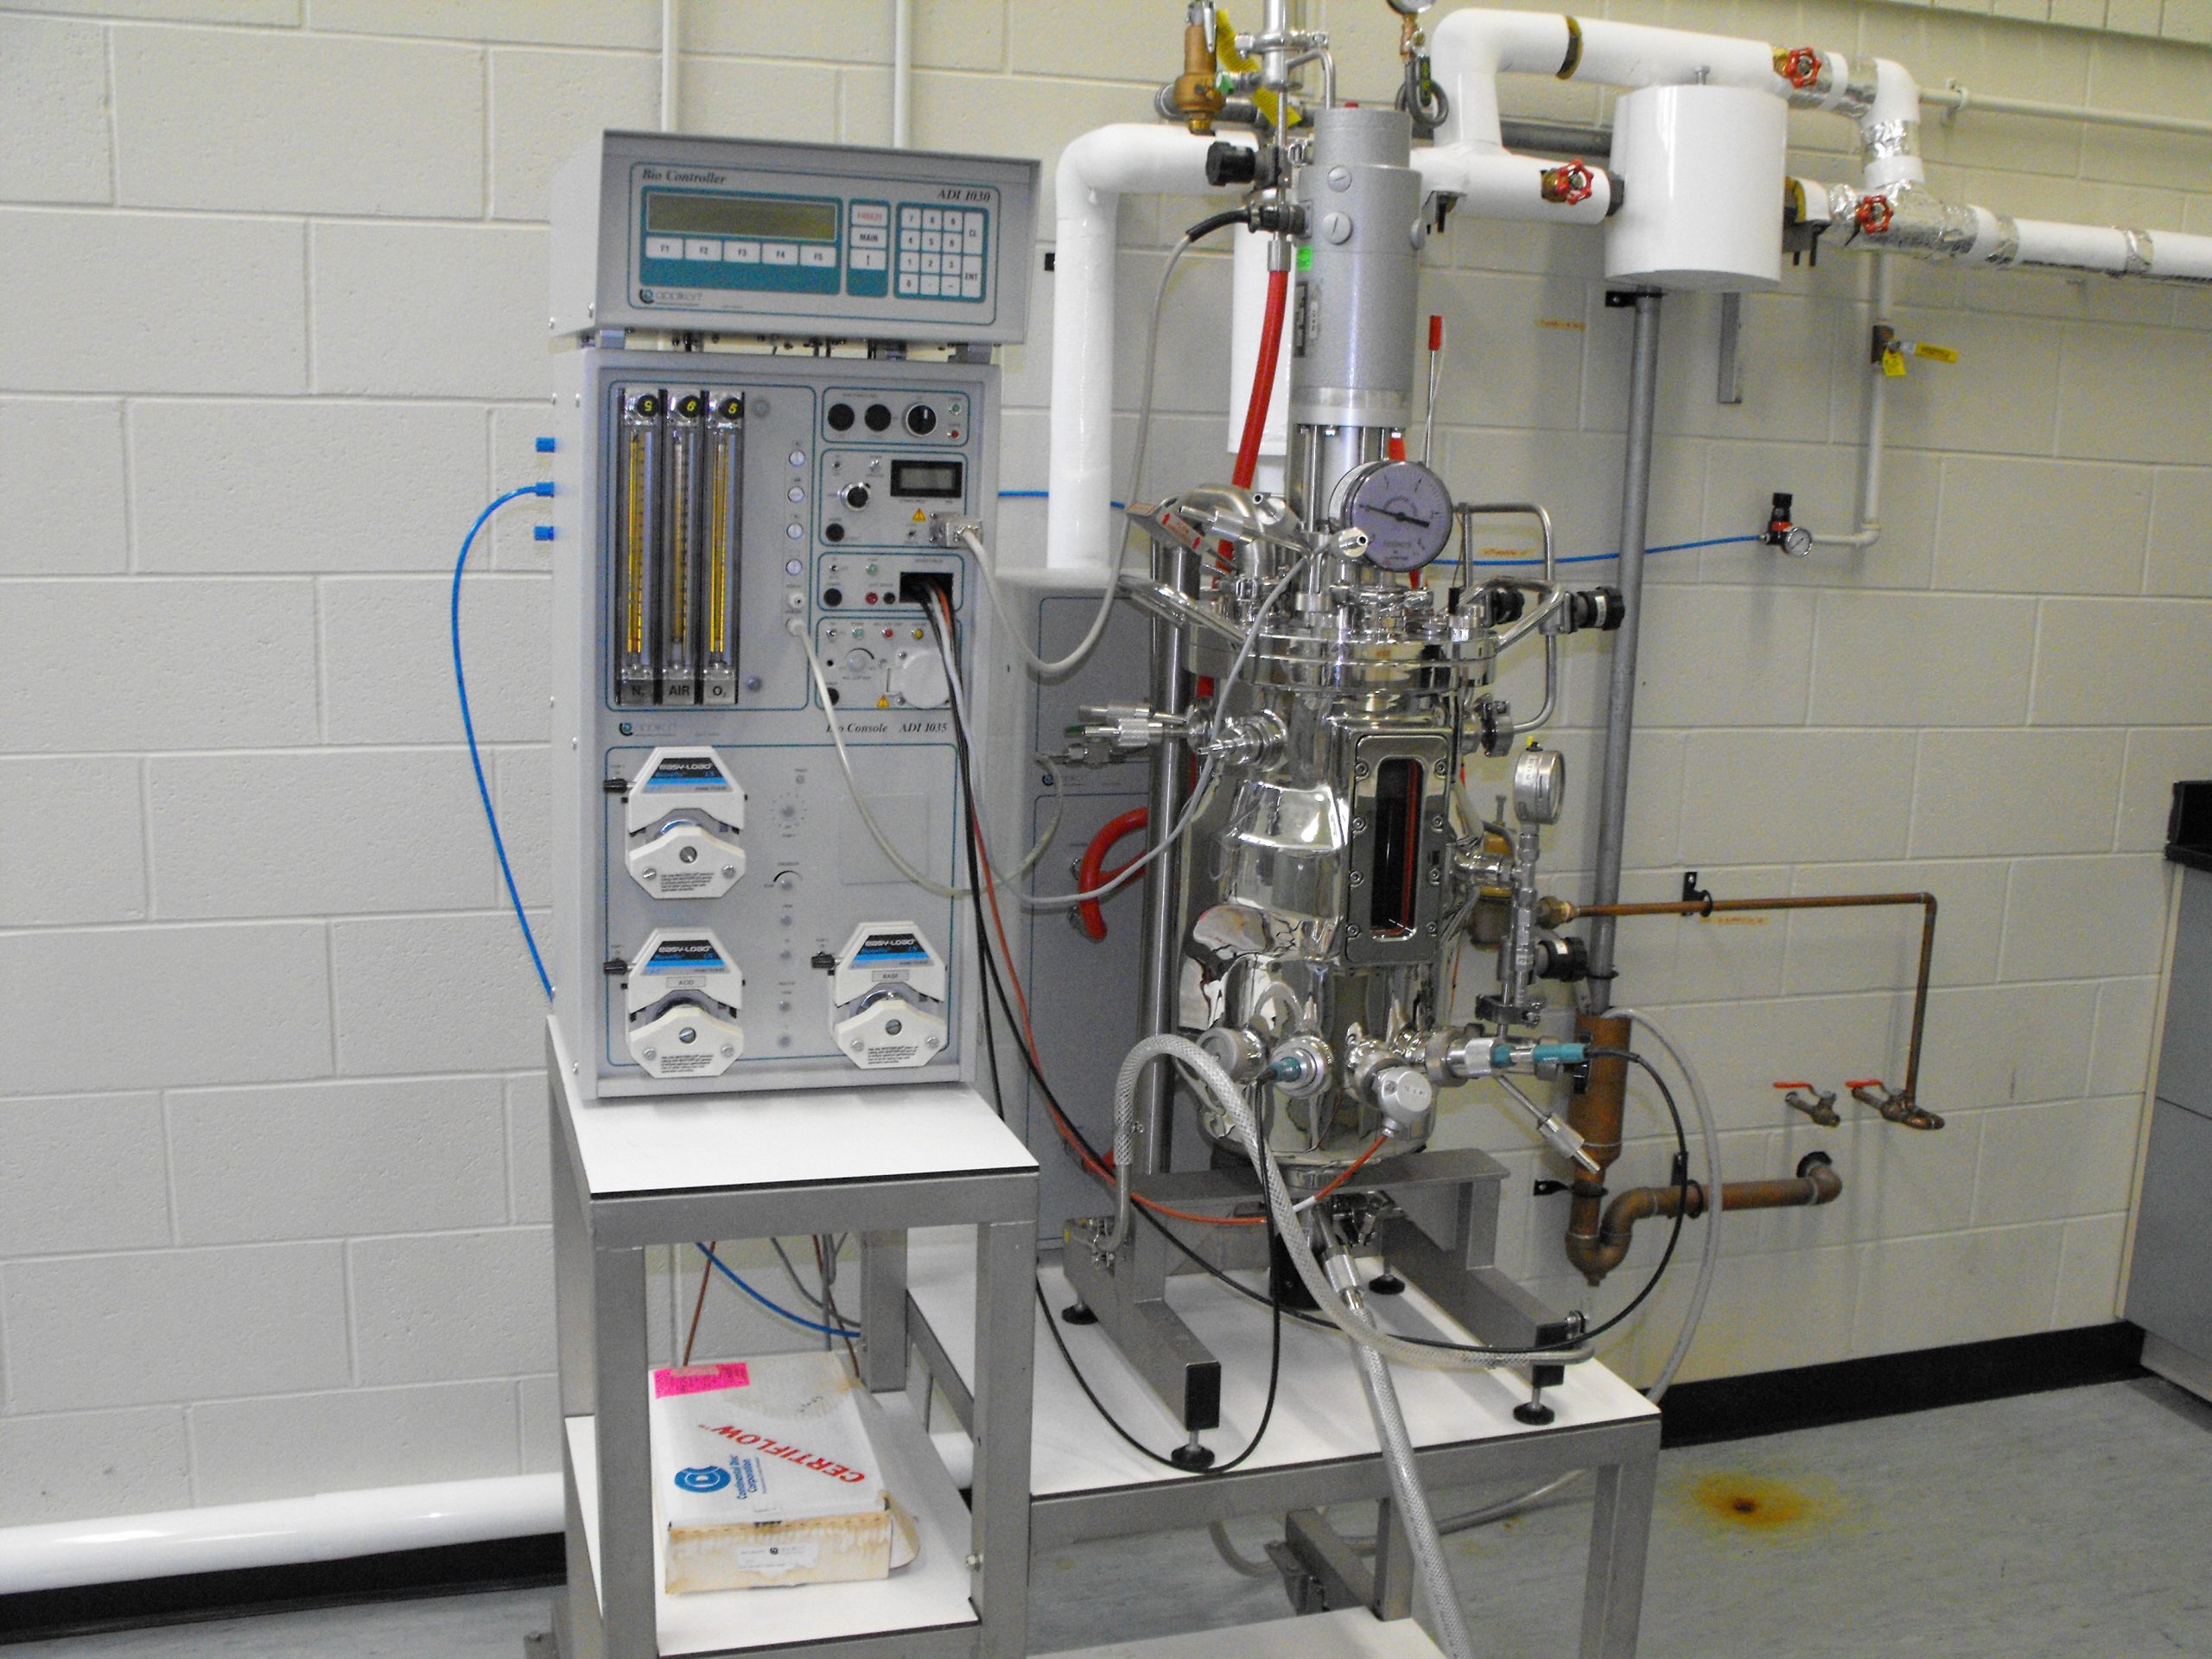
Figure 7: 15-liter bioreactor
The operation of this bioreactor is in general similar to the 3-liter one. During a fermentation process, temperature, pH, dissolved oxygen, and the stirrer RPM are monitored and controlled. As with the 3-liter reactor, The process can be aerobic or anaerobic. In the aerobic case, oxygen is supplied through air sparging through the liquid.
The main difference of this 15-liter reactor, besides its size, is that this is connected to the lab’s steam line and to the lab’s water supply. The reactor is “jacketed”; i.e. has a hollow space (a jacket) surrounding the reactor, and steam or water can be circulated through the jacket. During set-up, steam can be directed into the jacket to sterilize the reactor. The steam is hot enough to raise the temperature of the reactor’s content to a sterilization temperature, which cannot happen in the 3-liter reactor which is heated through the electrical blanket. Steam can also be run through sampling ports for sterilizing them. During fermentation, hot water is run through the jacket to maintain the required process temperature.
The following images highlight the main elements of the reactor, which are similar to those of the 3-liter one.
Figure 8: Front view of the 15-liter bioreactor
Figure 9: Side view A of the 15-liter bioreactor
Figure 10: Side view B of the 15-liter bioreactor
Figure 11: Bioreactor Console and Controller
Procedure
The following two videos describe the operation of the two bioreactors:
- 3-liter bioreactor. This is a video on a bioreactor with a newer controller and console that the one used previously in this manual. The basic operation is same, though; only the HMI and the position of the pumps is different. 3-liter Bioreactor VIDEO
- 15-liter bioreactor. This is a video on the set-up of the 15-liter for anaerobic fermentation. Watch the whole video: 15-liter Bioreactor VIDEO
1. Dismantling the bioreactor
- Loosen and remove six nuts from the head plate of the bioreactor
- Lift the head plate and identify all the components of the bioreactor referenced in the lab manual
- Discuss the function of each of these component with your group members
2. Preparing the system for a “dry run” (ask instructor for assistance)
This procedure will not include the connection and control of sparging of the reactor contents.
- Add 2 liters of the tap water to the vessel
- Reattach the head plate to the glass vessel.
- Tighten the nuts going across the circle so that the gasket that is positioned between the glass and the head plate is compressed evenly. First tighten the nuts loosely, then re-tighten them.
- Check if all the auxiliary equipment (pH sensor, dissolved oxygen sensor, external and internal heat exchangers, sampling port, addition port, thermowell) is attached to the head plate tightly. If any of these components are loose, tighten them.
- Transfer prepared 0.1 molar sodium hydroxide base and 0.1 molar acetic acid (provided by the lab technician) to the addition bottles and connect the rubber tubing to the reactor from each bottle through the acid and base pumps on the Bio Console as shown in figure below.
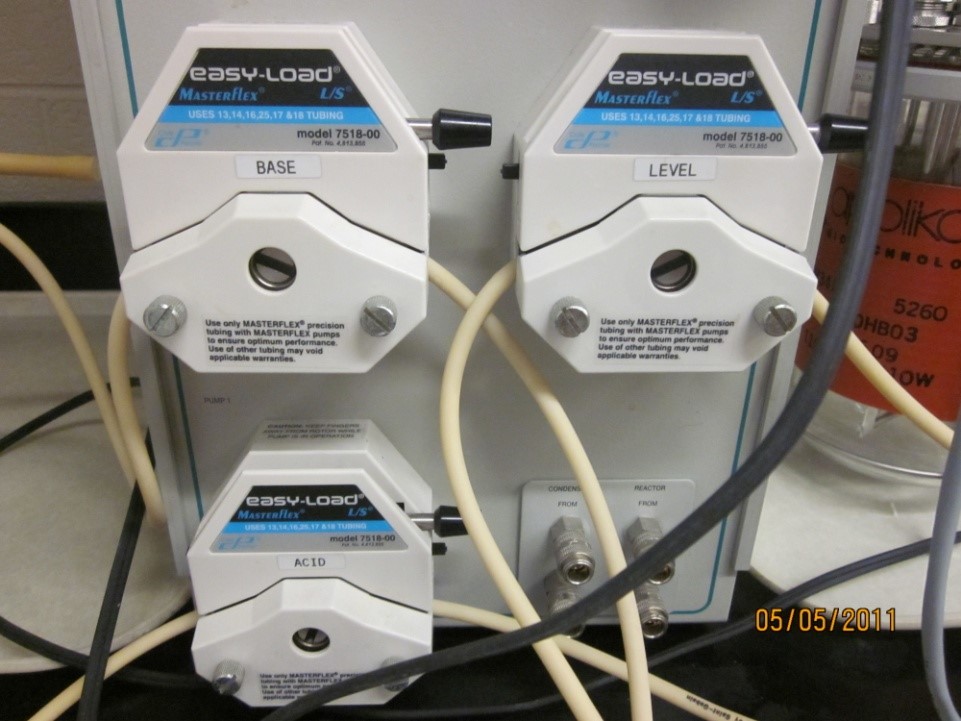 Figure 12: Visual of hose connections to the bio-console
- Insert the thermocouple into the well on the head plate.
- Insert the level sensor to the head plate and connect the electrical wire to the sensor (one end goes to the sensor, the second one to the head plate).
- Connect the pH sensor and dissolved oxygen sensor into the controller (make sure that protective cup from the pH sensor is removed, otherwise the pH control will not be done properly).
- Connect the stirrer motor to the agitator shaft and to the Bio Console
- Connect the heating mantle to the Bio console
The complete set-up of the system is shown in figure below
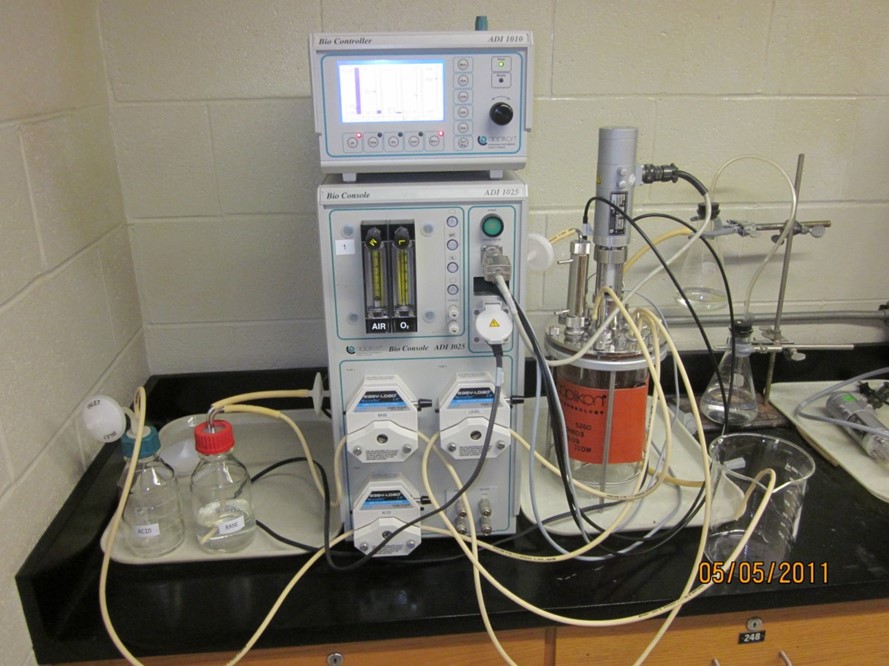 Figure 13: Complete set-up on 3-L Bioreactor
3. Setting up the fermentation process system and entering the process parameters into the controller.
In this run the pH, temperature, level, and stirrer speed will be controlled.
- Check if all the sensors are properly connected into the Bio Controller unit.
- Set process parameters for your run as follows:
- pH 4.5
- temperature 40°C
- agitator speed 200 rpm
- position the level sensor approximately 2 cm above the liquid level
4. Start running the process by activating all control loops
Monitor the process parameters for 10-15 minutes. Record the following:
- Is temperature going up?
- Is pH changing?
- How much time does it take for the agitator to reach a set point after starting the controller?
-
Normally the process is left at this stage for number of hours/days. Samples can be taken at predefined time intervals and analyzed for the progress of the process
5. Shut down the system
- Stop all control loops
- Open the head plate of the reactor and pour water out of the reactor
- Turn off the power to the unit
Report
Tabulate initial and final process parameters during the “dry run” and answerthe questions included in the procedure part of this lab manual.
References:
“Autoclavable bioreactor systems 1-20 liters” Operator Manual; Applicon