12 Chapter 12
We will continue with the Type2Diabetes.pptx file.
- Apply a design
- Go to the Design Tab and look for the Themes Grouping
- Choose the Integral theme
- Each theme comes with a variant. Look for the Variants Grouping and choose a variant to change the colour style and font style of the Integral theme
- If the Design Ideas pane on the right hand side is not open (it should auto-open as soon as you choose a theme) – look for the Designer Grouping – Design Ideas will be the only button in this grouping. Click to open it up
- The Design Ideas pane allows you to choose different ideas for how a slide might be presented, instead of just having text and images and having to design it yourself. This tool is very useful in making your presentation pop out.
- Click on Slide 1 – the Title Slide – and choose a different design for the title slide
- Click on Slide 2 – the Causes – and choose a different design for the Causes slide
- Click on slide 3 – the Symptoms – and choose yet one more design for the Symptoms slide
- Now press F5 on your keyboard to look at your new presentation!
- Insert stock images
- Go to the Home tab and look for the Slides Grouping
- Click New Slide and choose ‘Two Content’
- In Click to Add Title type ‘Prevention’
- In the content area on the left you will see the following in the center:
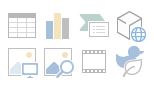
From left to right in the top row:
Image 1: Insert a table
Image 2: Insert a chart
Image 3: Insert Smart Art
Image 4: Insert 3D ModelFrom left to right in the bottom row:
Image 1: Insert Pictures
Image 2: Insert Stock Images
Image 3: Insert Video
Image 4: Insert an IconFor this exercise choose Insert Stock Images - In the dialog that comes up, search ‘Heart’ and look for the following image:

- Click the Insert button
- The Design Ideas pane should auto-open. If it doesn’t, go ahead and open it up, and choose a design
- In the second content area type the following:
Healthy Diet
Exercise
- Add animations to images
- Click on the heart image we added to the Prevention Slide to select it
- Click on the Animations Tab and look for the Animation Grouping
- Choose Wipe
- Go to the Slide Show tab and click the From Current Slide button to start your presentation at the current slide
- Click to see the wipe animation that you added to the image!
- Add animations to text
- Choose the box around the text
- Click on the Animations Tab and look for the Animation Grouping
- Choose Appear
- Go to the Slide Show tab and click From Current Slide button
- Click to see the animations for both the Heart from the previous exercise, and to watch each word appear separately after each click!
Each animation you add will display in the order in which you added them!
- Export as video
- Click on the Record tab and look for the Save grouping
- Choose Export to Video
- In the Create a Video save dialog that comes up you have several options:

In the first dropdown it will allow you to choose the quality of the video – the above shows it at Full HD. For the Highest Quality (largest file size) choose Ultra HD (4k). For the Lowest Quality (smallest file size) Choose Standard. Which you choose depends on what device you’ll be presenting on. For instance – if you are presenting on a regular computer projector, Standard will likely be good enough. If you are going to play it in a continuous loop on a high definition television, you’ll want to use Full HD or Ultra HD (4k)The second dropdown will allow you to use the timings and narrations if you’ve added those to the presentation. In this case we have not, so leave it at Don’t Use…In seconds spent on each slide the default is 5 seconds. You can play with this setting and export it several times until you feel like you have the proper length between slides. In this case we will leave it at the default.Choose Create Video
- Save the Video to your desktop
- Double click on the video on your desktop to play your newly created video!
All screenshots and icons from Microsoft PowerPoint, used with permission from Microsoft.
