7 Infrared Sensor
Learning Outcomes
- Explain how an IR sensor works and why they’re used
- Program their Zumi to stop when it detects an obstacle
- Program their Zumi to go through a maze with their IR sensors
- Program their Zumi to stop at a crosswalk with their IR sensors
- Program their Zumi to follow a line using their IR sensors
IR Sensors
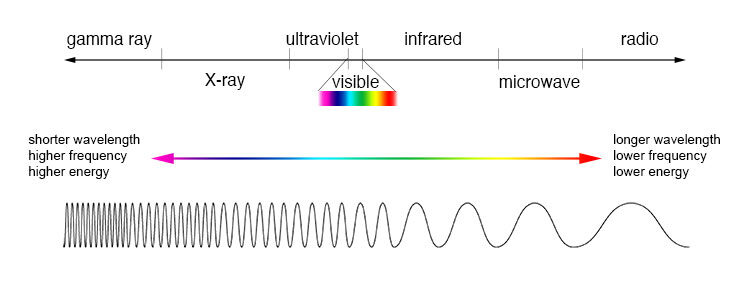
Infrared (IR for short) is a form of electromagnetic radiation that is not visible with the human eye. It’s also a form of energy. However, as scary as the name sounds, not all electromagnetic radiation is dangerous. There is a small portion of it that we can see, meaning this is visible light! The different colors that we see depend on the various wavelengths. As the wavelengths get longer, the colors become less visible to humans. However, special sensors can detect these waves. You will use the IR sensors on Zumi to detect objects that are covering the sensors.
Zumi IR sensors
Zumi is equipped with 6 IR sensors: two in the front, two in the back, and two on the bottom.
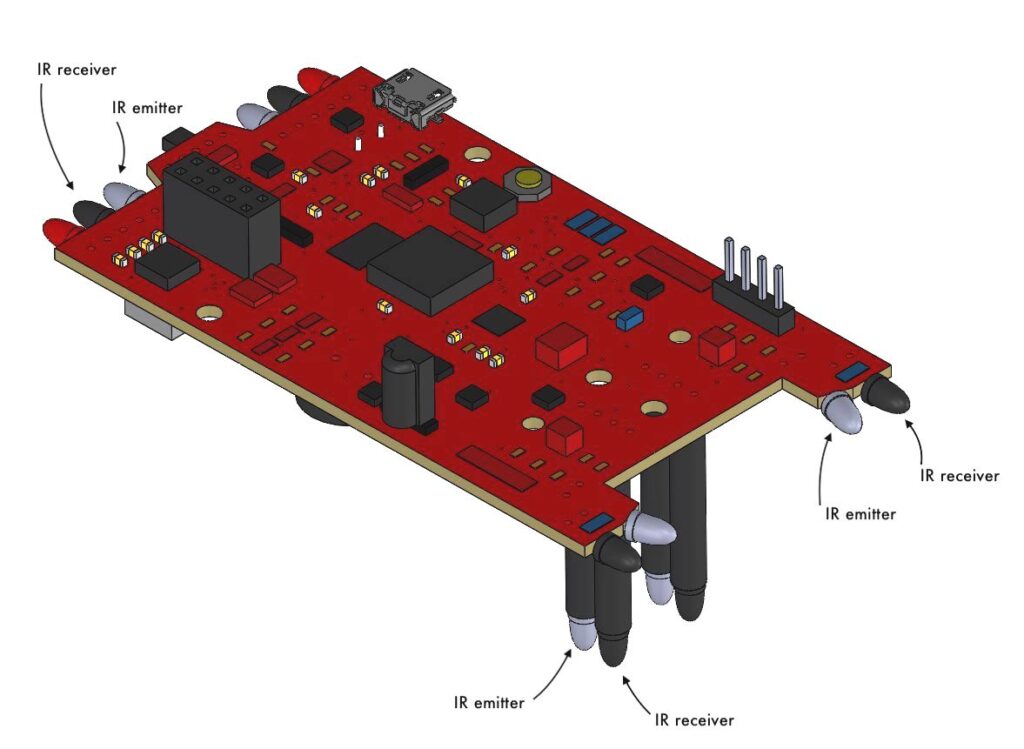
All of the IR sensors come in pairs. The clear IR LED emits the infrared light, and the darker LED is the sensing part. The reason why the sensing bulb is black is to block out regular light. Think of the LED as wearing sunglasses to protect the LED from regular light.
Activity: ‘Seeing’ infrared light
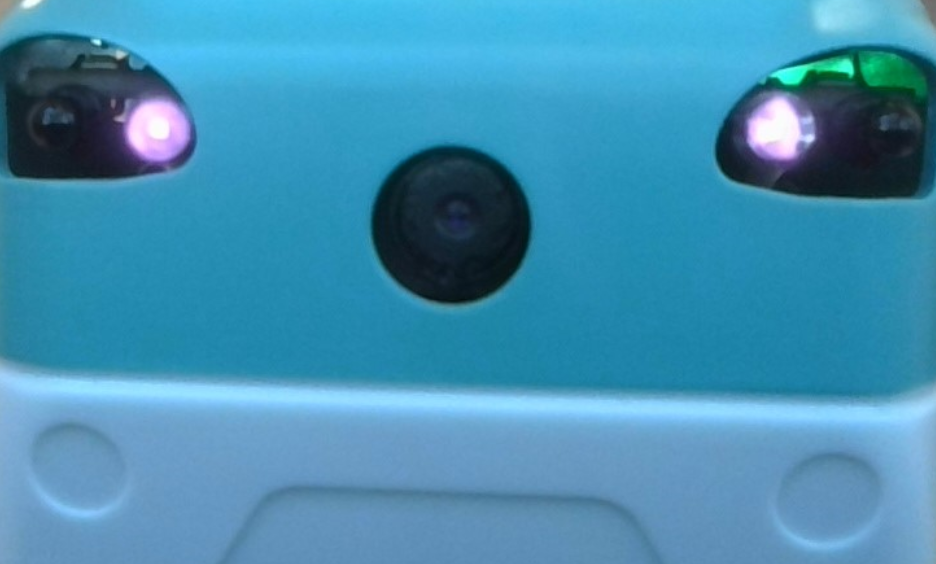
Even though our eyes can’t see the infrared light, some cameras can detect it. Try holding Zumi’s sensors up to your webcam or a phone camera. What color does it look like to you?
What does the IR data mean?
IR sensors work by emitting an infrared pulse and measuring the infrared light that returns after it bounces off an object. This number will be between 0 and 255. A lower number indicates that something in the vicinity is reflecting the IR light back to the sensor. You will able to see the data on the console. The console is where you will see any output from the program.

In the next steps, you will use the “Print” block to show the data on your computer screen. You are not going to be printing with ink and paper, but telling the program that you want to see the output on your screen. Without it, you wouldn’t be able to see what the data is!
Reading IR data
Open the “Sensors” menu to find the read IR block. There is only one block, but you can use it to read all 6 sensors!
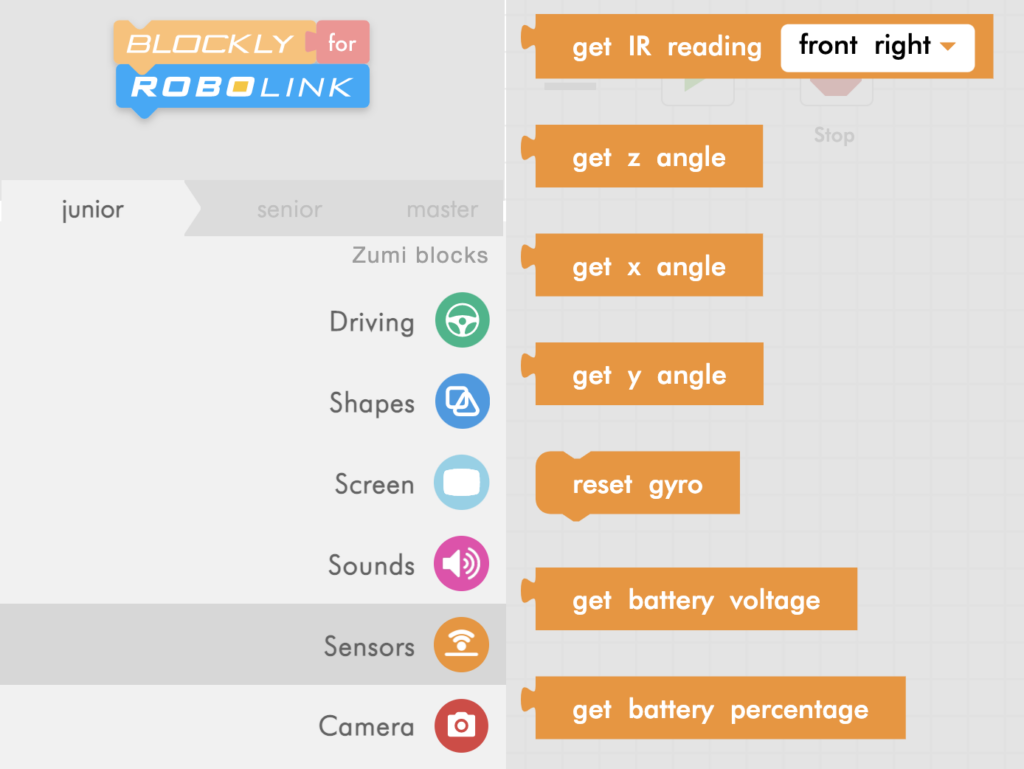
Drag the block to get the IR reading to the workspace.

From the “Input/Output” menu, find the print block and connect it to the get IR reading block.

If you run the code, you will only get one reading in the console. One reading is not a helpful way to see how the IR values change. Repeat this code 100 times and watch the numbers change as cover up the front right IR sensor! What happens when you cover the sensor? What happens when you point the sensor to a window or sunshine?
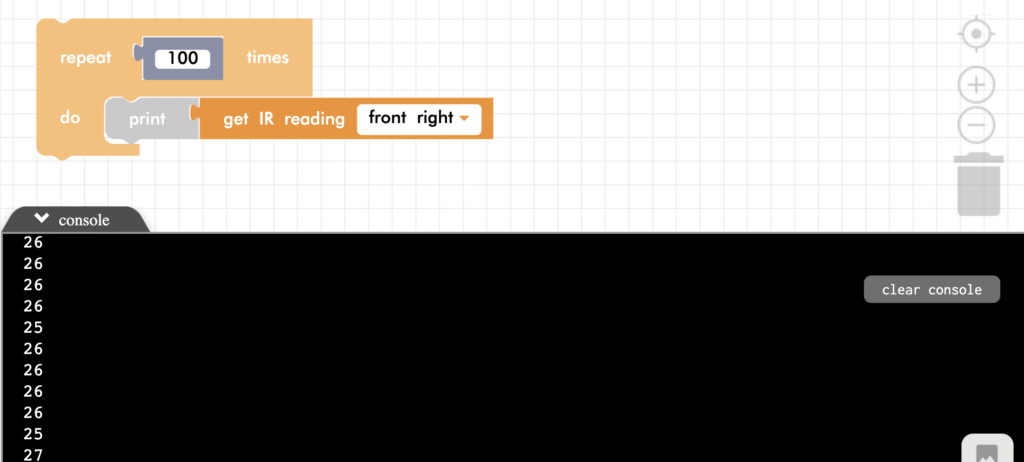
The numbers get lower if there there is more infrared light being reflected back. In other words, there is an object in front of Zumi that is reflecting the light. If the value is closer to 255, this means that there is little to no infrared light being reflected back. This could mean nothing is in Zumi’s way or that there is a black object in Zumi’s way. Remember that black absorbs light! This is why you feel warm when you wear black on a summer day.
Varying values
Add a one second wait between readings so you can see the differences. Try placing the white and black color cards that came in your kit in front of the sensors and see the values change.
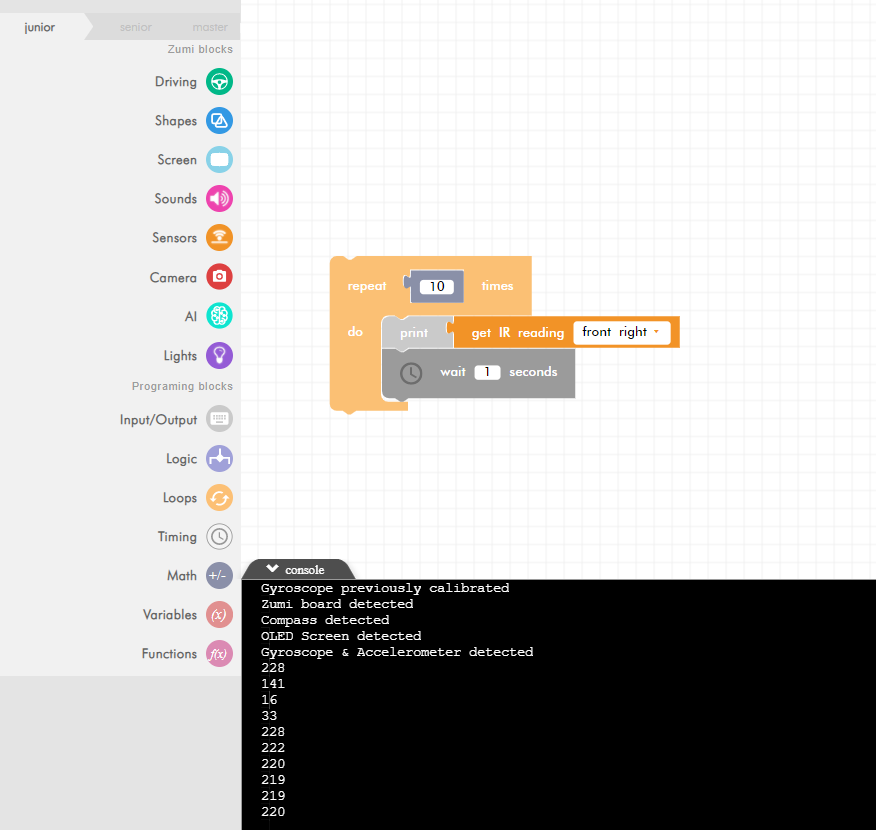
In the example above, you notice the values go down to around 20 when the sensor is covered, and will be around 220 when the sensor is left uncovered. Your values may not exactly match these ranges. Everyone’s sensors are slightly different. The lighting in the room can also affect the values. If you are still getting some strange readings, make sure the IR sensors are not bent out of shape.
Note: If the IR sensor value never changes (always at 0 or always at 255) it might be a sign that the sensor is broken or that it is stuck inside the shell.
IR Sensors and Sound
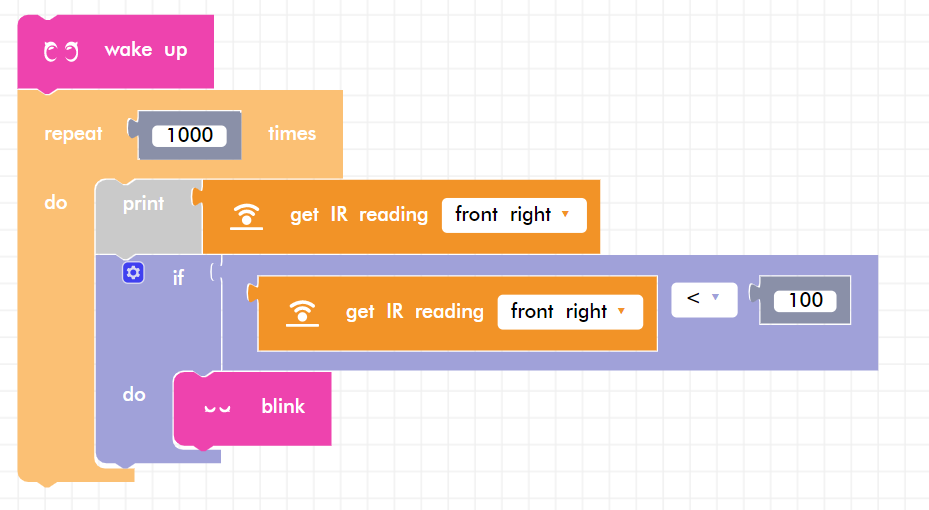
In this activity, you will combine your knowledge of IR sensors, sound, and conditionals to make an obstacle detector! Zumi will make sounds if she detects an obstacle in front of her sensors. First, add a wake up sound to indicate the program started.

Next, setup a repeat block that will check the sensor readings 1000 times.
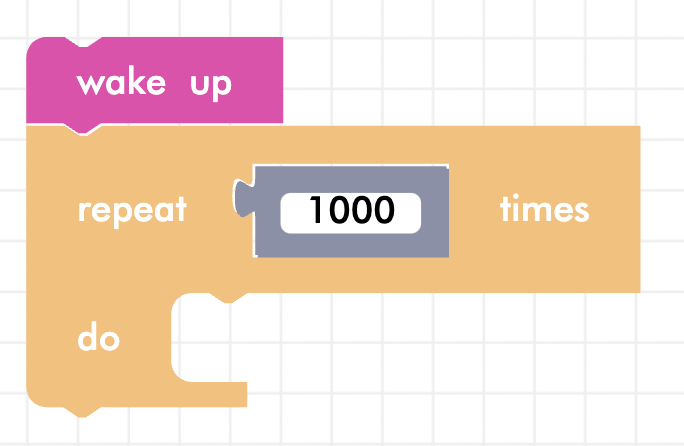
Now you need to write code that checks if the sensor is being covered. Remember from your testing that the sensor value will drop below a certain value. On average, you can use 100 as a starting threshold. Since we are comparing values, get a “less than” comparator block.
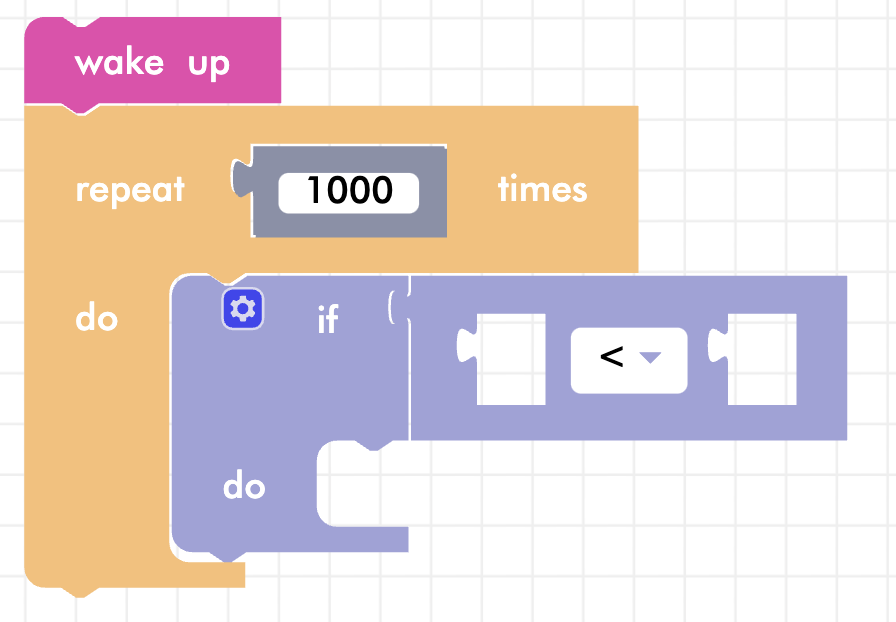
Pick one of the sensors that you will be covering up and check if it goes below the threshold (in this case, 100). If the sensor is covered, pick a sound to play! It might be useful to include a print statement as well, so you can still see what values the IR sensor is outputting!
Zumi security alarm
In the previous activity, you only checked if one sensor was being covered. Self-driving cars need to check all of their surroundings! In this activity, you will learn how to check if one sensor or another is detected. This time, you will use a logical comparator. Logical comparators are statements like “and” and “or”. For now, replace the the “less than” block with the “or” block. Keep the other block nearby! You will use it later.
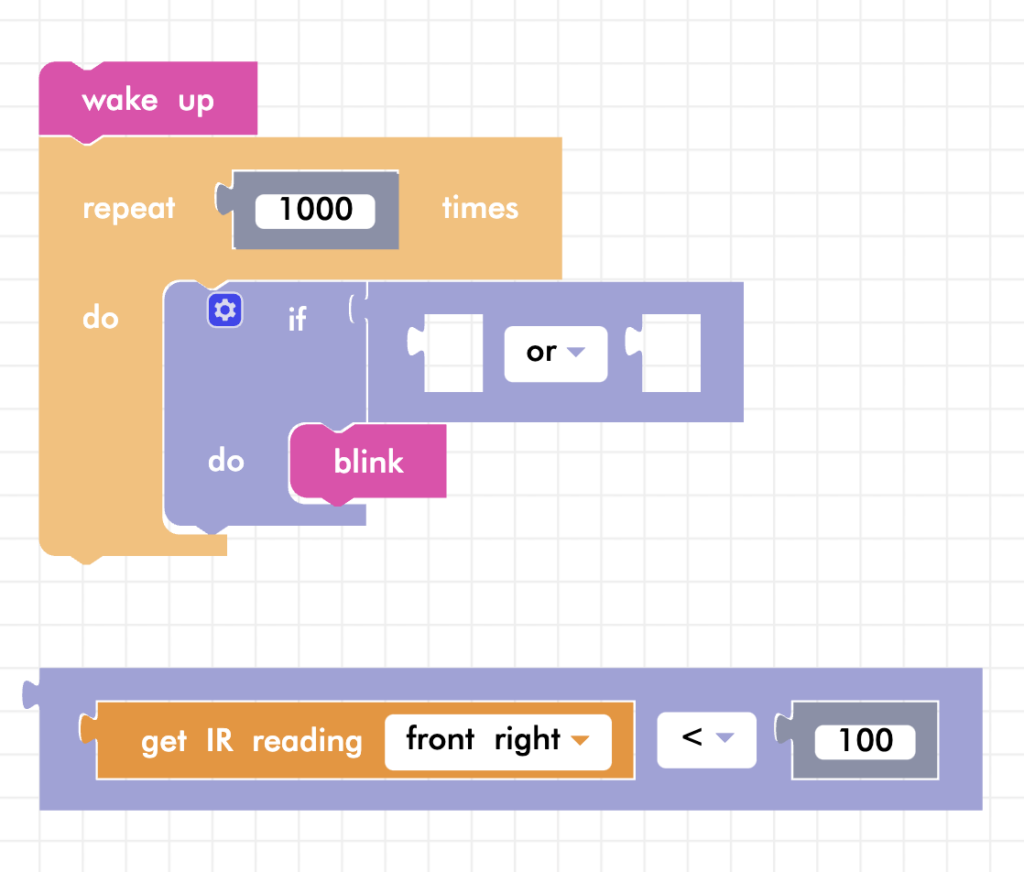
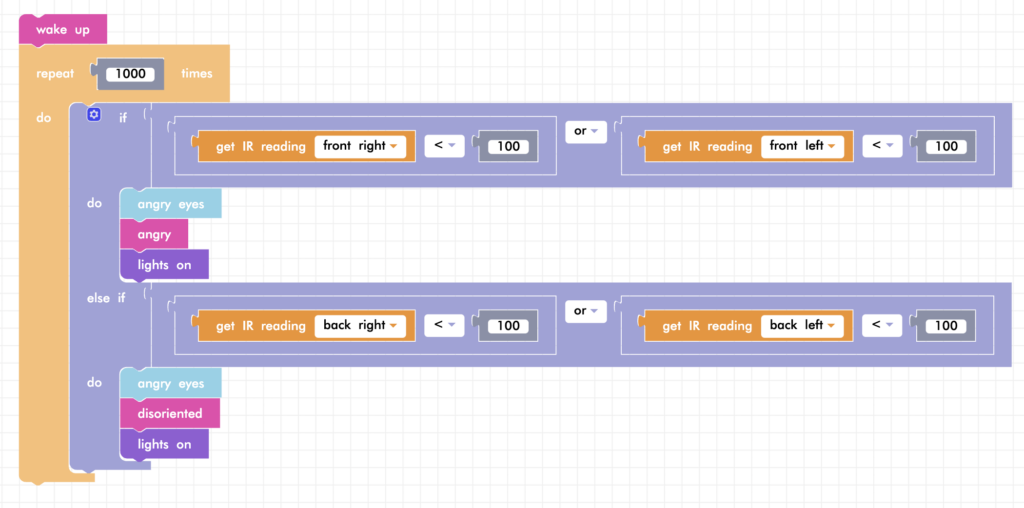
You will still check if the front right sensor is below the threshold, but the condition would also be true if the front left sensor is covered. A condition with an or statement will always be true if at least one of those inputs is true. Fill in the other side of the or block with the front left sensor.

Since you are making a security alarm, you can change the sounds, screen, and lights!

Create an else if statement and repeat the same code for the back left and back right sensors. You can keep the same reaction or come up with a new one.
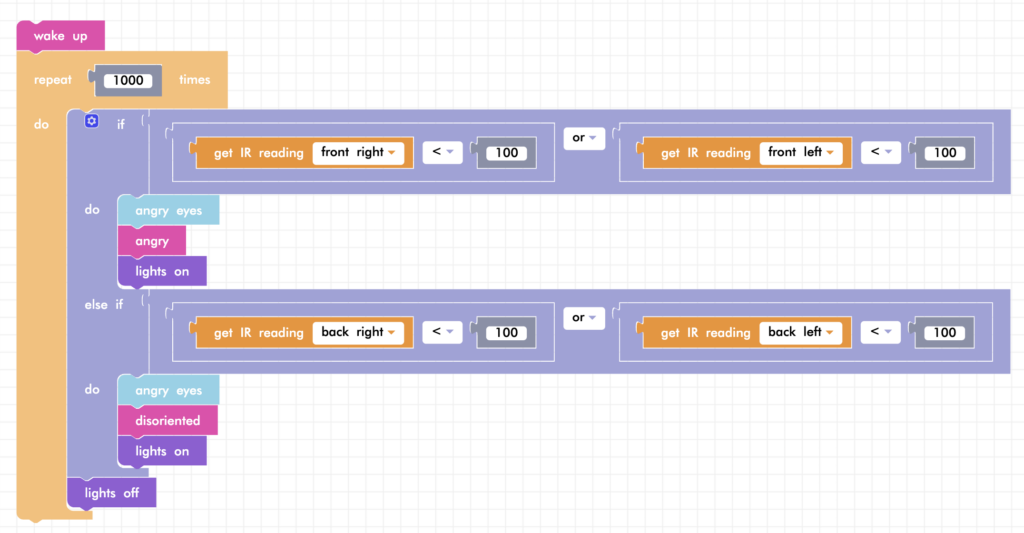
If you turned on the lights when Zumi detected something, make sure you turn them off before the loop repeats.
Review
In this lesson, you learned how to use one of Zumi’s sensors to perceive the environment. The infrared LEDs emit and receive infrared light to determine if there are obstacles in Zumi’s way. There are 6 LEDs you can read data from:
- Front right
- Front left
- Back right
- Back left
- Bottom right
- Bottom left
Remember that the get IR reading function will return a number from 0-255. A number closer to zero means something is reflecting IR light back to Zumi. Warning! Dark or black objects will be “invisible” to Zumi because they are absorb light.
Test Your Knowledge
Review The Key Concepts
Solve The Problem
Scenario: You are working with autonomous vehicles that need to operate in safe conditions.
Problem: How can Zumi detect close obstacles? How can it communicate and express that information?
Sample Solution
There are many different ways that we can solve the problem listed above. Please watch the following video to review a sample solution completed by Ontario Tech University Engineering Students.
Demo
Code
Common Errors
Errors can also occur while creating a solution to the problem. Please review the video below to view some of the common errors that can occur.

