8 Gyroscope and Accelerometer
Learning Outcomes
- Explain how a gyroscope works
- Program their Zumi to drive in a shape using loops
- Program their Zumi to perform more complex driving maneuvers
- Program their Zumi to navigate a city with U-turns, traffic circles, and parking
Gyroscope
When you think of a gyroscope, you may be thinking of a mounted, spinning wheel that stays balanced in the same orientation, no matter which direction you turn or flip the gyroscope. How? This can be explained by conservation of momentum. While you may not have heard of this term before, you have experienced this. For example, if you have ever spun around on an office chair, you probably noticed you spin faster when you bring your arms and legs in. Since momentum has to be conserved, your speed increases when you bring your mass (arms and legs) closer to you.
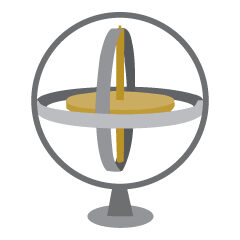
In electronics, gyroscopes don’t look like this. They are tiny chips that also use motion to detect changes in orientation. For robotics, this device measures rotation speed. Gyroscopes are important because we need rotation speed to calculate how many degrees Zumi has turned in a given amount of time.
Axes
There is more than one axis that you can use to measure rotational speed. The axis you will be most concerned with is yaw, or measuring turns to the left and right. You can also measure if Zumi is tilting forward and backward or tilting left and right. These three axes are called roll, pitch, and yaw.
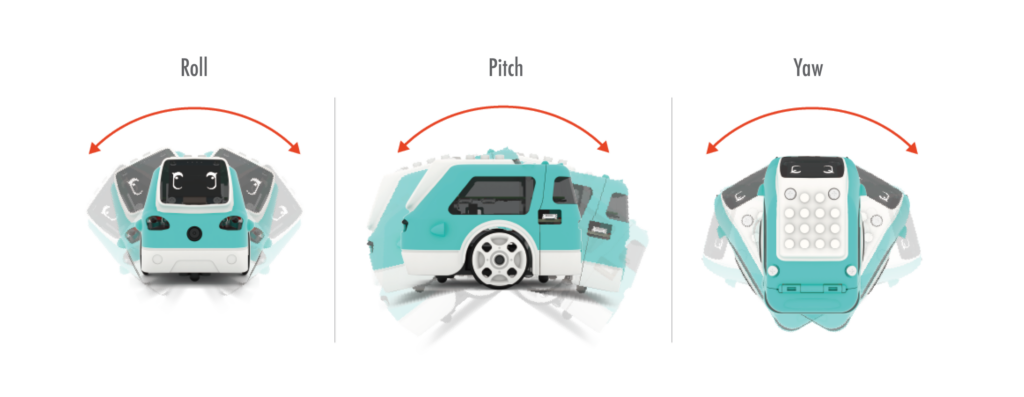
In code, you will call these axes X, Y, and Z.
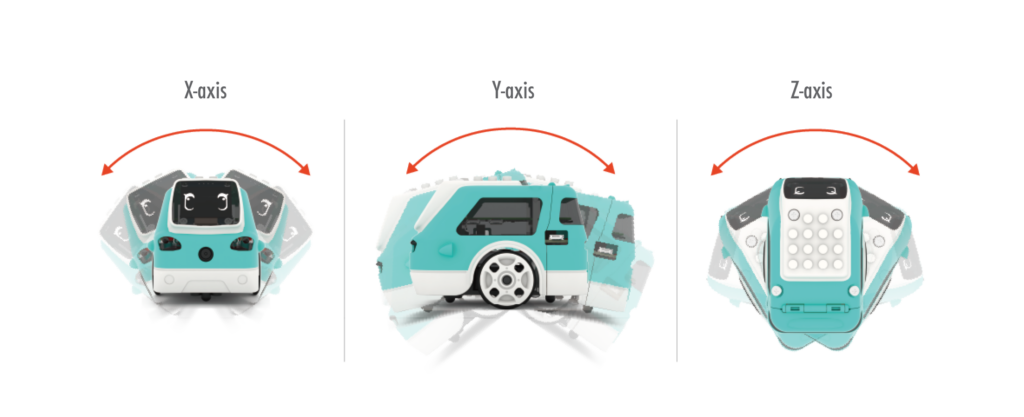
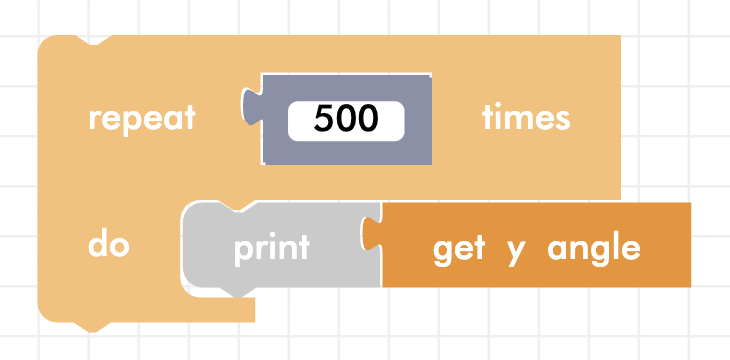
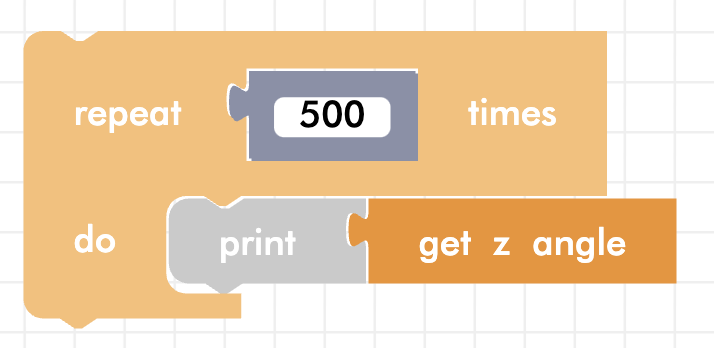
First, create the following code and start off Zumi on a flat surface. Once it starts running, slowly rotate Zumi on that axis to see the numbers change.
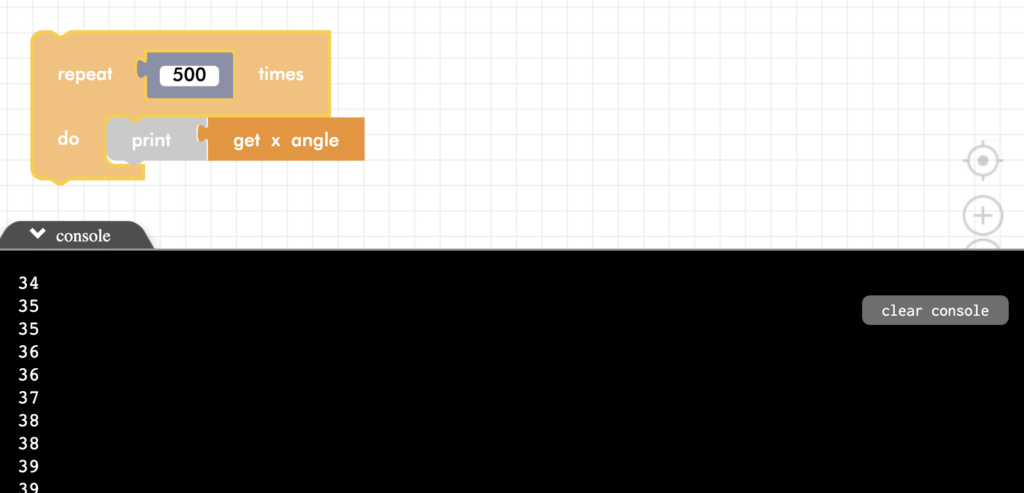
Now, try again with the Y axis.
Finally, test the Z axis. This is the one that will be most important when dealing with making accurate turns.
NOTE: Notice that when you turn Zumi to the left, the angles are positive. When you turn Zumi to the right, angles are negative.
How is the gyroscope related to driving?
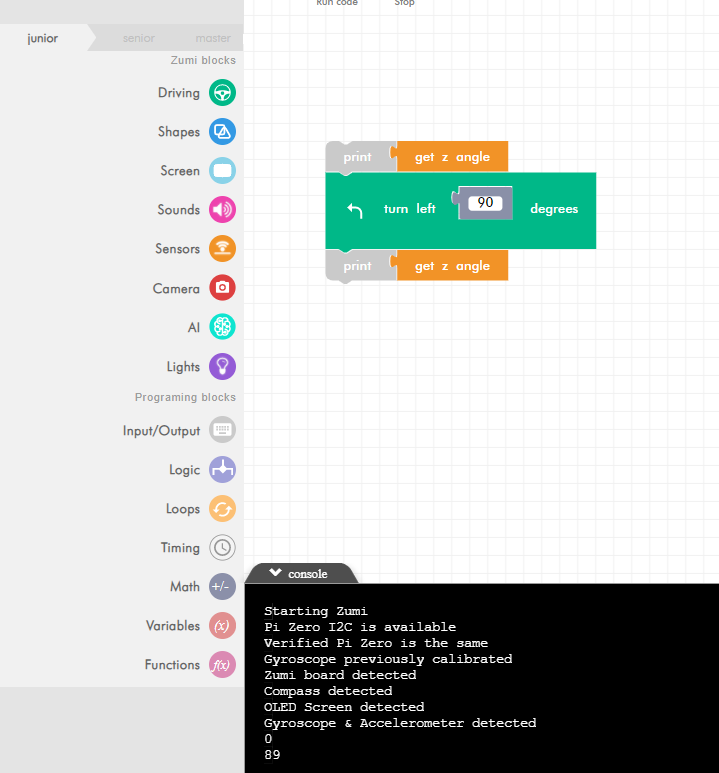
Now that you are familiar with all of the axes we can measure rotation, let’s focus on the most important one for driving: the Z axis. See how Zumi keeps track of the angle she’s facing by trying this code.
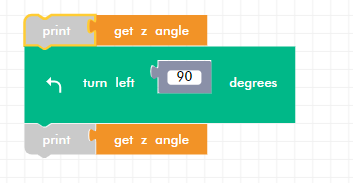
Look at the console to see the two angles. You should see a starting angle of 0 and a finishing angle around 90. It will not be perfect, but you will get an idea of how Zumi is keeping track of her angle when driving.
Adding if statements
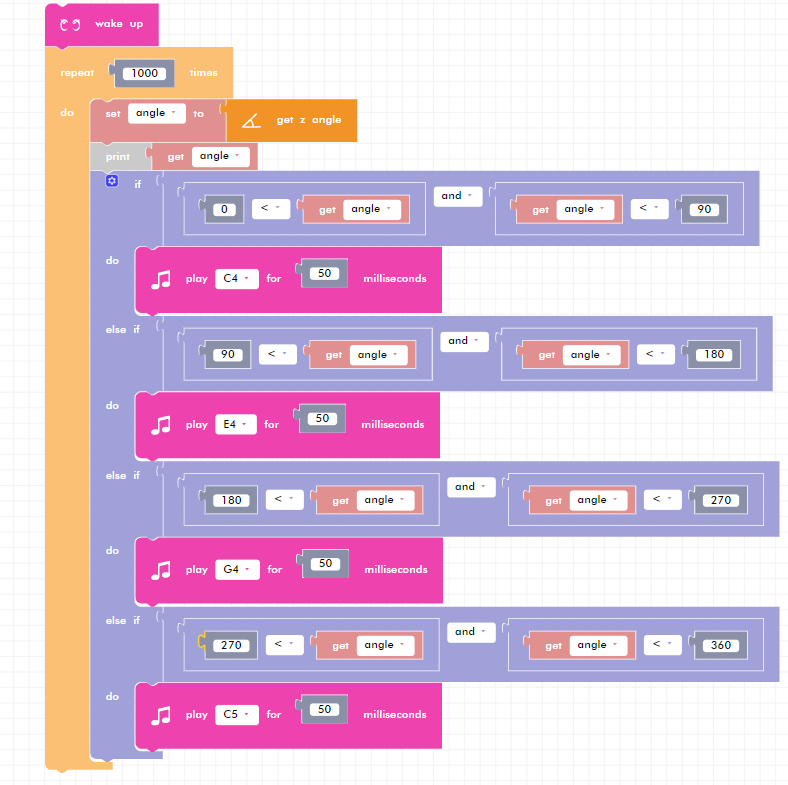
Zumi will play four different notes depending on which quarter of the circle she is facing. To do this, we need to write if statements for four cases:
- If 0 degrees < angle AND angle < 90 degrees (First quarter)
- Else if 90 degrees < angle AND angle < 180 degrees (Second quarter)
- Else if 180 degrees < angle AND angle < 270 degrees (Third quarter)
- Else if 270 degrees < angle AND angle < 360 degrees (Fourth quarter)
Set up 4 if statements, the AND blocks, and the comparator blocks.
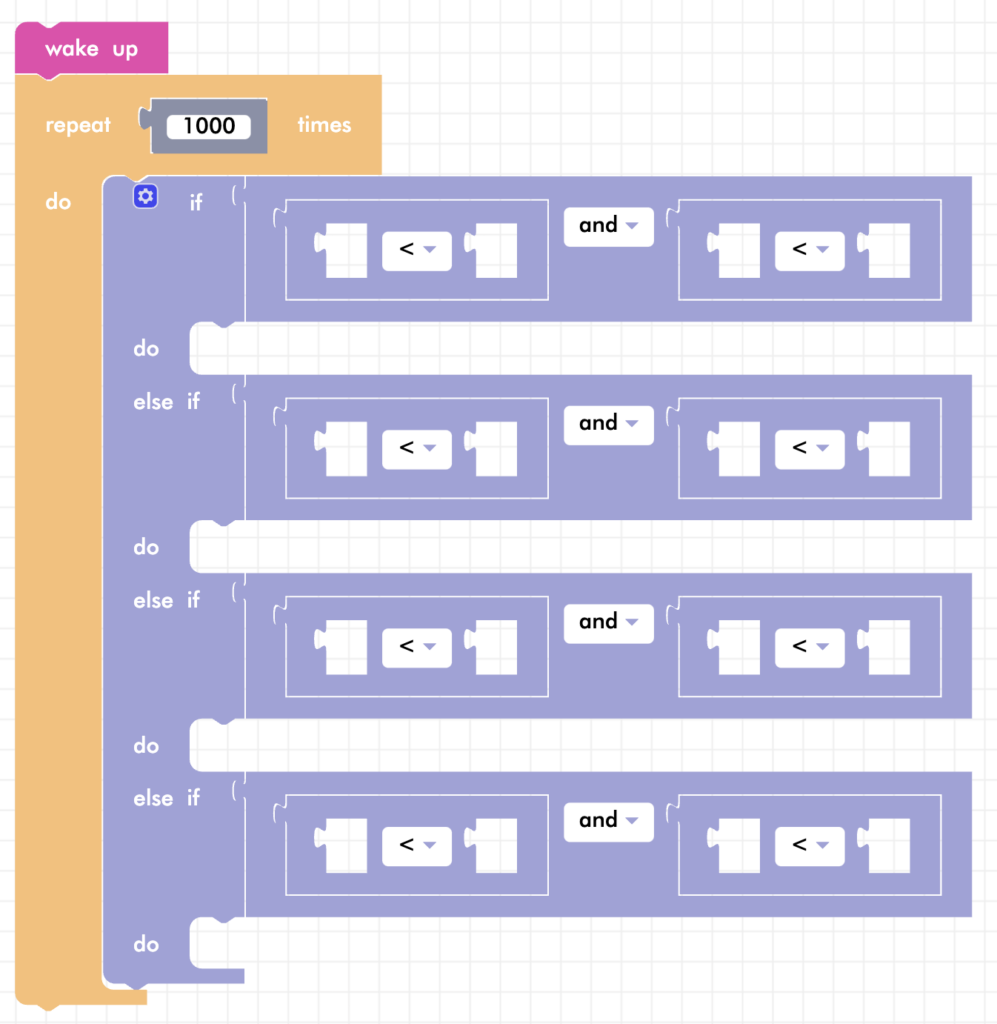
Since you will need to compare the same angle reading multiple times, create a variable at the top of the loop that will save the reading.
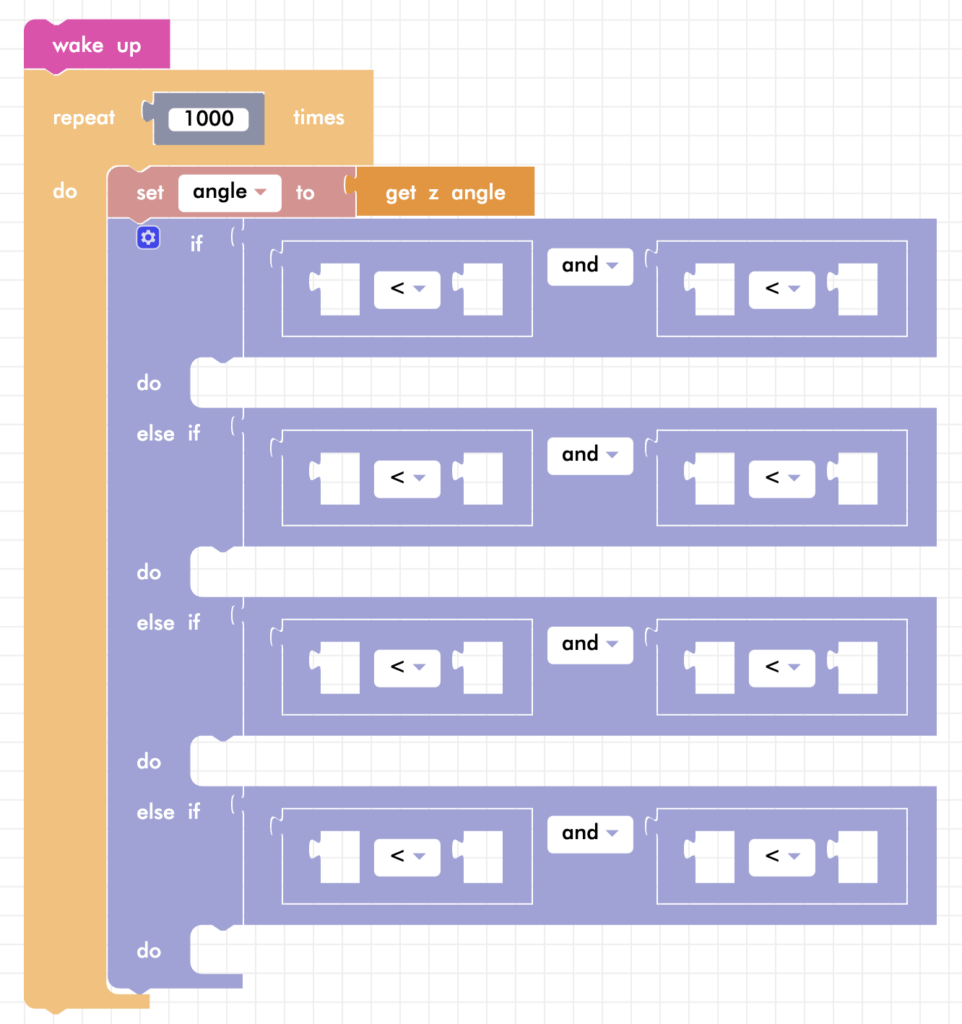
Finally, match the code to the outline written above and add four unique sounds!
NOTE: Notice, once again, that if you turn Zumi to the right, the values read by the gyroscope are negative. Therefore, the sounds will not play. If you turn it left more than a full 360°, the gyroscope will read angles larger than 360, and the buzzers will not play any notes. Look at the console for the printed values as you turn Zumi to figure out which notes should or should not be playing!
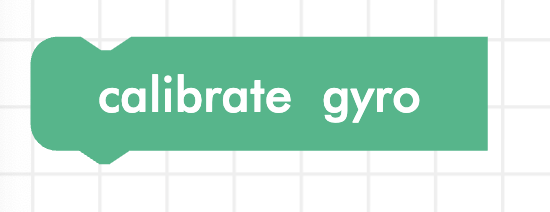
Calibrate gyro
If the gyro seems to be giving inaccurate results, you may need to recalibrate it. If you run this block (inside of the “Driving” menu), Zumi needs to be on a flat surface and should not be moved.
Reset gyro
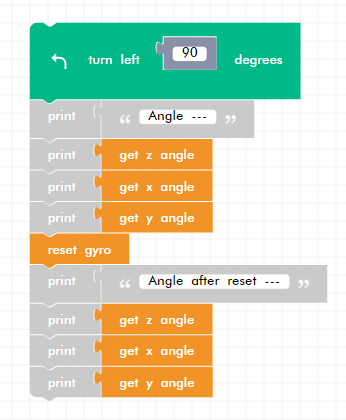
The gyro will always reset to 0 when you run a Blockly program, but sometimes you need to reset the gyro in the middle of your program. When the block is called, all degrees will reset back to 0. Try the following program to see how this works.
Review
You did it! You learned a little bit about how gyroscopes work and how you can get the data from Zumi’s gyroscope. Zumi has three axes you can read: roll (X), pitch (Y), and yaw (Z). The most important one for driving and making turns is the Z axis. In this lesson, you were able to write code that can do different things depending on the gyroscope reading!
Test Your Knowledge
Review The Key Concepts
Solve The Problem
Scenario: Your group would like for Zumi to play a sound each time it is facing different directions.
Problem: How can you play a sound each time your Zumi faces a certain direction?
Sample Solution
There are many different ways that we can solve the problem listed above. Please watch the following video to review a sample solution completed by Ontario Tech University Engineering Students.
Demo
Code
Common Errors
Errors can also occur while creating a solution to the problem. Please review the video below to view some of the common errors that can occur.
