14 Advanced IR
Learning Outcomes
- Understand the functionality of Zumi’s IR sensors for collision avoidance.
- Demonstrate the ability to use Zumi’s collision avoidance features to navigate around obstacles.
- Apply the knowledge of Zumi’s heading control in conjunction with collision avoidance to create controlled movements around obstacles.
- Utilize Zumi’s bottom IR sensors to enable Zumi to follow lines effectively.
Introduction to obstacle avoidance
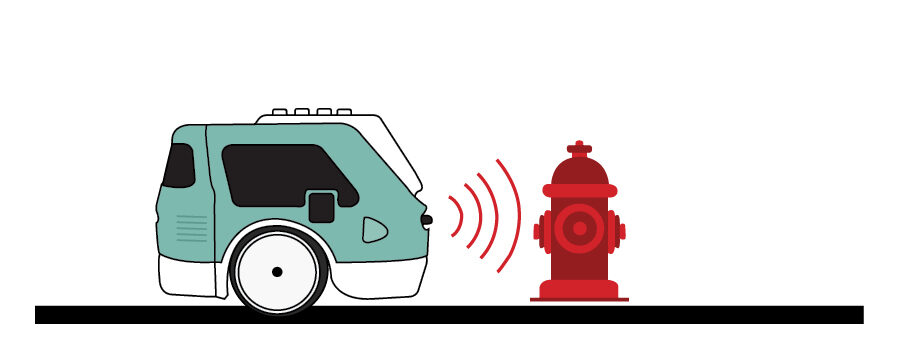
Have you ever been in a car when the emergency auto brakes went on? What happened? How was the car able to tell when to stop? Self-driving cars need to be able to avoid obstacles in an emergency. Instead of infrared, they use more advanced sensors like LIDAR (Light Imaging Detection and Ranging) and RADAR. LIDAR uses laser light to map out the environment while RADAR uses radio waves. Despite not having this technology, Zumi can still avoid obstacles!
Stop for pedestrians
It is extremely important for self-driving cars to be able to detect dangers up ahead, especially if they are pedestrians! In the code below, Zumi drives forward using forward_step() until she detects your hand (or another object) with either the front left or front right IR sensor. When you take your hand away, Zumi should keep driving. At the end of the loop, don’t forget to add a stop in case Zumi doesn’t detect any obstacles.
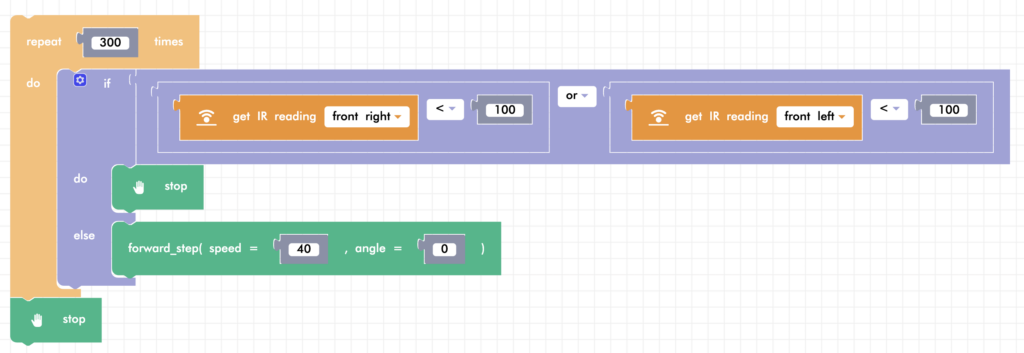
Now have Zumi drive in reverse and check her back IR sensors!
Avoid collision functions
That’s a lot of code to write just to avoid some obstacles! So we made a function for you that you can use to drive until an obstacle is detected. Once an obstacle has been detected, the function will stop running, even if the duration has not been completed. If there was no obstacle detected during the timeout, Zumi will stop automatically. Try it out!

Try going in reverse at an angle while checking the back sensors.

Challenge: Escape a Maze
Collision avoidance is an essential feature in any car, but a self-driving car would have to go around the obstacles in addition to stopping for them. In this section, you will learn how to change direction if Zumi encounters an obstacle and write a program to have Zumi escape a maze!
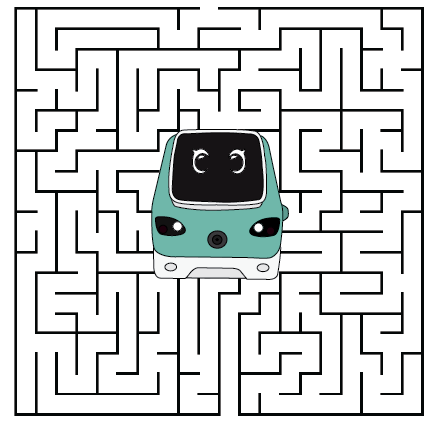
For this activity, you will need both of your front IR sensors. This time, instead of stopping and waiting for the obstacle to be removed, you will tell Zumi to turn a little to the left or to the right to go around, depending on which sensor is triggered.
Initialize heading
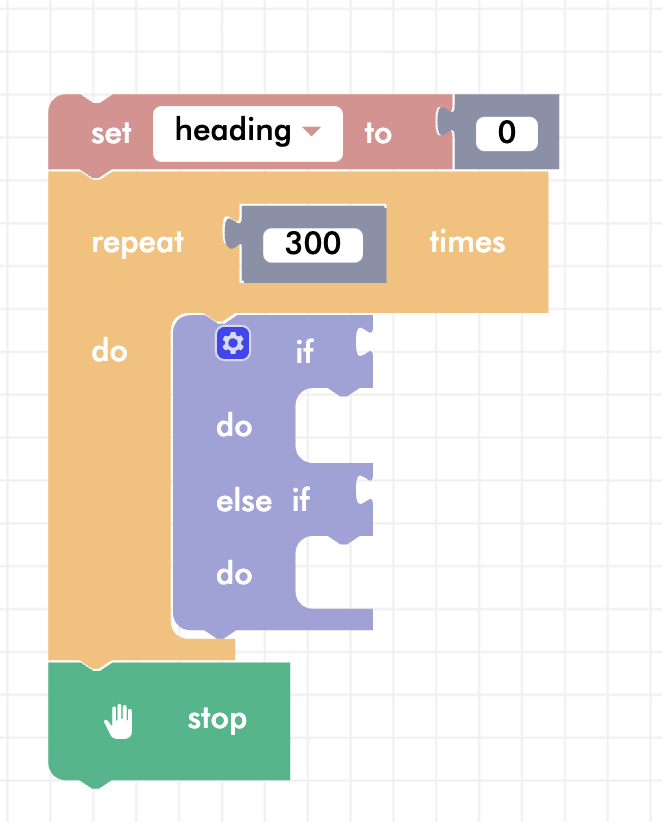
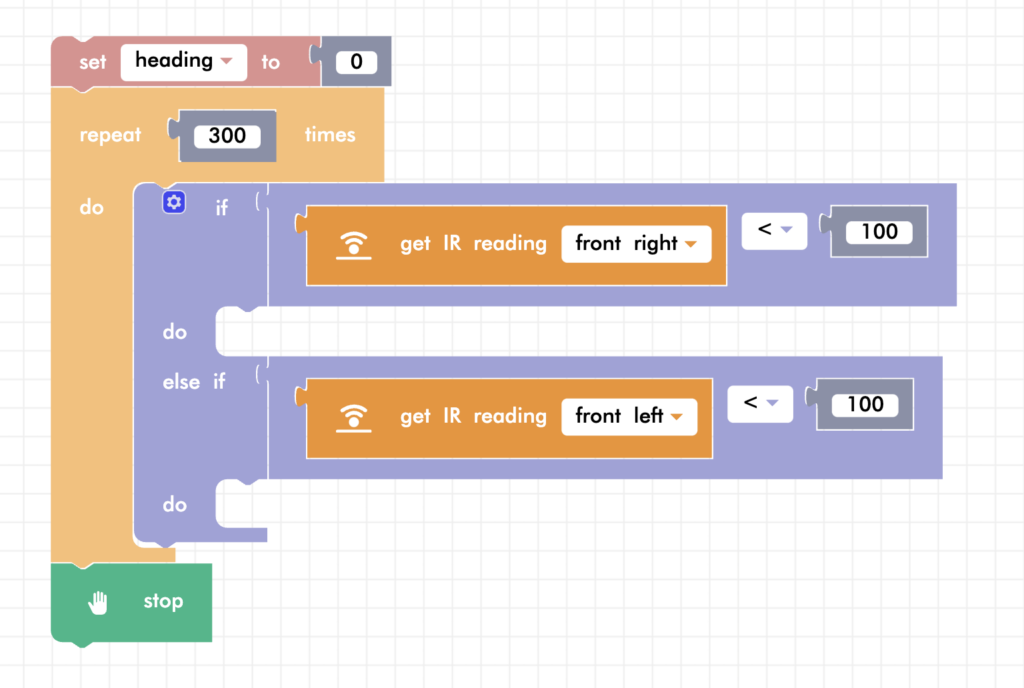
Start by creating a variable “heading” that is initialized to 0. Then, set up a loop with two if statements. Why two?
- If the right sensor detects an obstacle, then Zumi’s angle should change a few degrees to the left
- If the left sensor detects an obstacle, then Zumi’s angle should change a few degrees to the right
There will be no else statement because Zumi will continue driving regardless if the object is on the left or on the right.
Check sensors
Since Zumi will do something different depending on which IR sensor is detected, separate the right sensor and left sensor detection into their own if statements.
Change heading
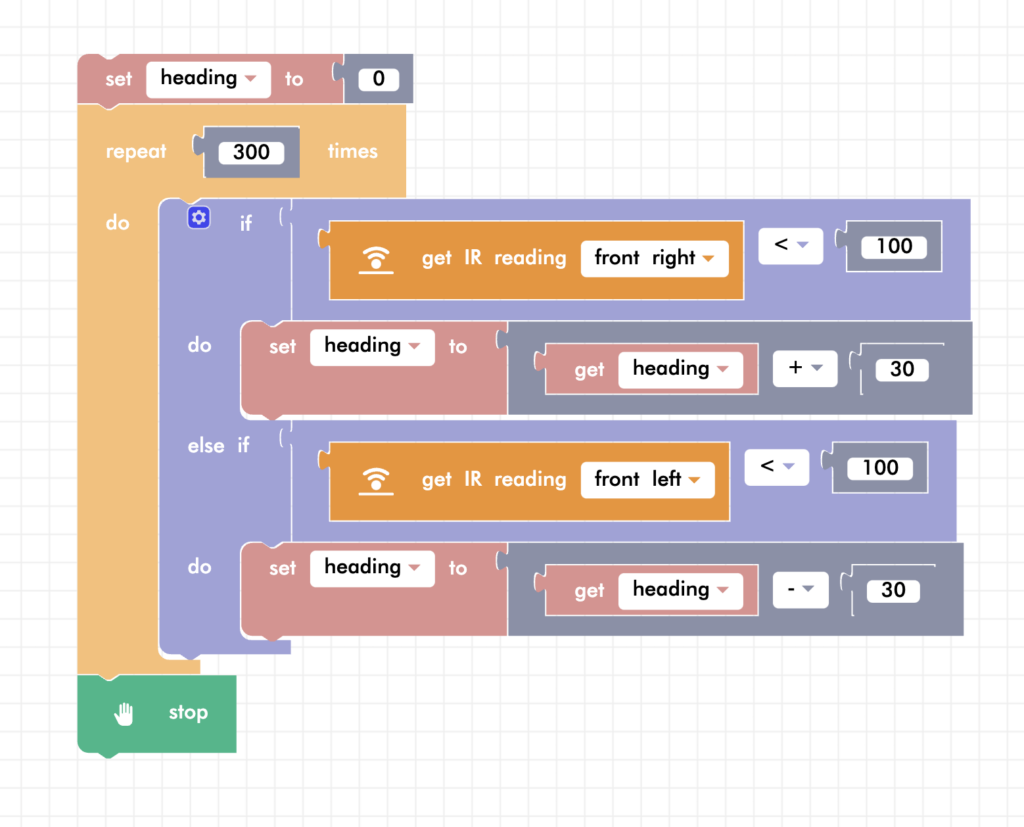
If an object is on Zumi’s right side, then Zumi will need to turn to left. Remember that in mathematics, turning to the left means the degrees increase while turning to the right degrees decrease. Add or subtract 30 degrees in the if statements.
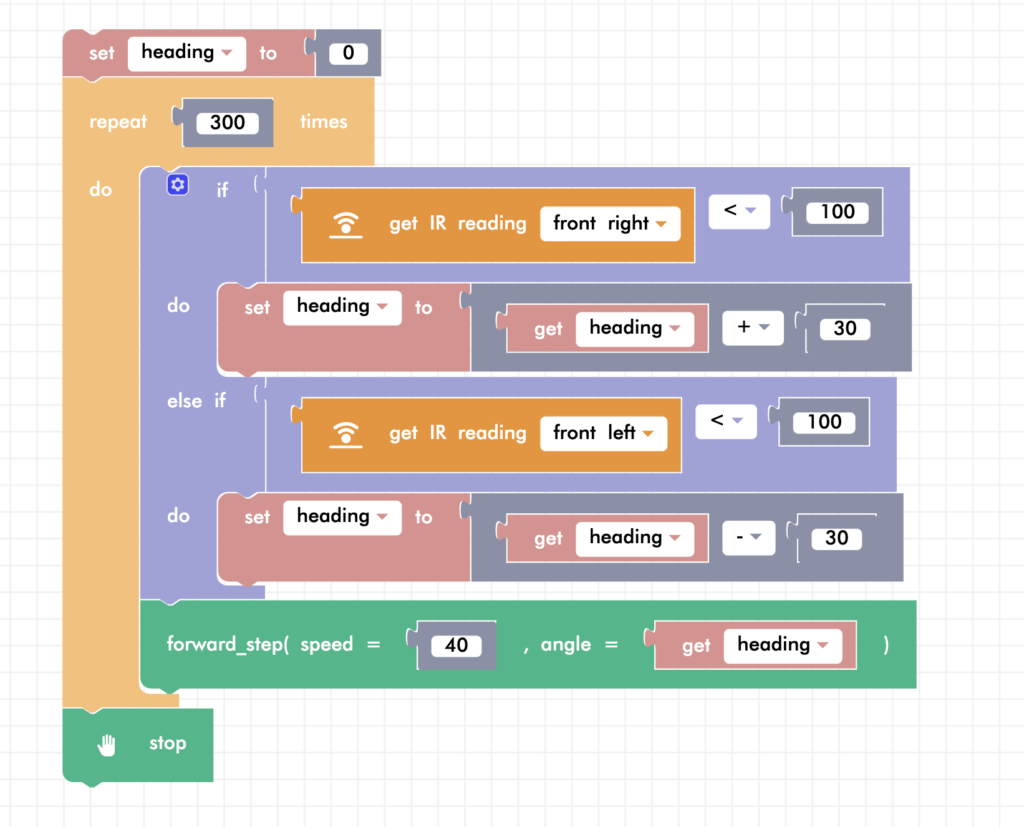
The last step in the loop before it repeats is to drive in that direction. You will be using the forward_step() block. Notice that since the angle is always changing, we use the heading variable instead which is keeping track of which direction Zumi should be going in.
Line following
You’ve learned how the front and back IR sensors can help Zumi avoid obstacles, but what about line following or staying with in the lanes on the road? You’re in luck! We’ve built a line follow function for you!
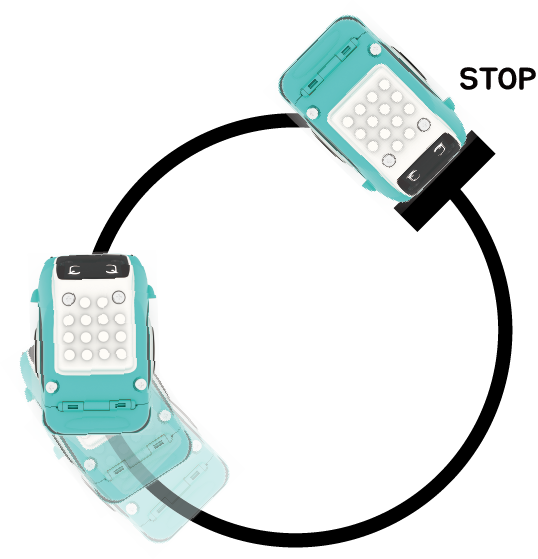
Since this is all about bottom IR sensors, this function uses both of them to check the line. Pretend you are walking on a piece of tape on the floor. If your right foot steps off the line, which way do you turn? What about your left foot? The IR sensors use the same logic.
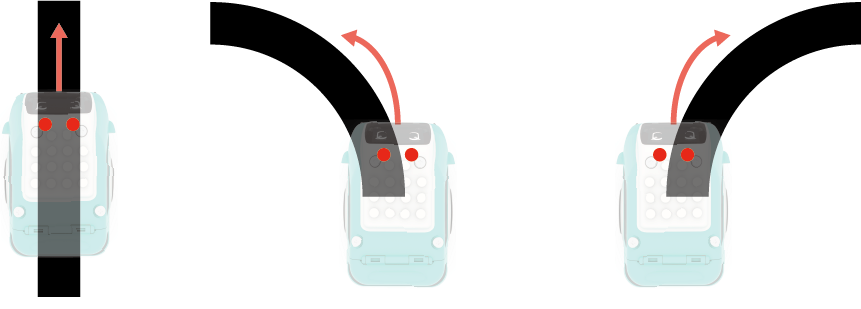
line_follow_gyro()
Let’s test the function! Use electrical tape or the driving school mat (if you have one) and line Zumi up on the starting black line. You can download a line following worksheet. The function line_follow_gyro() needs many parameters. Set the speed to a relatively low speed and set the program for 3 seconds (or more, depending on how long your line is!).

If you think that Zumi is not detecting the lines very well, or that the difference between dark and light is not big enough, you might need to adjust the thresholds, or limits, that the IR sensors will detect. Their default is set to 100. Refer to the IR Sensor lesson to test your IR sensors and figure out your thresholds.
If you think that Zumi is turning too little or too much, change the angle adjustment parameter.
Note: This function calls a while loop. If both of the IR sensors see white (the end of the line), the code will automatically stop, even if the time was not completed.
Review
In this lesson, you learned how to use Zumi’s IR sensors to avoid collisions with objects. You also learned how to combine that collision avoidance with Zumi’s heading to make Zumi move around those obstacles. Finally, you learned how to use Zumi’s bottom IR sensors to have Zumi follow lines.
Test Your Knowledge
Review The Key Concepts
Solve The Problem
Scenario: You are testing safety measures for an autonomous vehicle, you have a closed track that has a pathway for your vehicle to follow and obstacles for your vehicle to avoid.
Problem: How can you tell Zumi to follow a line on the road while avoiding obstacles?
Sample Solution
There are many different ways that we can solve the problem listed above. Please watch the following video to review a sample solution completed by Ontario Tech University Engineering Students.
Demo
Code
Common Errors
Errors can also occur while creating a solution to the problem. Please review the video below to view some of the common errors that can occur.
