13 Advanced Routing
Learning Outcomes
- Explain how to use the move_to_coordinate() function to navigate.
Coordinates
When you think of a coordinate system, what do you think of? You might think of the Cartesian plane taught in math class.
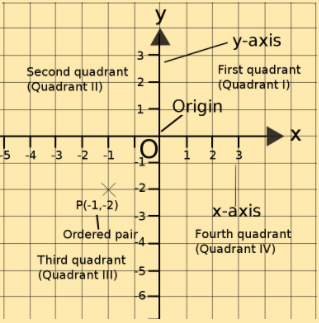
The “origin” is your starting point, located at x=0 and y=0, or where the two lines intersect. X-Values to the right of the origin (greater than 0) are positive, and x-values to the left of the origin (less than 0) are negative. Similarly, y-values above the origin are positive and y-values below the origin are negative. We can define any point on the plane with an ordered pair. In the picture above, (-1,-2) means that from the origin, we are one unit to the left and 2 units down.
What are the Coordinates of These Points?
Let’s practice! What are the coordinates of these points?
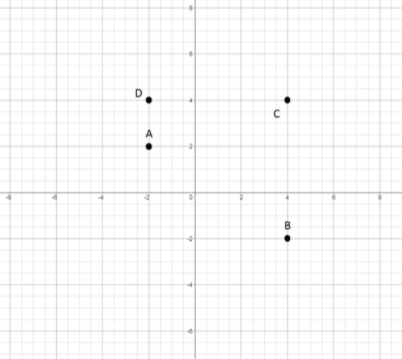
Now, imagine Zumi is on this plane starting at the origin facing the positive x-axis. If you told Zumi to go to point C -> B -> Origin, what would the path look like?

Answers:
a) (-2,2)
b) (4,-2)
c) (4,4)
d) (-2,4)
Speed calibration
First, you need to calibrate your Zumi to drive at accurate distances. The speed calibration works by measuring the black and white line markers on the speed calibration road piece which you can download and print here.
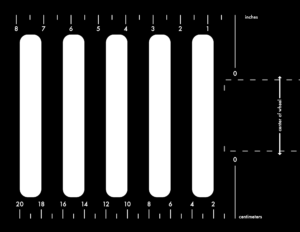
With this piece you can run the speed calibration function which will drive Zumi over 5 road markers. The speed calibration sheet must be printed to scale in order for it to work successfully. Each of the road marker pieces are spaced 2 centimeters apart. Zumi uses this information to predict the speed it travels at. From the Senior driving commands menu, place the speed_calibration() block in your workspace.

Place your Zumi on the indicated marker on the speed calibration sheet. When you run the speed calibration code some values will be displayed in the console. They correspond to the line of best fit that represent the relationship between your Zumi driving and distance. Don’t worry yet about what that means! The following are examples for a specific Zumi that has been tested, your values will be different.

Once you have your values, your Zumi will automatically be calibrated to try and accurately drive those distances.
Move to a coordinate
Remember the coordinate example from earlier? Now you are going to have Zumi drive in that pattern! From the origin, Zumi will drive to (4,4), then to (4,-2), and finally back to the origin (0,0). Here’s a refresher for what that looks like.
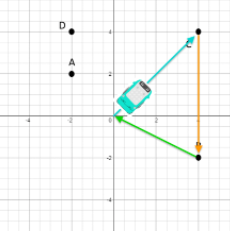
Let’s start with the first coordinate. Grab the move_to_coordinate() block from the Senior driving commands menu and place it in the workspace.

This function has three parameters: the desired x-coordinate, the desired y-coordinate, and the units. In this case, we will use inches since the speed_calibration() function saves everything in inches. If you want to use centimeters, make sure to change the third parameter to “centimeters” using the dropdown menu.
Change the x and y coordinates to the first point (4,4).
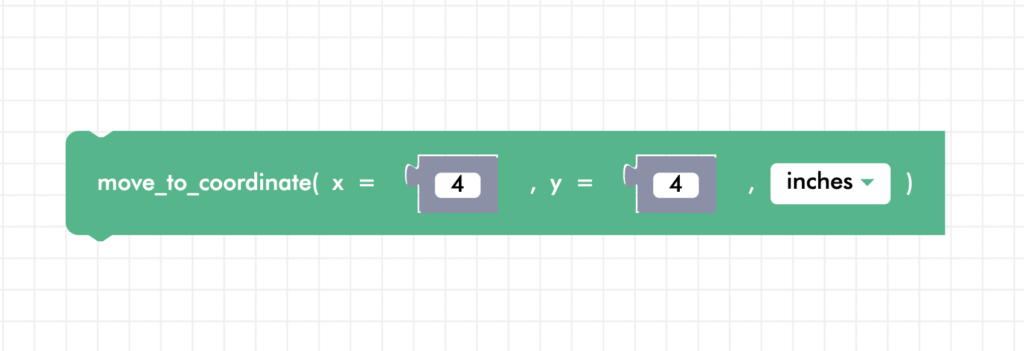
Then, add the coordinate (4,-2) then go back to (0,0)! Run the code and see if it matches what you predicted.
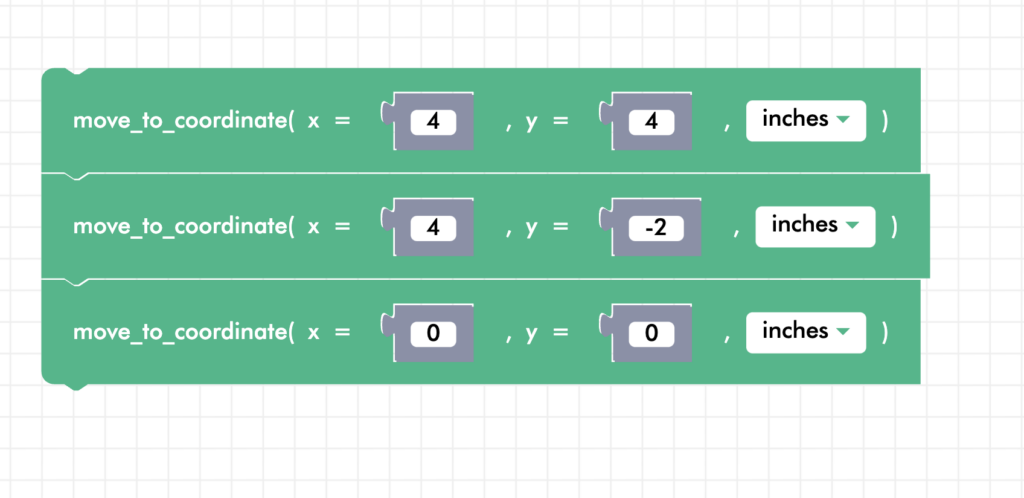
Square solution
Here is just one possible solution. You can make yours bigger, smaller, or in any direction!
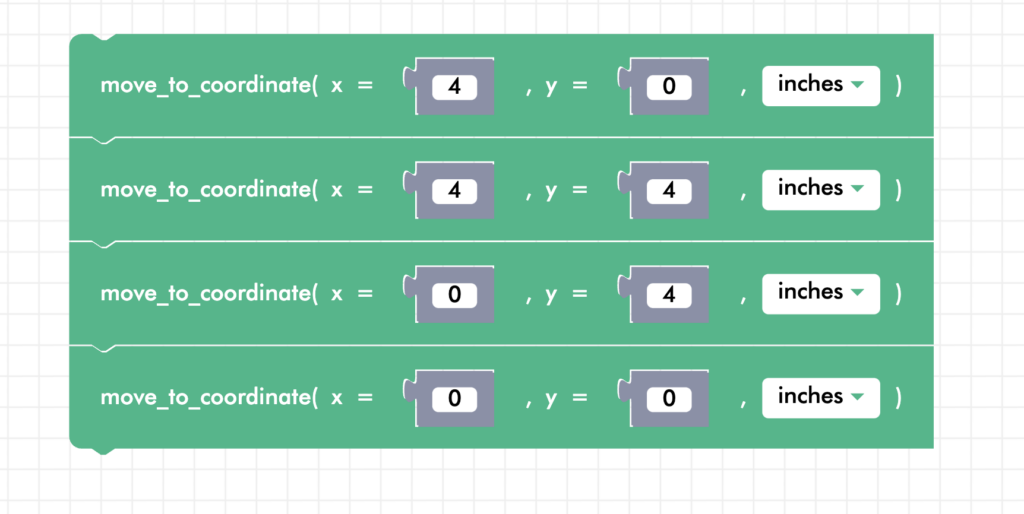
Challenge: Zumi Tetris Block
Want to try a more challenging activity? Try making the outline of the T-shaped block from the game Tetris! You can use this picture as a reference or pick any of the Tetris blocks. Scroll down for a solution!

Example Code:
Review
In this lesson, you learned how to calibrate your Zumi to drive distances accurately using the speed calibration sheet. To use it, line up Zumi’s wheels with the arrows and run the speed_calibration() block. This block saves Zumi’s speed predictions in inches. After you have calibrated, you can use move_to_coordinate() to move to any coordinate on the coordinate plane! Remember that at the beginning of each program, Zumi always starts at (0,0) facing the positive X-axis.
Test Your Knowledge
Review The Key Concepts
Solve The Problem
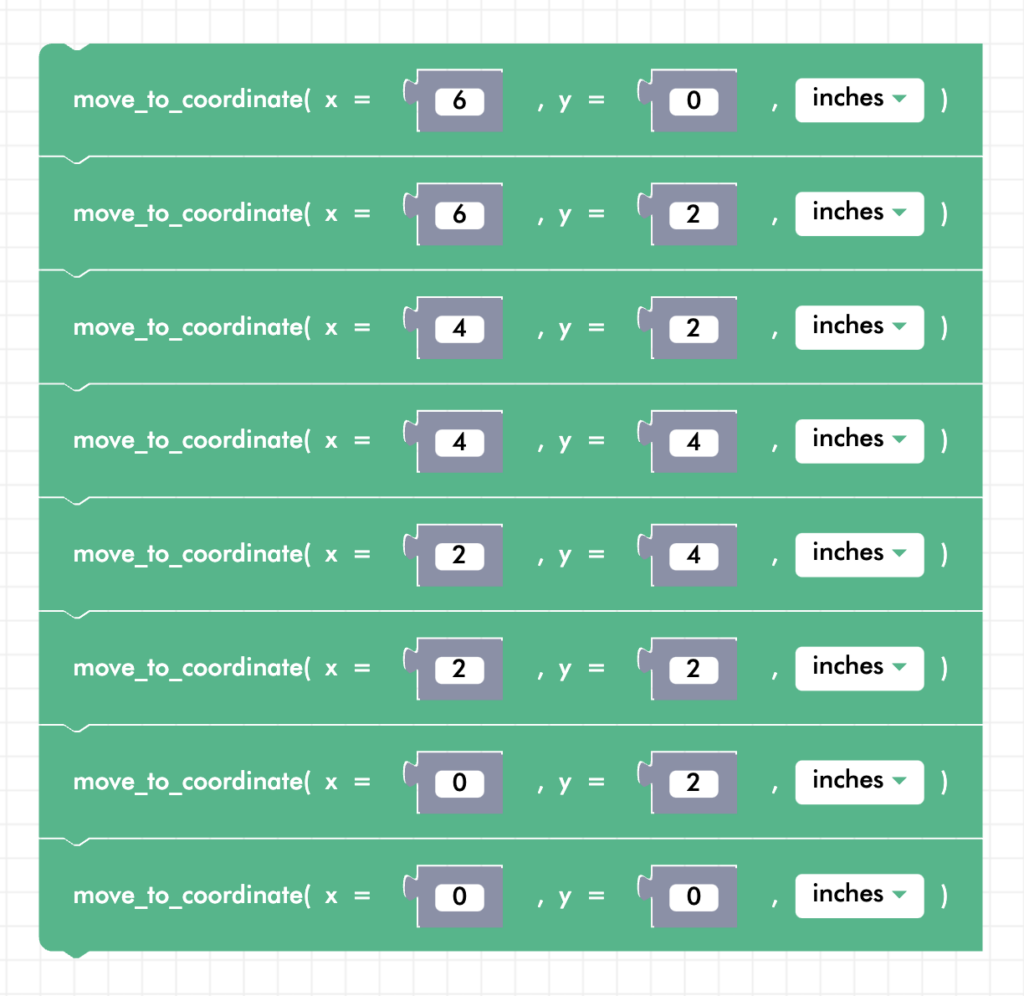
Scenario: You are in charge of programming an autonomous vehicle’s route to pick up packages from various locations. The vehicle needs to visit a series of stops, each defined by a set of coordinates. The coordinates for the stops are as follows: (6,0), (6,2), (4,2), (4,4), (2,4), (2,2), (0,2), (0,0). Your task is to develop a route plan that allows the vehicle to travel to each of these coordinates in an efficient manner, ensuring all packages are picked up. This scenario involves applying your knowledge of route optimization and autonomous vehicle programming to manage the vehicle’s journey across these specific points on a grid.
Problem: Create a navigation route for an autonomous vehicle to efficiently travel to multiple designated locations for package pickups, using specific coordinates for each stop.
Sample Solution
There are many different ways that we can solve the problem listed above. Please watch the following video to review a sample solution completed by Ontario Tech University Engineering Students.
Demo
Code
Common Errors
Errors can also occur while creating a solution to the problem. Please review the video below to view some of the common errors that can occur.

