11 Sign Detection
Learning Outcomes
- Demonstrate proficiency in utilizing the “get find stop sign” block to obtain and manipulate Boolean values in code.
- Apply the concept of continuous image capture within a loop until the detection of a stop sign is achieved.
Scanning a QR code
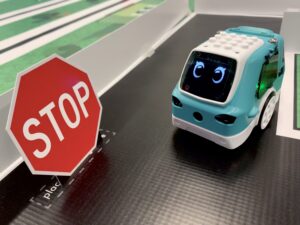
If you haven’t already, print out a stop sign. You can lean it on an object or other piece of card stock. You can also print out more than one to create a city!
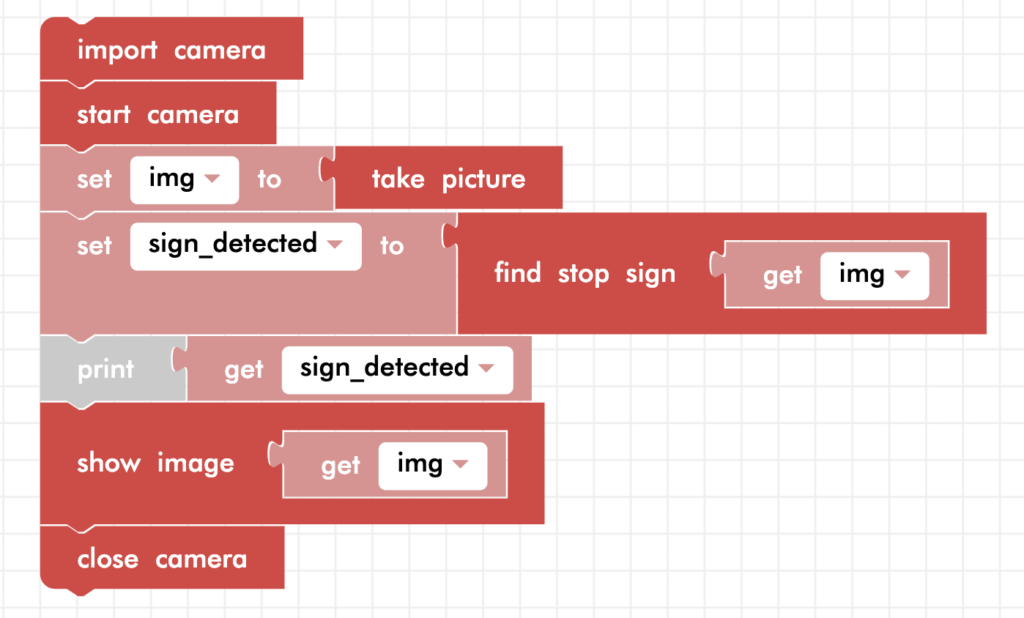
To detect the stop sign, you need the camera blocks. Drag the following blocks into the workspace. You will be using a new block and variable to find the stop sign. As with the QR code, don’t forget to show the image and close the camera!
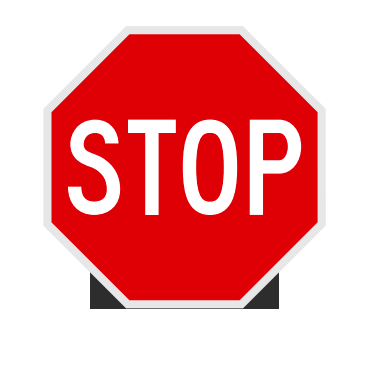
Now run the code and point Zumi’s camera to the stop sign. If you don’t have a printout, point Zumi to the image below. It may take some time to take and display a single picture.
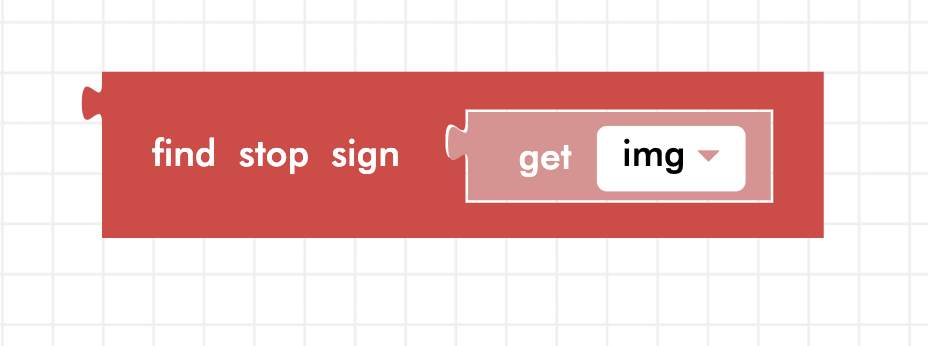
find stop sign
It’s time to introduce a new function! The “find stop sign” block will process the image parameter and draw a rectangle around the stop sign if one is found. Since this function returns a boolean, it must be connected to a variable block. The boolean will be True if a stop sign was found and False if a stop sign was not found. Remember that boolean values can only be True or False. In the code above, check the console to verify if a stop sign was found. Run the code again without a stop sign .
Rules of the Road
As drivers, we need to follow certain rules of the road. The most common rule of all is to stop at stop signs, so that is what we are going to be doing! We want our Zumi to drive forward until she sees a stop sign. Once she sees a stop sign, we want her to stop and then take a left turn! Let’s see how we can do that.
We previously introduced the idea of a loop – when a certain section code repeats over and over again. However, unlike what we previously learned, now we don’t know how much time Zumi should go forward for. Still, we do know that we want Zumi to drive forward until she sees a stop sign. Go to the loops tab and grab the “repeat while” block.
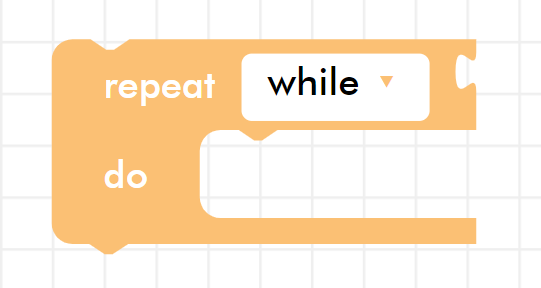
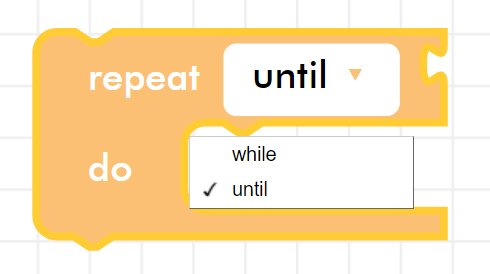
Click on the dropdown menu and select “until”. This is because we want Zumi to drive forward until she sees a stop sign.
Combining our new knowledge of the until loop with the camera code, we can ensure that Zumi will only go forward until she sees a stop sign. Include a wait block so that Zumi can be still as she takes her picture. If she does not see a stop sign, she moves forward for 1 second at 40 speed (you can change this if you want!) and takes another picture to see if she sees a stop sign now.
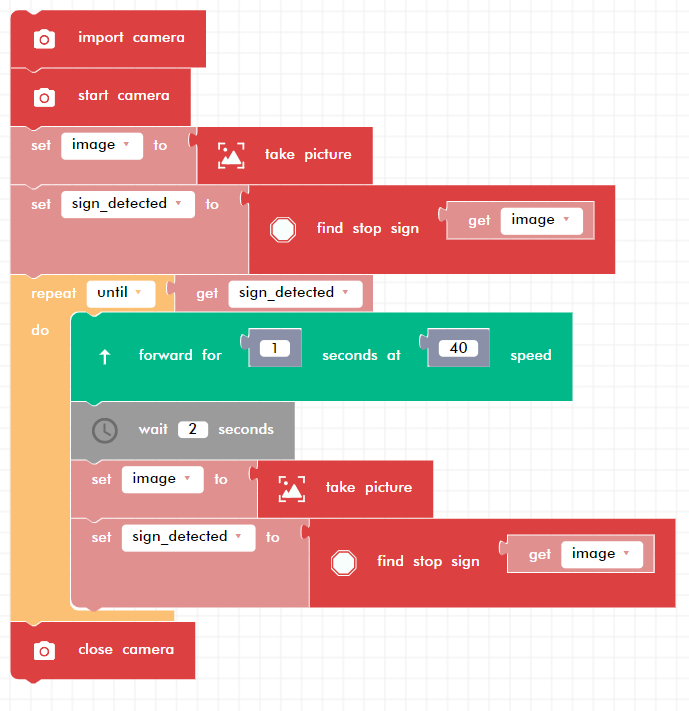
Great! Zumi now stops at stop signs! Now, let’s get Zumi to turn left afterwards. Where should we put this block? Let’s think about it chronologically (in order by time).
- Zumi starts driving forward.
- Zumi eventually sees a stop sign.
- After Zumi sees a stop sign, she stops going forward, and she takes a left.
After listing everything out in order, it appears that we can put the left turn after Zumi sees a stop sign. Even better, once Zumi sees a stop sign, she exits the loop. That means we can put the left turn right after the loop. It is often helpful to think of code chronologically when deciding where to put what!
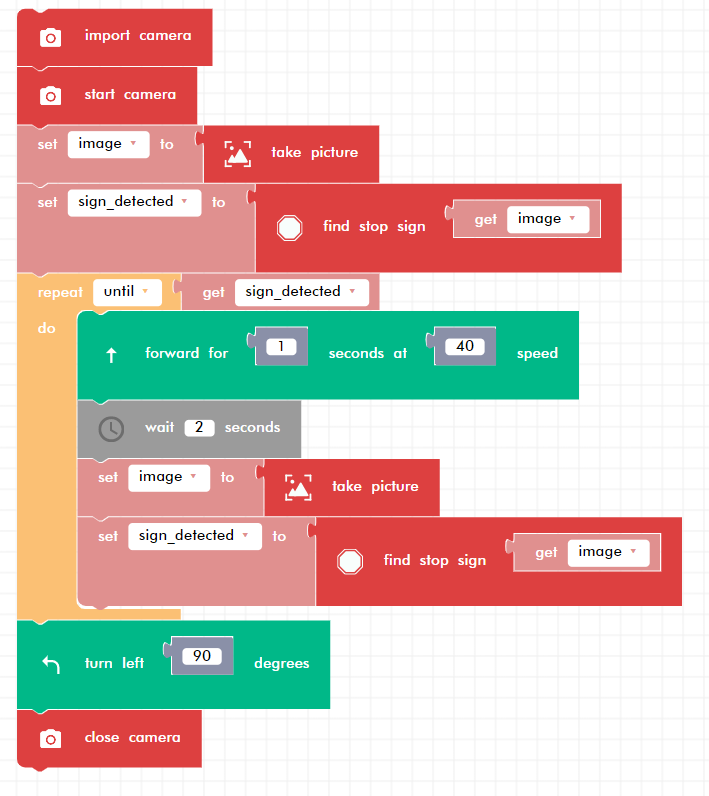
Zumi can now stop at stop signs and make a turn. She’s really starting to feel like she can drive herself!
Review
You’ve mastered find stop signs in Blockly! Let’s review what you learned:
- How to use the get find stop sign block which returns a boolean
- How to take pictures in a loop until a stop sign is detected
Test Your Knowledge
Review The Key Concepts
Solve The Problem
Scenario: Your team would like to test Zumi’s ability to drive on roads that have road signs.
Problem: How can Zumi see and follow road signs?
Sample Solution
There are many different ways that we can solve the problem listed above. Please watch the following video to review a sample solution completed by Ontario Tech University Engineering Students.
Demo
Code
Common Errors
Errors can also occur while creating a solution to the problem. Please review the video below to view some of the common errors that can occur.
