10.3
Processing Problems and Solutions
In order for images to be of diagnostic use, they must be free of error. The types of errors that can occur are time and temperature errors, chemical contamination errors, film handling errors, and lighting errors.
Time and Temperature Errors
For time and temperature errors, underdeveloped film (light) can occur, which is inadequate development time, developer solution too cool, depleted, or contaminated developer solution. Overdeveloped film (dark) can happen, which is excessive developing time and developer solutions that are too concentrated or too warm. Reticulation of emulsion (cracked) is when reticulation is caused by a sudden temperature change between solutions.
In the Iannucci & Howerton, Dental Radiography Principles & Techniques, 6th Edition textbook on page 101, refer to figure 10-4. And on pages 100 to 102, refer to figures 10-14, 10-15, and 10-16.
 |
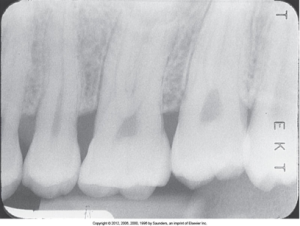 |
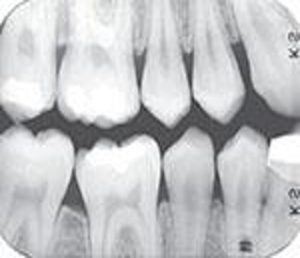
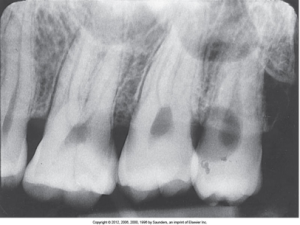
| A diagnostic radiograph with images that exhibit proper density and contrast. | An underdeveloped film appears light. |
 |
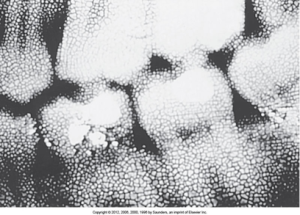 |
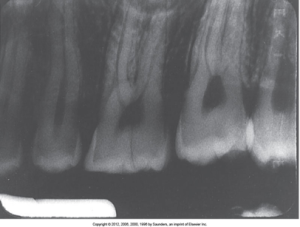
| An overdeveloped film appears dark. | Reticulation- A film with a damaged emulsion appears cracked. |
Chemical Contaminations Errors
Chemical contamination errors include developer spots which is when the developer comes in contact with film before processing. A neat work area can prevent errors like developer splash. Another error is fixer spots, which is when the fixer comes in contact with the film before processing, and yellow-brown stains occur when exhausted developer or fixer, or there is insufficient fixation time or rinsing.
In the Iannucci & Howerton, Dental Radiography Principles & Techniques, 6th Edition textbook on page 101, refer to figure 10-5. And on page 103, refer to figures 10-17, 10-18, and 10-19.
 |
 |
| Developer spots appear dark or black. | Fixer spots appear light or white. |
 |
|
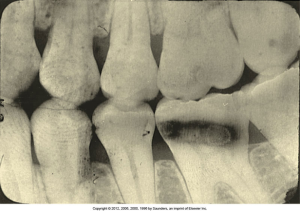
| A number of processing errors may result in a yellow-brown film: exhausted developer or fixer, insufficient fixing time, and insufficient rinsing. | |
Film Handling Errors
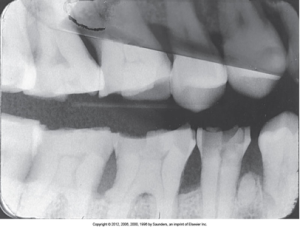
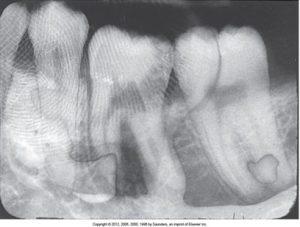
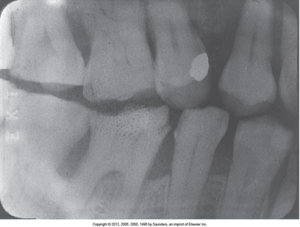
Film handling errors are developer cut-off, which is when a straight white border represents the undeveloped part of the film, resulting from insufficient developer levels, and fixer cut-off, which is when a straight black border represents the unfixed part of the film resulting from insufficient fixer levels. Overlapped films can occur when white or dark areas appear on the film where overlapped—and air bubbles, which are white spots where air is trapped on the film surface.
In the Iannucci & Howerton, Dental Radiography Principles & Techniques, 6th Edition textbook on page 102, refer to figure 10-6. And on pages 104 – 105, refer to figures 10-18 through 10-25.
 |
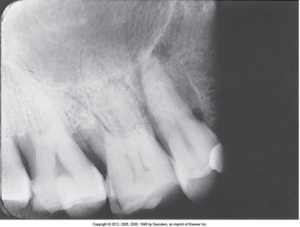 |
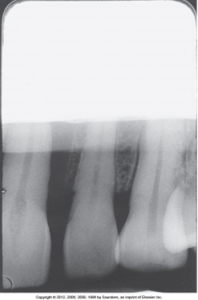
| Developer cut-off appears as a straight white border on a film. | Fixer cutoff appears as a straight black border on a film. |
 |
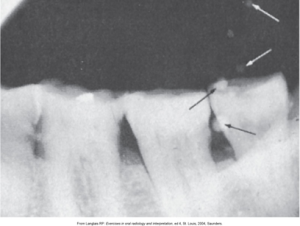 |
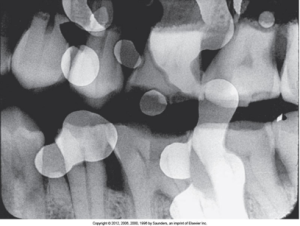
| Overlapped film. | Air bubbles appear as tiny white spots. See where arrows are pointed. |
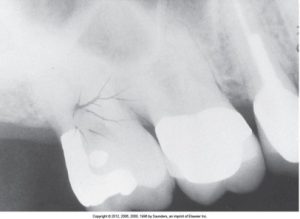
More problems of film handling are fingernail artifacts, which are when black crescent-shaped marks appear, fingerprint artifact that shows a black fingerprint, and static electricity that shows thin, black, branching lines. You can prevent this from occurring by slowly opening film packets to prevent static electricity from damaging the film. And scratched film can appear as white lines in the imaging.
In the Iannucci & Howerton, Dental Radiography Principles & Techniques, 6th Edition textbook on pages 100-106, refer to figures 10-23 through 10-28.
 |
 |
| A fingernail artifact appears as a black, crescent-shaped mark. | A black fingerprint artifact appears on the film. |
 |
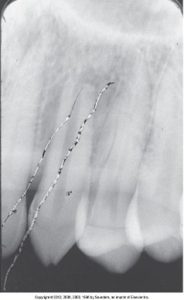 |
| Static electricity appears as black branching lines. | Scratches appear as thin white lines. |
Lighting Errors
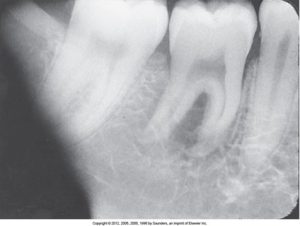
Light leaks and fogged film are lighting errors. If a light leak error occurs, the exposed area will appear black, and a fogged film will appear gray and lack image detail and contrast.
In the Iannucci & Howerton, Dental Radiography Principles & Techniques, 6th Edition textbook on page 103, refer to figure 10-7.
 |
 |
| A portion of the film exposed to light appears black. | A fogged film appears gray and lacks detail and contrast. |
Practice Makes Perfect
Answer the multiple-choice questions to familiarize yourself with the different processing errors.
Media Attributions
- Iannucci & Howerton: Dental Radiography Principles and Techniques, 6th Edition, Chapter 10, CC BY-NC-ND
