The purpose of oral suctioning is to maintain a patent airway and improve oxygenation by removing mucous secretions and foreign material (vomit or gastric secretions) from the mouth and throat (oropharynx). Oral suction is the use of a rigid plastic suction catheter, known as a yankauer (see Figure 5.3), to remove pharyngeal secretions through the mouth (Perry et al., 2014). The suction catheter has a large hole for the thumb to cover to initiate suction, along with smaller holes along the end, which mucous enters when suction is applied. The oral suctioning catheter is not used for tracheotomies due to its large size. Oral suctioning is useful to clear secretions from the mouth in the event a patient is unable to remove secretions or foreign matter by effective coughing. Patients who benefit the most include those with CVAs, drooling, impaired cough reflex related to age or condition, or impaired swallowing (Perry et al., 2014). The procedure for oral suctioning can be found in Checklist 42.
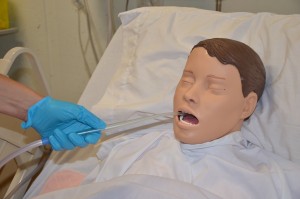
Checklist 42: Oral SuctioningDisclaimer: Always review and follow your hospital policy regarding this specific skill. |
|||
Safety considerations:
|
|||
| Steps | Additional Information | ||
|---|---|---|---|
| 1. Assess patient need for suctioning (respiratory assessment for signs of hypoxia), risk for aspiration, and inability to protect own airway or clear secretions adequately, which may lead to upper airway obstruction. | Baseline respiratory assessment, including an O2 saturation level, can alert the health care provider to worsening condition.
Signs and symptoms include obvious excessive secretions; weak, ineffective cough; drooling; gastric secretions or vomit in the mouth; or gurgling sounds with inspiration and expiration. Pooling of secretions may lead to obstruction of airway. Suctioning is required with alterations in oxygen levels and with increased secretions. |
||
| 2. Explain to patient how the procedure will help clear out secretions and will only last a few seconds. If appropriate, encourage patient to cough. | This allows patient time to ask questions and increase compliance with the procedure. Minimizes fear and anxiety.
Encourage the patient to cough to bring secretions from the lower airways to the upper airways. |
||
| 3. Position patient in semi-Fowler’s position with head turned to the side. | This facilitates ease of suctioning. Unconscious patients should be in the lateral position. | ||
| 4. Perform hand hygiene, gather supplies, and apply non-sterile gloves. Apply mask if a body fluid splash is likely to occur. |
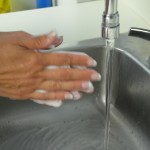 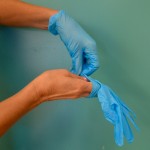 This prevents the transmission of microorganisms. Supplies include a suction machine or suction connection, connection tubing, non-sterile gloves, yankauer, water and a sterile basin, mask, and clean towel. Suctioning may cause splashing of body fluids. |
||
| 5. Fill basin with water. | Water is used to clear connection tubing in between suctions. Fill basin with enough water to clear the connection tubing at least three times.
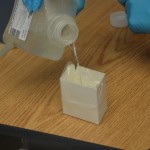 |
||
| 6. Attach one end of connection tubing to the suction machine and the other end to the yankauer. | This prepares equipment to function effectively.
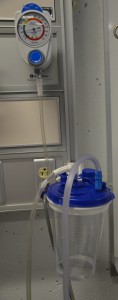 |
||
| 7. Turn on suction to the required level. Test function by covering hole on the yankaeur with your thumb and suctioning up a small amount of water. | Suction levels for adults are 100-150 mmHg on wall suction and 10-15 mmHg on portable suction units. Always refer to hospital policy for suction levels. | ||
| 8. Remove patient’s oxygen mask if present. Nasal prongs may be left in place. Place towel on patient’s chest. | Always be prepared to replace the oxygen if patient becomes short of breath or has decreased O2 saturation levels.
The towel prevents patient from coming in contact with secretions. |
||
| 9. Insert yankauer catheter and apply suction by covering the thumb hole. Run catheter along gum line to the pharynx in a circular motion, keeping yankauer moving.
Encourage patient to cough. |
Movement prevents the catheter from suctioning to the oral mucosa and causing trauma to the tissues.
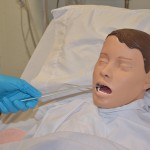 Coughing helps move secretions from the lower airways to the upper airways. Apply suction for a maximum of 10 to 15 seconds. Allow patient to rest in between suction for 30 seconds to 1 minute. |
||
| 10. If required, replace oxygen on patient and clear out suction catheter by placing yankauer in the basin of water. | Replace oxygen to prevent or minimize hypoxia.
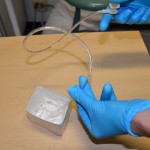 Clearing out the catheter prevents the connection tubing from plugging. |
||
| 11. Reassess and repeat oral suctioning if required. | Compare pre- and post-suction assessments to determine if intervention was effective. | ||
| 12. Reassess respiratory status and O2 saturation for improvements. Call for help if any abnormal signs and symptoms appear. | This identifies positive response to suctioning procedure and provides objective measure of effectiveness. | ||
| 13. Ensure patient is in a comfortable position and call bell is within reach. Provide oral hygiene if required. | This promotes patient comfort. | ||
| 14. Clean up supplies, remove gloves, and wash hands. Document procedure according to hospital policy. | Cleanup prevents the transmission of microorganisms. Documentation provides accurate details of response to suctioning and clear communication among the health care team. | ||
| Data source: Perry et al., 2014; Potter et al., 2010 | |||
Critical Thinking Exercises
- What is the purpose of oral suctioning? Name three types of patients at risk for airway obstruction or ineffective cough.
- What is the rationale for encouraging the patient to cough before suctioning?

