Use Video in Microsoft Teams
Turn your video on or off
Before a meeting
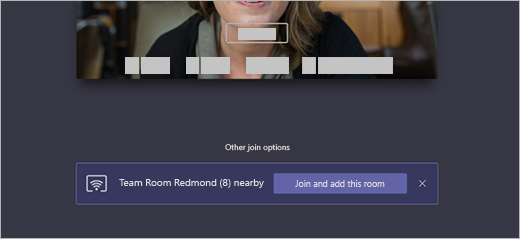
To turn on your video before a meeting, just select Camera  right before you join.
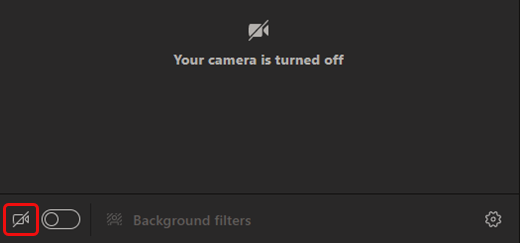
During a meeting
You might want to turn your video on and off over the course of a meeting—if you’d prefer people only see you while you’re talking, for example. Go to the meeting controls anytime during the meeting and select Camera  .
.

Change your background
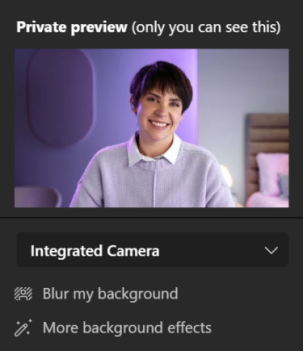
If you want to change what appears behind you in your video, you can either blur your background, or replace it entirely with any image you want.
When you’re setting up your audio and video before a meeting, select Background filters  (just below the video image). You’ll see your background options on the right.
Note: If you don’t see the option to turn on background effects, the feature might not be available on your device yet.
For more details about customizing your background, see Change your background for a Teams meeting.
Change your view
Customize how you see other people’s video during a Teams meeting. For example, you may want to see as many video feeds as you can at one time in a large meeting.
Note: To provide the best possible audio and video quality, we might decrease the number of videos you’re seeing at once if you’re running a little low on bandwidth or device memory.
- Join your meeting.
- In the meeting controls, select Change your view
 .
.
Some options may not be available depending on the size of the meeting.
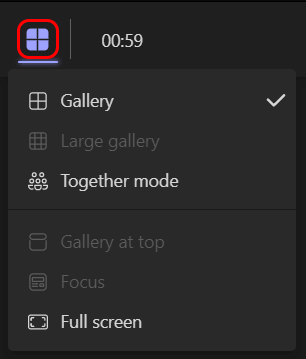
3. Choose one of the following view options:
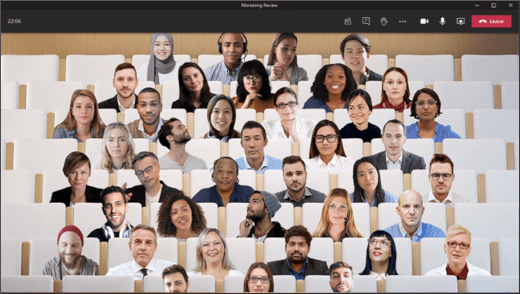
Gallery
The default view when you join a meeting shows up to nine other people on your screen at the same time. If there are more than nine others in attendance, Teams prioritizes the people who have their video turned on and those who’re speaking the most.
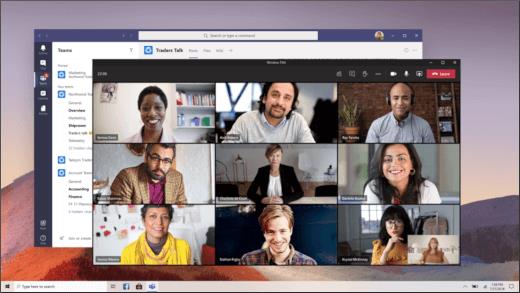
For people who haven’t turned on their video, Teams shows their profile pic instead (or their initials if they haven’t added one).
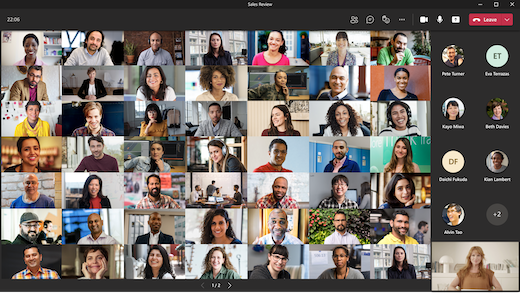
Large gallery
See the videos of up to 49 other people at once. This option is available when at least 10 people have their cameras turned on.

Note: If no one is sharing video, Large gallery won’t be selectable in the menu.
When more than 49 participants join a Teams meetings, see them all in a gallery with pages. In Large gallery view, navigation controls < > appear at the bottom of the gallery when there are more than 49 participants. Use these navigation controls to view or engage with more participants.
Together mode
Lets you feel like you’re in the same shared space with everyone in the meeting. Together mode is available when there are at least five people in the meeting.
If you’re a meeting organizer or presenter, you have an assortment of scenes to choose from. To change the scene, click on the scene name in the bottom left corner of your screen.
Under Choose a scene, pick the one you want and select Apply. The scene will change for everyone who’s in Together mode.
Note: The classroom scene automatically seats the meeting organizer (or whichever presenter was first to join) apart from the other participants.
2×2 (web only)
If you’re using Teams on the web (Edge or Chrome browser), you’ll see up to four video streams at a time. Join a Teams meeting and ask your participants to turn on their cameras to display a 2×2 grid of four participant videos at once.
Note: 2×2 video on Teams for web (Edge and Chrome) is available as part of the public preview program and may undergo further changes before being released publicly. To get access to this and other upcoming features, switch to the Teams public preview.
Focus
Available when content is being shared. This is the view to choose when you’d like to pay close attention to the content without the distraction of seeing people’s video feeds.
- Join your meeting.
- In the meeting controls, select Change your view and choose Focus.
Notes:
- The Change your view feature is available as part of the public preview program and may undergo further changes before being released publicly. To get access to this and other upcoming features, switch to the Teams public preview.
- If you’re not using public preview, select More options
 in the meeting controls to find these options.
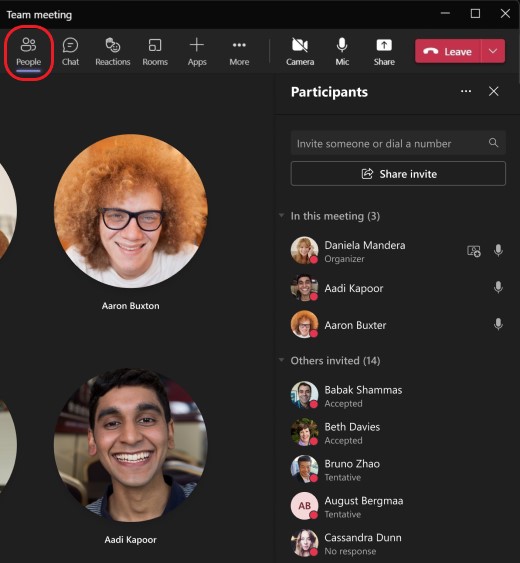
Pin someone’s video
To pin someone’s video to your view regardless of who’s talking, select More options in their video feed (next to their name) and choose Pin.
Pin your own video
To pin your own video, select More options in your video feed (next to your name) and choose Pin for me. This will pin your video for your own view, others won’t see you pinned. If you no longer want to be pinned, select More options > Unpin for me.
Spotlight a video
Spotlighting a video is like pinning it for everyone in the meeting. If you’re an organizer or a presenter, you can choose anyone’s video (including your own) to be the main video people see.
To spotlight someone else’s video, right-click on the one you want and select Spotlight.
To spotlight your own video, first select Show participants. Then, under Participants, right-click your name and select Spotlight. You can spotlight anyone else’s video this way, as well.
Hide your own video
To hide your own video, select More options in your video feed (next to your name) and choose Hide for me. This will hide your video for your own view, others will still see your video. If you no longer want to be hidden, select More options > Unhide for me.
Reframe a video
Teams crops some videos to make them fit your screen better. If you want a different view of a particular video—for example, if someone’s cropped out of the video or it only shows part of their face—select More options in their video feed then Fit to frame to see the entire video.
Select Fill frame to see a closer, cropped view.
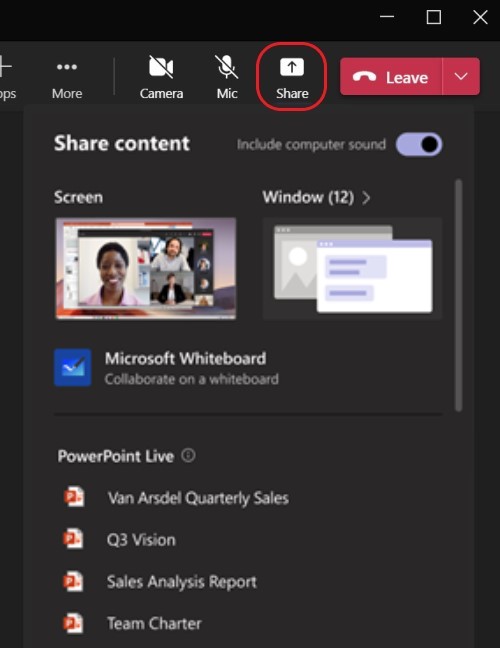
Recording a Meeting
Start recording
When you start recording a meeting, you also turn on live transcriptions (if your IT admin allows transcriptions).
-
Start or join the meeting.
- Go to the meeting controls and select More actions > Start recording.
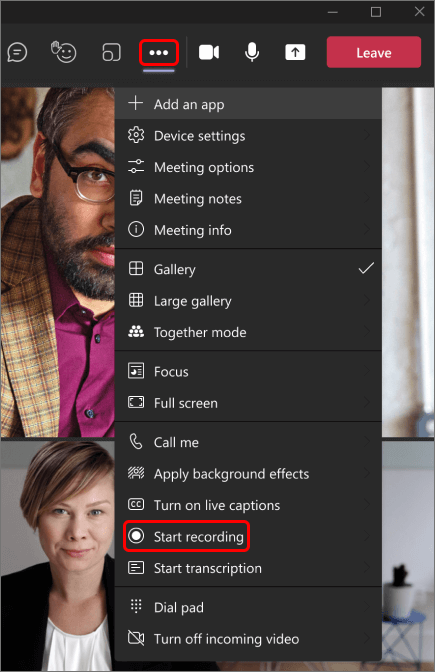 Everyone in the meeting gets notified that recording and transcription have started.

Stop recording
- Go to the meeting controls and select More actions .
- Choose one of the following:
- Stop recording: Stops the recording and live transcription.
- Stop transcription: Stops just the live transcription. The recording continues until you select Stop recording.
Find recordings
Recordings are available in different places depending on the type of meeting.
- The recording is processed and saved to SharePoint if it was a channel meeting or OneDrive if it was any other type of meeting.
- The meeting recording shows up in the meeting chat or channel conversation (if you’re meeting in a channel).
Note: For now, guests and external attendees can view the recording only if it’s explicitly shared with them.
Who can start or stop a recording?
Anyone who meets the following criteria can start or stop a recording, even if the meeting organizer isn’t present.
- Has one of the following licenses: Office 365 Enterprise E1, E3, E5, F3, A1, A3, A5, M365 Business, Business Premium, or Business Essentials.
- Has recording enabled by an IT admin.
- Isn’t a guest or from another organization.
| Type of user |
Can start recording? |
Can stop recording? |
| Meeting organizer |
|
|
| Person from same org |
|
|
| Person from another org or company |
|
|
| Guest |
|
|
| Anonymous |
|
|
Notes:
- Recording continues even if the person who started the recording has left the meeting.
- The recording stops automatically once everyone leaves the meeting. If someone forgets to leave, the recording automatically ends after four hours.
- If one of the participants has a policy for compliance recording, the meeting will be recorded according to the policy even if that participant is from another org.
Manage the expiration of a meeting recording
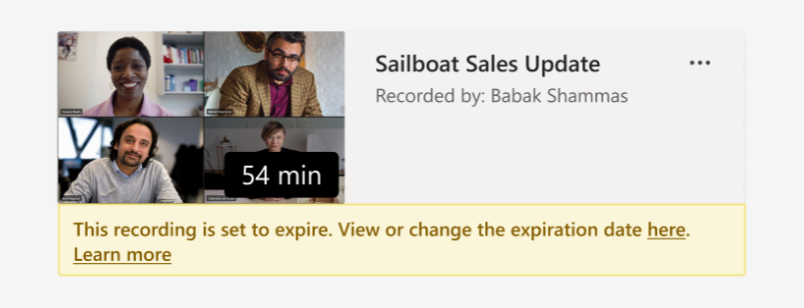
Your admin’s settings determine whether (and when) a recording will expire. If your recording has an expiration date, you’ll see a message indicating that when the recording pops into the meeting chat after the meeting ends.
Open the details pane to view or change the expiration date.
There are a couple of different ways to get there:
- Click on the recording to open it in your browser. Once the browser page has opened, select
 in the upper right to open the details pane.
- Or, go to My files in your OneDrive or SharePoint site and view as a list. Mouse over the recording in question, select Show actions (the three vertical dots to the right of the file name), and then choose Details.
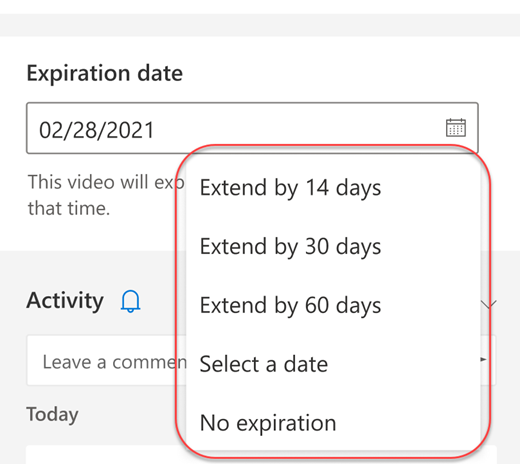
When the details pane is open, look for Expiration date. Here’s where you’ll see the date that’s currently set.

Open the drop-down to see your options for changing the date. Extend the recording’s availability for a certain number of days, or pick a specific date on the calendar. You can also choose No expiration if you don’t want it to be deleted.


 in a chat (below the box where you type a new message) to book a meeting with the people in the chat.
 on the left side of the app and select New meeting in the top right corner.
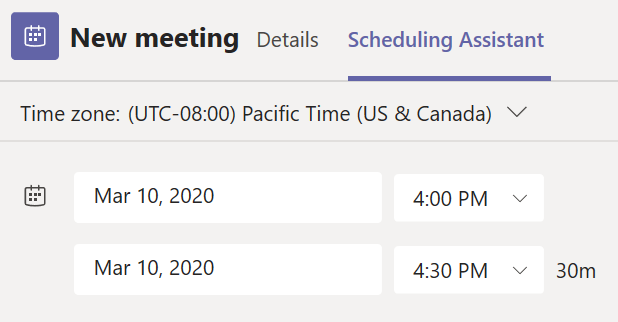
 in your meeting controls to see the people who were invited but haven’t joined yet.
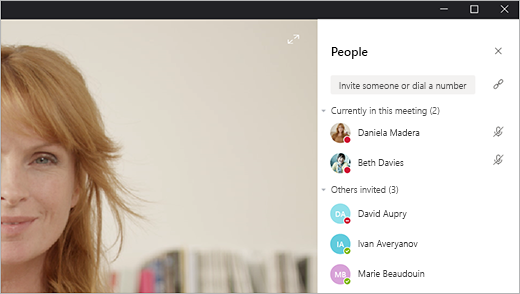


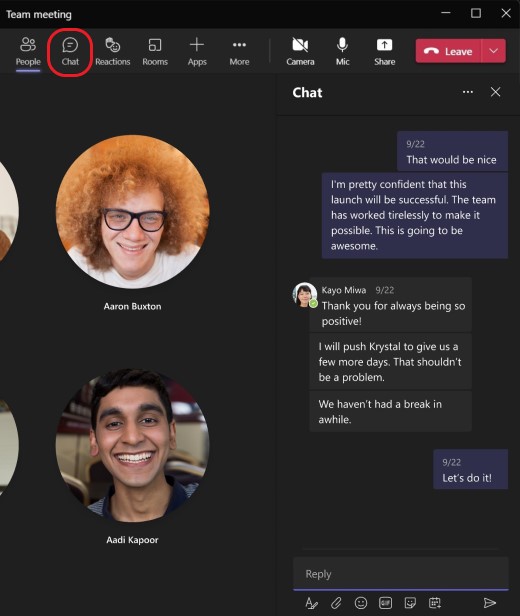
 .
.
 .
.
 .
.
 to create and assign people to breakout rooms.
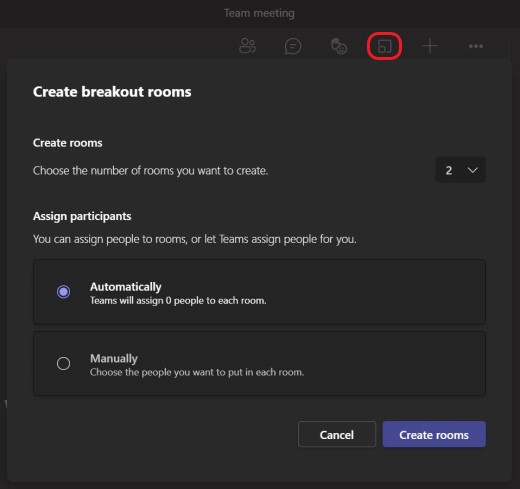
 to search for and add an app for the meeting.
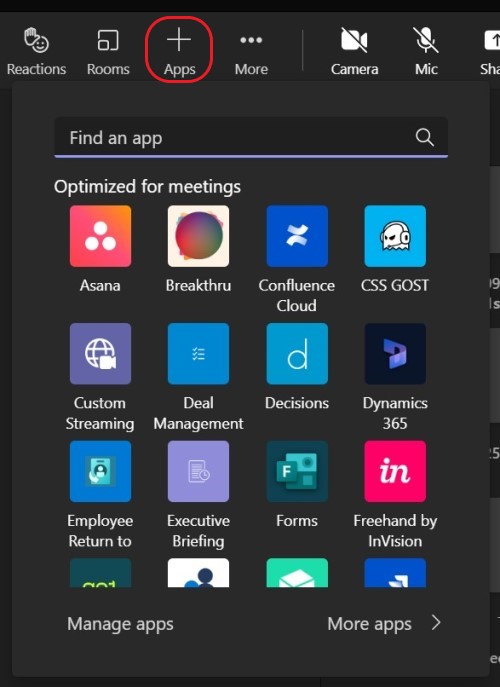

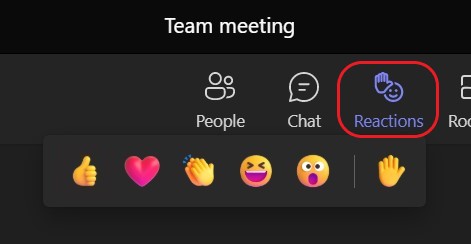
 .
.
 to unmute your mic.
 .
. .
.
 . If you’re the meeting presenter, you can also select the dropdown and choose End meeting. Only meeting presenters can end meetings.