11 Using Media Sources
In the following section, you will need to download the following plugins:
VB-Audio Cables are used in a similar manner to virtual cameras. It is software that assists your computer in redirecting the audio to the desired input and output.
By going into the OBS Settings Audio tab, you can add these virtual cables to your Global Audio Devices
Audio Monitor 0.7.1 – Plugin for OBS Studio to add Audio Monitor dock and filter. It allows you to put the audio of a OBS source to an audio device by adding the Audio Monitor filter on the Source in OBS Studio.
To add a Media Source to your Scene:
- Click the “+” at the bottom of the Sources dock
- Select Media Source from the Sources menu
- Give a name to this Source
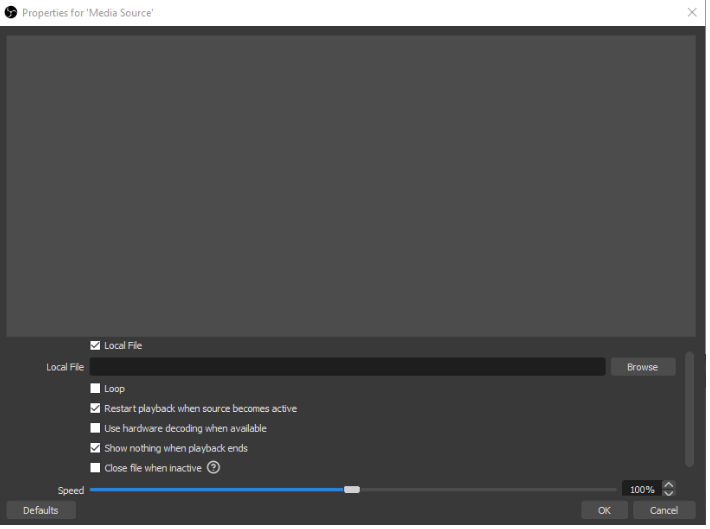
- Click Browse and select the Media source you would like to add to your Scene. For ease of use, add the recording we just created in the screen capture and recording
- Also, select Loop and reduce the speed of the video
Within the Audio Mixer dock:
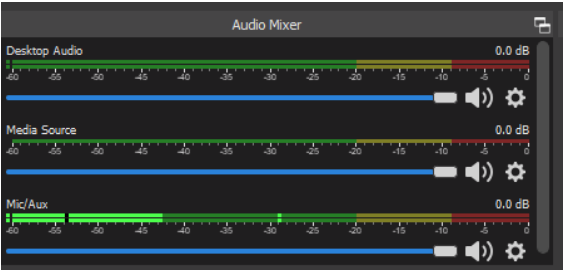
Click on the gear at the far right under the “Media Source” (the name of this audio source will be the name of the you gave to the media source)
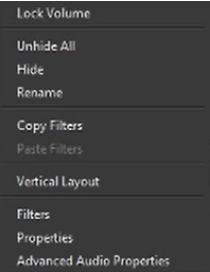
In the Audio Source menu, select “Advanced Audio Properties”
Within the Advanced Audio Properties window, under the “Audio and Monitoring” settings, change it from “Monitor Off” to “Monitor and Output”
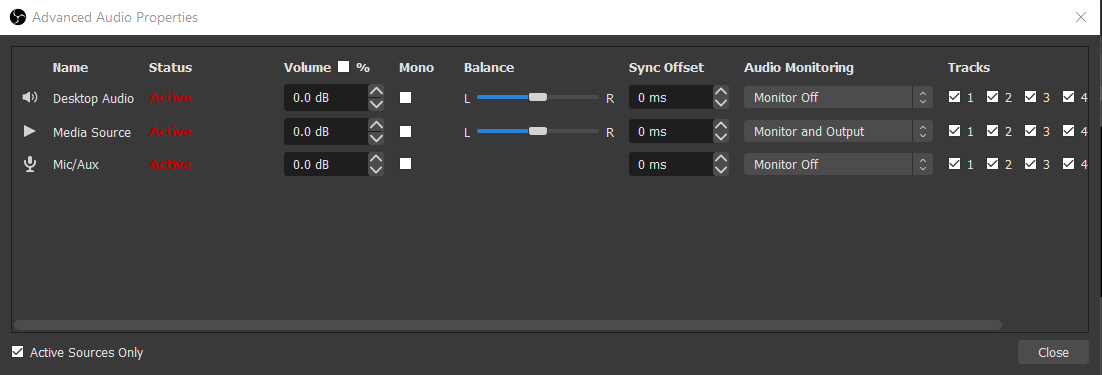
This will allow for the audio from your Media Source to play through your Virtual Camera.
Using VB-Audio Cables & Audio Monitor Plugin
In order to use OBS for your audio in Zoom, you will need to follow these steps and install the Audio Monitor plugin. This will direct that audio into the location you want.
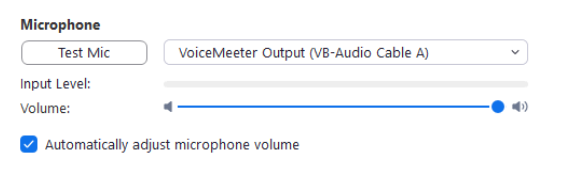
In order for this to work, you will need to set your zoom microphone to be a VB-Audio Cable:
Then follow these steps in OBS Studio:
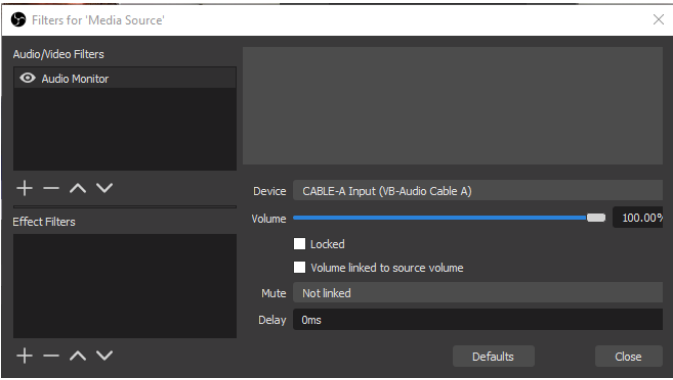
Click on the gear at the far right under the “Media Source” (the name of this audio source will be the name of the you gave to the media source)
In the Audio Source menu, select “Filters”
If you have not installed the Audio Monitoring Plugin you will not see the Audio Monitor filter:

You can choose to just share your microphone and/or also share your desktop
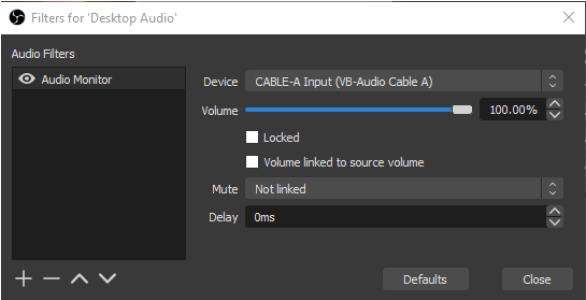
Also, if you are sharing media through OBS Studio, Media Sources also have an Audio/Video Filter and you would want to direct that audio to the VB-Audio Cable you selected.
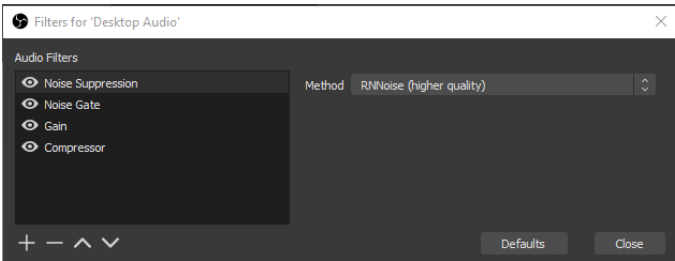
Audio Filters
Audio Filters are important for improving how you sound and removing background noise. Here is how you add these filters:
Click on the gear at the far right under the “Media Source” (the name of this audio source will be the name of the you gave to the media source)
In the Audio Source menu, select “Filters”
Noise Suppress: Remove background noise
Suppress Level (dB) – lower dB Value=more suppression
Start on -10 and go down up to -60 until the background noise is gone
Gain: Increases the Input
Gain (dB) – negative Values will lower your Audio Input while positive Values will increase it
Do some tests by recording your Audio Input and checking the video to make sure no clipping occurs because of too audio high volumes.
Noise Gate: Turns the Microphone off if no one is talking
Close Threshold – When the mic drops below this volume, the noise gate will turn off the microphone
Open Threshold – When the mic goes above this volume, the noise gate will turn on the microphone
Attack time – How long it takes for the mic to go from off to on, as a fade in.
Hold time – How long the mic should stay on after the volume has dropped below the close threshold.
Release time – How long it takes for the mic to go from on to off, as a fade out.
In most cases configure your Close Threshold first (it always has to be lower as your open Threshold). First do not talk and see if the Microphone inputs any Volume in OBS, then increase the Close Threshold until the Microphone input stops.
Now start talking and see if your Open Threshold is correct. You should see the green bar moving, meaning your voice comes in. You can then increase the Open Threshold until the Microphone stops showing input in OBS. Then slightly lower it again and you should have a good value.
Compressor: makes loud sounds quieter and typically would be placed at or near the beginning of your filter chain.
Ratio – The amount of compression or gain reduction to apply to a signal that is above the threshold. For example, 2:1 will be a weak compression (this translates to an audio level 6dB above the threshold will be 3dB above after the compression), while 6:1 will be a much stronger compression.
Threshold – Once the signal reaches this level the compressor will begin to apply compression at the set ratio. When levels are below the threshold the ratio is 1:1 which translates to no gain reduction.
Attack – How quickly, in milliseconds, you want the compressor to reach full gain reduction when levels exceed the threshold.
Release – How quickly, in milliseconds, you want the compressor to return to zero gain reduction after levels drop below the threshold.
Output Gain – When you compress a signal it typically ends up quieter which reduces your average level. Applying Output gain brings the average level of the source back up which can help improve its presence over-top of other audio sources.
Sidechain/Ducking Source – When a compressor is placed on an output audio source such as your Desktop, Sidechain can use the input from a microphone/aux source to reduce the volume of the output source. See Sidechain Compression/Ducking.
